Going full circle
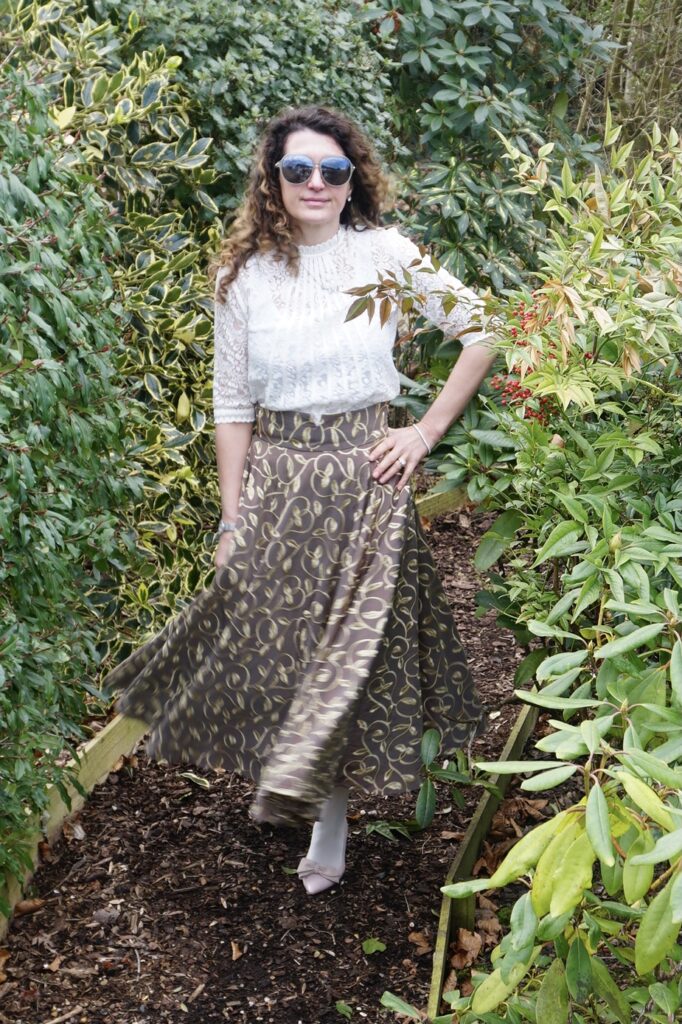
I have two loves that seemed incompatible until recently: circle skirts and midi skirts. Well, in theory they shouldn’t be, but I had never dared exploring the fabric consumption required by making a circle skirt midi length. I have now, so let me introduce you to my Fabric Gobbler Midi Circle Skirt (how more complicated a name can I find…):
Which pattern to make a circle skirt?
Making a circle skirt is in theory quite easy: you just need to measure your waist and play with circle circumference formula (not forgetting to add ease).
In practice, life is short to remember what pi is so I strongly advise you use By Hand London’s circle skirt calculator; or a tried-and tested skirt from your pattern stash. I went for the later option, using the circle skirt from the M7081 dress – with 8 versions to date, I don’t think I have a more tried-and-tested pattern than this one…
This knee-length skirt is perfectly designed to fit within a 150cm-wide fabric when cutting on the length grain of the fabric – ie the usual way, where your fabric selvedges sit right and left .
But if you want it to be any longer, you will need to cut the fabric on the cross grain – with your fabric selvedges sitting top and bottom. It is usually not recommended as the fabric has less stretch in this direction, but for a full circle skirt it doesn’t really matter. The only constraint is that it will not work if your fabric has a strong directional pattern.
How much fabric then?
I decided to lengthen the skirt by 20cm – which actually makes it a very long midi skirt, 84cm long excluding the belt (I am 1m68 tall). For a real midi I think an extra 10cm would have been enough.
And for that I used a whopping… 4m of fabric!!! While the knee-length skirt uses only 2m! Arrrgghhh! Arguably there is quite a bit of fabric leftover, which could be used for a sleeveless dress bodice for instance – but definitely not enough left for sleeves as well.
But it is all really worth it – look how this beauty moves as you walk! I love it!
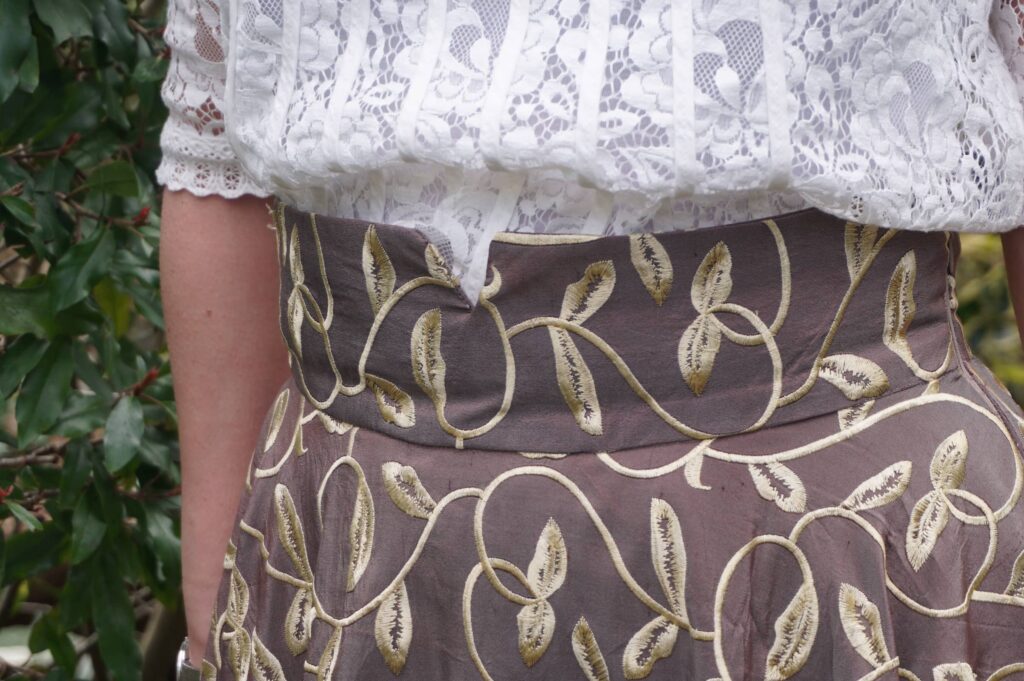
What belt then?
For the belt, I had the perfect belt waiting for me from my recent Elegante skirts; and the measurement was spot-on for my circle skirt. But after attaching the invisible zip and the lining, I realised the belt was too high… so I unsew lining, zip and belt, took off 1.5cm (5/8in) from the belt… and sew everything back together. NOT FUN! Never go into a project thiking it is going to be a fast one…
But here too very much worth it because this belt is just perfect with this skirt!
Fabric, lining and hem
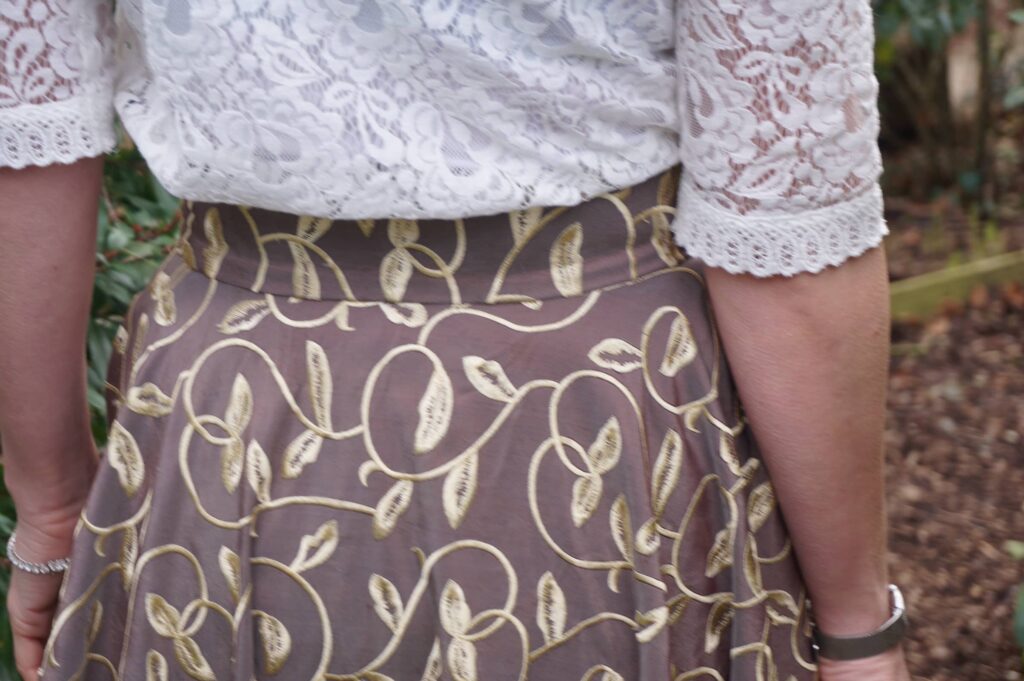
This fabric is… silk, of course! More specifically embroidered silk dupion from Amothreads (and still in stock at the time of writing). It was very easy to work with (see my previous article for more details on working with this material) and makes the skirt feel very luxurious.
I lined it with plain (antistatic) lining fabric, of which I used only 2m by making the lining knee-length… I had completely omitted the fabric increase when ordering my lining, oh well…
And the hem… Usually I would sew the hem by hand on this type of fabric, just because it is so much nicer. But frankly after the belt issue I had run out of patience and I machine-hemmed, naughty me! I am the only one to notice I am sure but it does not annoy me too much…
Conclusion: never-ending fabric purchases…
My typical fabric length purchase seems to be continually growing . I used to buy 2m of fabric for dresses, went for 3m when I discover circle-skirt and maxi-skirt dresses, and I am now considering going for 5m to fit a midi circle skirt and sleeves… Where will it end? Let me hide in shame…
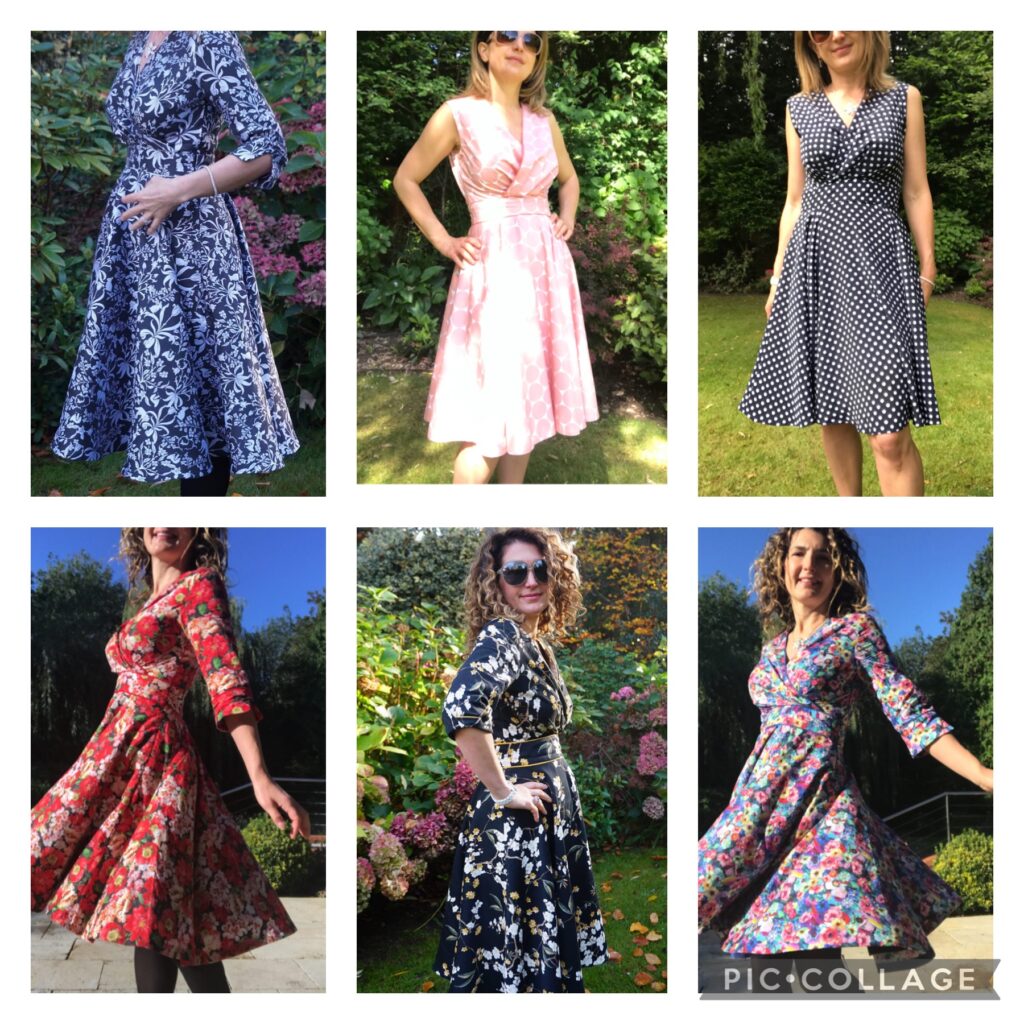
I’ve done it again! Another M7081 dress… in silk
I warned you a few months ago, McCalls’s M7081 has become one of me favourite ever patterns. And as I have turned into a complete fabric snob, I only sew silk now (only kidding – well…). So let me introduce you to my newest dress, a silk version of M7081.
M7981 pattern review: one of my favourites
This is my … well, seventh!!! version of this pattern… No wonder I can sew it with my eyes closed! I already reviewed it on the blog several times – see here and here for my winter versions; here and here for my summer versions.
So obviously I run the risk of repeating myself… but never enough of a good thing, right?
If you haven’t guessed already, I absolutely adore this pattern. It combines in a single dress all my favourite attributes: a mock wrap bodice, bust pleats, a fitted belt and a full circle skirt. The only possible improvement to the pattern would be to make the skirt midi length but then the fabric consumption would go completely out of control – one of my next articles will feature a maxi circle skirt (on its own) and I’ll give you more details.
I made my usual changes to the initial pattern. They consist in:
- Omitting the collar;
- Fully lining the entire dress – which sorts out the issue of finishing neatly the neckline;
- Using my pattern of the Cami dress by Pauline Alice for the sleeve cuffs.
I cut a size 10 and added 1cm of extra ease at the waist as the fabric has no stretch whatsoever and was cut against the grain, but otherwise the fit is perfect.
Fabric used: more silk sewing
I am completely obsessed with sewing silk currently, as my recent articles testify – I have gathered all my advice on how to tackle this scary material in this article. Just to summarise the key points: pre-wash your fabric; work with a Microtex needle; avoid having to unsew stitches by using a tried-and-tested pattern; and work slow!
After having worked on lightweight silk crepe (here) and silk-wool mix (here), I went for heavier embroidered silk dupion. This one is from AmoThreads, it is still in stock and was a massive bargain for such a beauty. You can tell it is quite stiff from how the bodice pleats and the circle skirt fall.
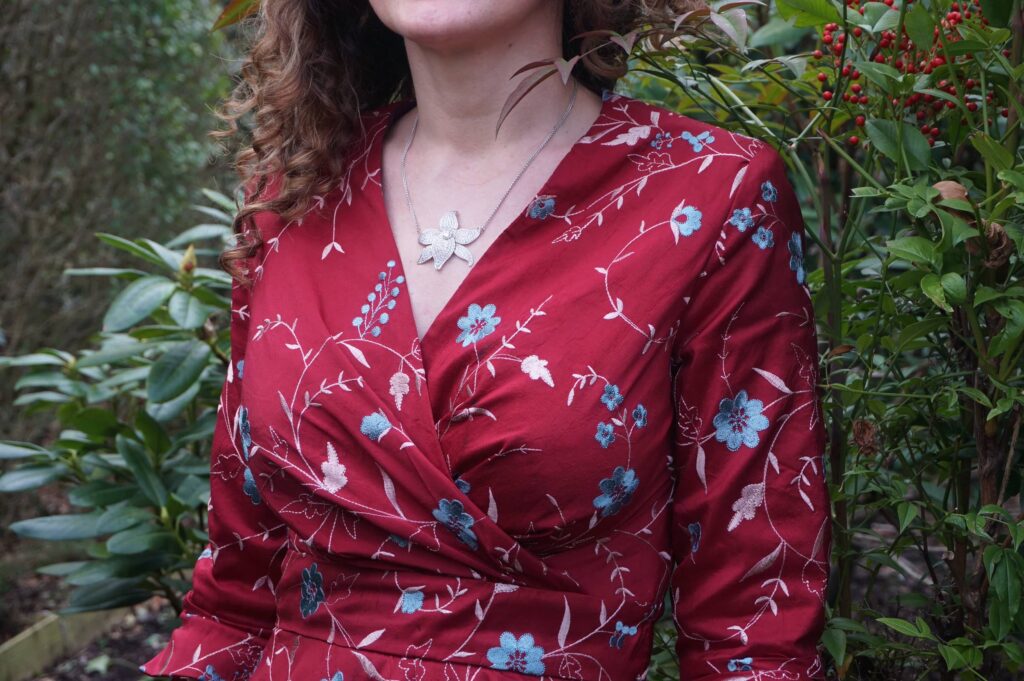
Working with dupion is actually a dream: it is reasonably thick (comparable to a cotton poplin) and it does not slip under the sewing machine foot (unlike lightweight silk). I did not even have to use a Microtex needle here.
The only thing you need to be aware to avoid a heart attack is that silk dupion seems to massively shrink when wet … then it regains its size when dry. I had a huge fear after machine-washing my dress for the first time: the skirt lining became completely visible, while I had been careful to cut it way shorter than the silk skirt. Arrggghhh! But then all came back normal, pfiou…
Conclusion: another little jewel in my wardrobe
I am very pleased with this little dress and I have worn it a lot since sewn – hence the need to wash it. The colour is definitely more within my Autumn hues, so it feels a bit strange to wear it in February. When Spring arrives it will sadly go into my out-of-season closet so I am making the most of it now!
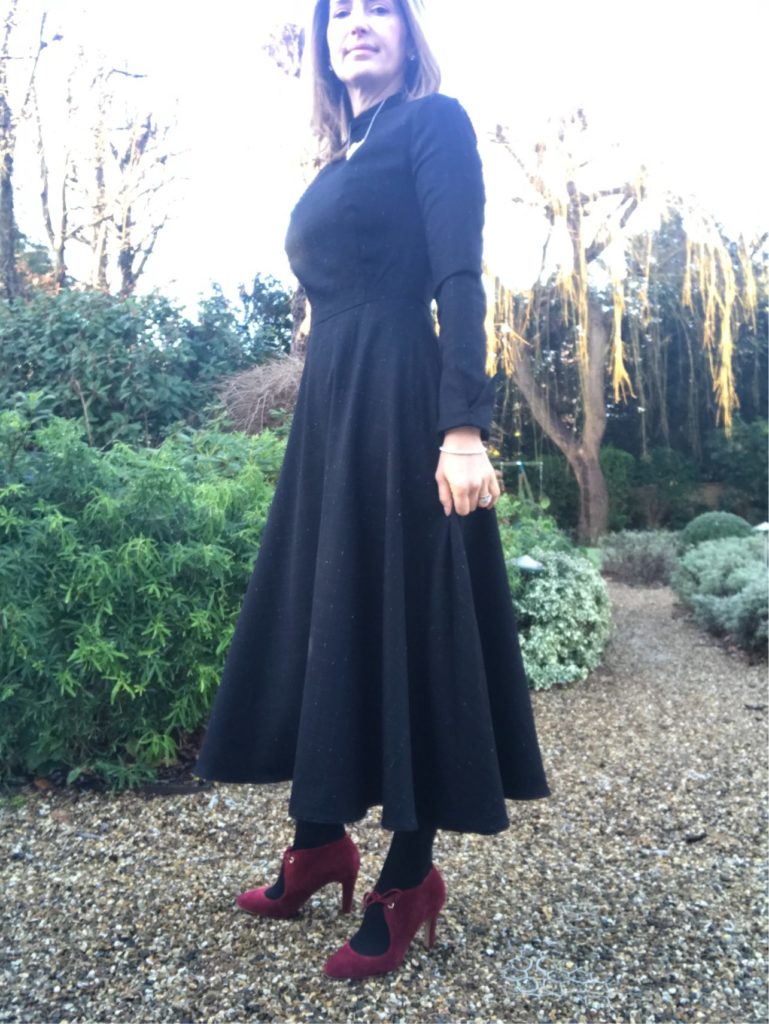
Sewing silk: my “nearly Dior” dress
Do you have fabric stored in your stash, that you adore but is far too precious to touch? That’s exactly how I felt about this one: a silk-wool mix, with a modernised jungle toile de Jouy pattern, directly from Dior’s resort collection of a few years ago. Very expensive, very delicate… and very scary to work with!! Let me introduce you to my Dior silk dress:
THE fabric: Dior toile de Jouy
I was familiar with Dior’s toile de Jouy jungle theme thanks to my lovely husband, who surprised my with a gorgeous handbag a few years ago. Jouy en Josas, were toile de Jouy originated from, also holds a special place in our hearts as this is where we studied and started dating.
Toile de Jouy is characterised by pastoral scenes with a a few characters depicted in a natural background; and with the same motif repeated all over the fabric. Dior has reinterpreted it with jungle backgrounds, making it less traditional and a far more funky – my fabric is mostly palms and palm trees, with a few birds hardly visible.
Getting hold of such a beauty was no small matter. I had previously missed the exact same fabric in blue from Selvedge and Bolts (one of my favourite fabric shops) – matching my bag, arrrgghhh!!!. So when it came back in a colour which is definitely not within my usuals, I did not think and immediately ordered 3 meters! – from my phone on the street… My Bestie was there and can testify… Fabric addiction is that bad!
Sewing with silk… again!
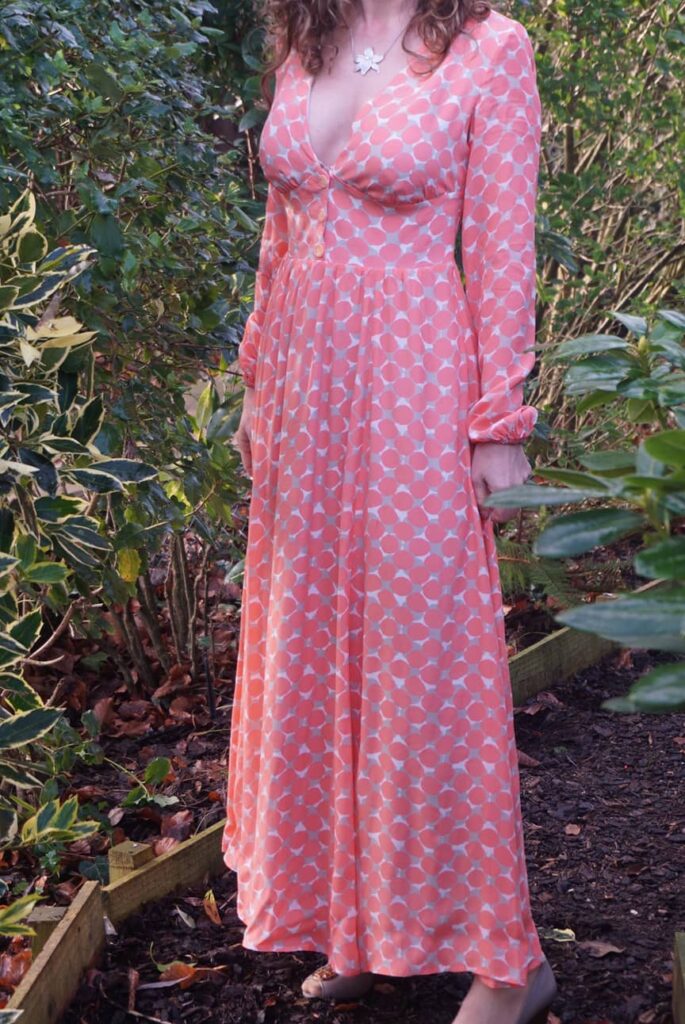
And then it stayed in my stash until I felt confident enough to sew it! That actually only happened a few weeks ago, when my first big silk project – otherwise named the coral bubble dress – turned out as a success.
I wrote a full article with advice and tips on how to sew silk here, so do have a read for more details. I did pretty much followed my own advice:
- Despite its price, I pre-washed my fabric as I would usually do for delicate material – in my Miele machine, wool program, cold, 600 spin;
- I used a tried and tested pattern – but more on this later;
- I worked with a microtex needle and super thin pins;
- and I worked SLOWLY – this fabric was so delicate I was scared to death the ripe it!
Pattern review and modifications: V9327
You may have recognised V9327, a winter dress pattern which I had already used twice and reviewed once in the blog. Both previous versions were in wool suiting, a material way easier to use than this one! I made the black version two winters ago and I do wear it a lot.
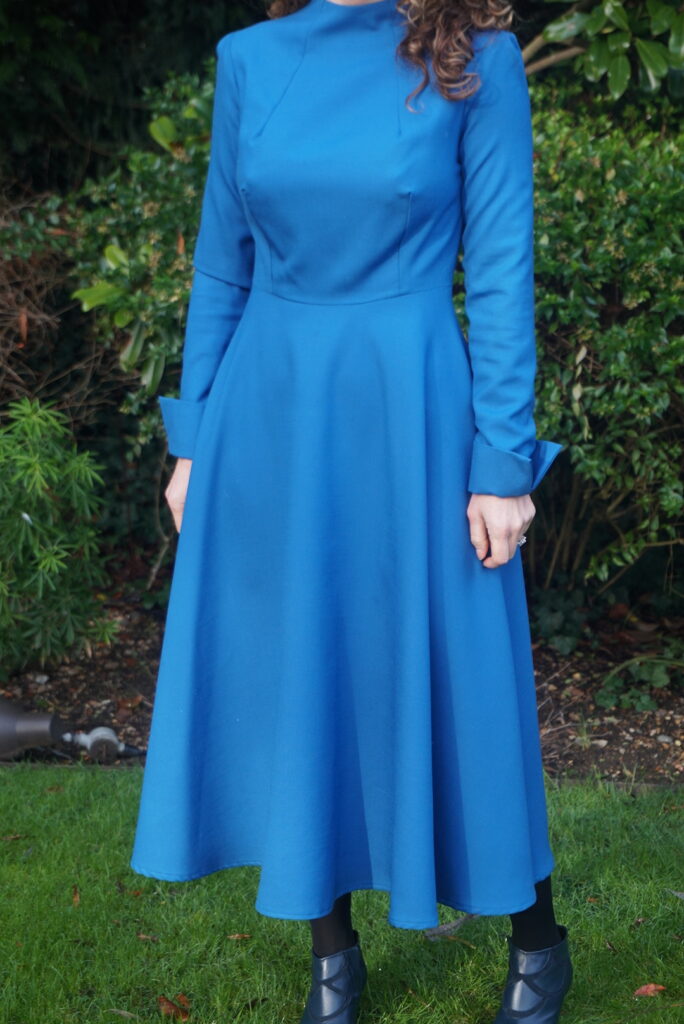
I really like this pattern for:
- its perfect fit: the bust darts and the custom bust cups help a lot here; I cut a size 10/ C cup for my UK 8/ US2/ FR36 and E cup; and required not adjustments at all;
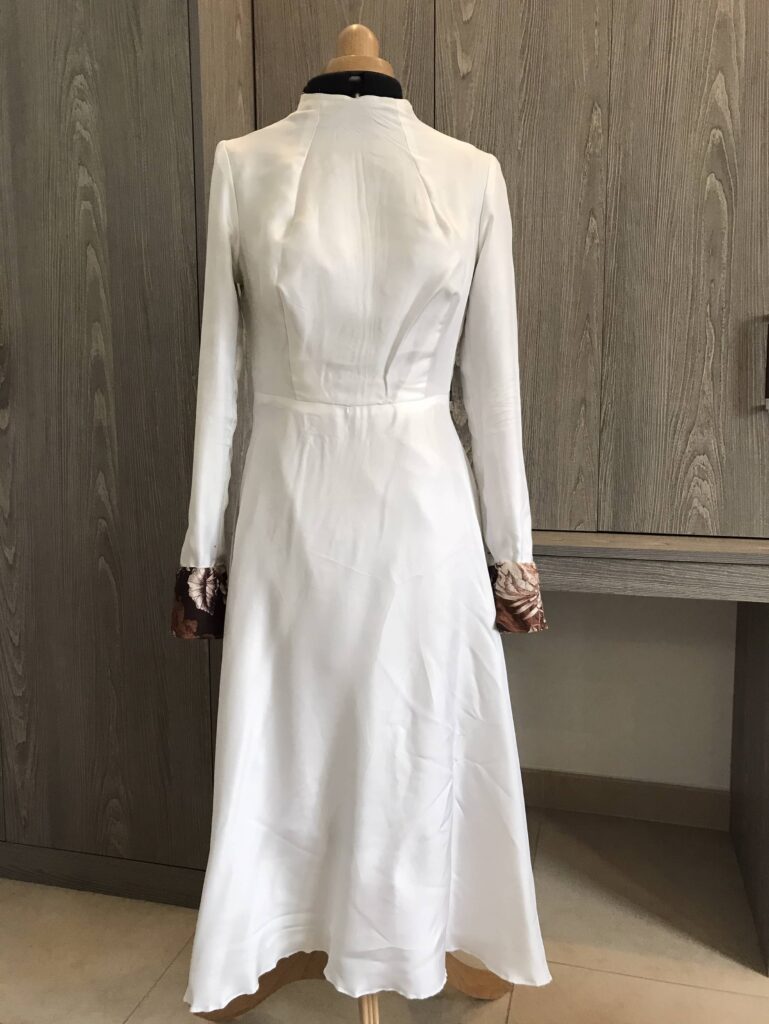
- its very wintery style: it is quite rare to find a dress pattern fully appropriate for winter, here the high neck, long sleeves and long skirt do the trick;
- its sleeve details – I adore sleeve cuffs!
I made no changes other than fully lining it – with silk of course. Here is what the dress looks like from this inside:
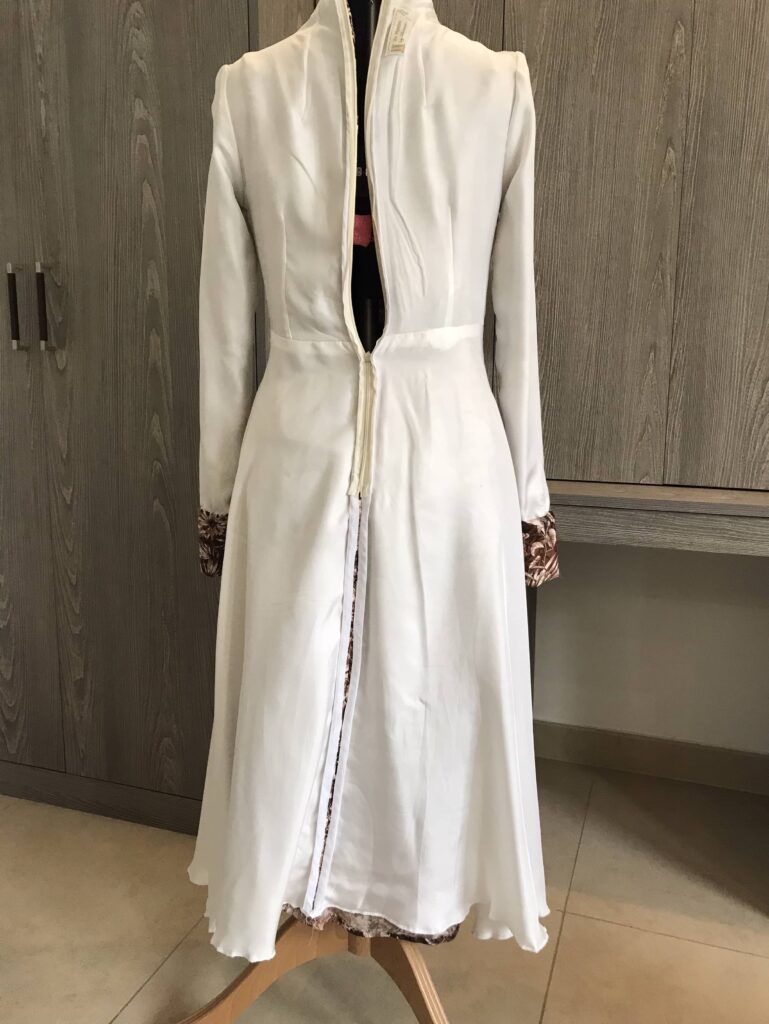
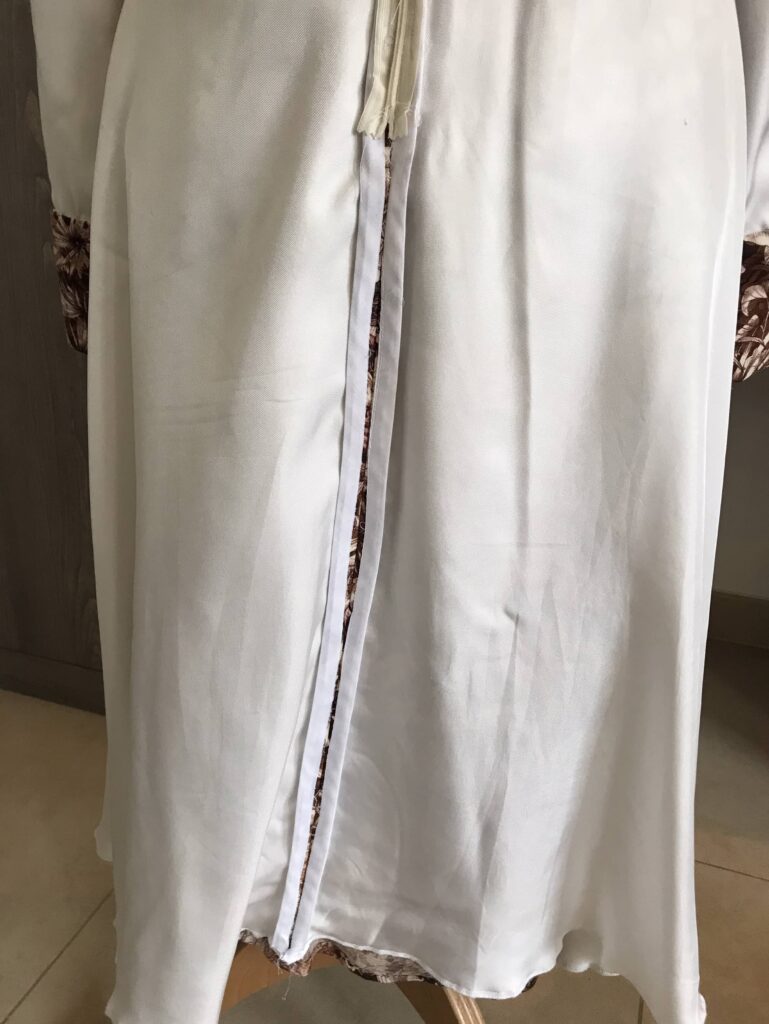
For this purpose, I made a second exact same dress in white silk and joined it to the first dress at the collar before adding my back invisible zip; and then added the zip as if both dresses were one.
This time I also covered the back sewing margins with bias tape, which I usually don’t do but why not waste even more time for unnecessary details… To be fair, I was worried the wool sewing margins would turn out to be itchy next to the skin… so not completely unnecessary!
Conclusion
Will you believe it: I actually did not like this dress the first time we took pictures! We had chosen a dark background and I really felt like I had sewn a camouflage suit!
Obviously since then my view has completely changed. This dress is so lightweight and soft it is wonderful to wear it. And although it is not in my usual colour palette, I’m definitely starting to really fancy the warm hues – especially since I bought new boots to match (not shown here), naughty girl!
And if you’ve read to the end of this article, here is my little secret: I have managed to source two other Dior fabrics (silk only this time) and can’t wait to get started on them. Do you have any suggestions of long, fitted but floaty dress pattern I could use?
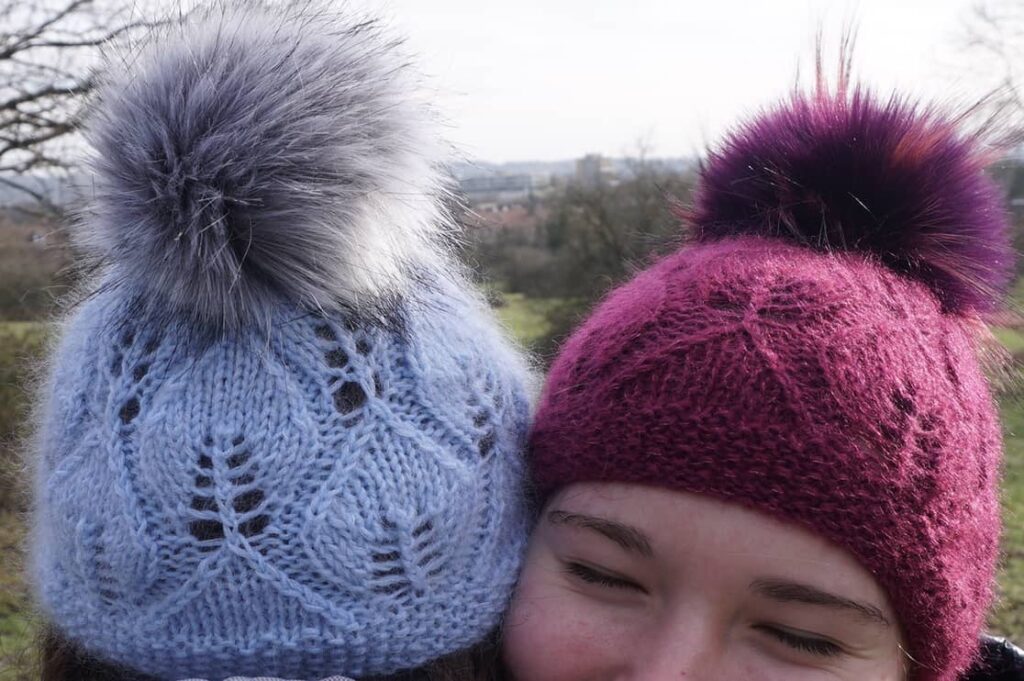
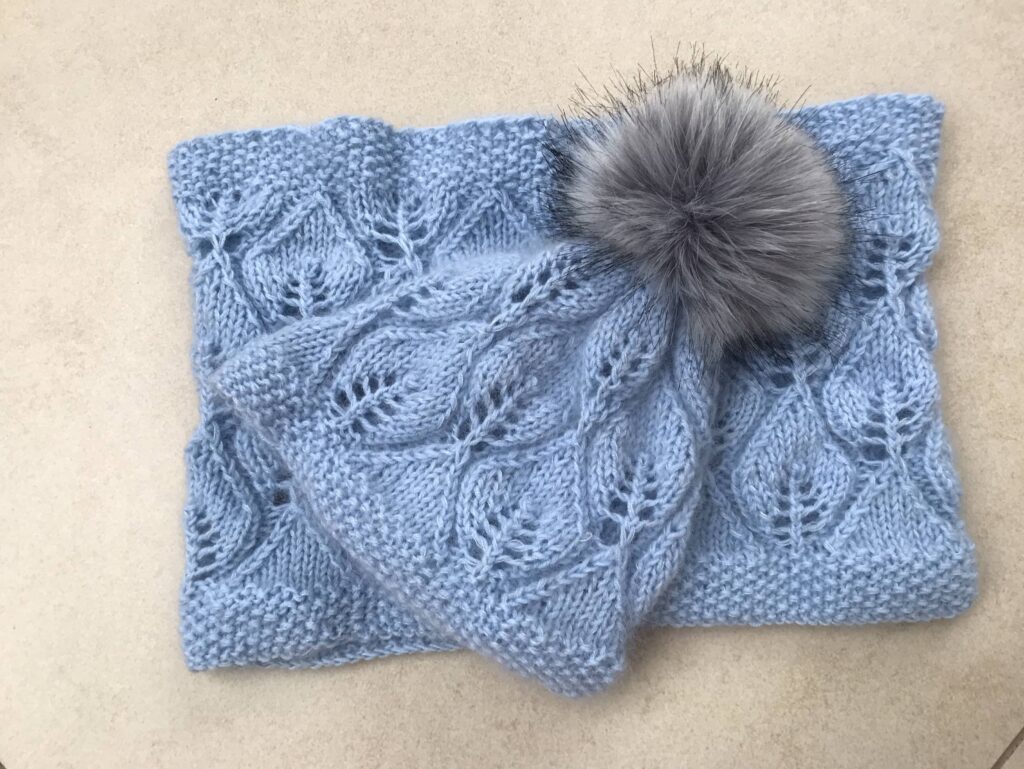
Free knitting pattern: the Floating Leaves Beanie
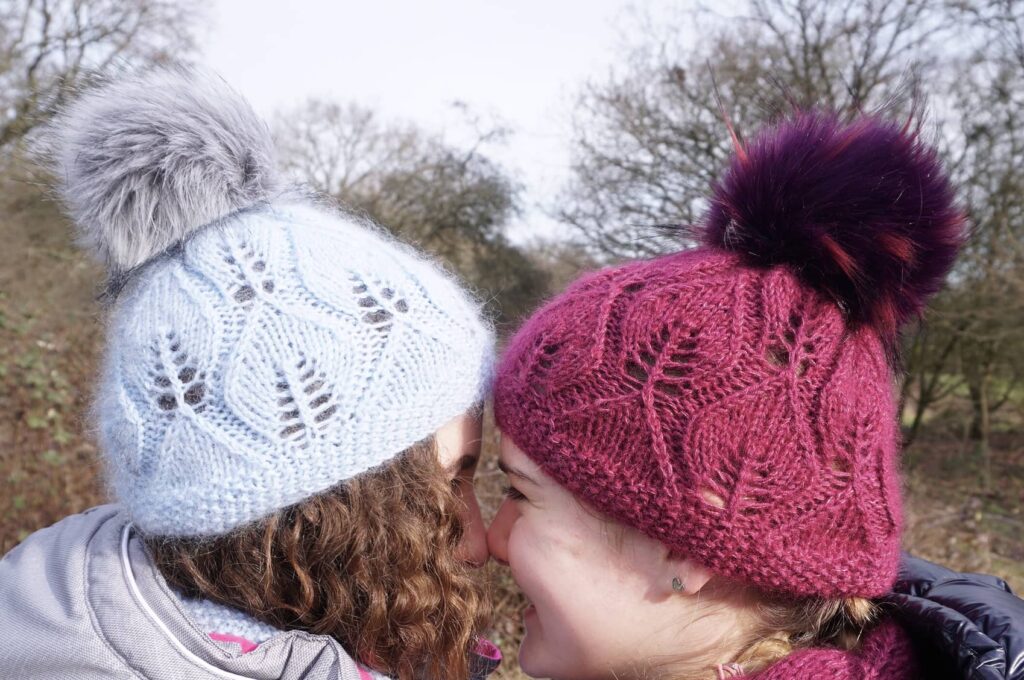
That’s it, I have crossed the dangerous line between making and designing… Let me introduce you the Floating Leaves Beanie, a quick and easy knit, with beautiful lace details and … a free pattern!
Technical details
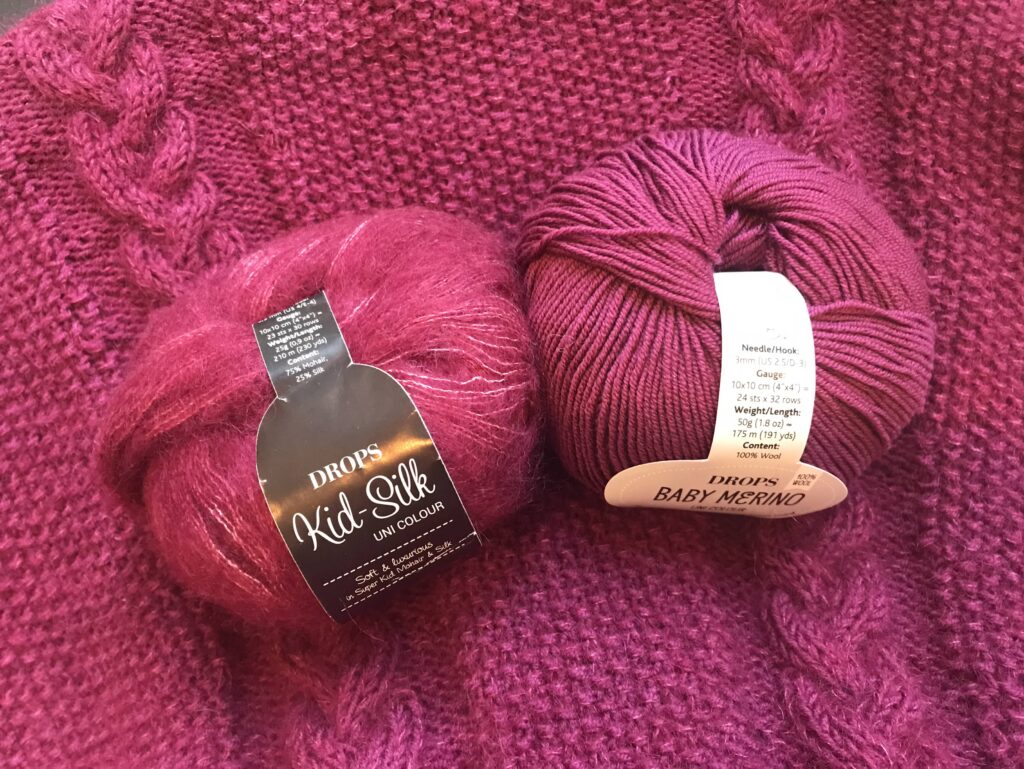
This beanie is knitted is 4mm/ US 6 needles, with a gauge of 22 stitches for 10cm width (or thereabout, no need to be super precise). Here I have used my beloved combination of Drops Baby Merino and Drops Kids Silk, but you can pretty much use anything as long as there is a bit of elasticity (I would definitely not recommend using solely kid silk for instance.)
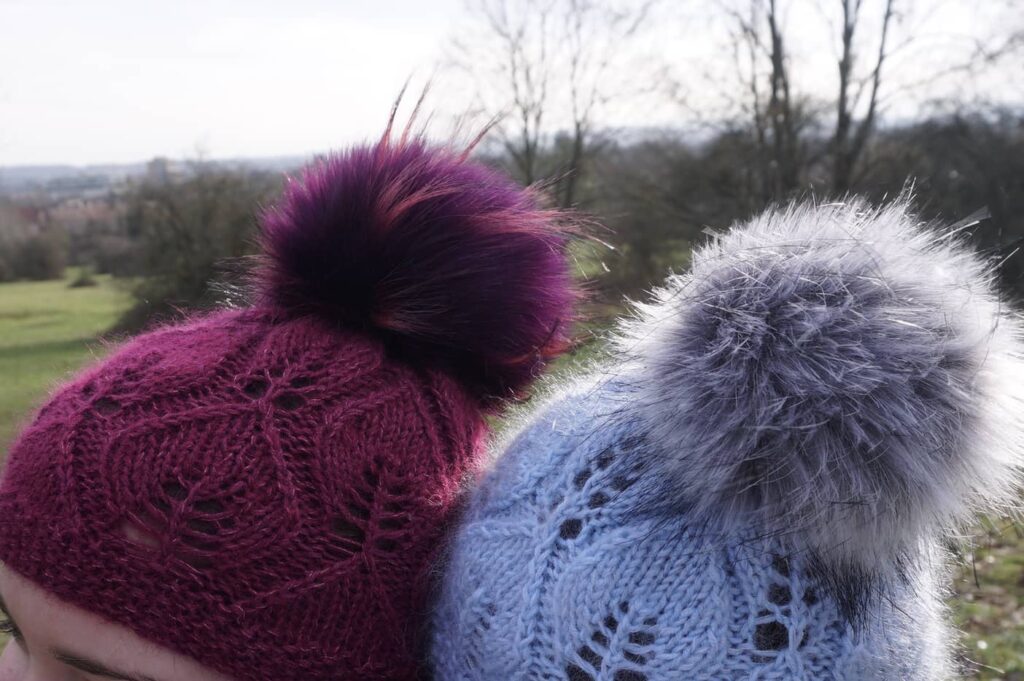
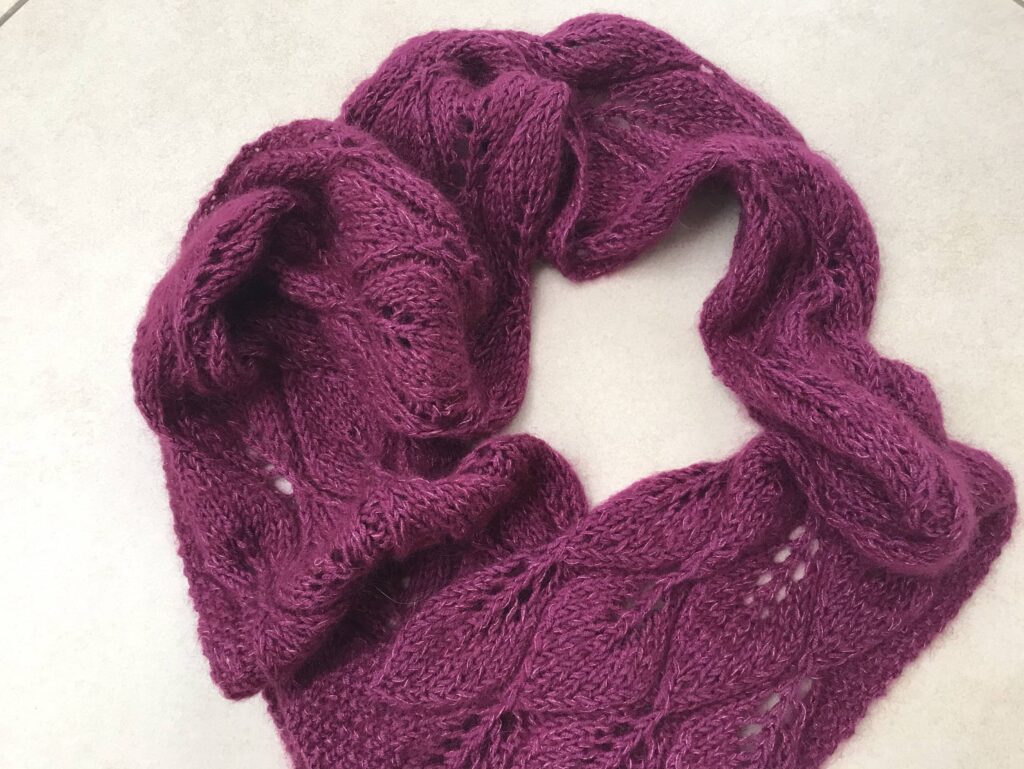
The joy about knitting a beanie is that it takes very little time (about 3 hours ). And you can use leftover yarn! The burgundy version is from leftovers of my Icon dress (colour codes 34 for the baby merino and 17 for the kid silk).
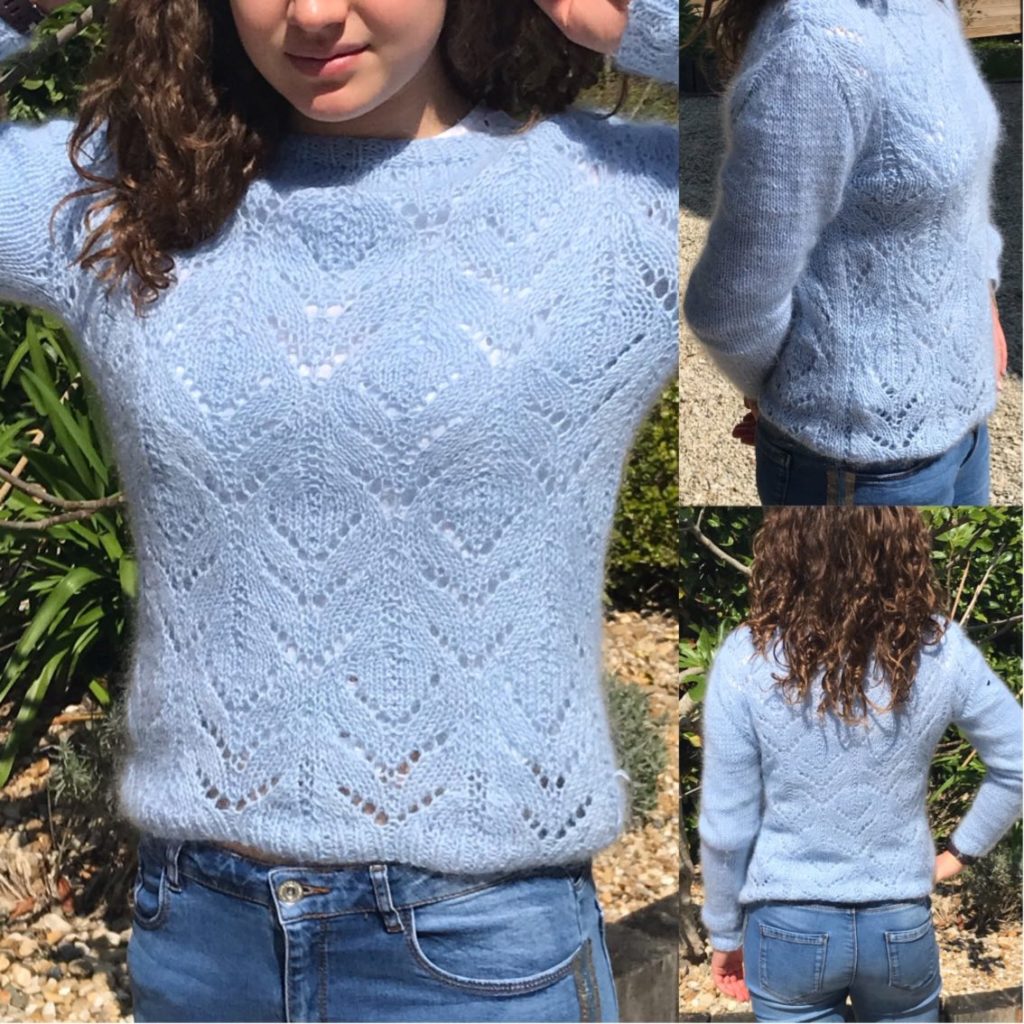
… while the blue version if from leftover of my daughters’ Blossom jumper (colour codes 11 for the baby merino and 07 for the kid silk).
Do not hesitate to browse my other knitting projects for more baby merino/ kid silk colour combinations, as these have been my yarns of choice over the past year so I have experimented a lot: green, purple, yellow, powder pink, coral, black, off white…
Knitting lace
This project obviously implies knitting lace, but that should really not scare you as there are very few stitches to know and they are in no way exotic– and in any case they are all explained on this website (my favourite), with videos of both the continental and the English knitting styles.
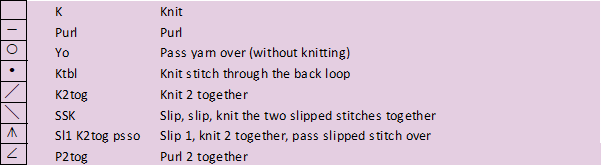
In the pattern, I have included the lace instructions both in diagrams and written, so that you choose whichever suits you best.
If you’ve never tried, I really recommend you give lace a go, as it give such an amazing outcome for not a huge effort. Also a beanie knits fully in the round, making things even easier
Matching you beanie
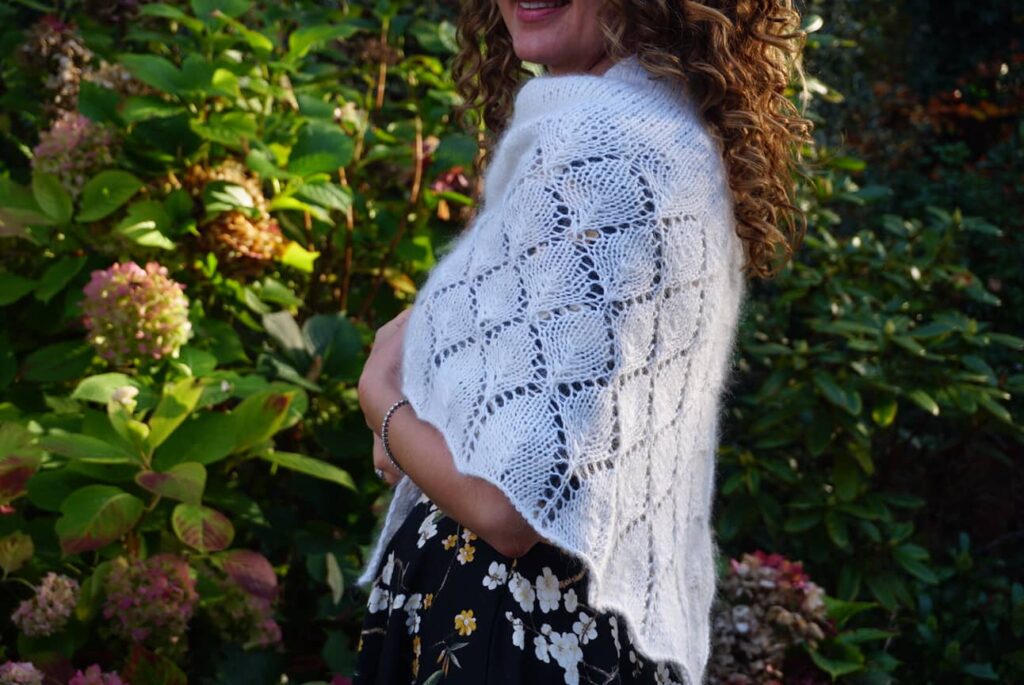
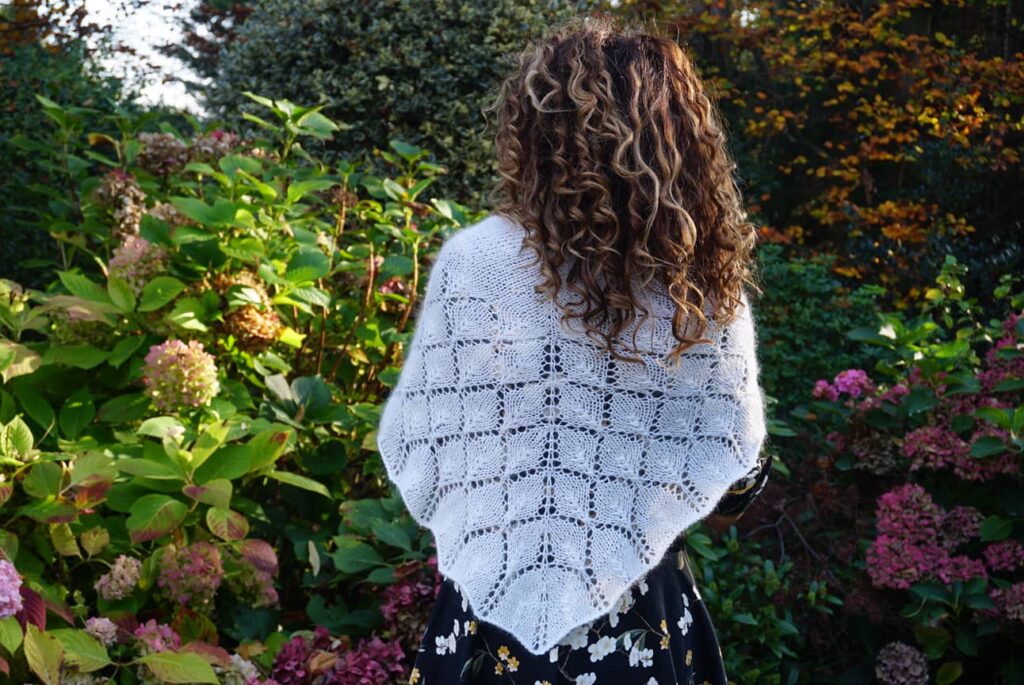
I am a huge fan of knitted lace leaves and the Floating Leaves Beanie was strongly inspired by Maria Magnusson’s Leaving Cowl, a free pattern on Ravelry. They therefore match exquisitely.
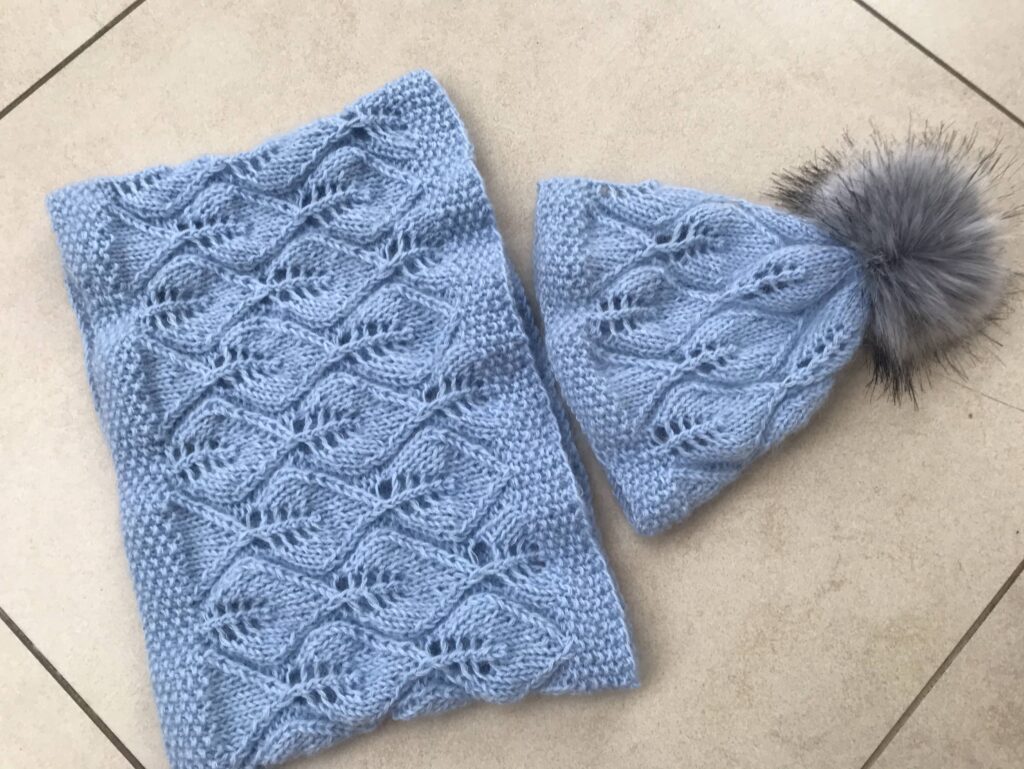
I also knitted a Floating Leaves scarf, but to be honest I found it quite a boring project… I am definitely not a scarves fan!
Another matching candidate is Betsy App’s Suspended Leaves shawl (also a free Ravelry pattern). This is a project I have already knitted twice and which I adore.
And my dream is to design a cropped, fitted Floating Leaves jumper but I have little hope of achieving this any time soon… The fitted aspect with all-over lace is always tricky. Anyway!
Free pattern
And here is the free pattern, available both in English and in French. I am a complete amateur pattern writer and this is my first ever pattern, so please feel free to let me know if there are mistakes (despite my many many checks). If you make this beanie let me know and let’s reference it as #floatingleavesbeanie!