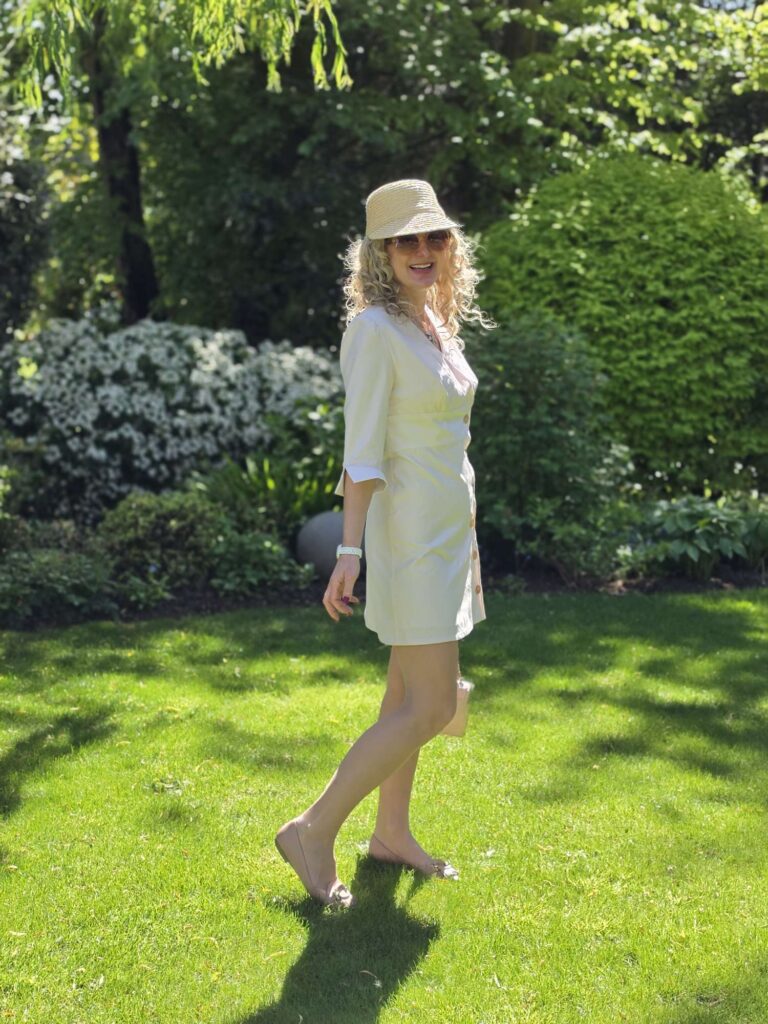
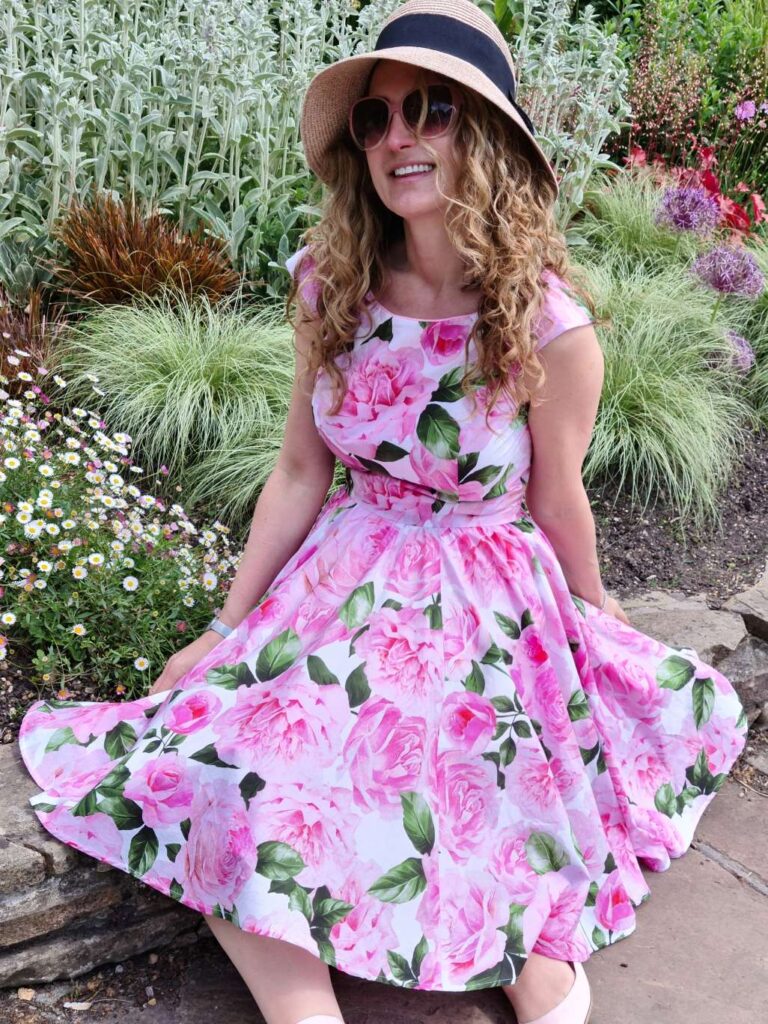
Sewing a new 1960’s dress: Style 3172 Vintage
My 1960’s revival obsession continues, as you probably guessed it would… Here is my second 1960’s dress, this time sewn from a genuine vintage pattern: Style 3172.
Sewing vintage… from Vinted!
Ever since I started sewing for myself (11 years ago), my style has definitely changed towards a more vintage look. Not that I did not like it before but it was just quite difficult to find the clothes I wanted without them looking either worn out or plain fake. Sewing sorted out this problem and my wardrobe bloomed into my 1950’s wildest dream!
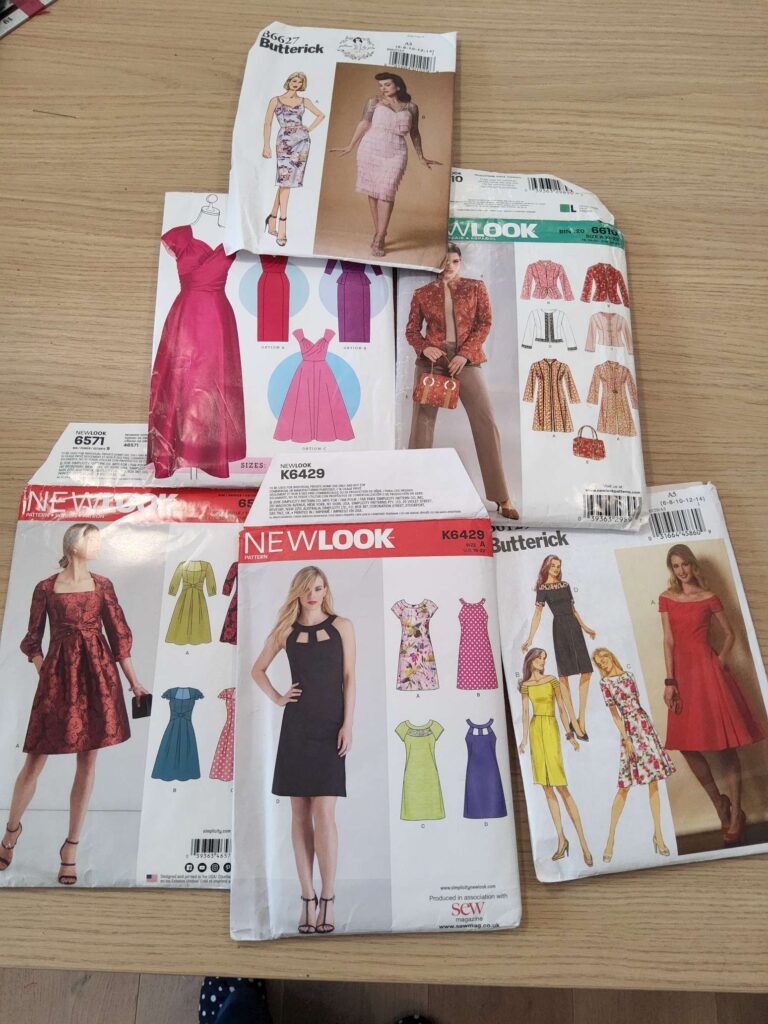
I have sewn tens of vintage-inspired dresses (mainly 1950’s) from contemporary patterns. But I had rarely ventured into genuine vintage patterns (just once actually). I particularly feared the sizing uncertainty: vintage patterns usually come in only one size; and the cost is high – vintage can fetch quite a high premium on Etsy or E-Bay… Who wants to spend a fortune to end up making zillions of adjustments? Certainly not me!
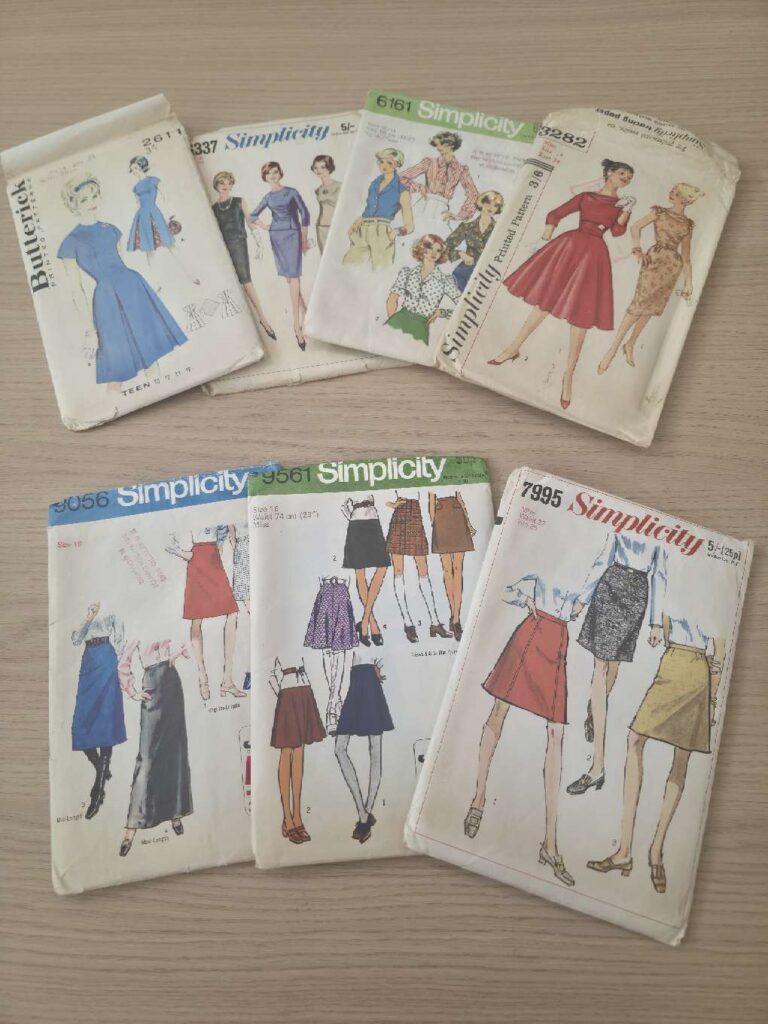
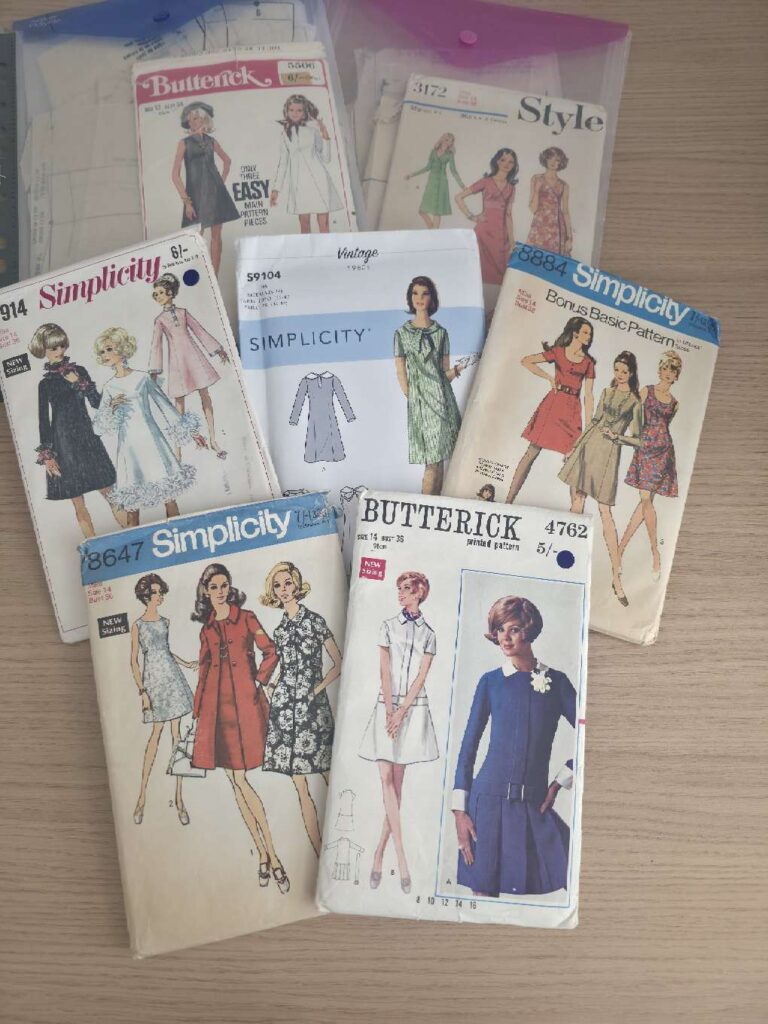
But then I discovered Vinted. After a (very long) designer shoe addiction phase, I started buying sewing patterns. And what joy! For between £3 to £5 (postage included), you can find real gems… and start building a ridiculously large collection. Here are only the vintage patterns, I buy non-vintage too…
So you can really take the risk of wrong sizing without too many regrets. A toile is never optional though!
Sewing the Style 3172 dress: the process
Introducing the pattern
I had never heard of the Style patterns, being more of a Vogue/ Butterick/ McCall’s/ Simplicity girl. But this dress was far too pretty to overlook – how lovey is this envelope!
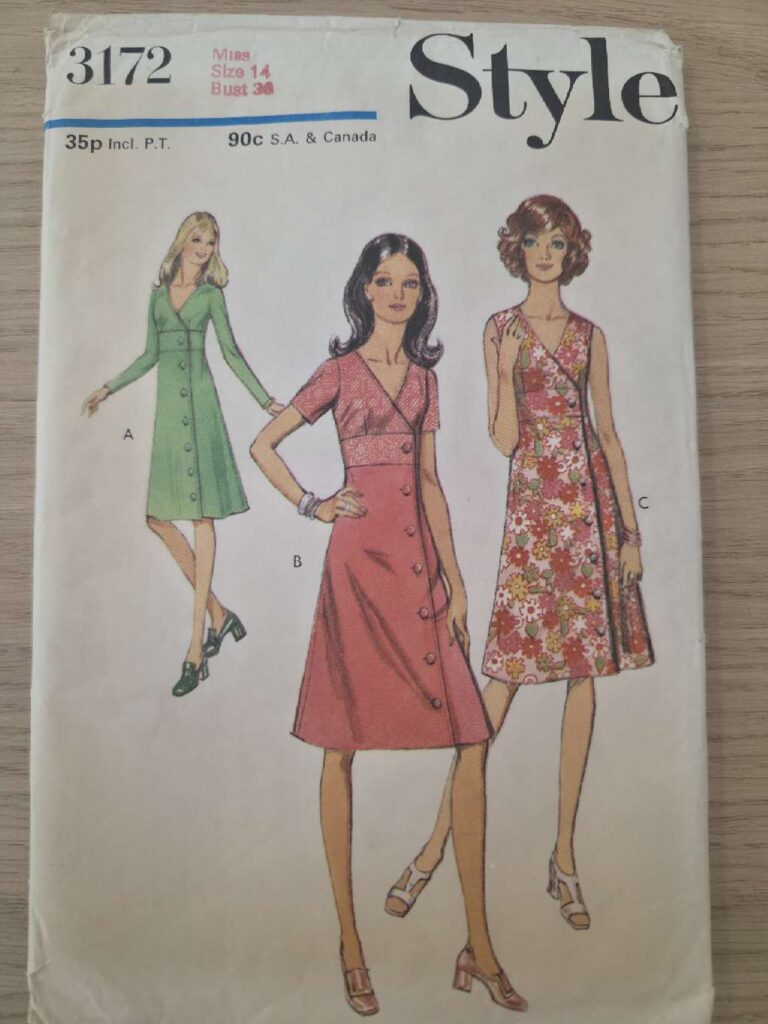
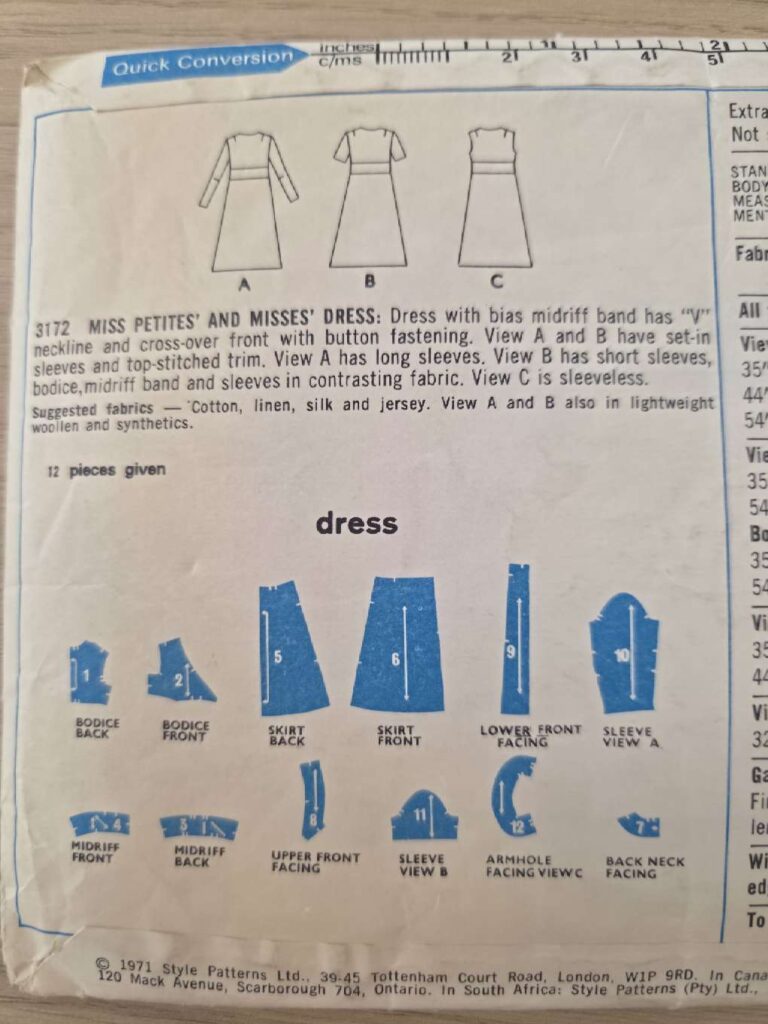
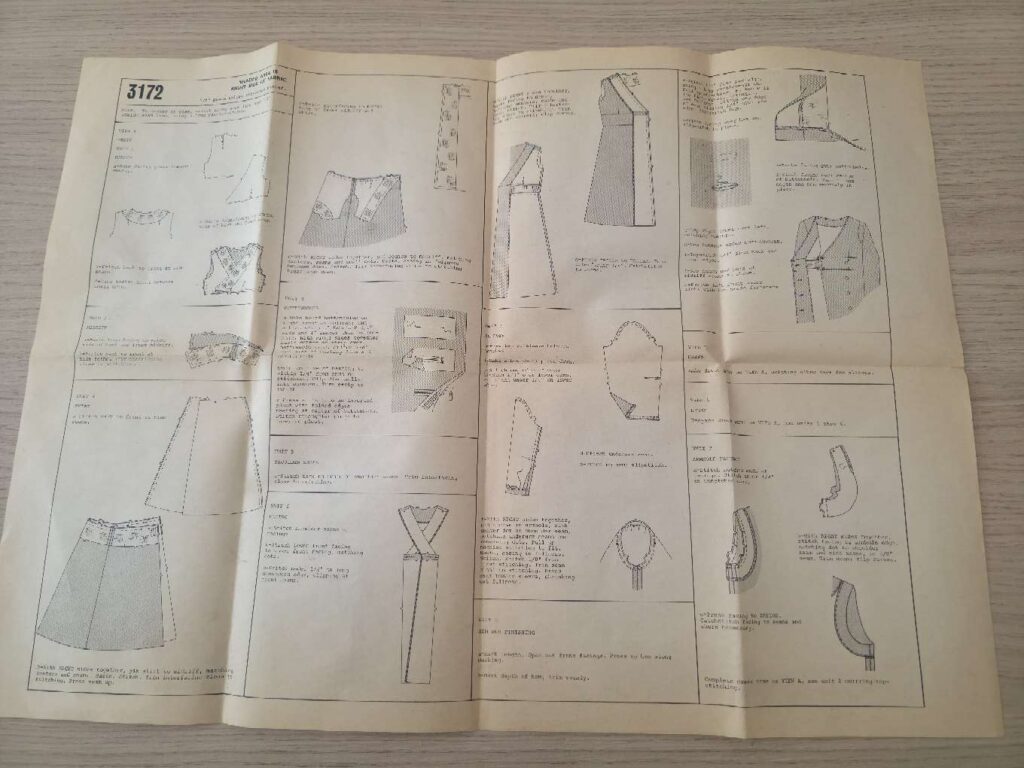
Overall it frankly looked a lot like Big 4 pattern, with very clear instructions (which I did not necessarily fully follow but never mind)…
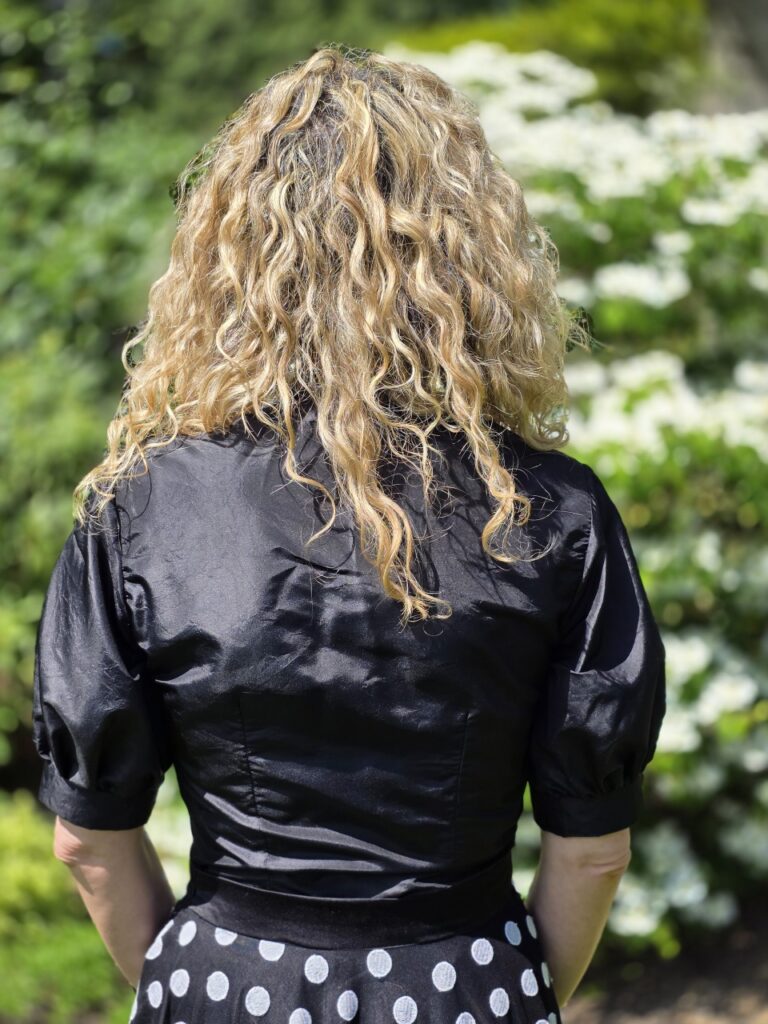
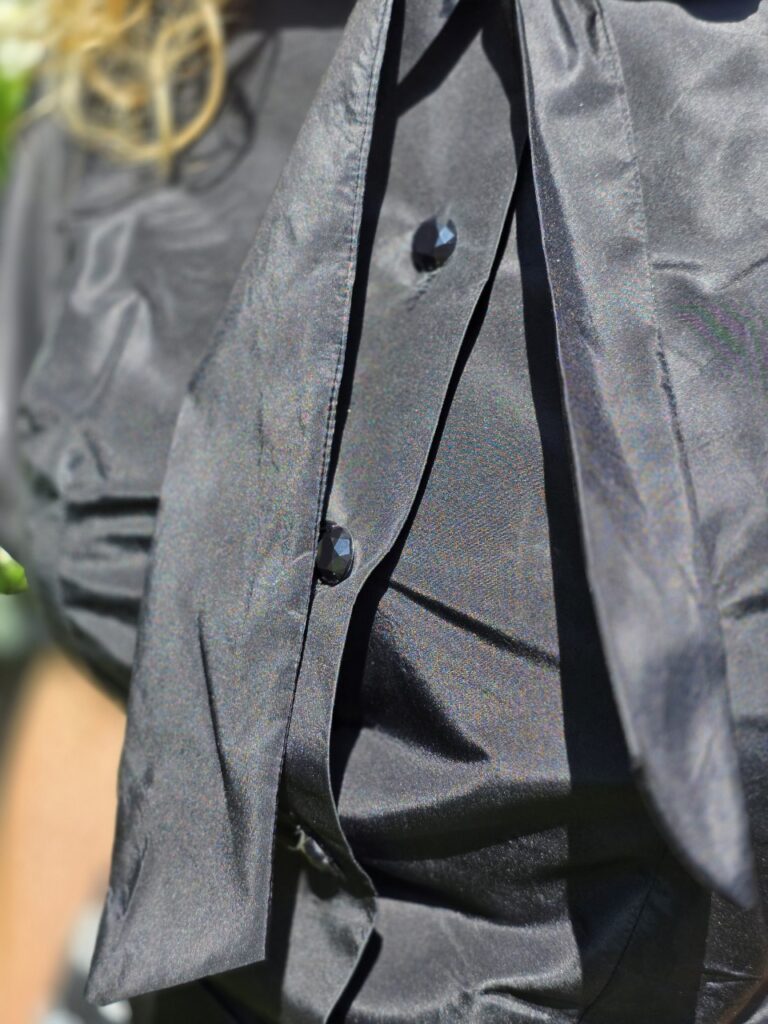
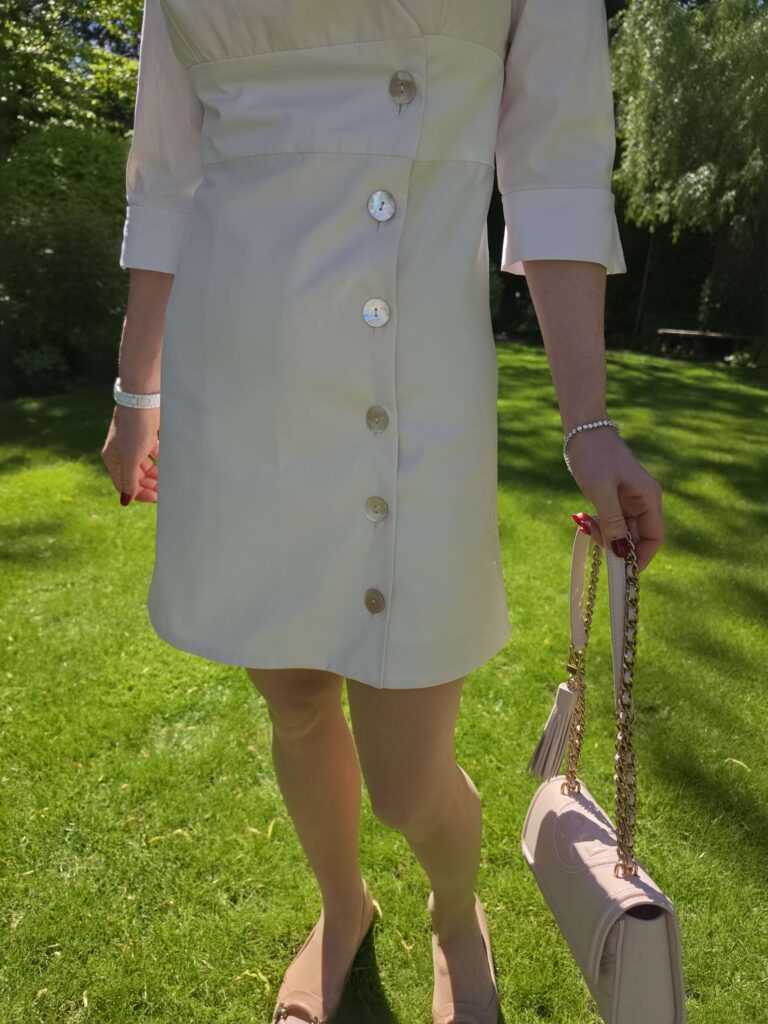
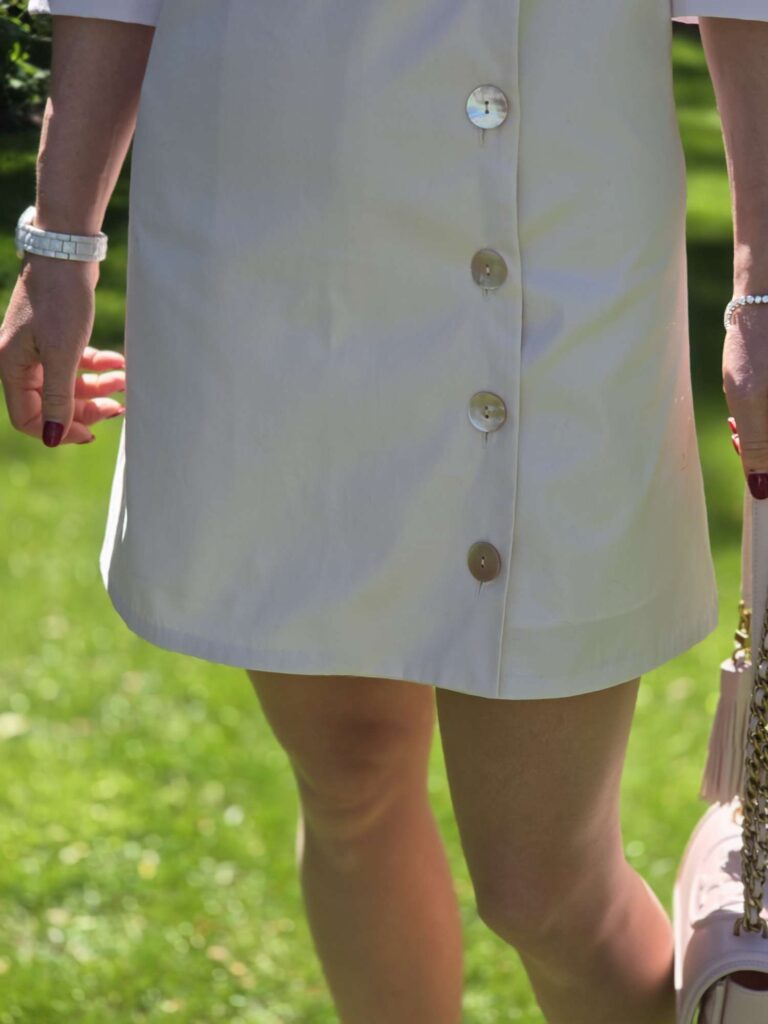
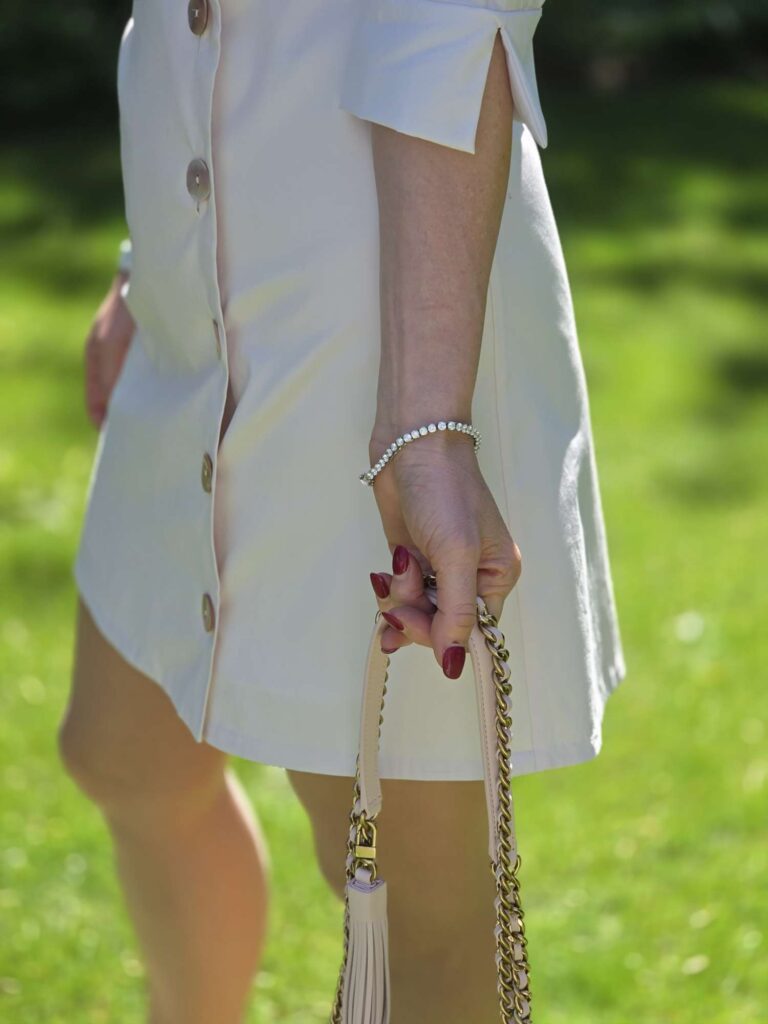
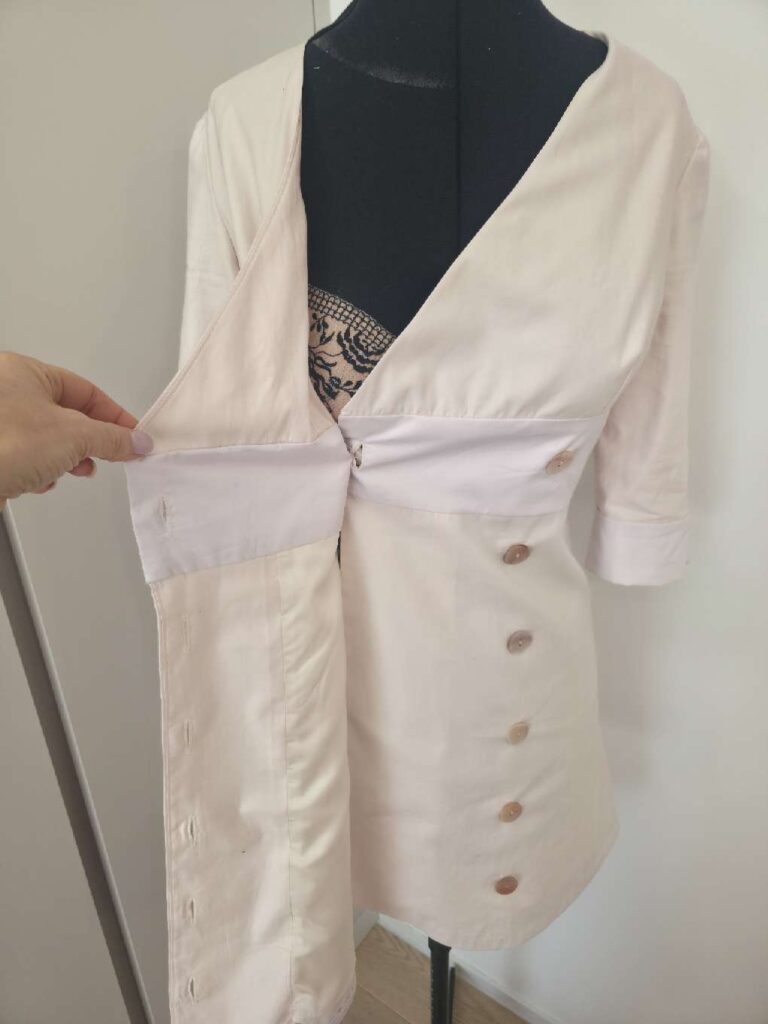
… a flattering shape and lovely details, in particular the crossed bodice and the side buttons…
… but the sizing was a bit of a nightmare!
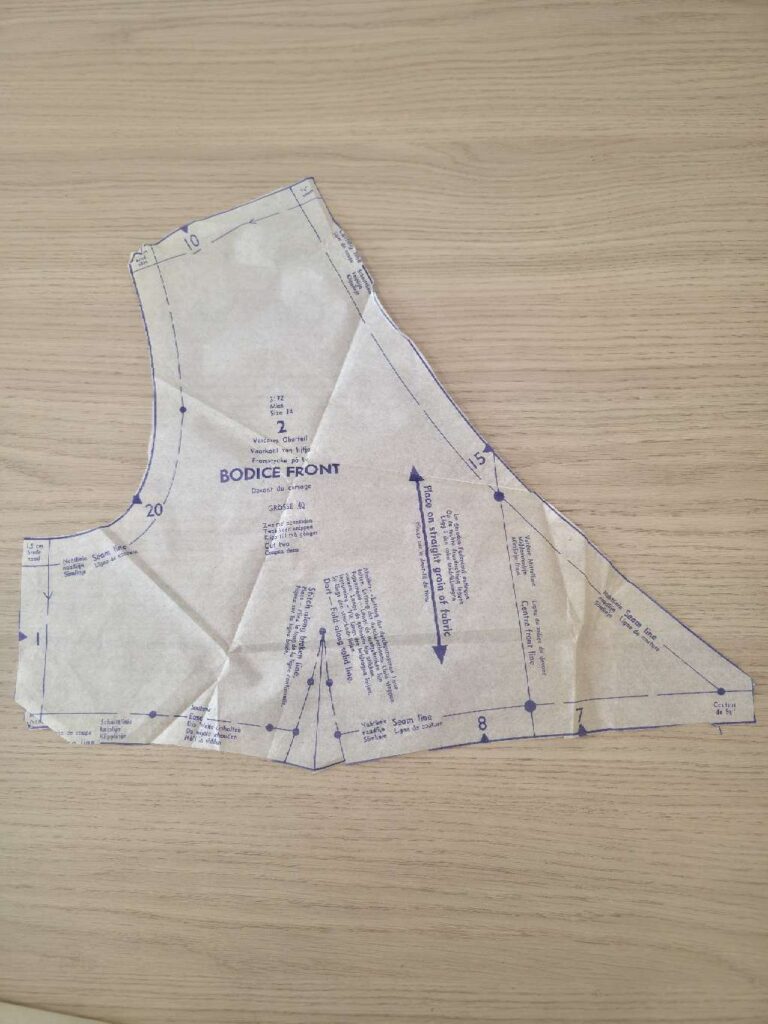
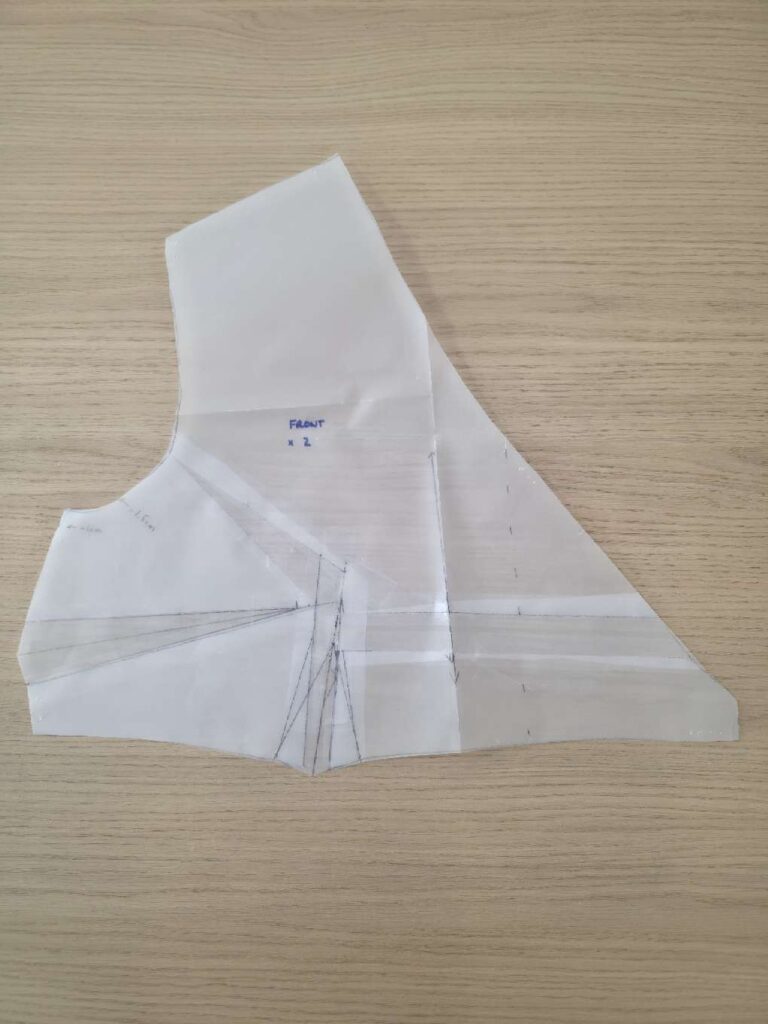
Adjustments made to the pattern: fit, fit, fit!
- My main work on the pattern was to make the dress fit better – I am obsessed with fit! My first toile, with my usual FBA of 2.5cm for my E-cup, was enormous. I had to remove about 1cm on the sides for each pattern piece (so 4cm in total) and redo a smaller, 1.5cm FBA. Here are the initial versus final bodices.
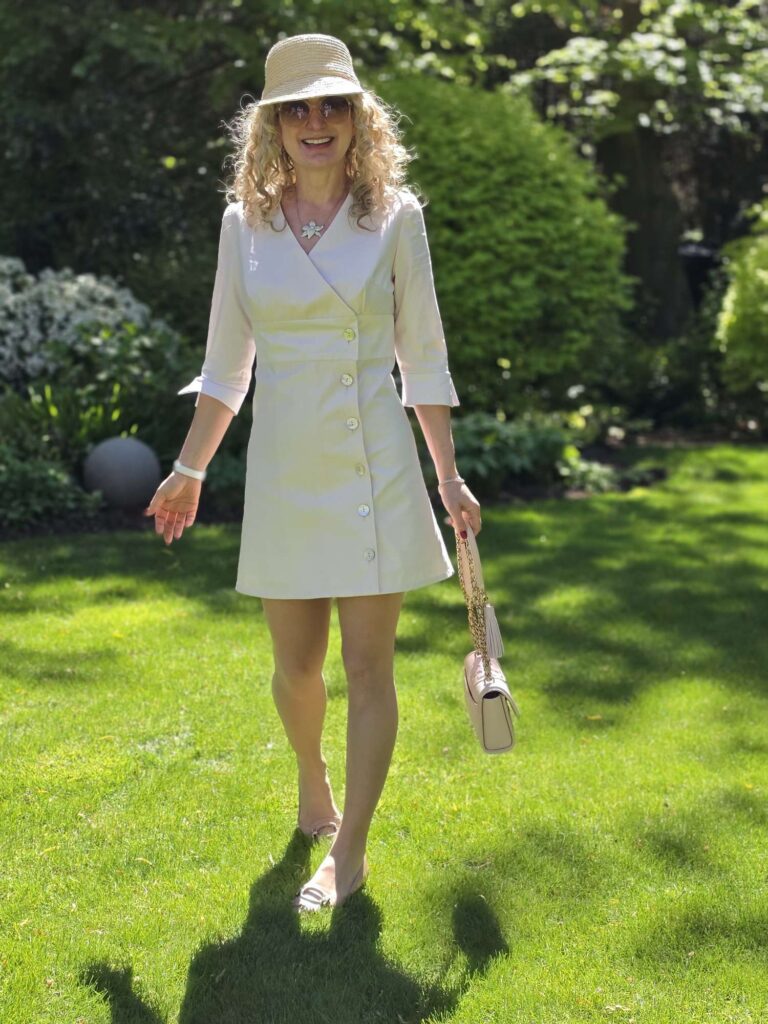
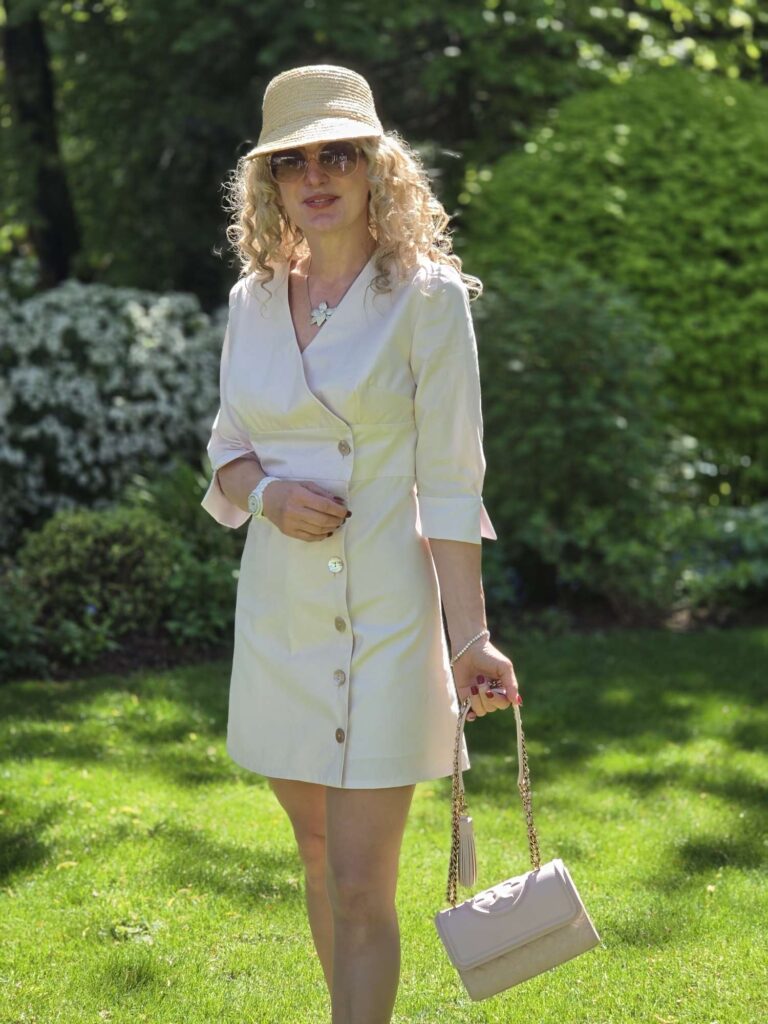
- I substantially shortened the dress to give it more of the mini look we associate with the 1960’s.
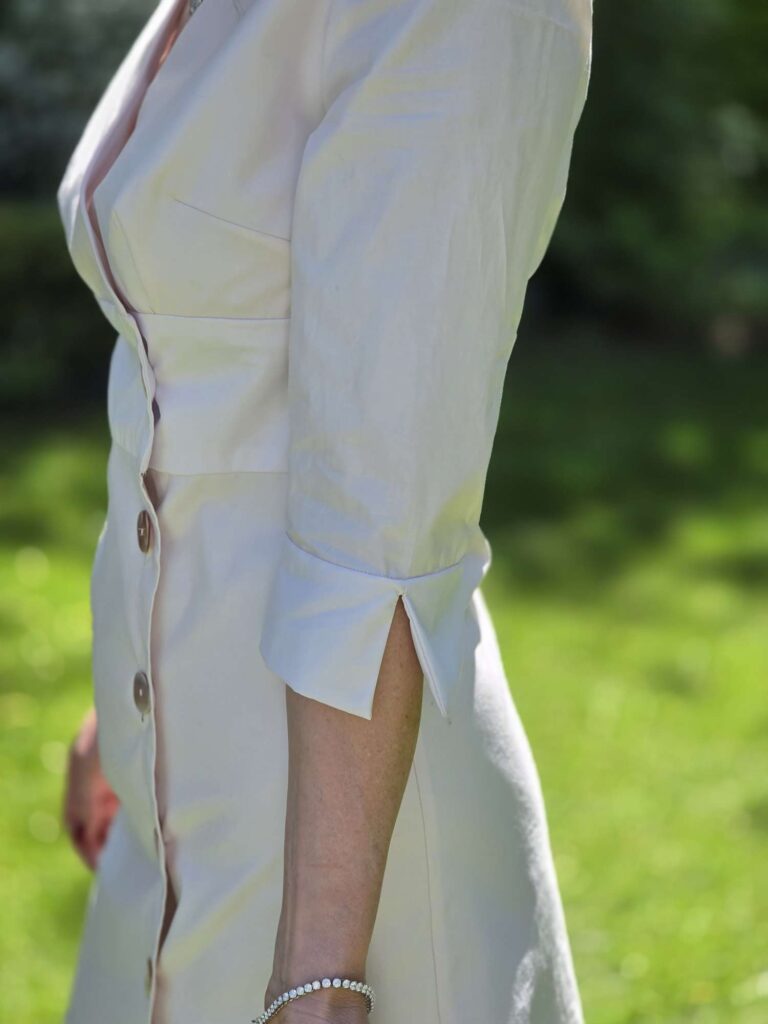
- I played with the inside to add some cotton lining for the bodice (less sweat) and synthetic for the skirt (softer with tights). I also added a button on the inside as a waist-stay substitute.
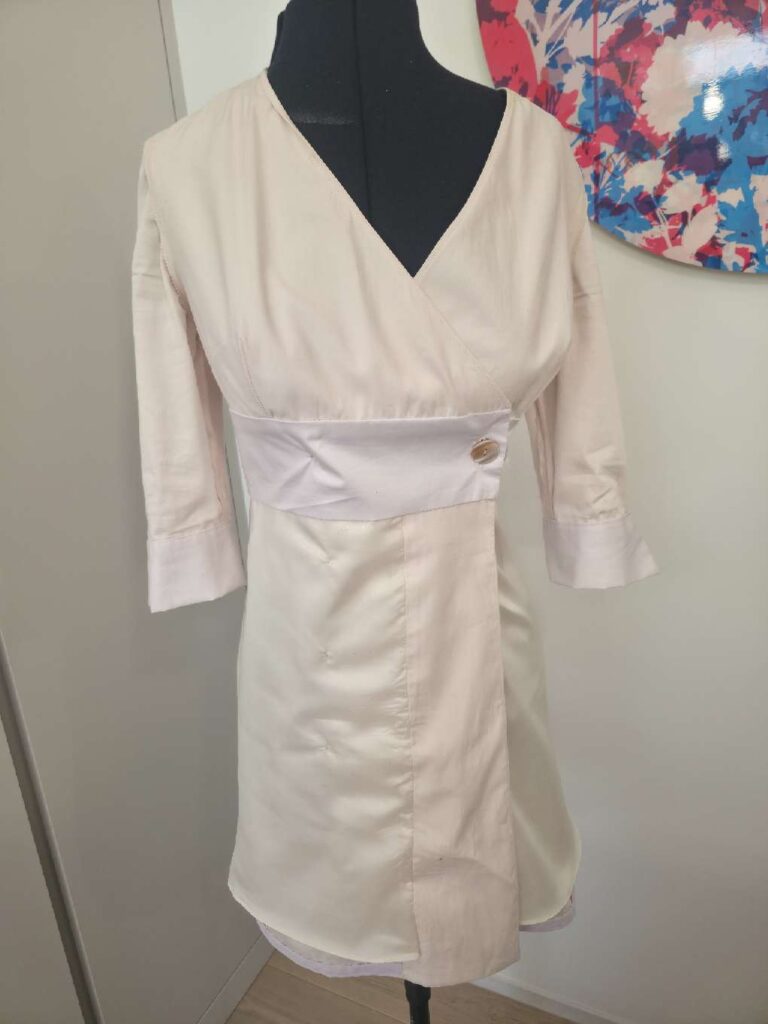
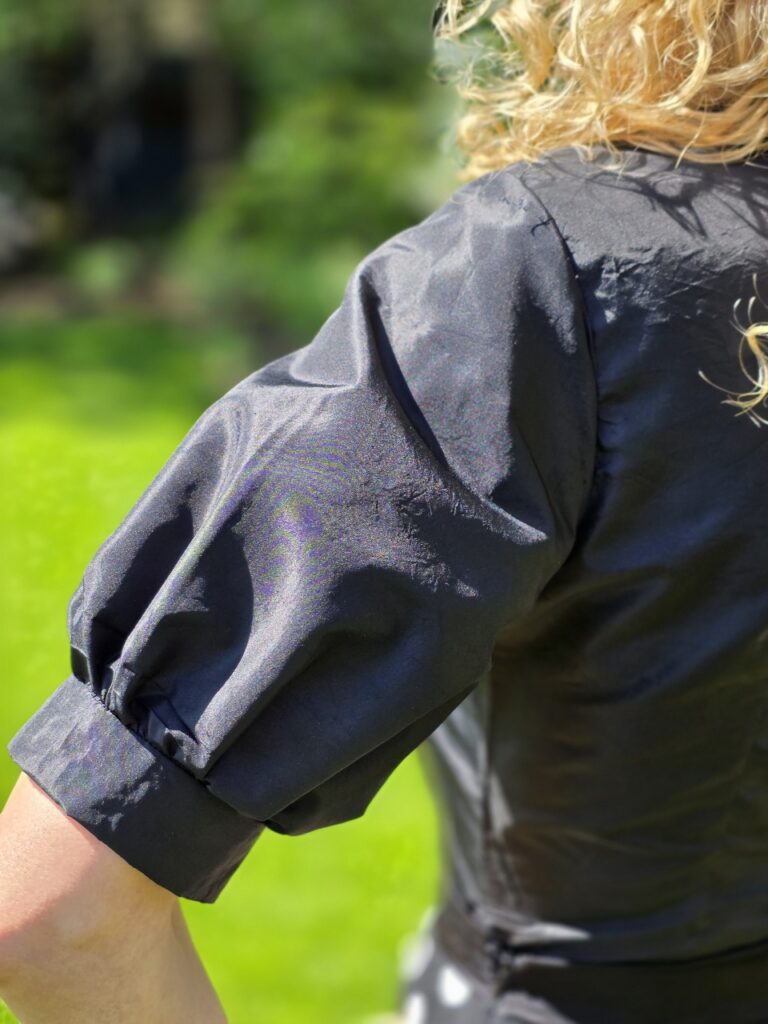
- Lastly I made the sleeves 3/4 and added a cuff – my favourite for mid-season dresses
Conclusion
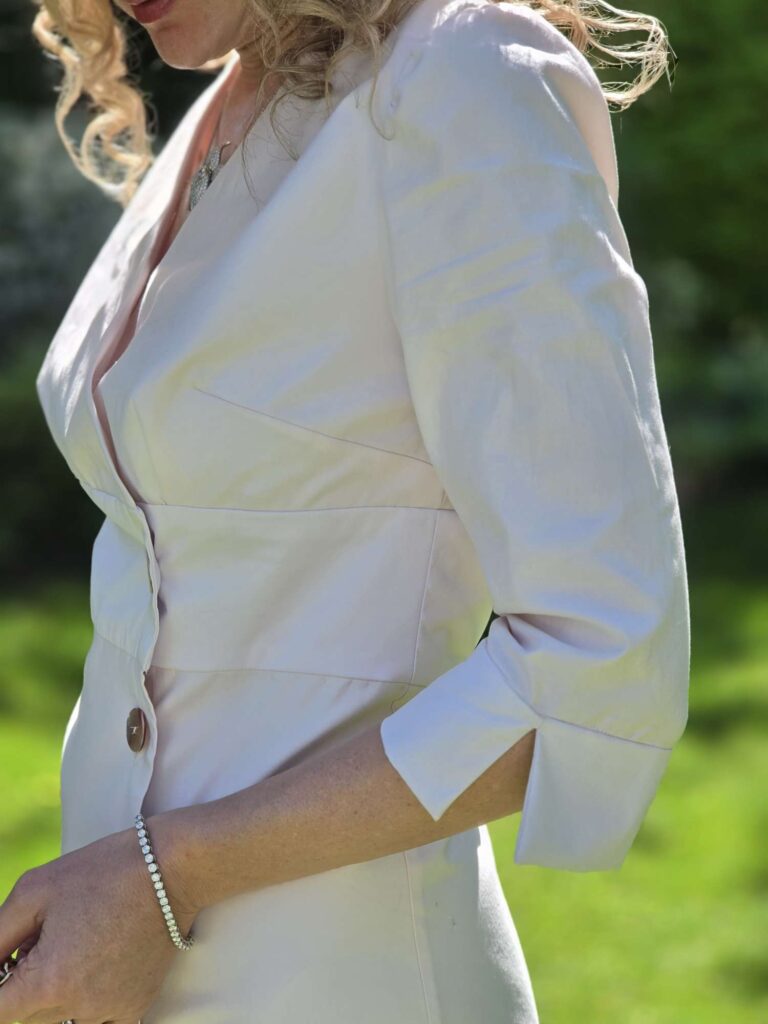
As a result of all these effort, this dress is an absolute perfect fit and very comfortable to wear. I also particularly like the soft contrast of colours. All in all I am very happy with this vintage pattern experience and fully ready to tackle more!
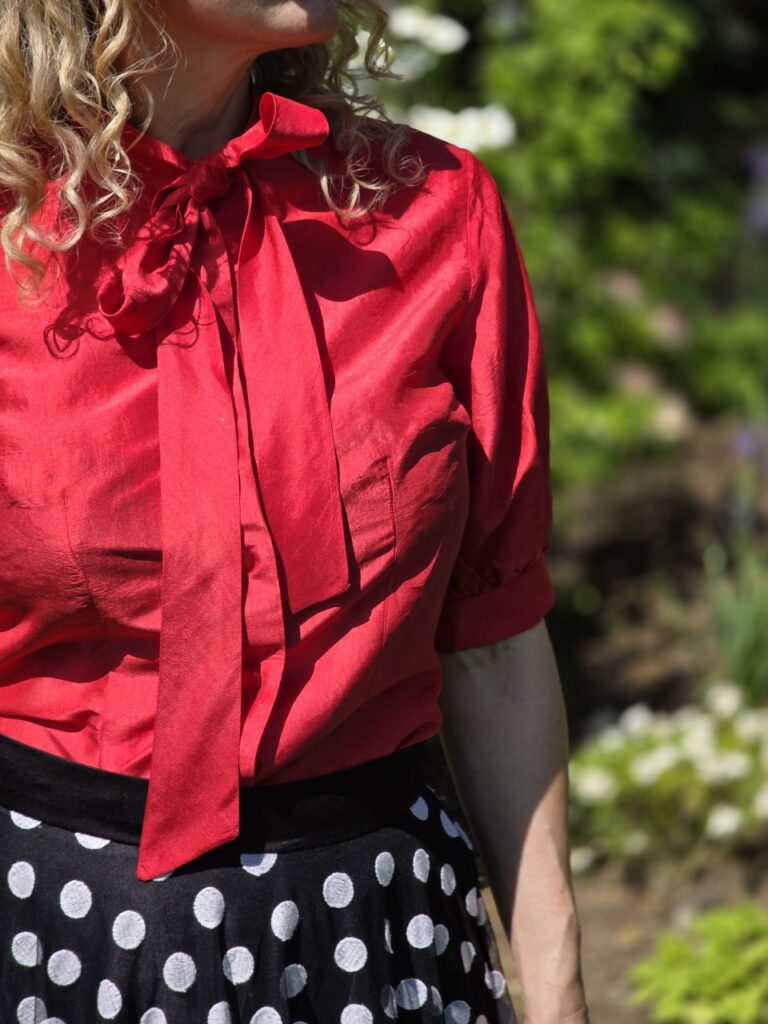
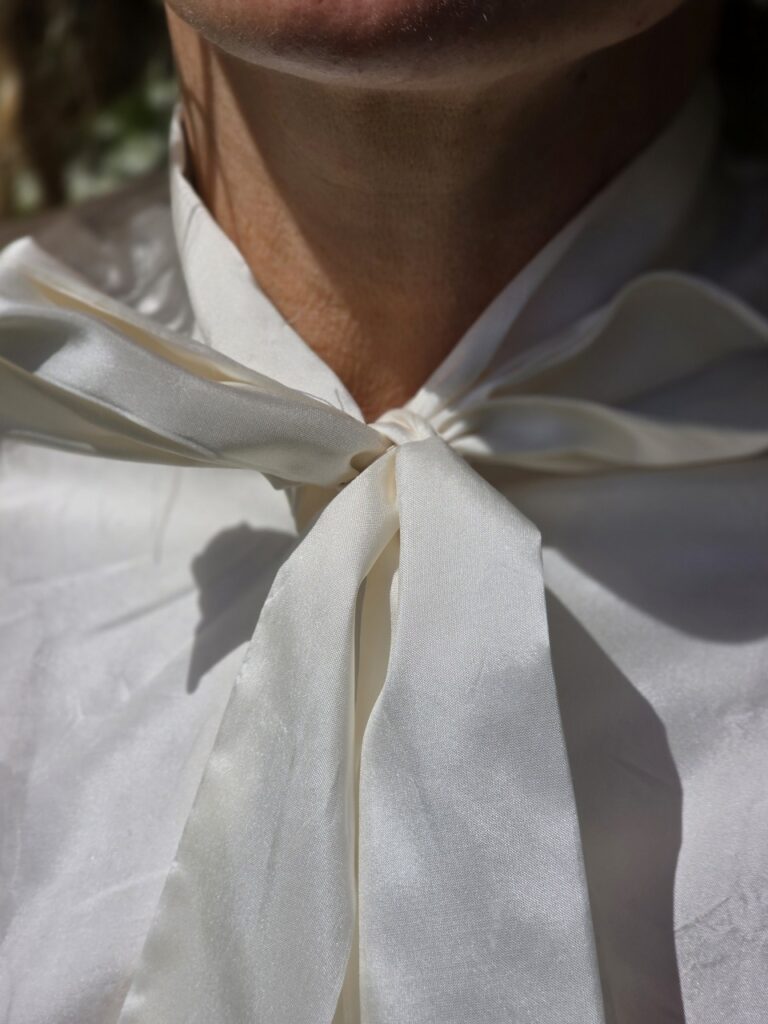
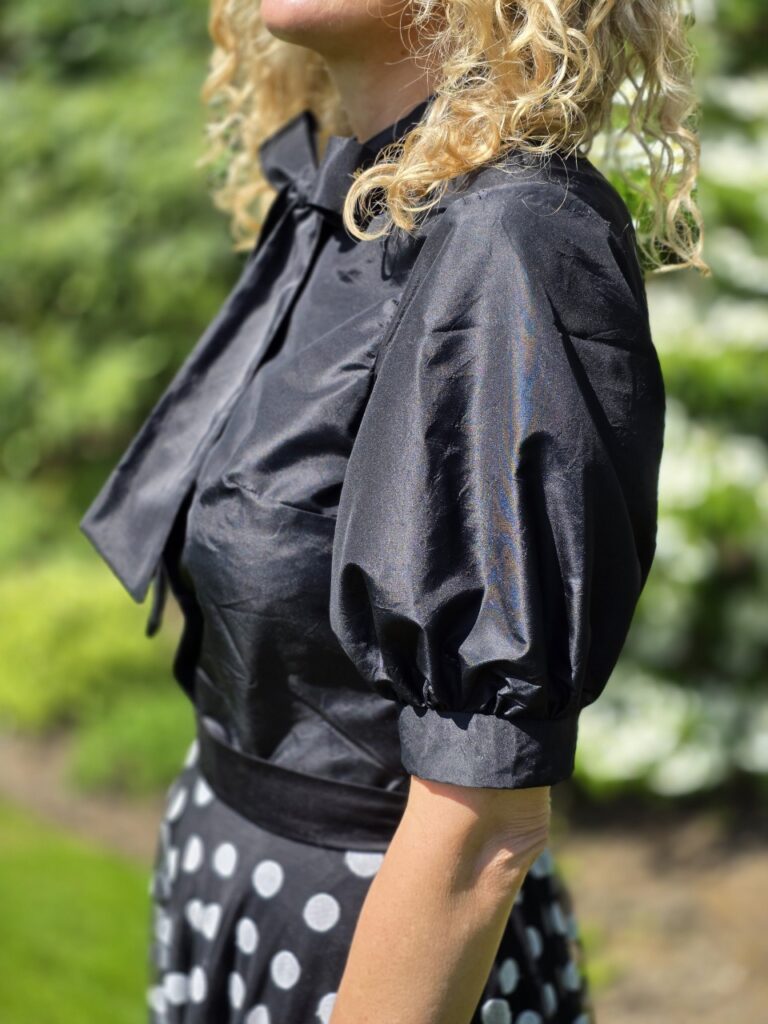
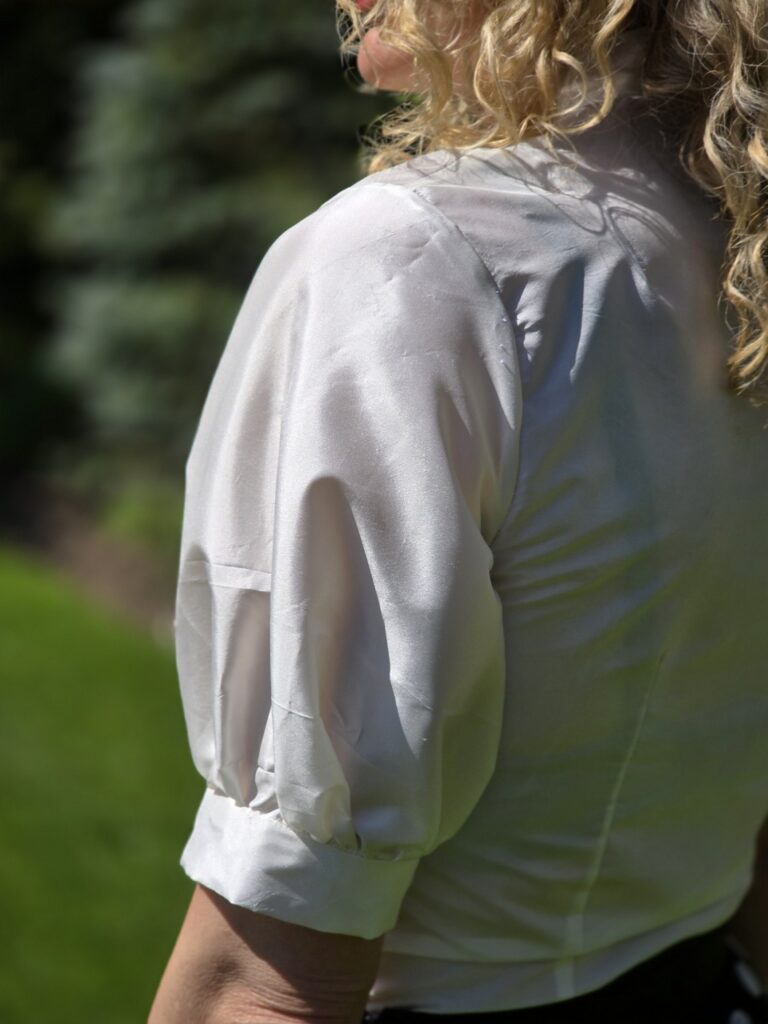
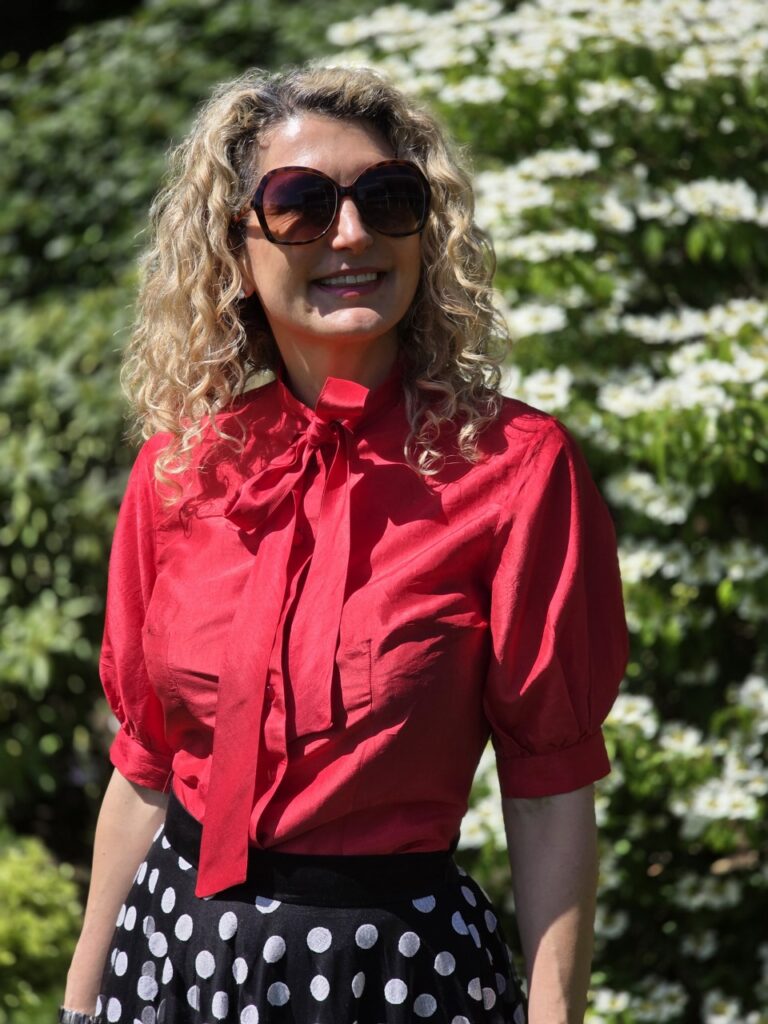
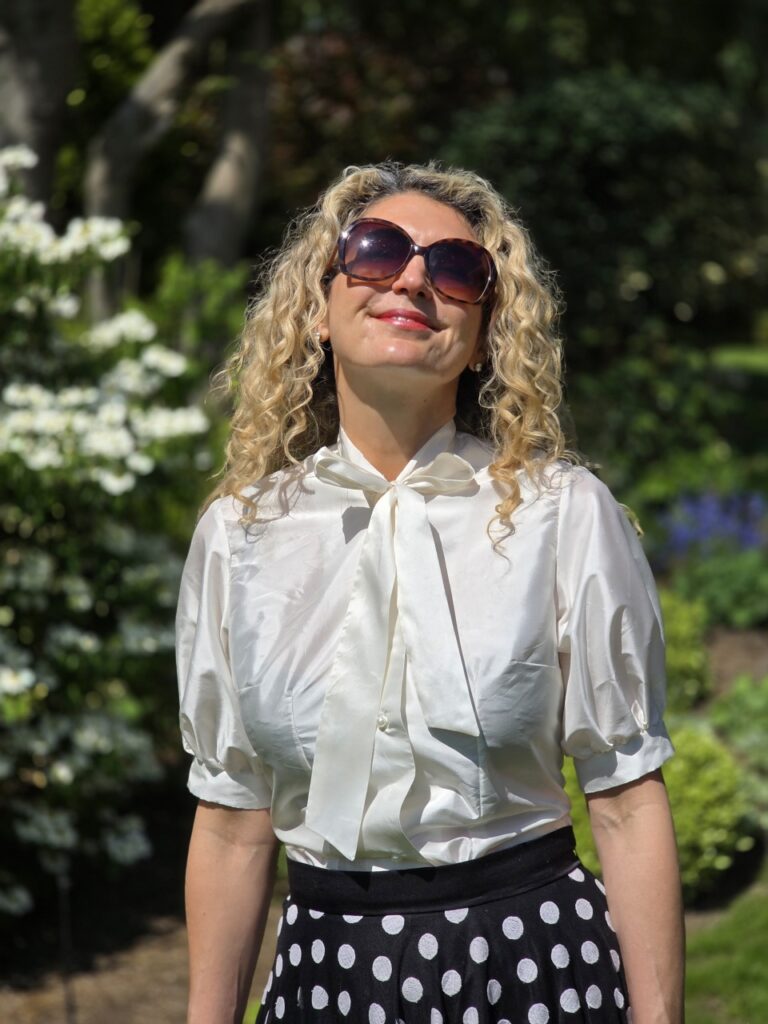
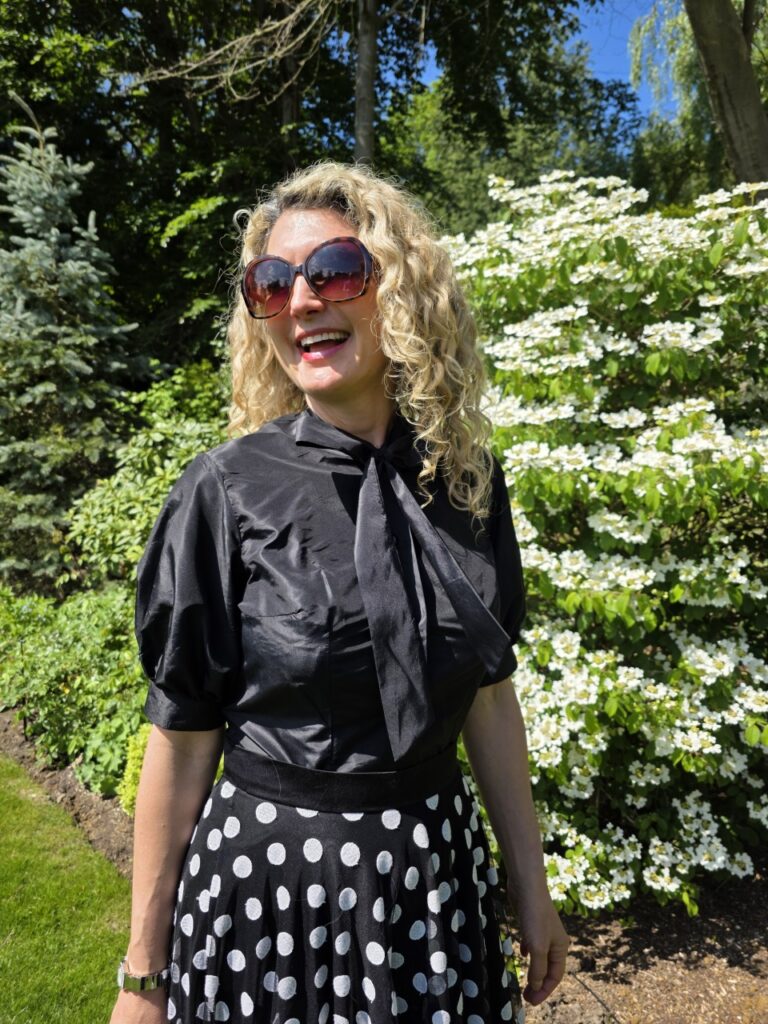
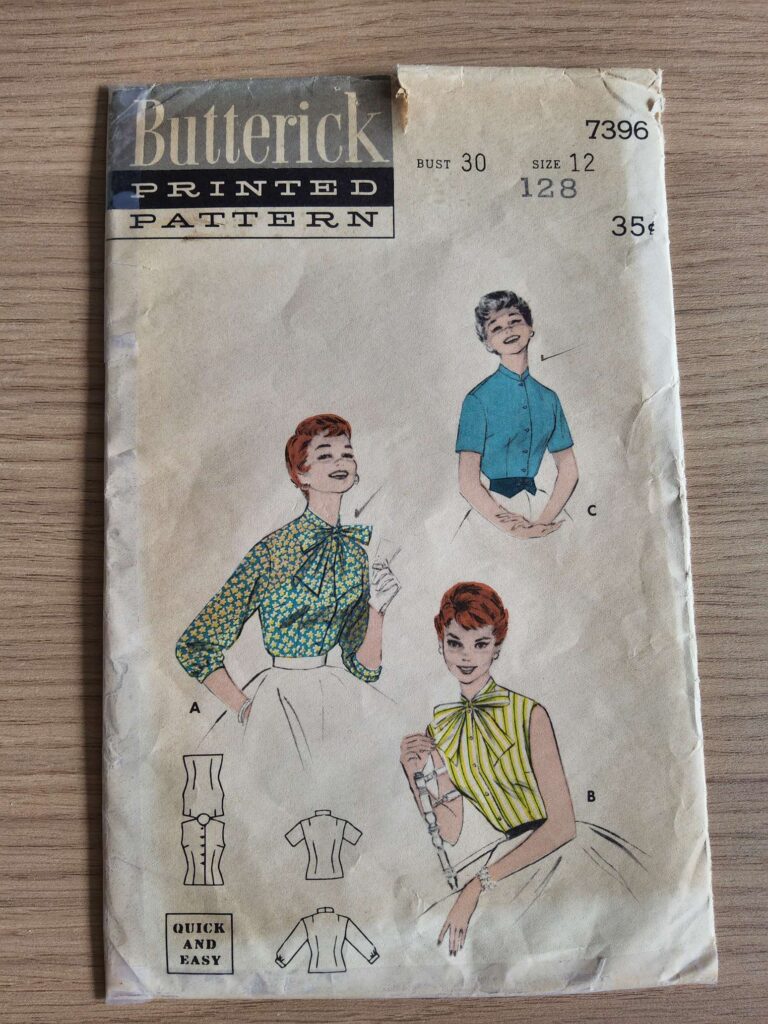
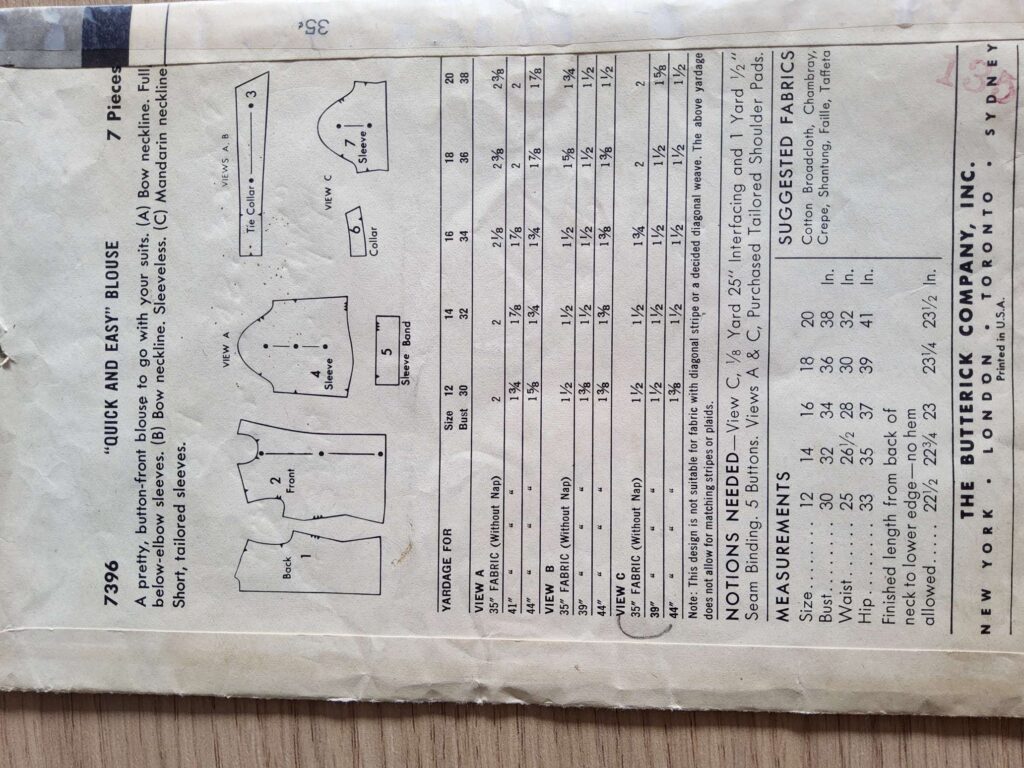
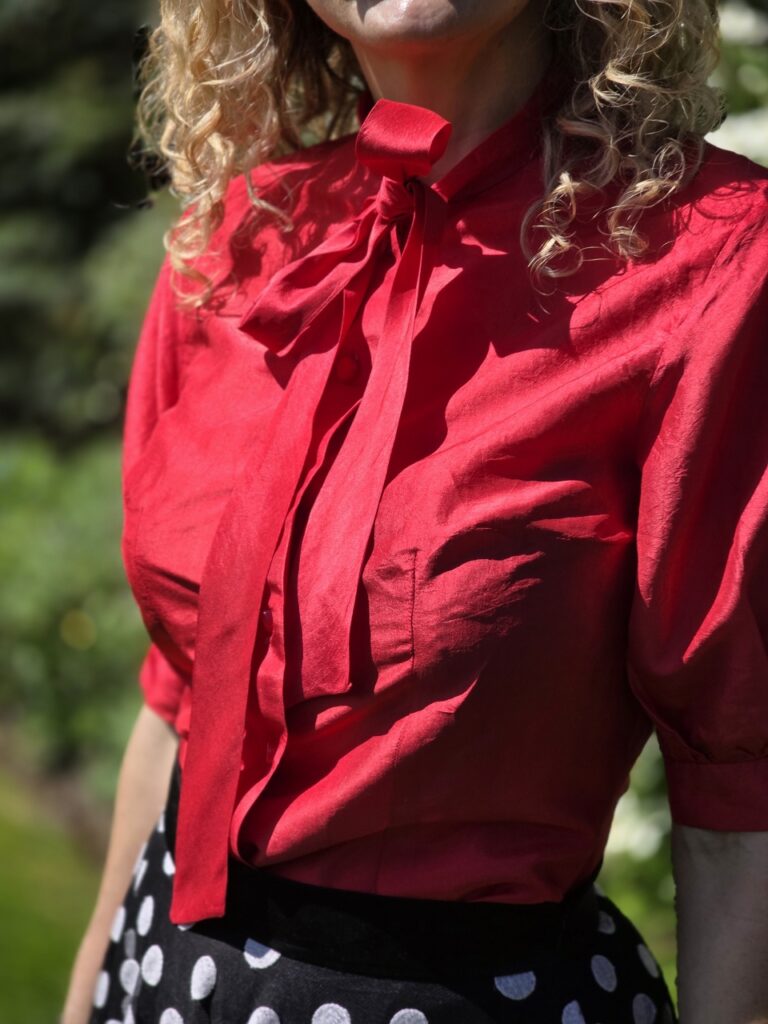
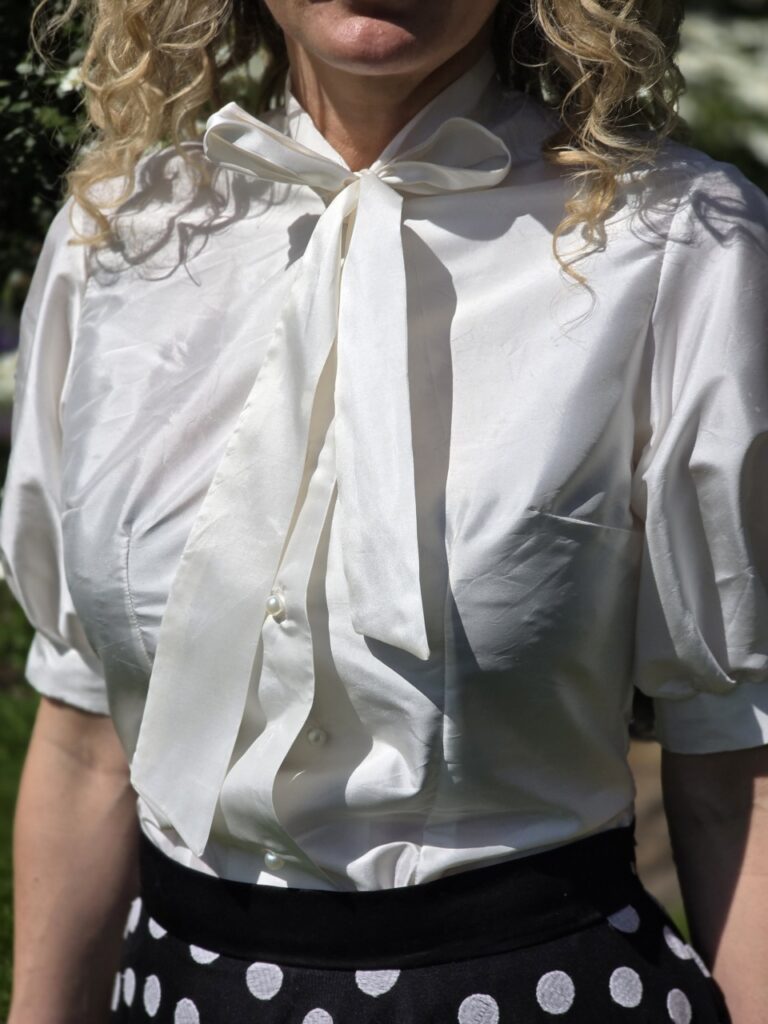
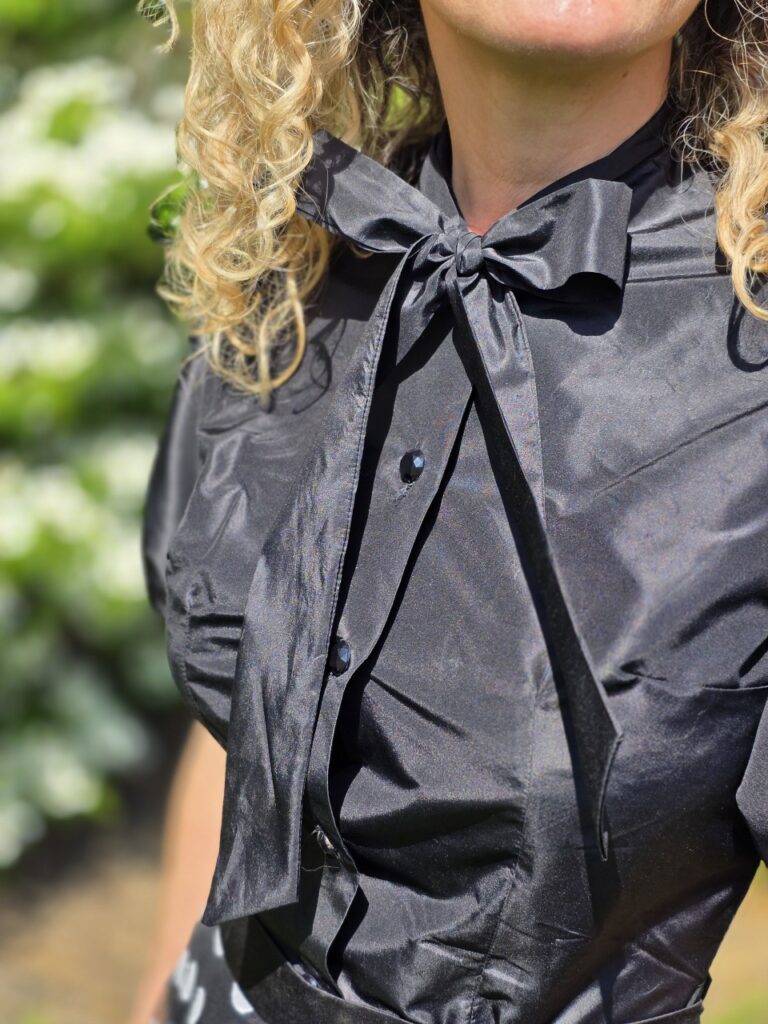
Sewing silk shirts using a vintage pattern: B7396
The fact that it is not a dress invites a celebration in itself! Can you believe this? I have just sewn not one, not two but three shirts, all in silks of different colours.
Using a true vintage pattern for the first time
It is no secret that I adore the 1950’s style. I have been using re-edited patterns from this era quite a bit recently (mostly by Butterick). However I had never sawn using a truly vintage pattern. I had little interest in hunting them down on e-Bay or Etsy, paying a hefty price, only to find out that the fit was a disaster. I am boring like that…
However, as part of my recent Vinted addiction, I have discovered that not only can I buy the most stunning unworn designer heels for a fraction of their initial price. I actually have an entire theory on the second hand high heel shoe market (but here is not the place ). But I can also buy sewing patterns!! Similarly unused, similarly cheap. Oh God, the beginning of the end….
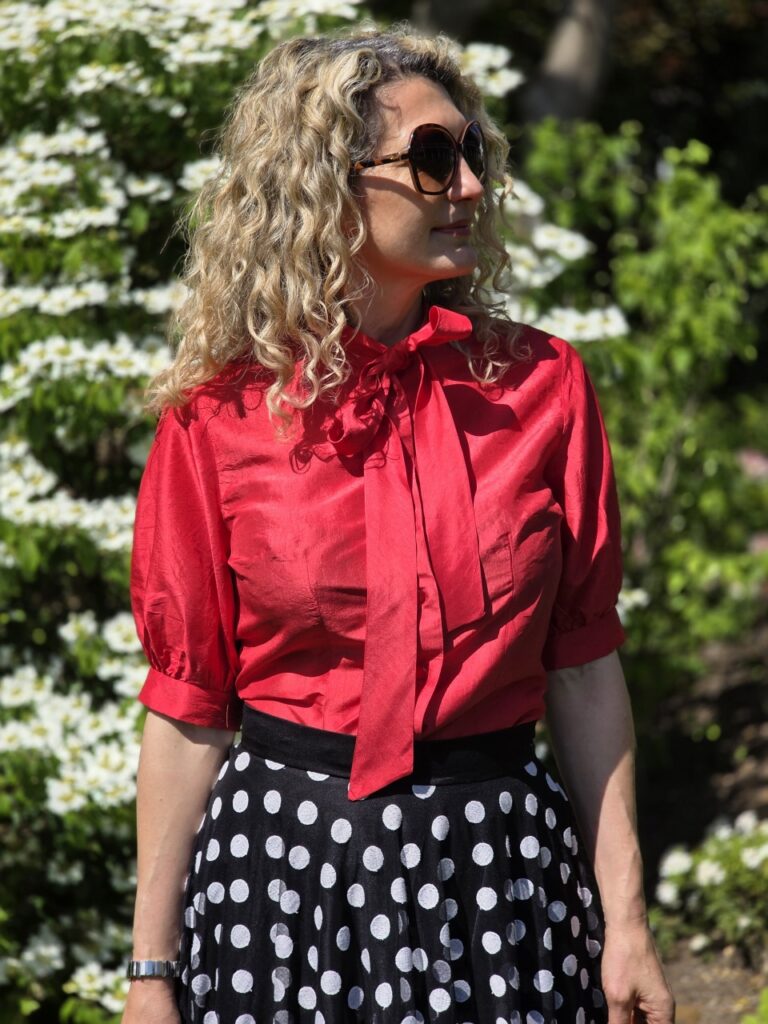
In any case, I had been looking for a shirt with a bow collar and here it was! Perfectly adjusted, looking extremely easy with very few pattern pieces… For £5, how could I resist? And how cute is this envelope?
I made a toile to check the sizing and I just had to add 2cm on each side… and then nothing else!! I am a size 10 for Vogue/ Butterick/ McCall so I think either 12 or 14 vintage is what I need. The shirt is very adjusted but it exactly how I wanted it! For the black one I mispositioned my buttons so will have to revisit this when I am brave enough…
Butterick Vintage 7396: full review
- Sizing: I used a bust 30/ size 12 for my UK 8/ FR 36/ US 2 and Vogue/Butterick/ McCall’s 10. I had to add 2cm on each side and I am very happy with the adjusted fit that resulted. I am an E cup and did not need an FBA.
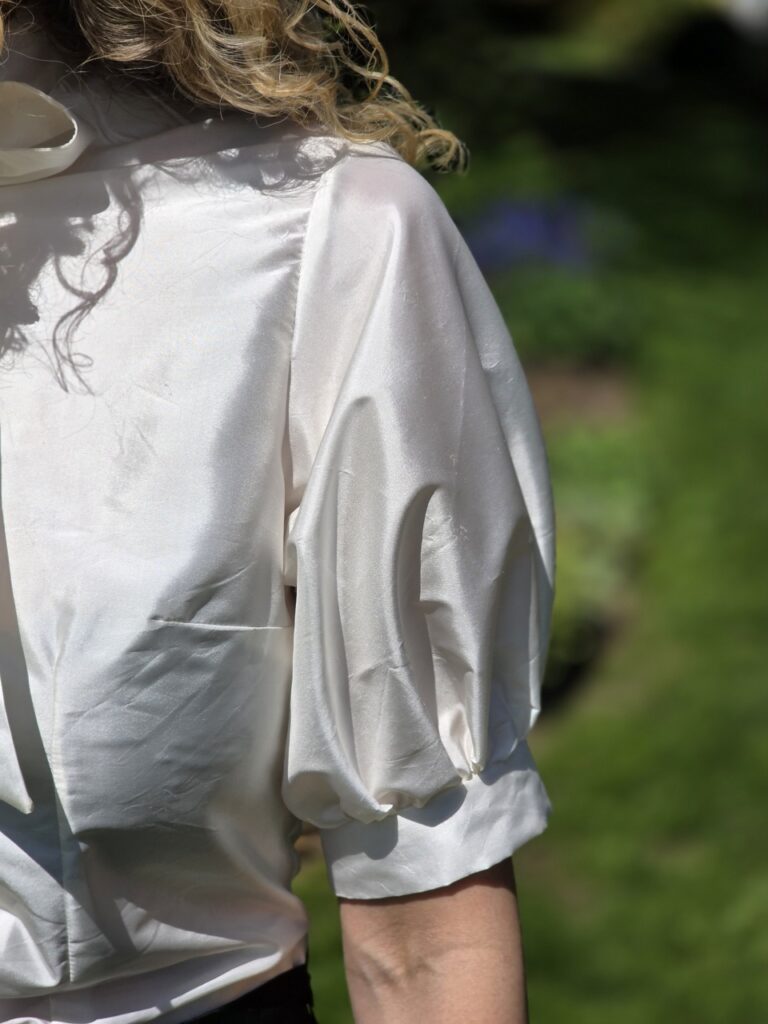
- Level of difficulty: easy peasy, 4 pattern pieces (5 when I changed the sleeves), you just need to be precise with the darts (2 at the front, one at the back).
- Fabric used: for all 3 shirts, I used a lightweight silk dupioni and I love it! I used a microtex needle but otherwise no change to my sewing routine, this thickness of silk is very easy to manage.
- Changes to the pattern: I used the puff sleeves from M8197; and I did French seams throughout, for a more polished look for the inside of the garment.
- Love rating: extremely high, this will be my go-to shirt pattern for the foreseeable future. I cannot wait to make winter versions…
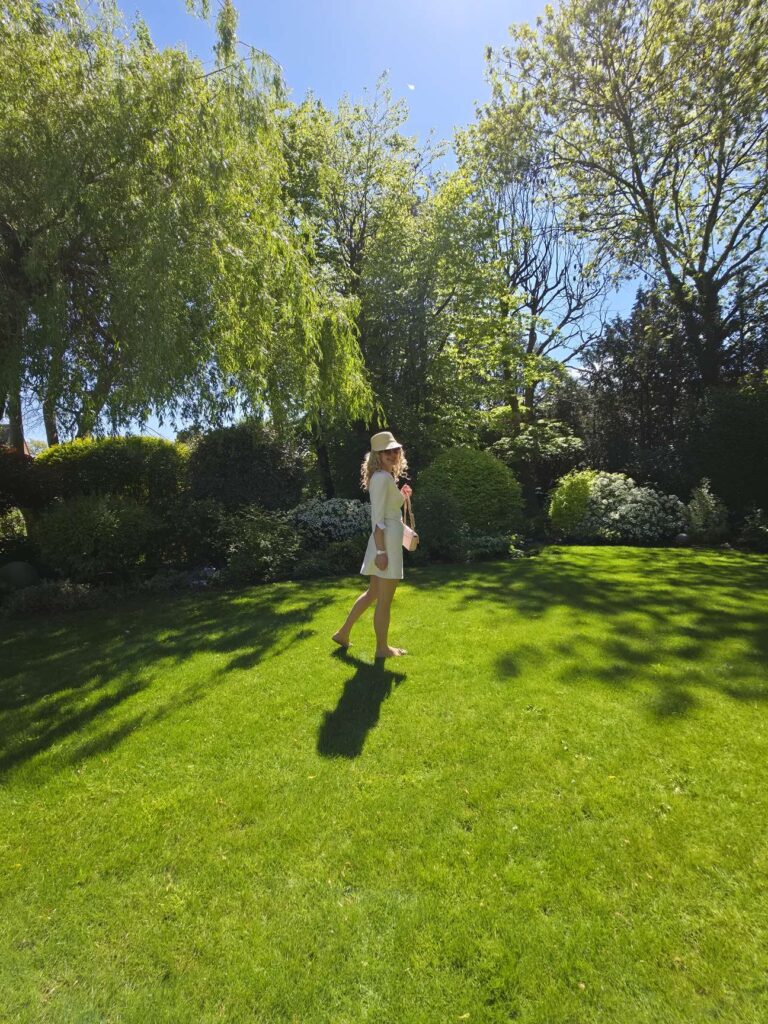
And a bit more photo bombing…