Sewing a maxi bubble skirt
After many months of looking for the perfect pattern, here is my self drafted maxi bubble skirt! Exactly the way I wanted it to be so well worth the wait…
The (unsuccessful) search for the perfect pattern
I have been wanting a bubble skirt for myself for a very long while – probably years rather than months to be honest… I am like that: I get fixated on an idea and I will not relent or compromise until I get exactly what I want (ask the company that built our house, they know…).
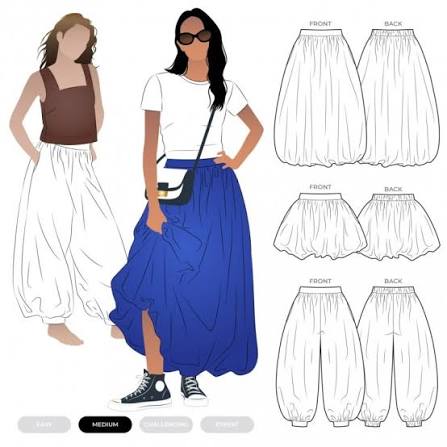
If you google “bubble skirt pattern” online, the only things that come out are very bubbly at the bottom – which is what we want… but also very bubbly at the top – definitely NOT what we want. The golden rule of any pear shape girl like me is DO NOT ADD ANY VOLUME AT THE WAIST.
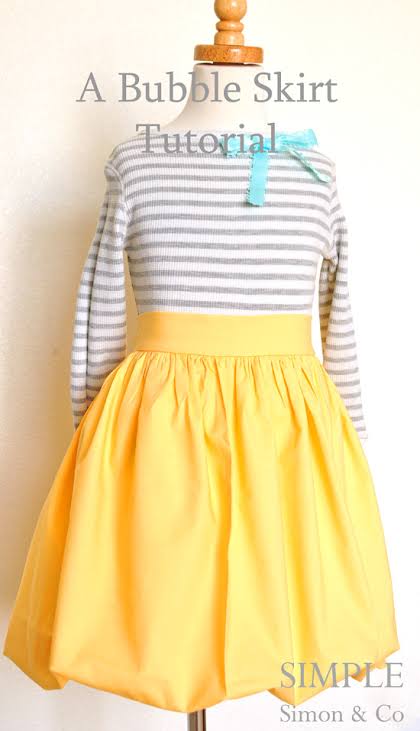
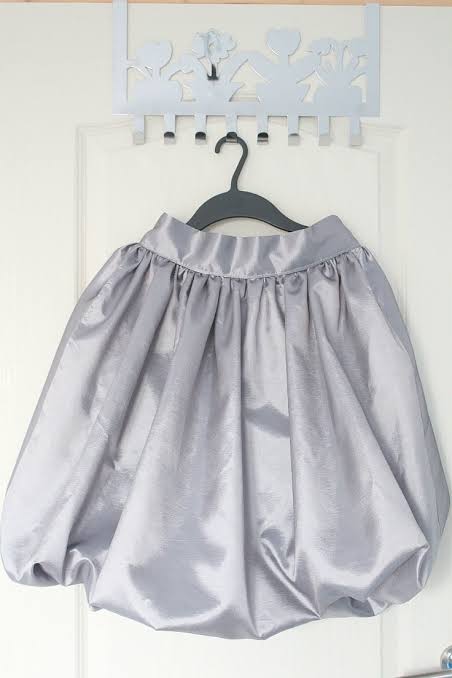
Anyway what I found were things like these (no offense to the pattern makers, just not fit for my body type)…
Sadly I am not good at self-drafting, I can tell you. I have a very precise idea in my head but I always seem to get either the measurements or the proportions wrong. So it is with great reluctance I decided to self-draft my maxi bubble skirt… and this time was a success!
How to self-draft a maxi bubble skirt
Word of warning: I used skirt patterns I have from previous dresses, namely B6446 and V9327. I have used these skirt patterns so many times that they are full or holes and tears, but I fear changing them by even a millimetre as they work so well. But you can use the circle skirt calculator from By Hand London, which is completely free.
Anyway, here are the steps I followed – sorry I took no progress pictures…
- Cut a full circle skirt of the length you desire + 12.5cm + sewing allowance (1.5cm for me). Mine is based on a 90cm long skirt in total, so it requires about 5m of fabric cut crosswise (perpendicular rather than parallel to the selvedge) to get no middle front or back seam.
- Cut a quarter circle skirt, 12.5cm shorter than the full skirt + sewing allowance. Here there is far less fabric needed (2m) and you can cut as you usually do if the fabric is 145cm wide or more.
- Overlock and sew side seams for both skirts, allowing space on one side for the zipper.
- Sew two gathering rows at the bottom of the full skirt. There is a lot of gathering ahead of you, so I would strongly advise you mark the quarters of both skirts before proceeding, so that your gathers are evenly spread.
- Progressively gather the bottom of the full skirt and pin it to the quarter skirt, right side to right side. I advise you proceed quarter by quarter. It takes forever but never mind…
- Sew bottoms of skirt together, check for potential puckers/ holes and sort them out.
- Remove the gathering threads and turn the skirts inside out so they are now wrong side to wrong side (how you will wear the skirt) and the gathering is enclosed.
- Attach the waistband at the top. Mine is a rectangle of fabric, INTERFACED and overlocked on small side. Width is: waist + 4cm ease + 1.5cmx2 sewing allowance. Height is 4cmx2 + 1.5cmx2 sewing allowance.
- Insert invisible zipper on the side, catching both skirts. You can have a nicer finish here by not catching the underskirt in the zipper and attaching it afterwards, but lets keep it simple.
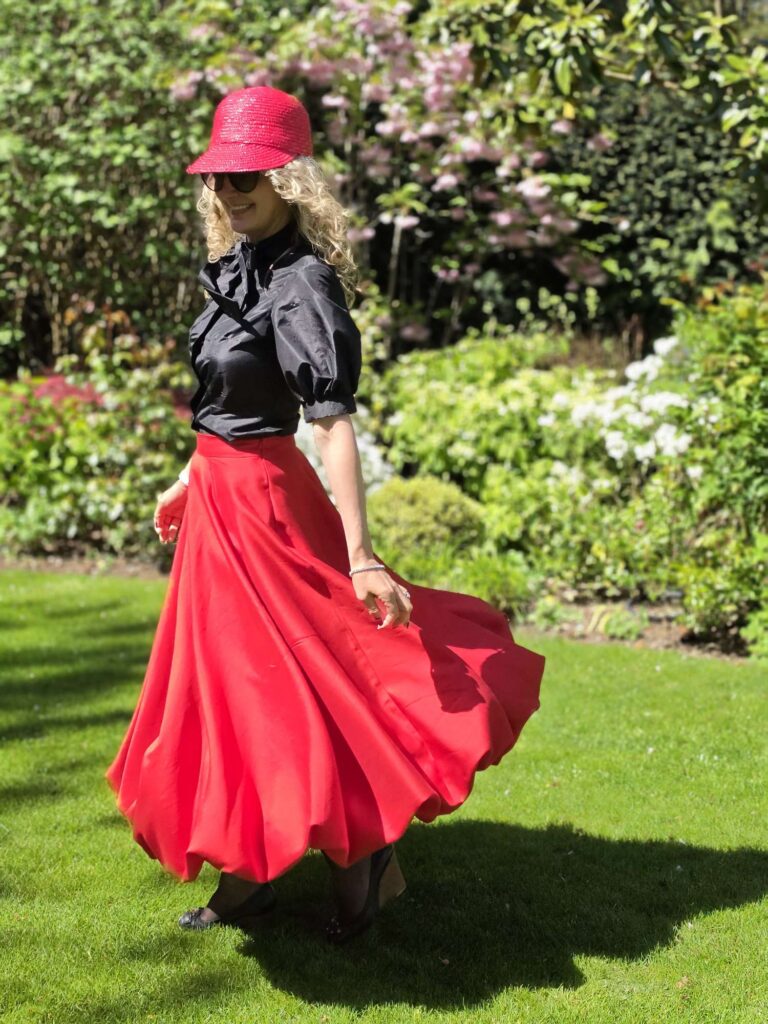
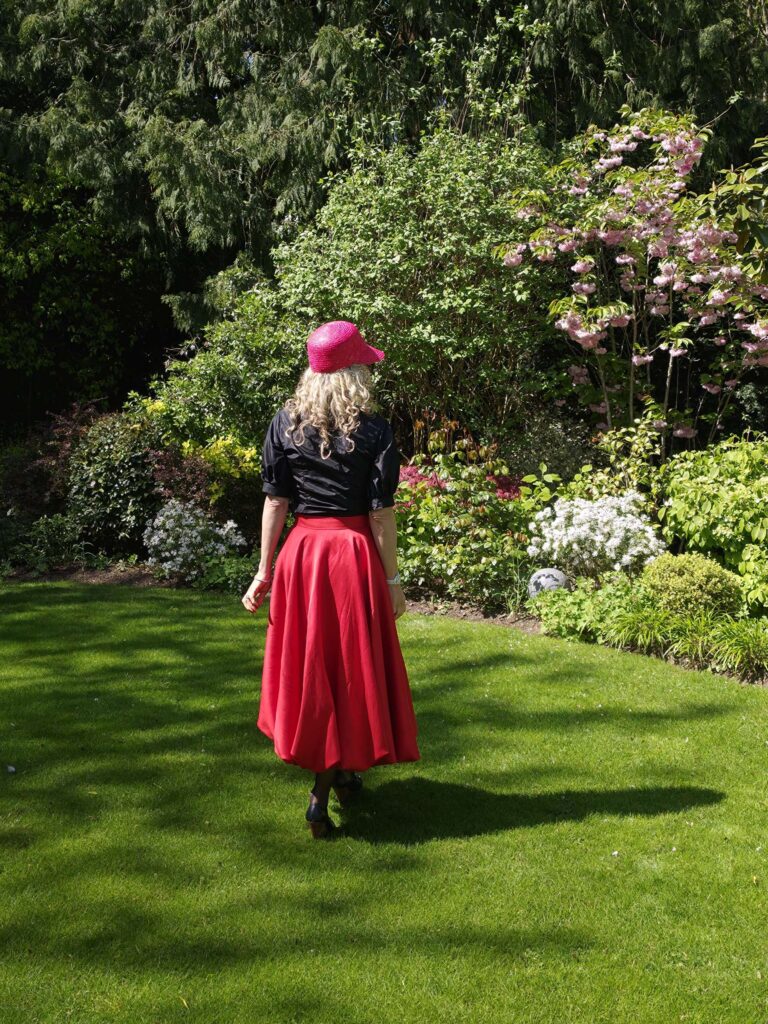
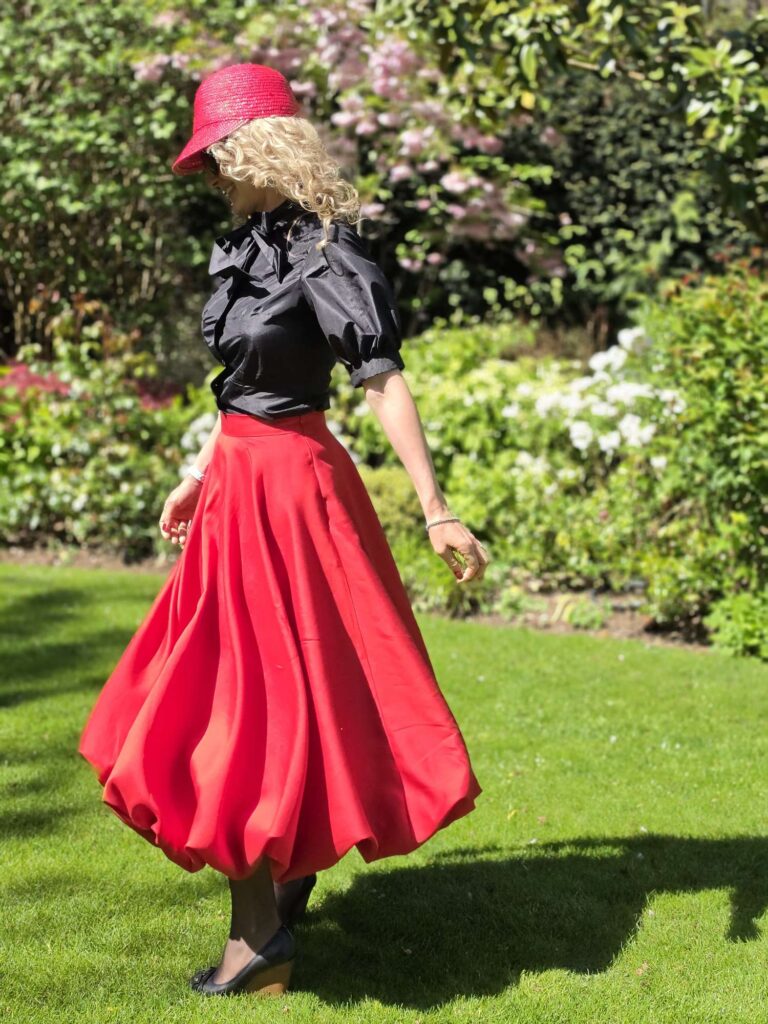
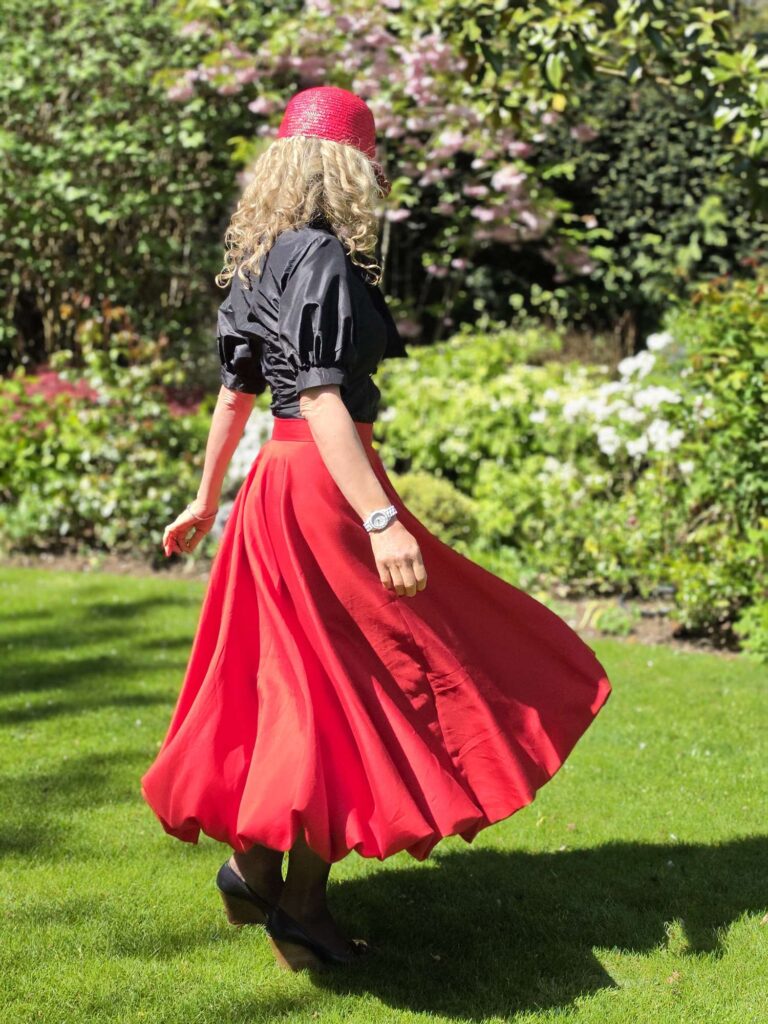
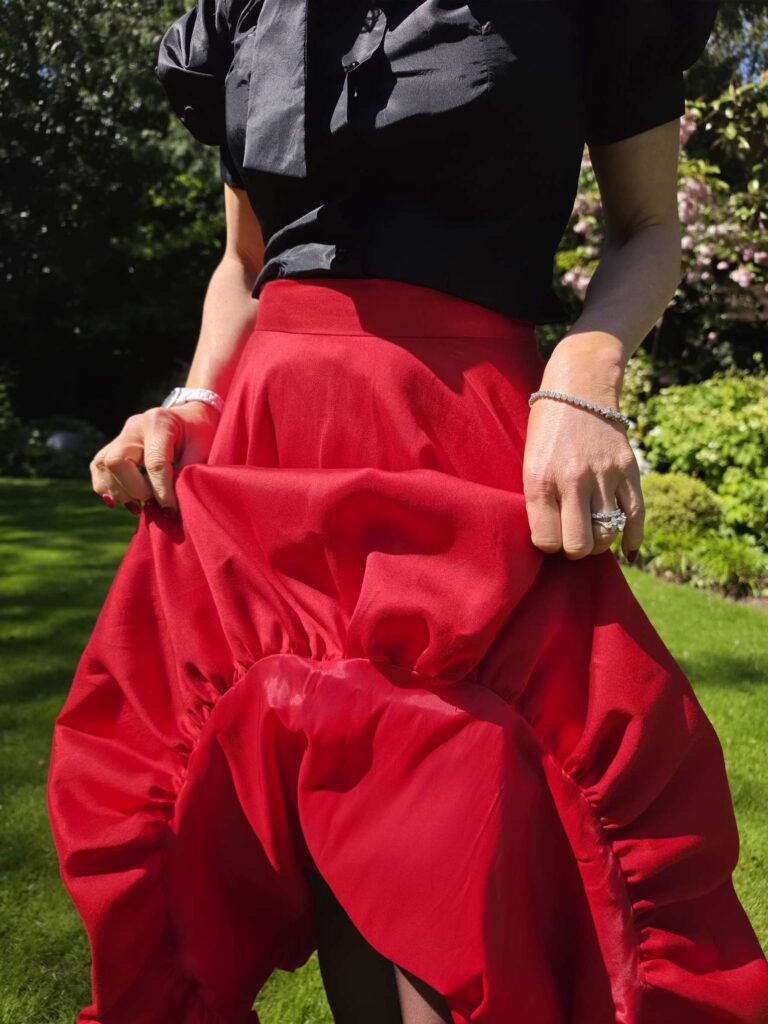
AND YOU ARE DONE! Nice puff at the bottom…

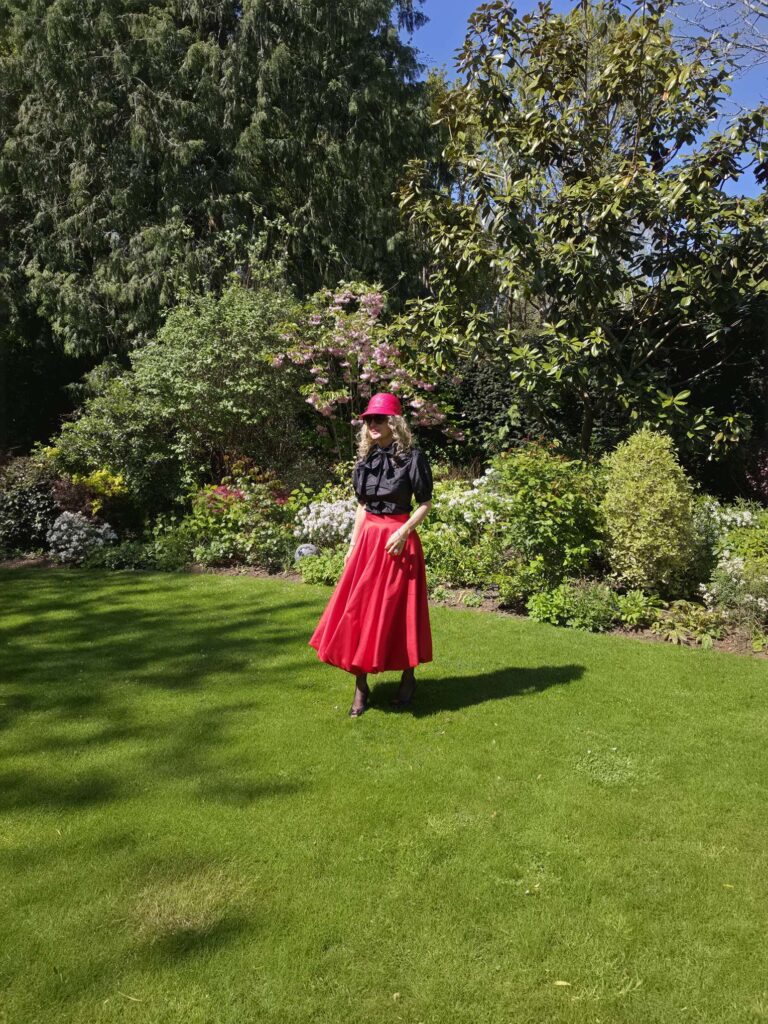
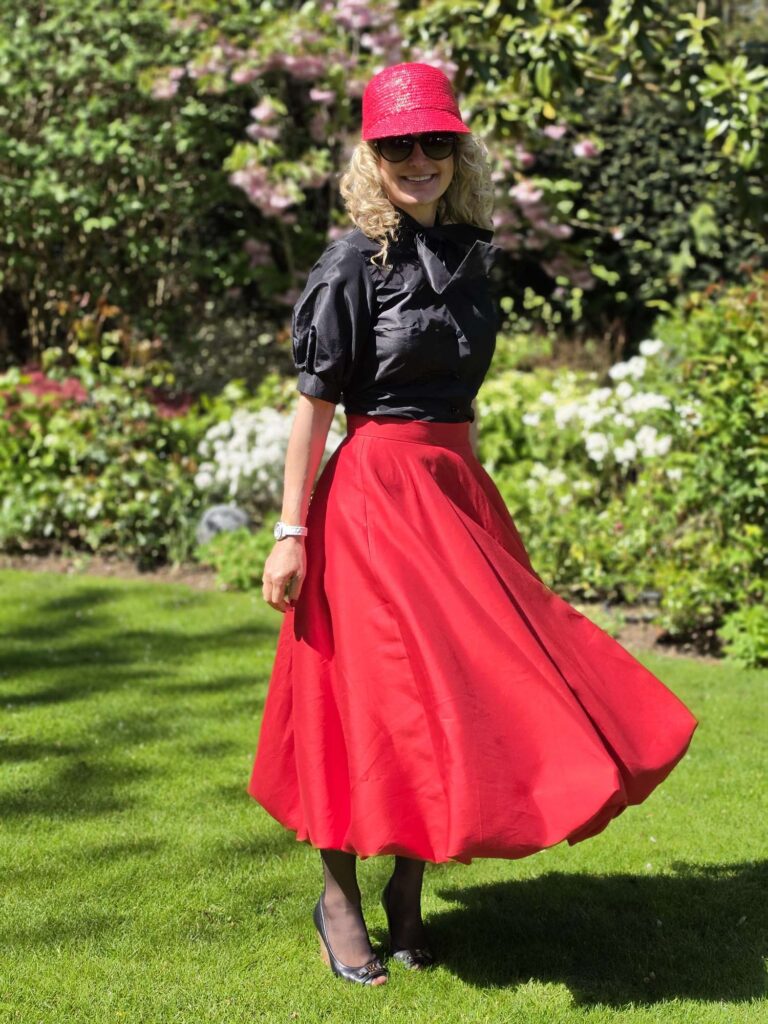
… but no puff at the top and a nice slim waist:
Conclusion
Super happy with this one although I am not sure how it will iron… Thankfully the fabric is a gorgeous silk/wool blend so it does not crease too badly/
Let me know if you would like a full tutorial, it may motivate me to make another of these beauties!
Thank you, I think it’s great!