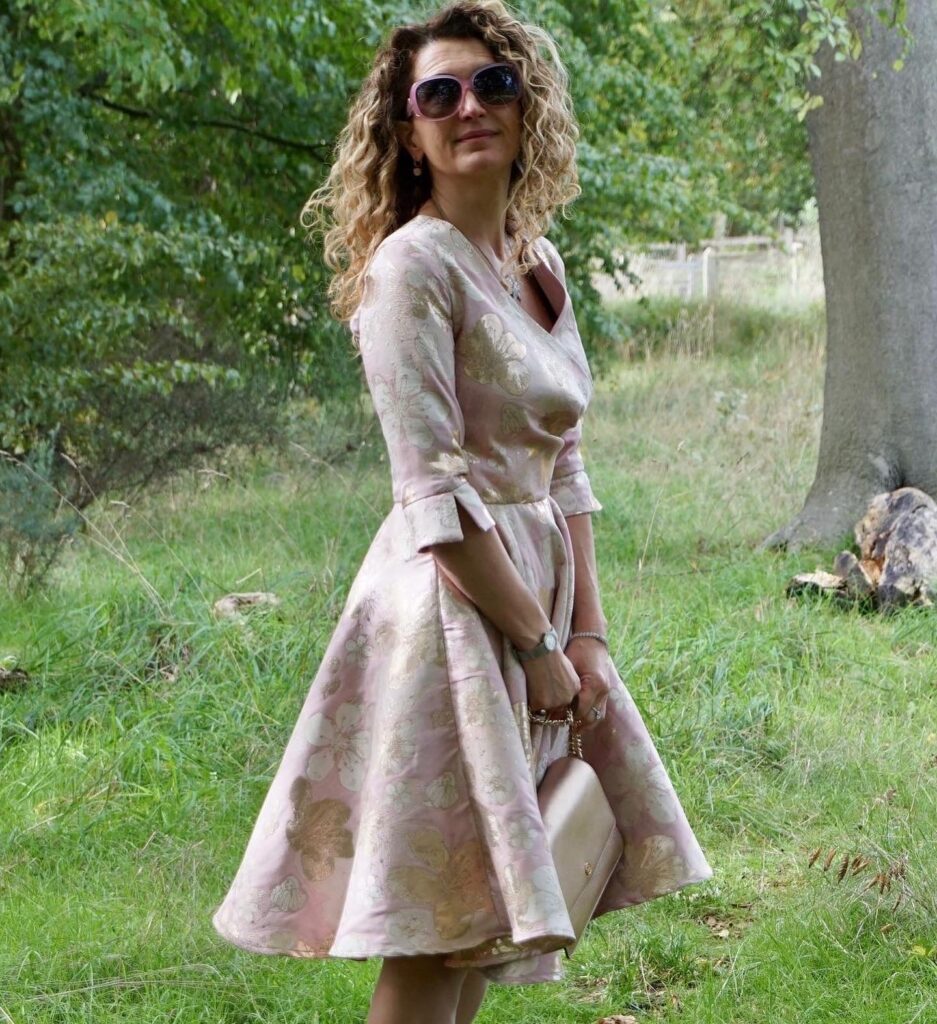
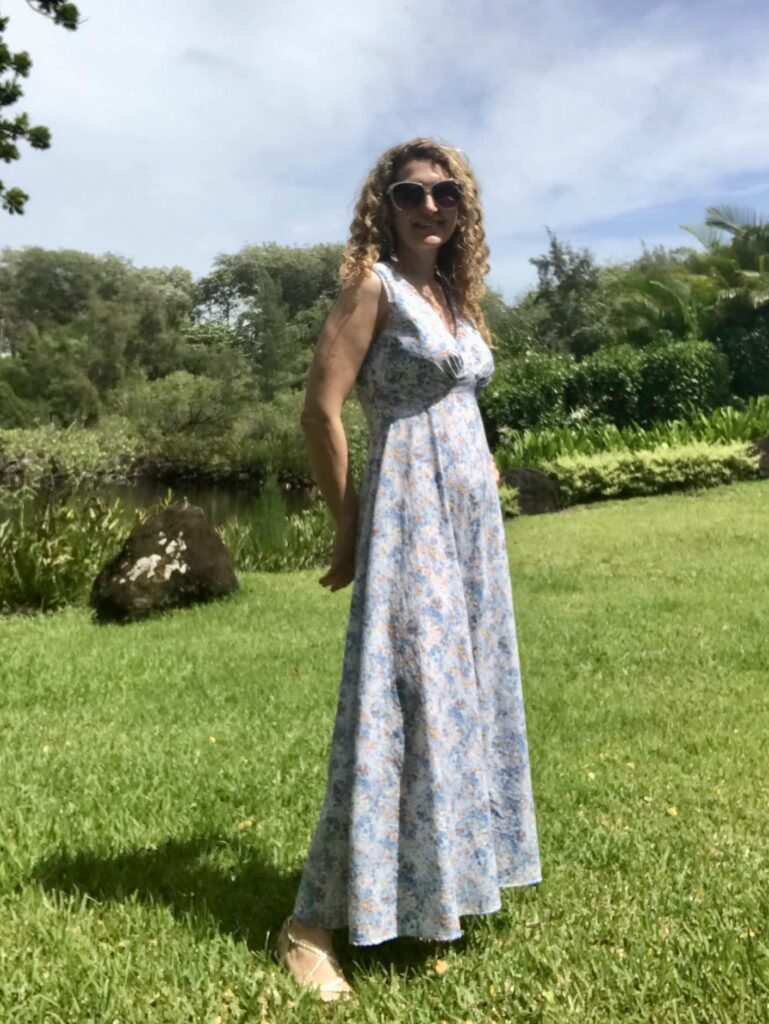
Sewing a B6446 dress in pink and gold brocade
The transition to Autumn sewing has been slow on the blog. Life has been busy, with a very big project finally materialising – we are building a house and the construction is finally happening, hurrah!!! However, I have managed to find time to sew, and here is my latest make: a B6446 dress, in a glorious pink and gold brocade – discreet and understated as ever…
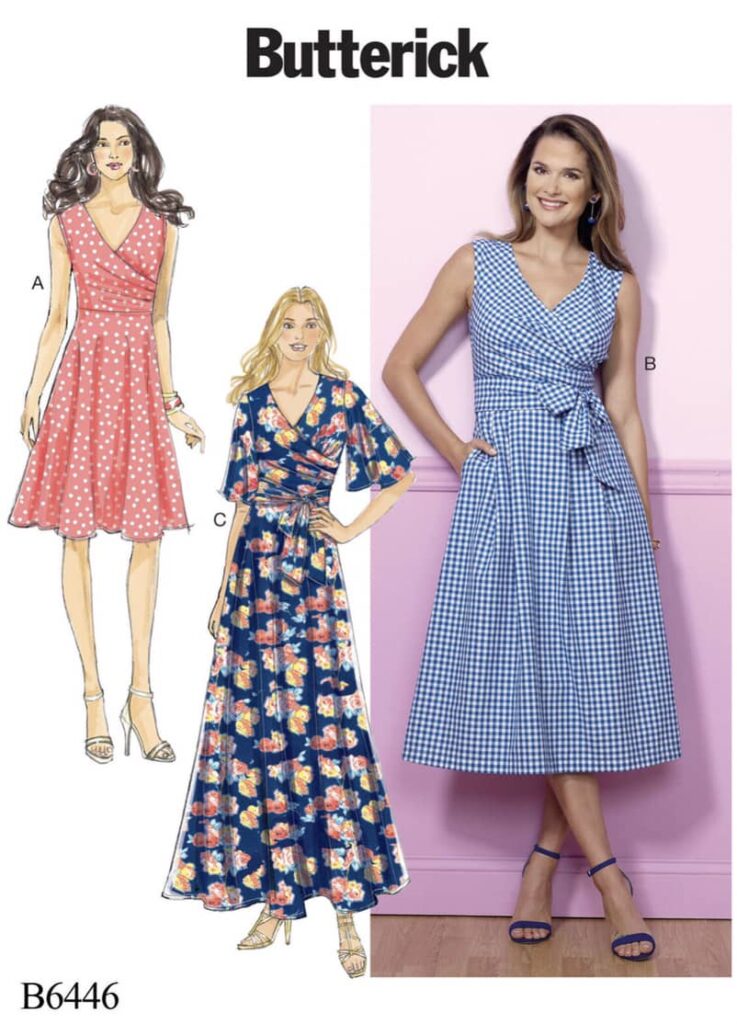
B6446: an all-time favourite pattern
I have now sewn the B6446 dress pattern… well, quite a few time! Enough for it to become well establishes in the “Six Mignons Sewing Hall of Fame”, along with M7081 (8 versions), Magnolia by Deer&Doe (x8), V9253 (x5), M6696 (x4) !
Here are my previous three versions of this pattern (reviewed on the blog here and here).
B6446 pattern review: many positives, only one negative
Let’s repeat what I said before. There are many things I like about the B6446 pattern:
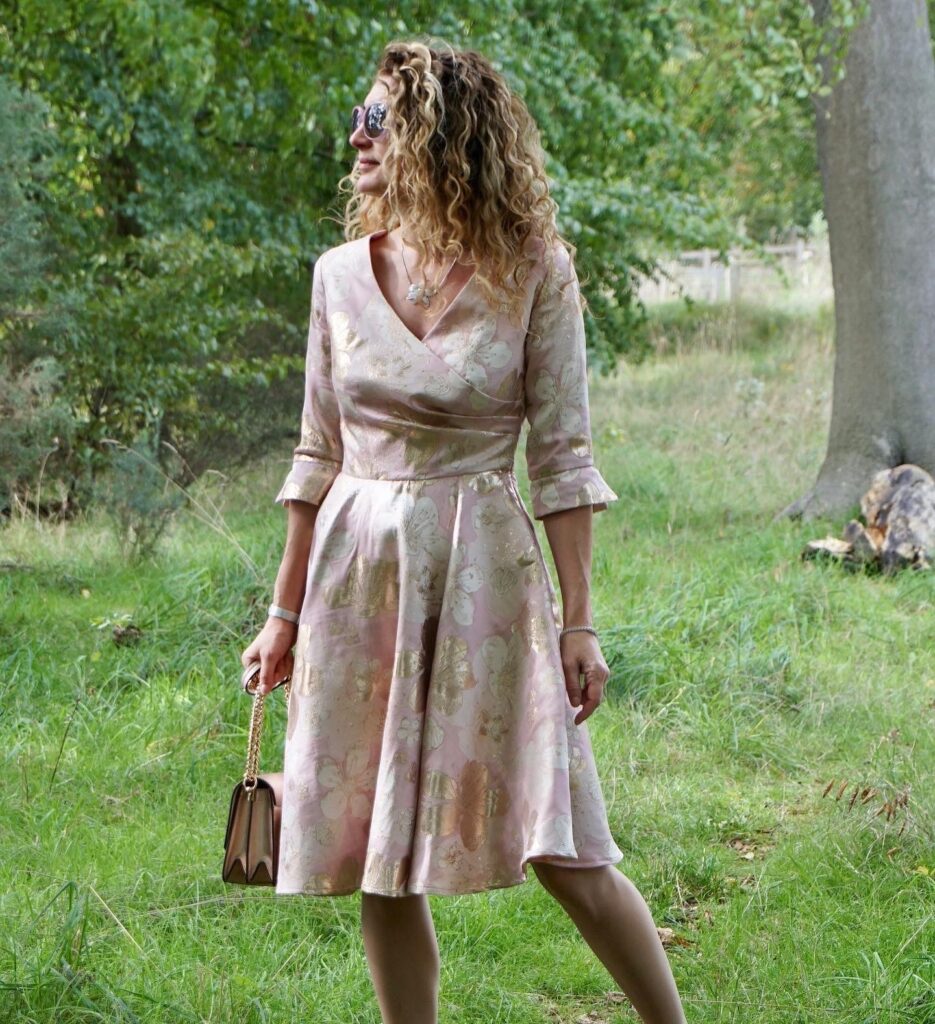
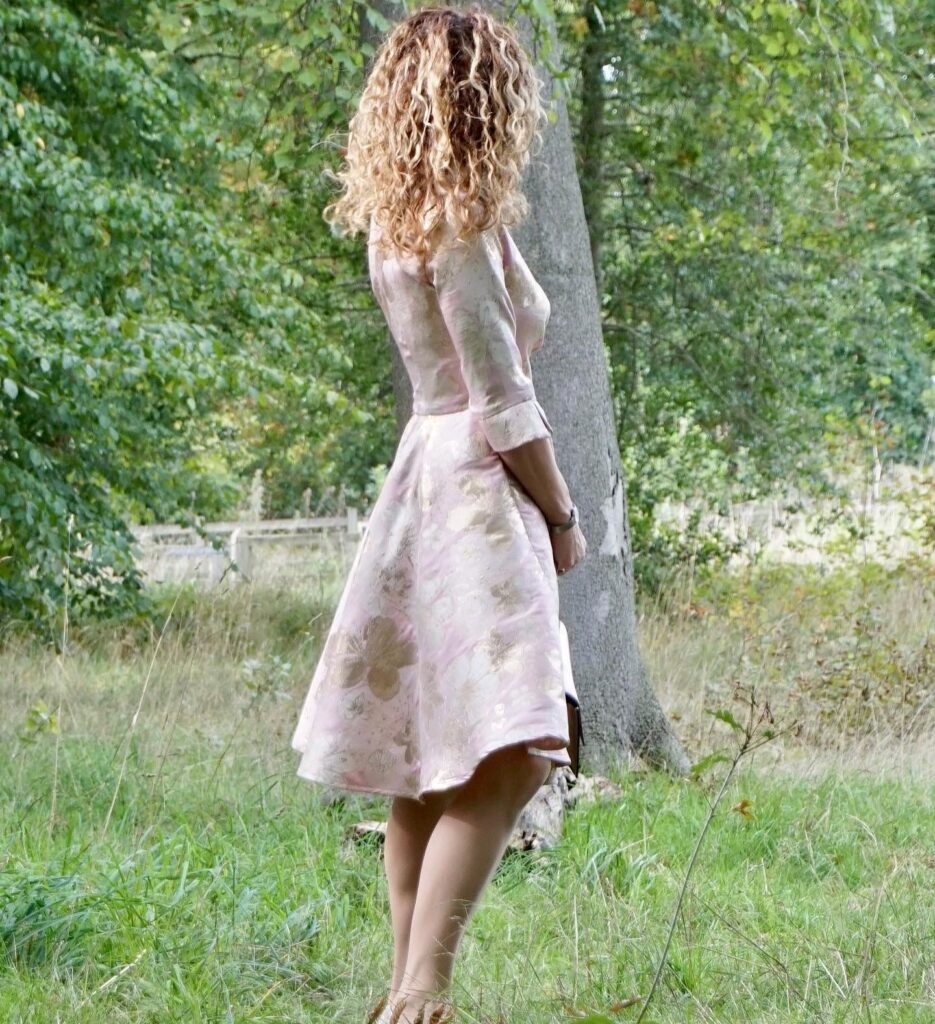
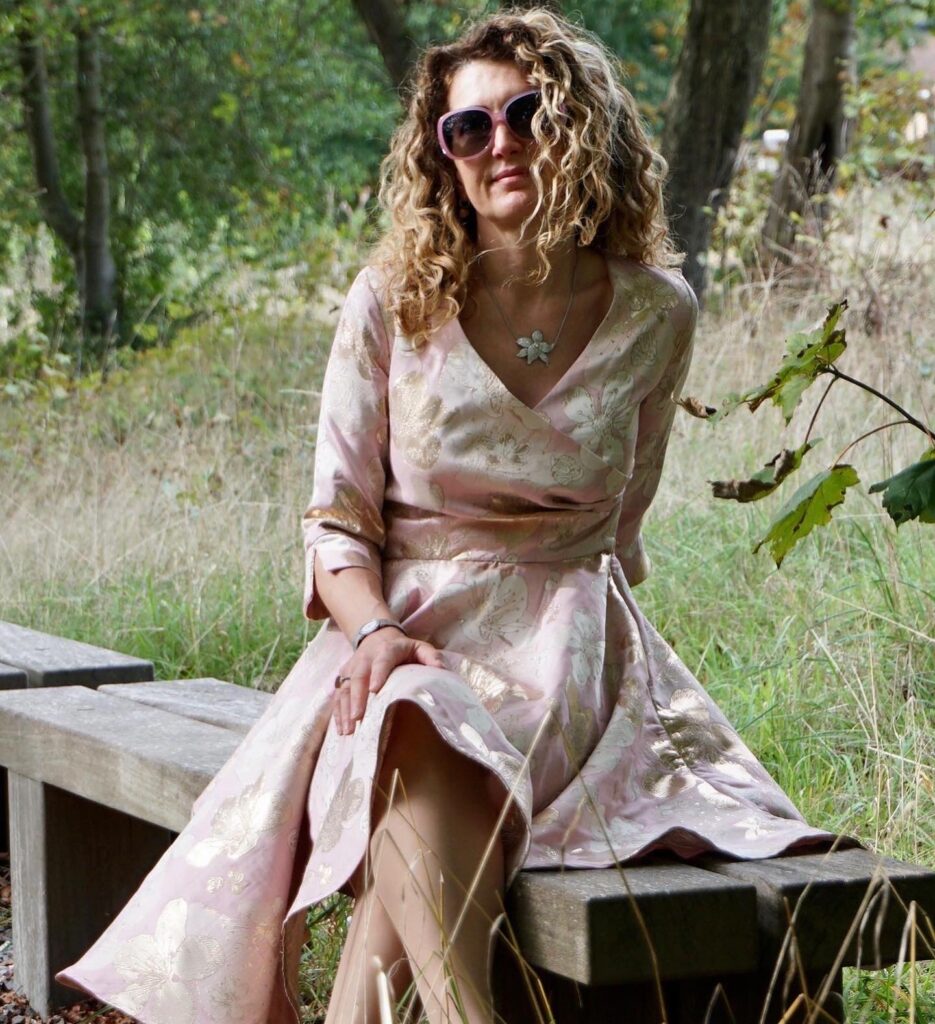
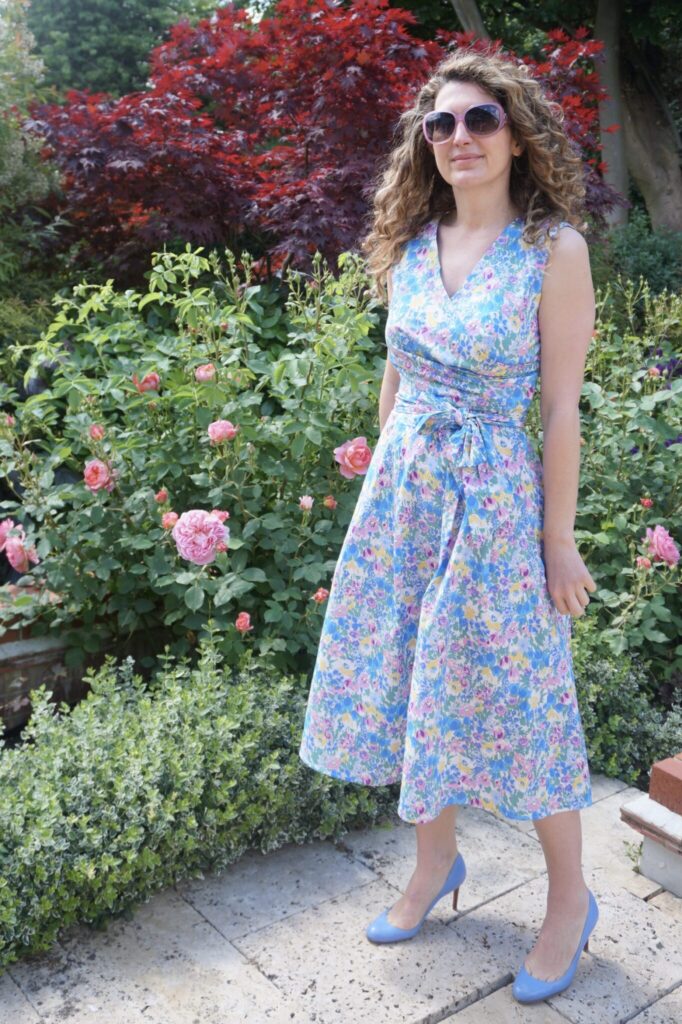
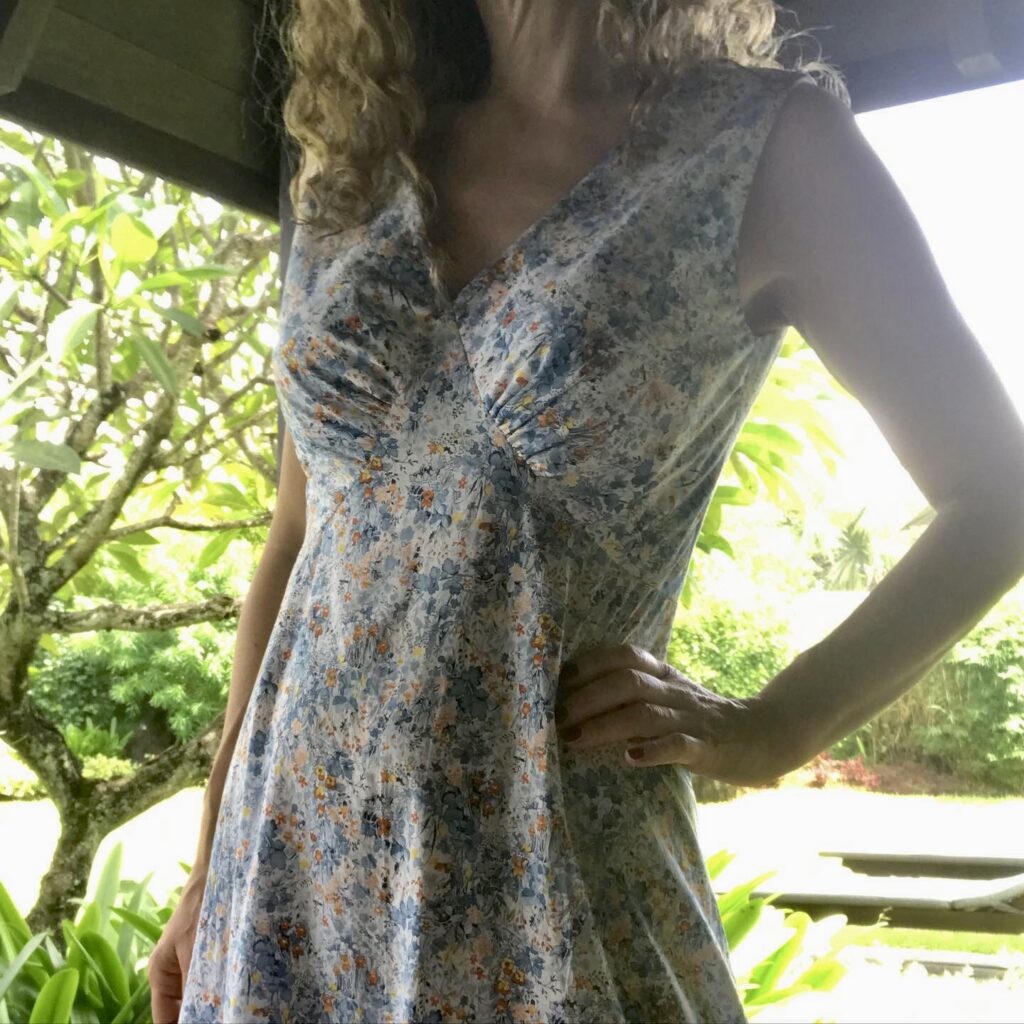
- The dress beauty lies in its mock-wrap bodice: the bust ease of the top piece is created by three side pleats, caught in the side seam. These pleats are not replicated on the hidden part of the bodice wrap, to avoid unnecessary bulk.
- The dress fits to perfection. As usual with Vogue/ Mc Call’s/ Butterick pattern, I cut a size 10 for my UK 8/ FR 36 / US 2. After making a bodice muslin, I did add 0.5cm at the waist to have a tiny bit more ease; but I made absolutely no other changes. In particular, there is plenty of bust room and I did not need an FBA for my E cup – hurrah!
- With a fully lined bodice, the inside finish is absolutely impeccable. I fully line my dress bodices most of the time anyway but it is usually not included in the pattern instructions – here it is.
- The pattern instructions are crystal clear, as they usually are for Butterick, Vogue and McCall’s. If you are not used to lining bodices, they will help you immensely.
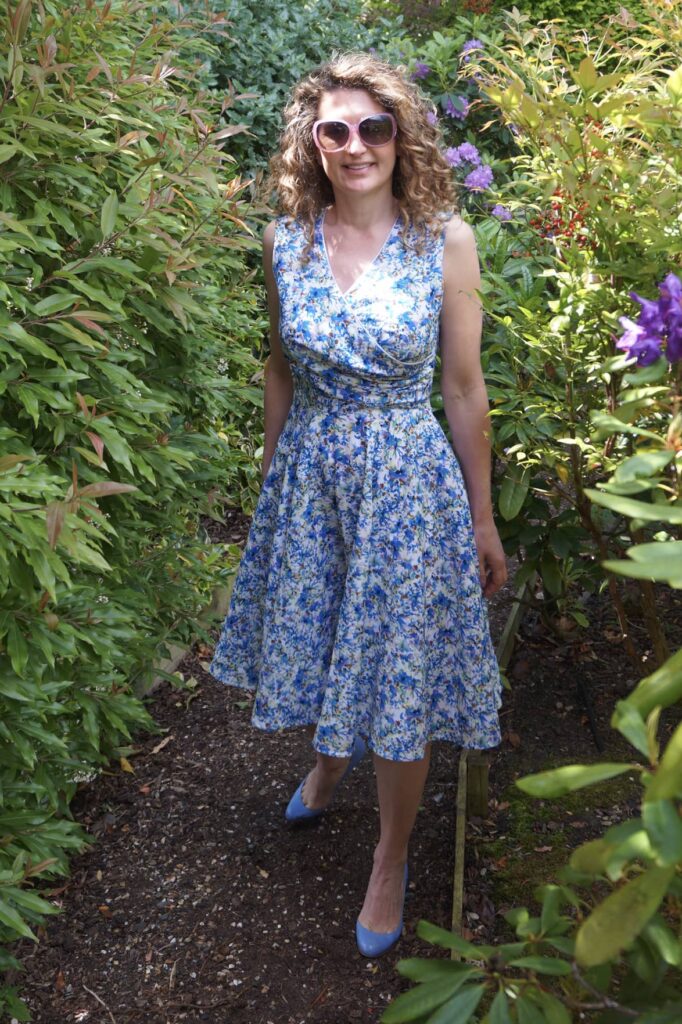
The major negative of this pattern is the bottom. The skirts on offer are frankly uninteresting in comparison to the bodice. I would strongly advise you go for much more volume with a full circle skirt, as I did.
Changes I made to the pattern
I made two main changes to the pattern, using pattern pieces from my beloved M7081:
- As just mentioned, I swapped the skirt for a full circle, so much more appropriate to the style of this dress in my view. Please note that I am note wearing a petticoat under my skirt, all the volume comes from the skirt itself – this is the reason why I like full circle skirts so much!
- As I really dislike the sleeve option offered by the pattern, I used the sleeves from M7081.
Fabric choice: advice for sewing metallic brocade
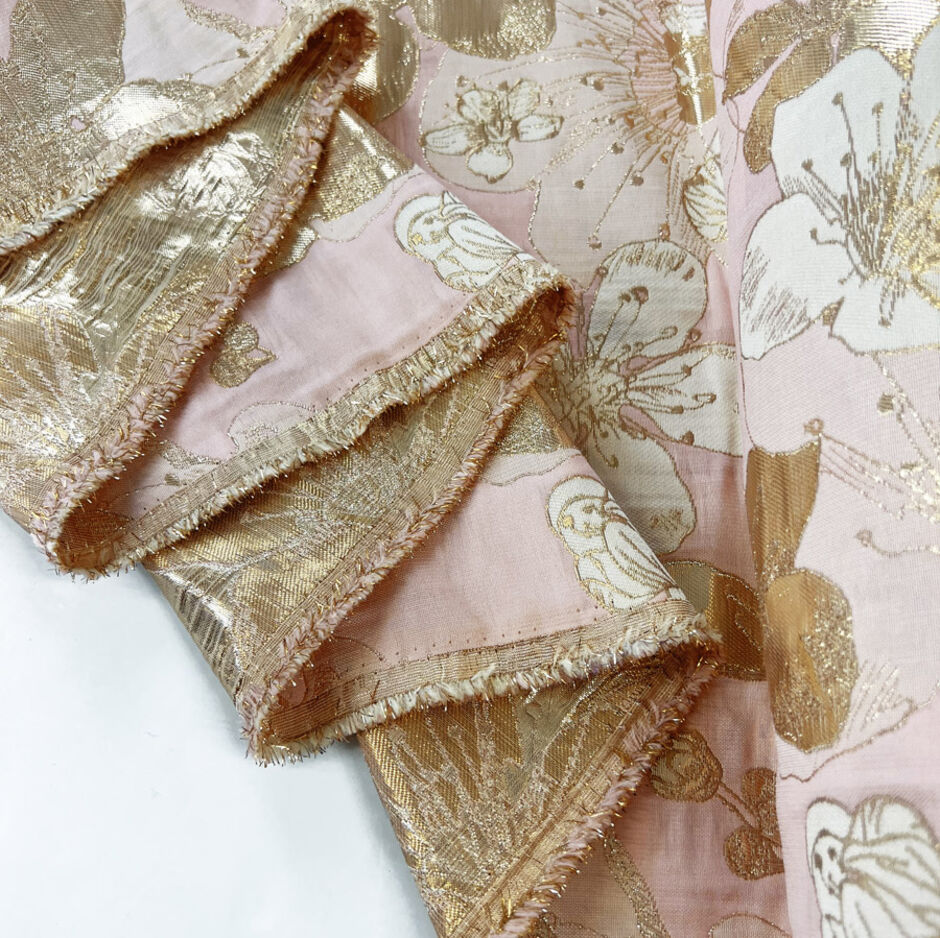
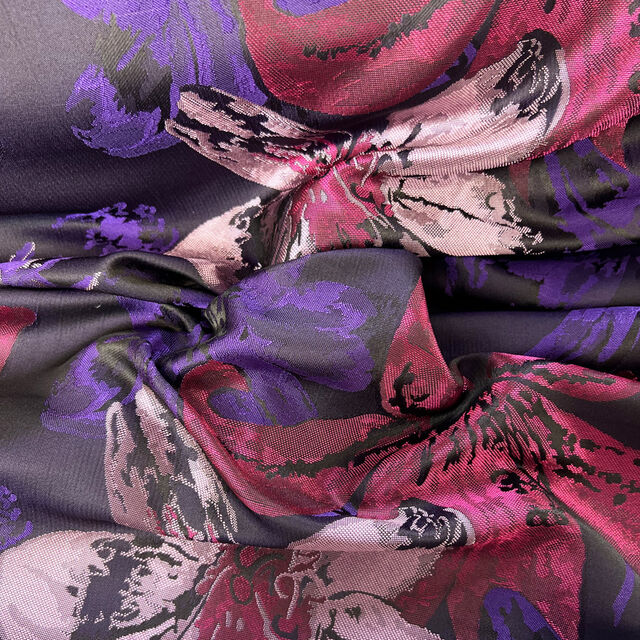
The fabric is used for this dress is a gorgeous pink and gold brocade from Croftmill (still a tiny stock left here at the time of writing). This is a fabric I enjoy wearing a lot in colder months, in a colour combination I absolutely adore.
Croftmill had a large arrival of these brocades early September and I really had to refrain myself from purchasing the entire stock… They have two very big advantages: they are very affordable, at £12/metre (brocade usually costs £30 +); and most are soft brocades, which are perfect for dresses – did you not know I sew mostly dresses? Here are two other options I am about to purchase:
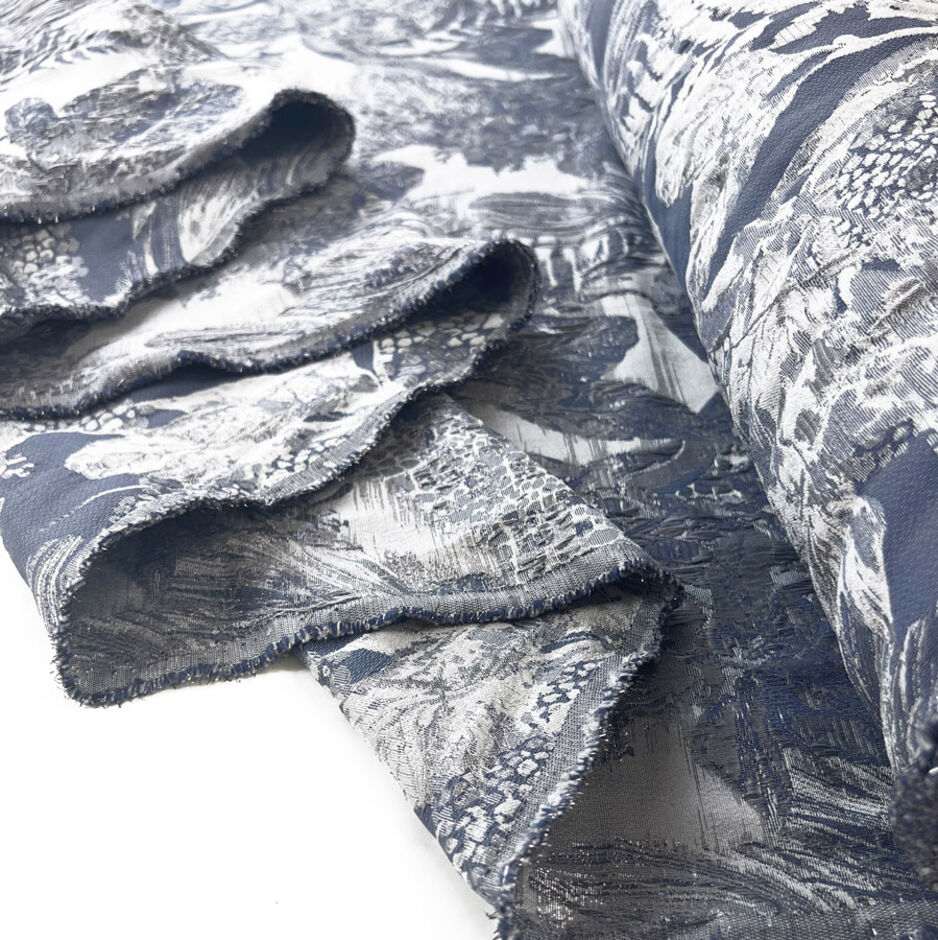
The problem with metallic brocade is that it creates several challenges to sew. I wrote a full article about how to sew metallic brocade a few years ago, here is a summary:
- Brocade frays like there is no tomorrow so make sure you overlock absolutely all raw edges, even if they are covered with lining.
- Metallic brocade is extremely itchy and absolutely intolerable on bare skin, so make sure to entirely line your garment and to finish your neckline so that the brocade fabric in not in contact with your neck (piping is a good option).
- Brocade has very little give, so I would not recommend it on extremely fitted garments; and I would allow a bit more ease than usual.
- Visible stitches are a no-go on brocade, so all hems will need to be invisible!
Once you’re aware of these points, the sewing is quite easy, because brocade is very stable hence easy to sew.
Conclusion
Another dress I am entirely satisfied with! I am now working frantically on a collection of mid-season cropped jackets to match my fit-and-flare dresses, more to follow soon…
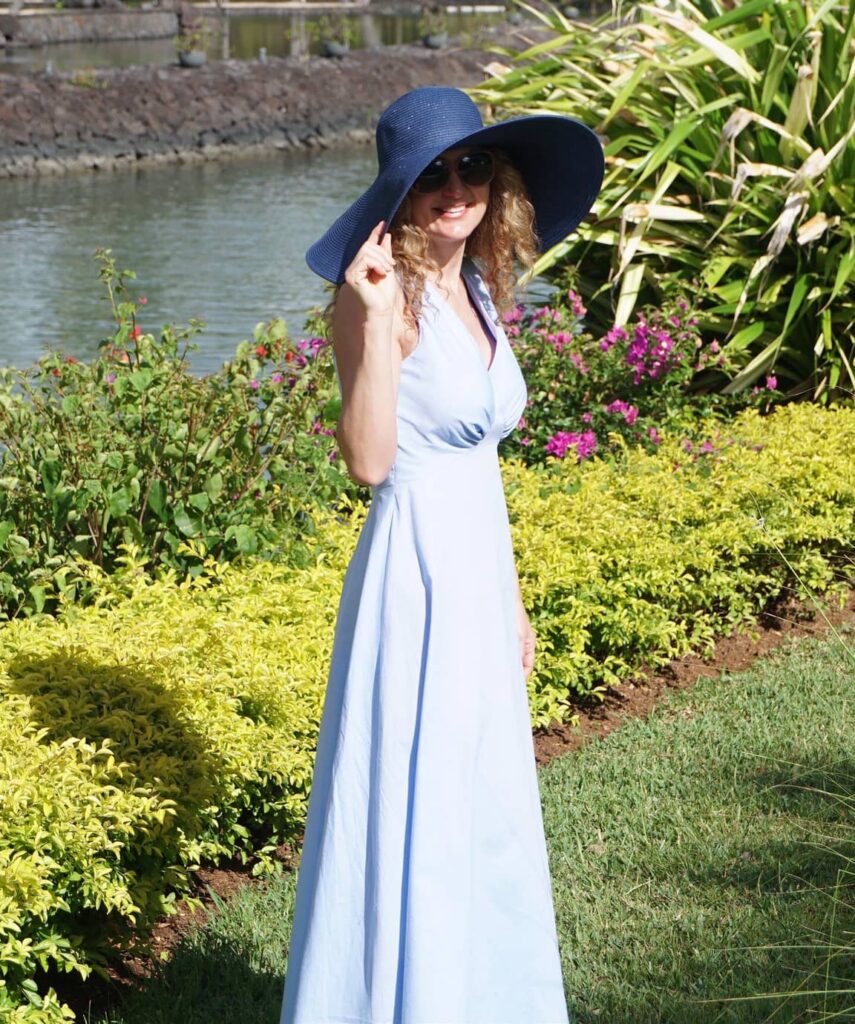
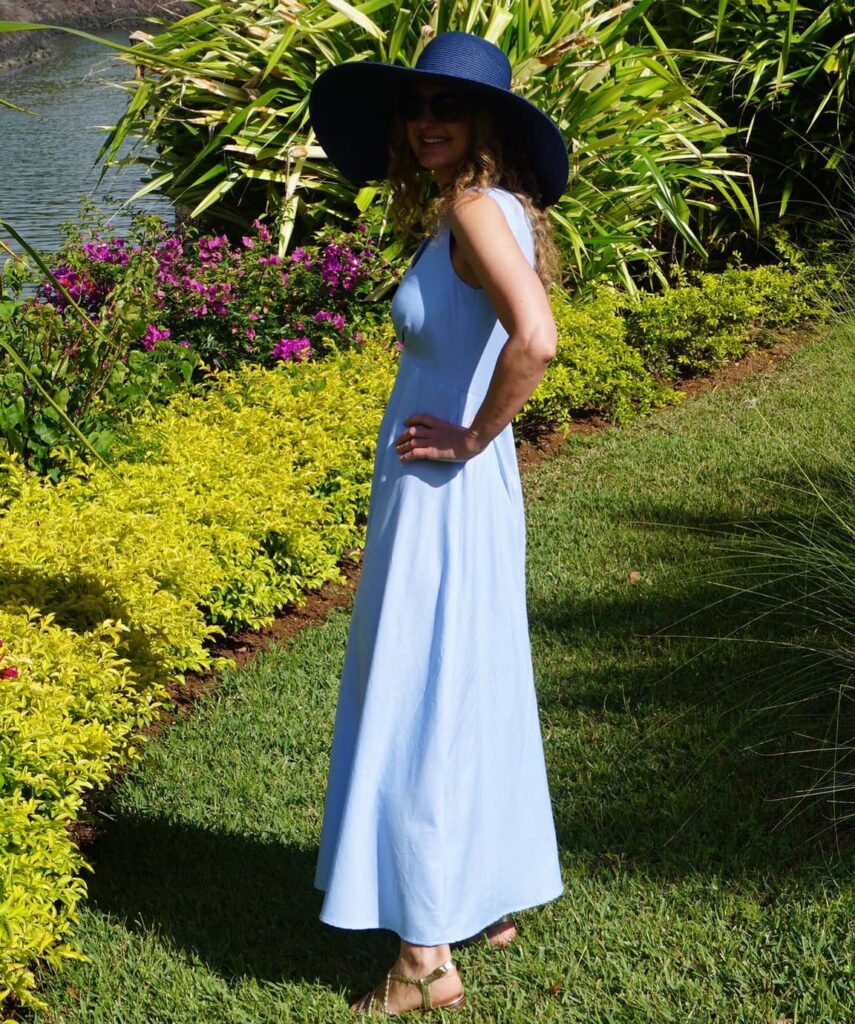
One last dress for the summer: NL6491
After a couple of rough months, this summer has brought me immense peace and joy. The weather has helped a lot. I love the heat, especially by the seaside. And I have truly made the most of the heatwave in my sewing room. So here is the last of my summer dresses.
NL6491 pattern review
Unusually for a French seamstress, I am a huge fan of traditional US pattern houses – in particular McCall’s and Vogue (which are both part of the same corporation). However I had never sewn any New Look pattern; andthis first experience was extremely positive.
Pattern description
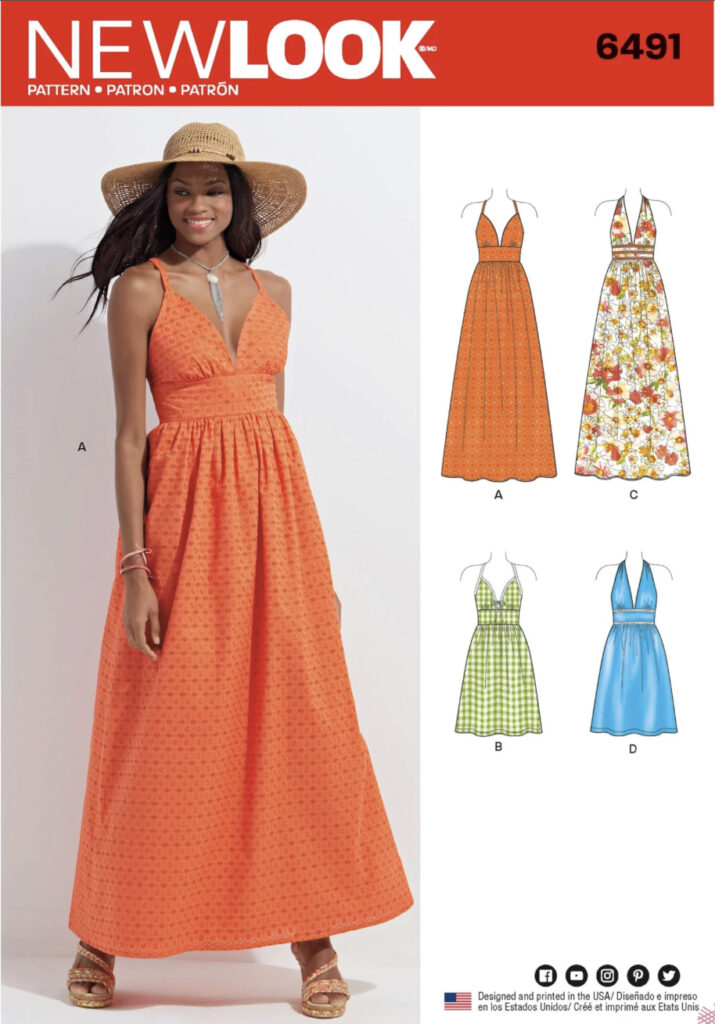
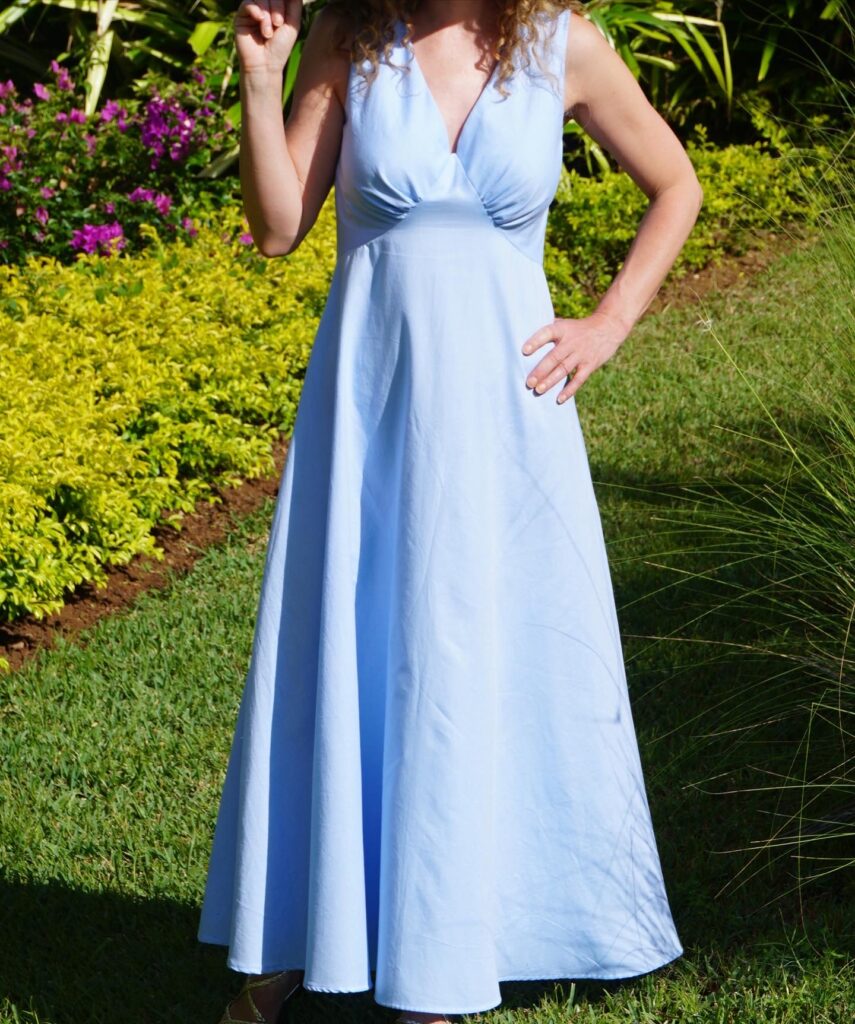
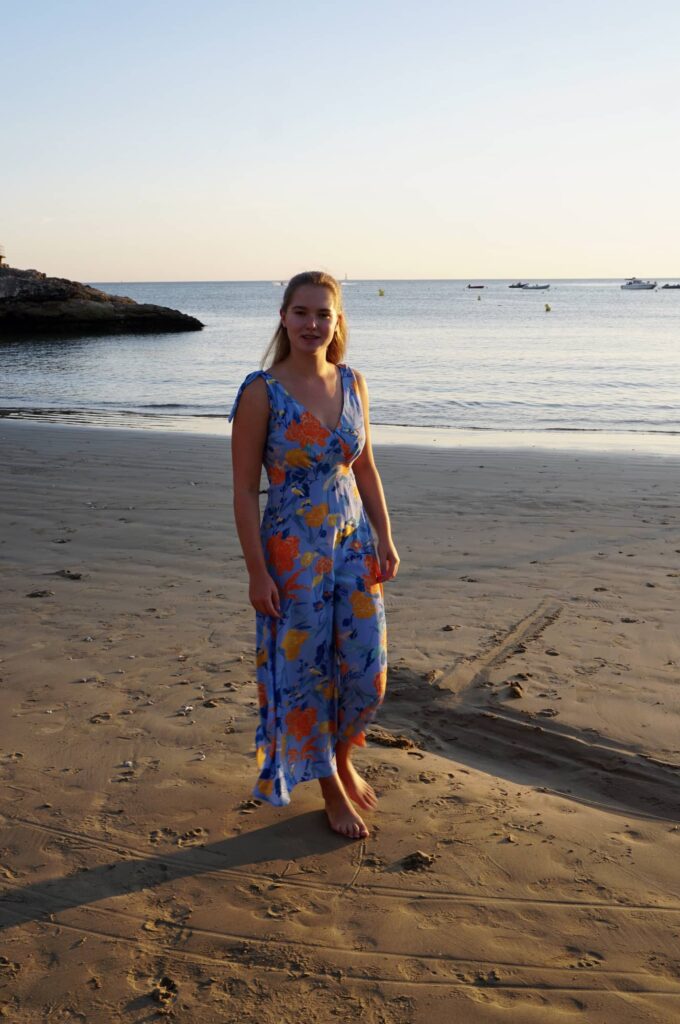
New Look 6481 is a halter dress with a deep-plunge cleavage; and a gathered skirt attached to the bodice via a belt. The dress is finished either with straps or neck ties and has two skirt length options: knee or ankle length. So four dress options in total – and many more if you decide to hack the pattern of course!
NL6491 pattern positives
There are many thinks I like about this pattern; and appart for not being a great fan of gathered skirts, nothing I strongly dislike
- This style is perfect for a hot summer. It has been my Holy Grail for ages: deeply desired as it is so perfect for the heat; but impossible to find in the right fit for my E-cup… until now! Just before sewing this dress, I actually had a go at a comparable Vogue pattern (V9259) which was a complete failure…
- The fit is extremely good… if you go one to two sizes down! Despite my measurements putting me between 12 and 14 on the enveloppe, I sized down to 10 and the fit was absolutely perfect! (with the help of a FBA, more on this later) This is exactly what I do for all McCall’s, Vogue and Butterick patterns and it works wonders. I measured the waist to check there was enough room (there was). I also made a toile, but more to check the accuracy of my FBA. I changed absolutely nothing else fit-wise.
- This is an extremely easy dress to sew. I had initially read the instructions when I received the pattern. Despite misleading them just before starting sewing, I had no problem putting the dress together. There is no technical difficulty except for the invisible zip at the back.
Changes I made to the initial pattern
I made two changes to the pattern:
- I used a different skirt, namely the one from the greatly acclaimed V9253 dress. This skirt is, in my view, immensely more flattering than a gathered rectangle and requires less work – so there is only upside!
- I made a very easy FBA, but adding 2cm to the curve under the bust point to create more room – something very similar to what I had done for my Lune dress.
Not my best fabric choice…
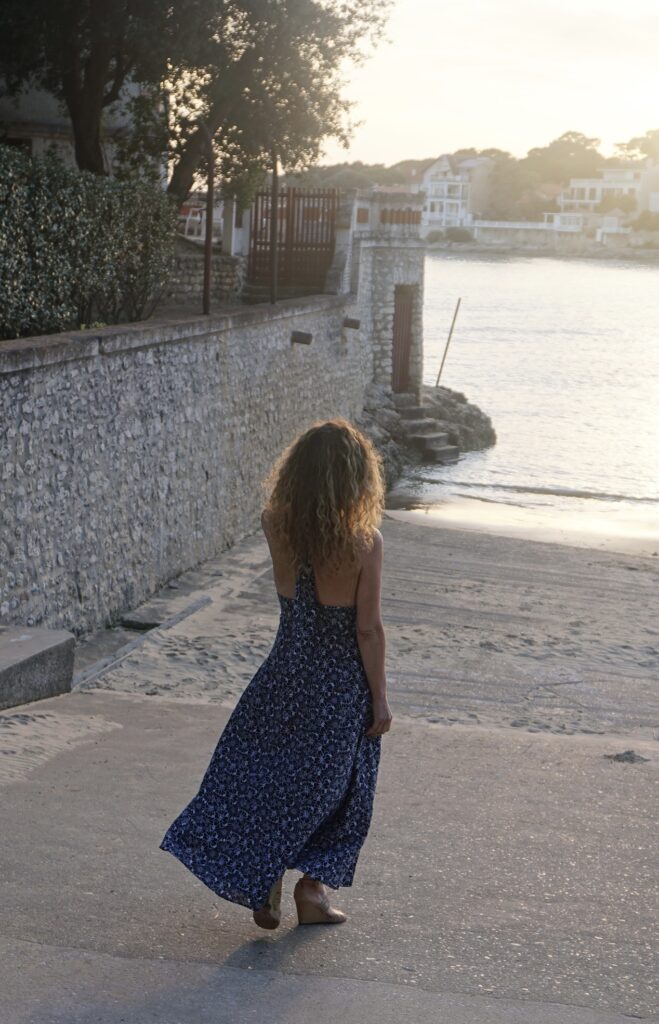
For this dress, I used a gorgeous navy eyelet cotton fabric with large white embroidered flowers. A feast for the eyes!
On paper, it looks like a good idea for a summer dress: cotton eyelet is lightweight and it breathes. But… effectively, eyelet fabric has to be lined EVERYWHERE, as there are holes in the fabric so it is actually more than see-though… Bottom line: even if you line with the lightest fabric you can find (cotton voile here), the dress ends up rather warm. Arrrghhhh!
Conclusion
Despite my dubious fabric choice, I am enamoured with this dress. I am so pleased to have found such a perfect fit for this style that I am now trying to think of an excuse to sew it for Autumn…. Any ideas welcome!
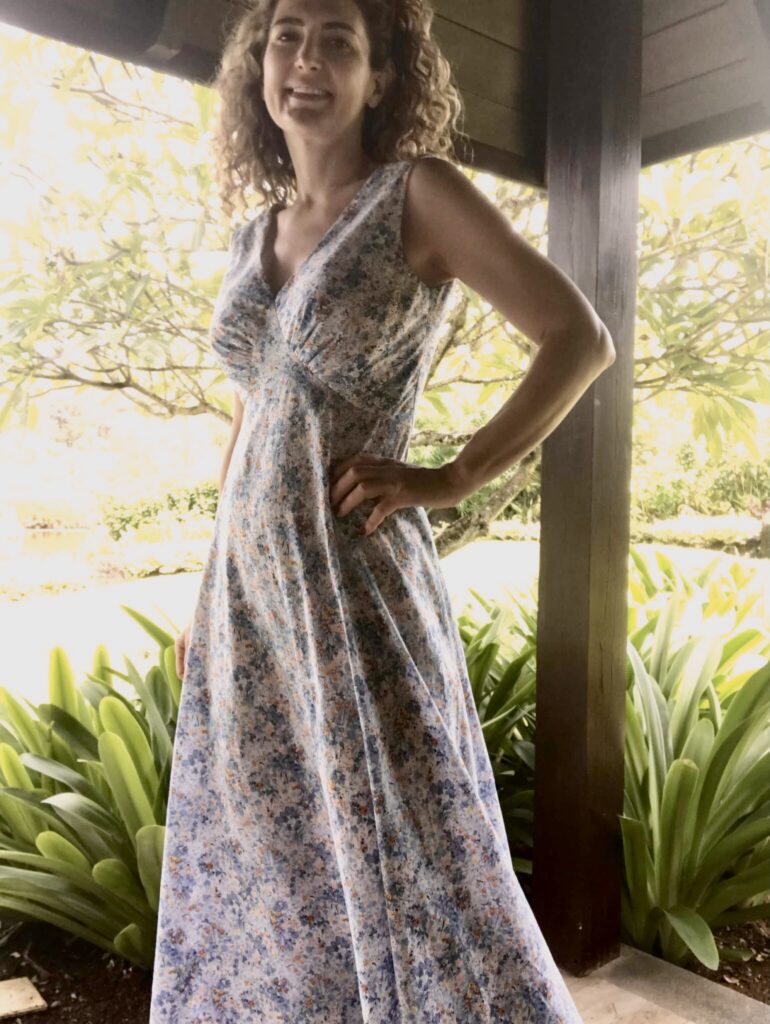
Sewing a Lune dress in silk
The summer has been about sewing lightweight cotton dresses for me. But here I have made an exception: let me introduce you to my luxurious silk Lune dress… Well, actually my daughter’s, as this dress suits her colouring much better than mine!
Three very different versions due to different fabric used
This is my third time sewing the Lune dress by French Poetry. Each version is based on exactly the same pattern pieces, with the tiny exception of the shoulders ties I added for this last one. However the three dresses look extremely different, don’t you think?
The style you give to this dress all comes down to the fabric you use in my view.
My first version is in cotton chambray. Although there is some drape in this fabric, it stiffness makes it look actually quite formal; very much occasion-wear if it were for the colour
My second version is a floral Liberty-like cotton lawn, very lightweight. It does not drape as much and the style is more country-chic / afternoon tea. Probably my least preferred at all but the most comfortable in the heat.

And this last version is in the most gorgeous silk crepe from the New Craft House. This is the absolute perfect match with this dress, with just enough weight and drape to make it stunning, especially in movement.
Lune dress pattern review
My first two versions of this pattern were sewn as part of my ”Resort Collection” this winter. And I briefly reviewed the pattern in this article.
Just to summarise:
- Size and fit: I cut a size 38 (I am a UK 8/ FR 36/ US 2) and made an FBA (for my E cup) following the designer’s recommendation here; and it worked wonders! Since I bought the pattern, cup options have been added so that should make life much easier. The dress is now my daughter’s, who is actually one size bigger than me, but with a slightly smaller breast cup.
- Changes I made to the pattern: Nothing except for an FBA.
- What I like in this pattern: the shape if beautiful, with its very pretty deep-plunge but bra-compatible neckline; and its fitted waist. The fit is excellent. And this is a very easy make, with a limited number of pattern pieces and extremely clear instructions. After my very positive experience of the Libra bodysuit, I am becoming a big fan of the French Poetry patterns.
- What I dislike about this pattern: not much except that the fabric indications are far too much – I used close to 2m for this dress rather than the 4m indicated.
- Love factor: I really like this pattern – as you have probably guessed since it is my third version!
Conclusion
I am absolutely thrilled about this version of the Lune dress… and a bit disappointed that I cannot wear it myself (the colours truly look horrendous on me, not sure what I was expecting). But I made a very happy girl and that’s all that matters!
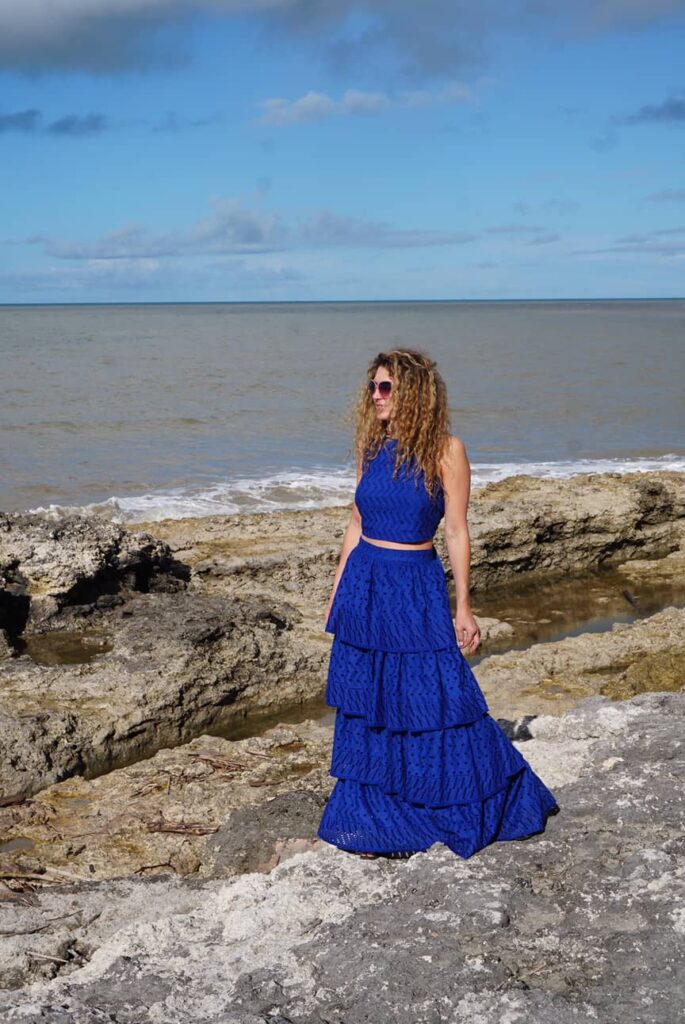
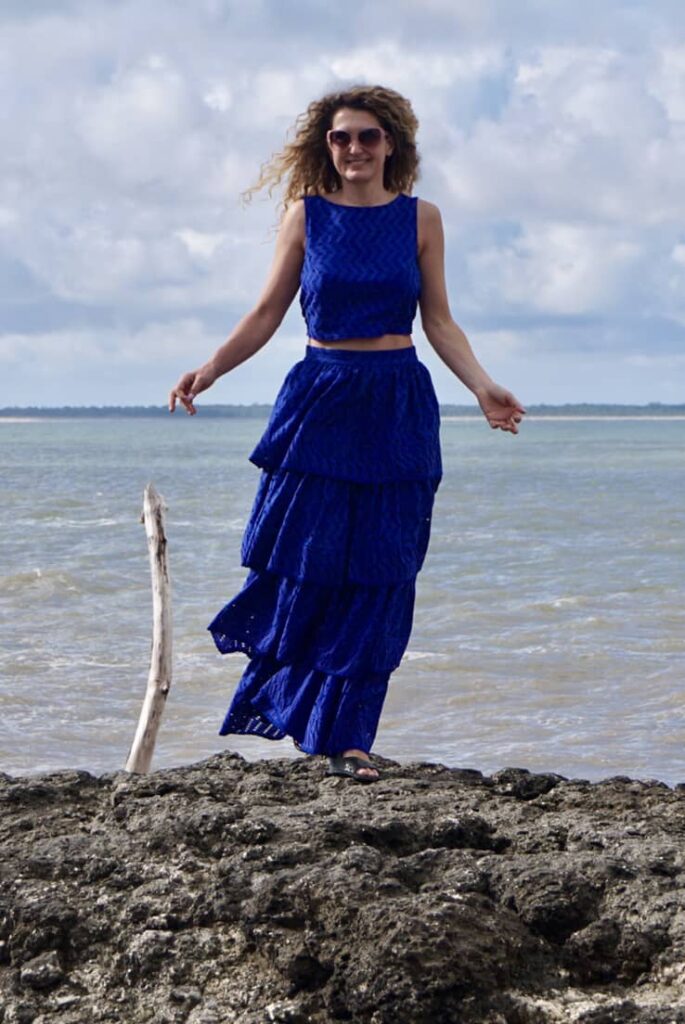
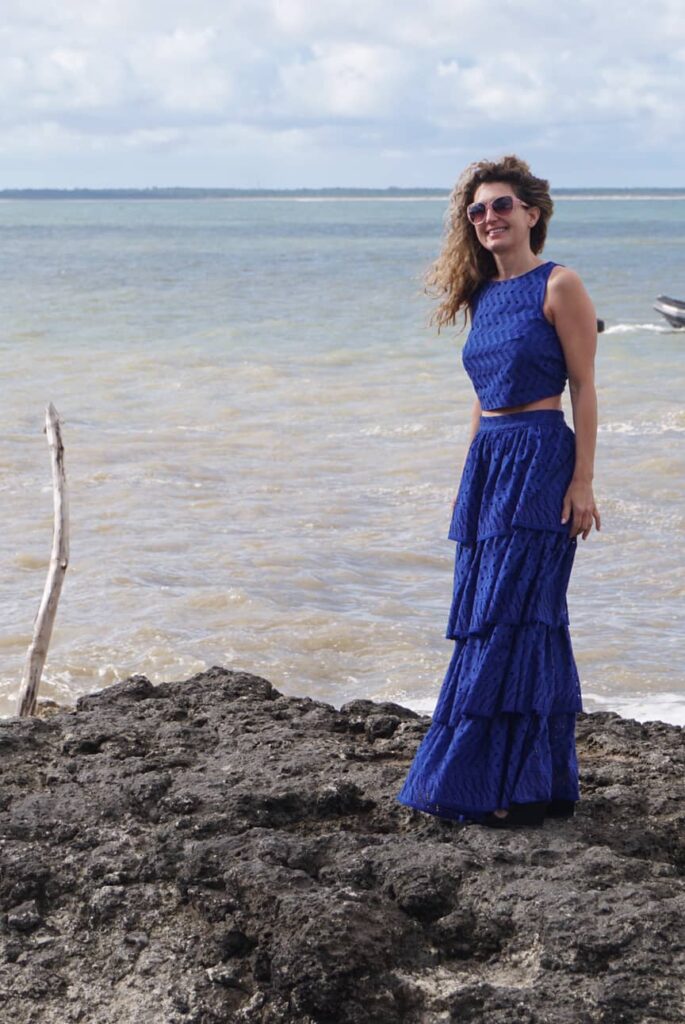
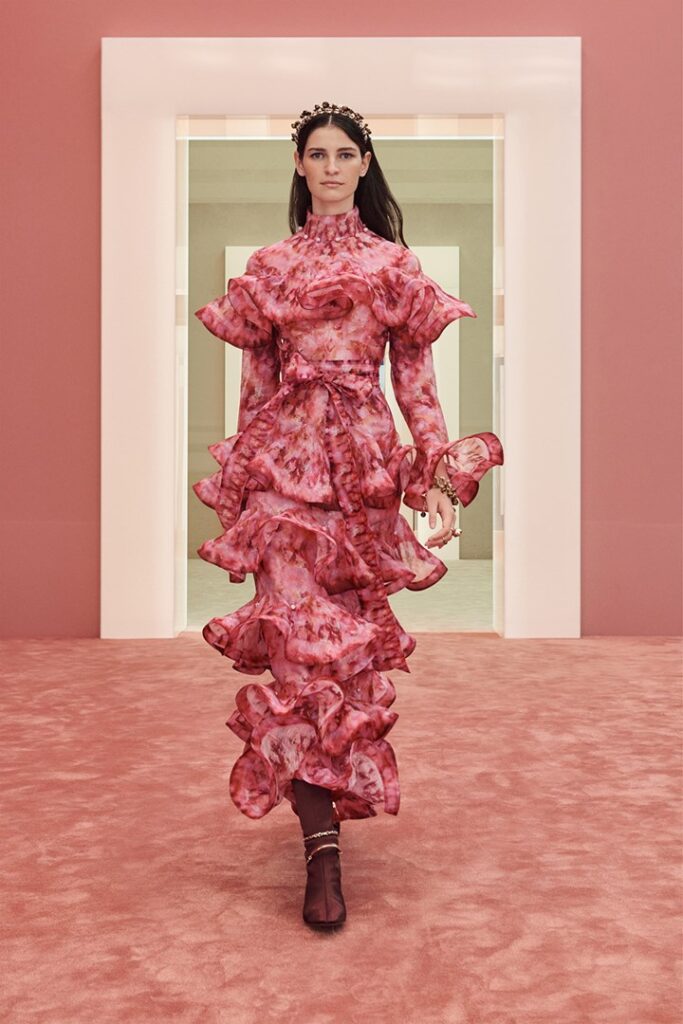
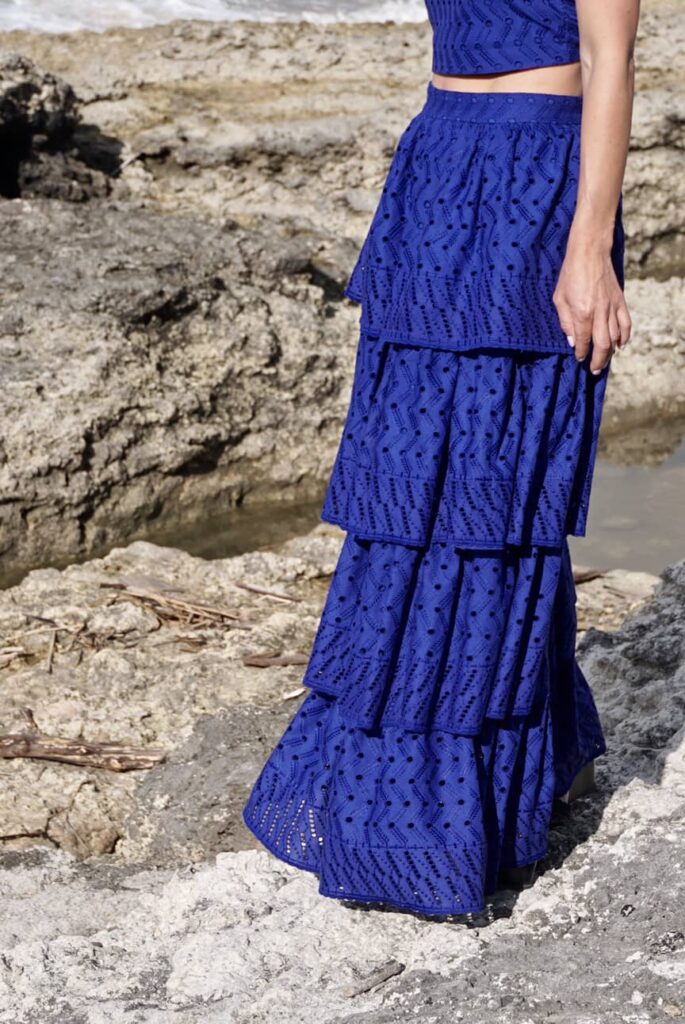
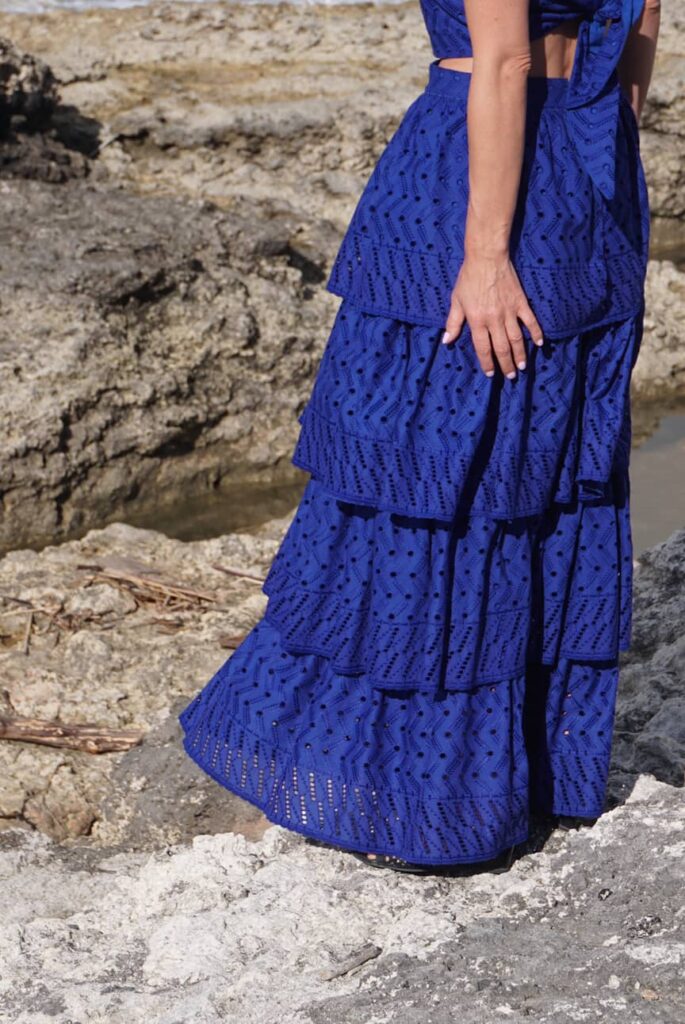
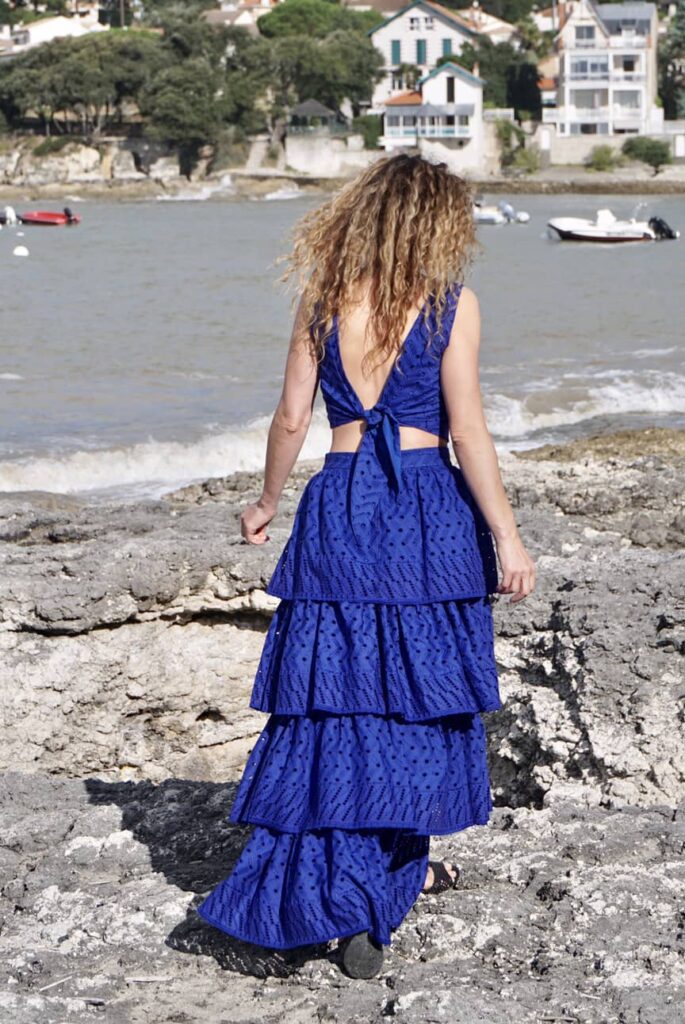
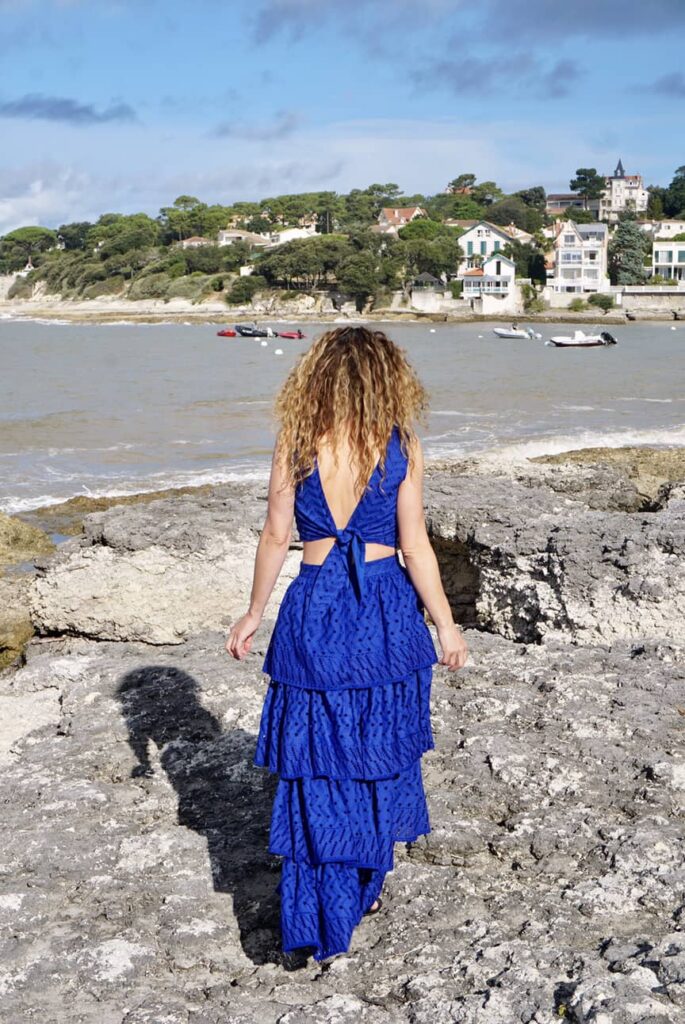
Tutorial: sewing a Zimmermann-like tiered ruffle skirt
I have been obsessed with Zimmermann tiered ruffled skirts for a long time. It took me ages to figure out how to reproduce them (let’s call it snail brain); and even longer to be motivated enough for all this gathering. But here we are, finally!
Zimmermann ruffles inspiration
If you are anything like me and follow Zimmermann’s collections in awe, you will know that ruffles are their key signature. And what ruffles!
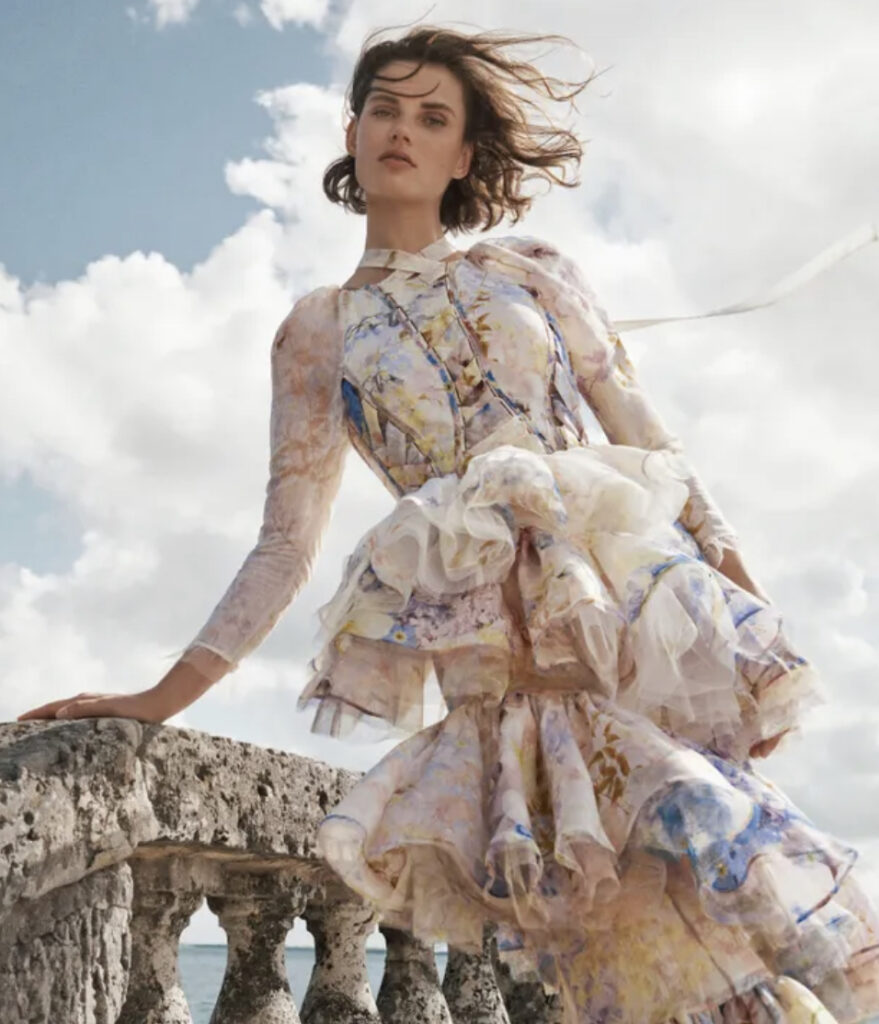
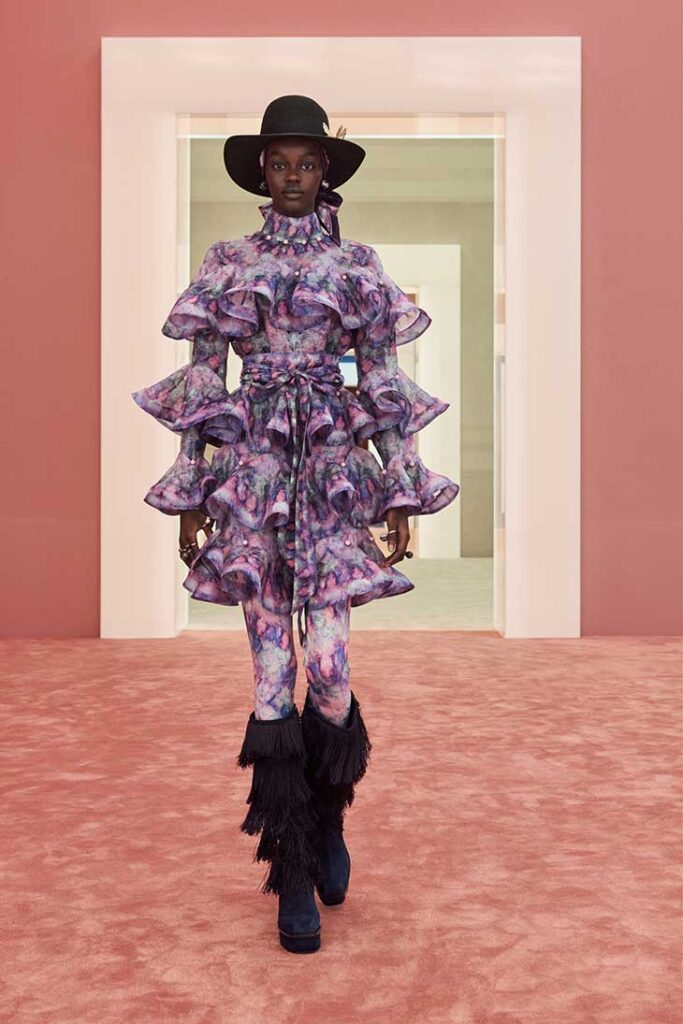
After fantasising for ages, I actually ordered a Zimmermann dress to try on… and realised two things:
- These over-the-top ruffles are DEFINITELY NOT wearable on a day-to-day basis!
- Zimmermann’s sizing is tiny for bodices – I suspect a small B cup is the most you could fit in there. No chance for me!
So I promptly returned the dress and started my long thinking process on how to self-draft my own tiered ruffle skirt.
Tiered ruffle skirt tutorial
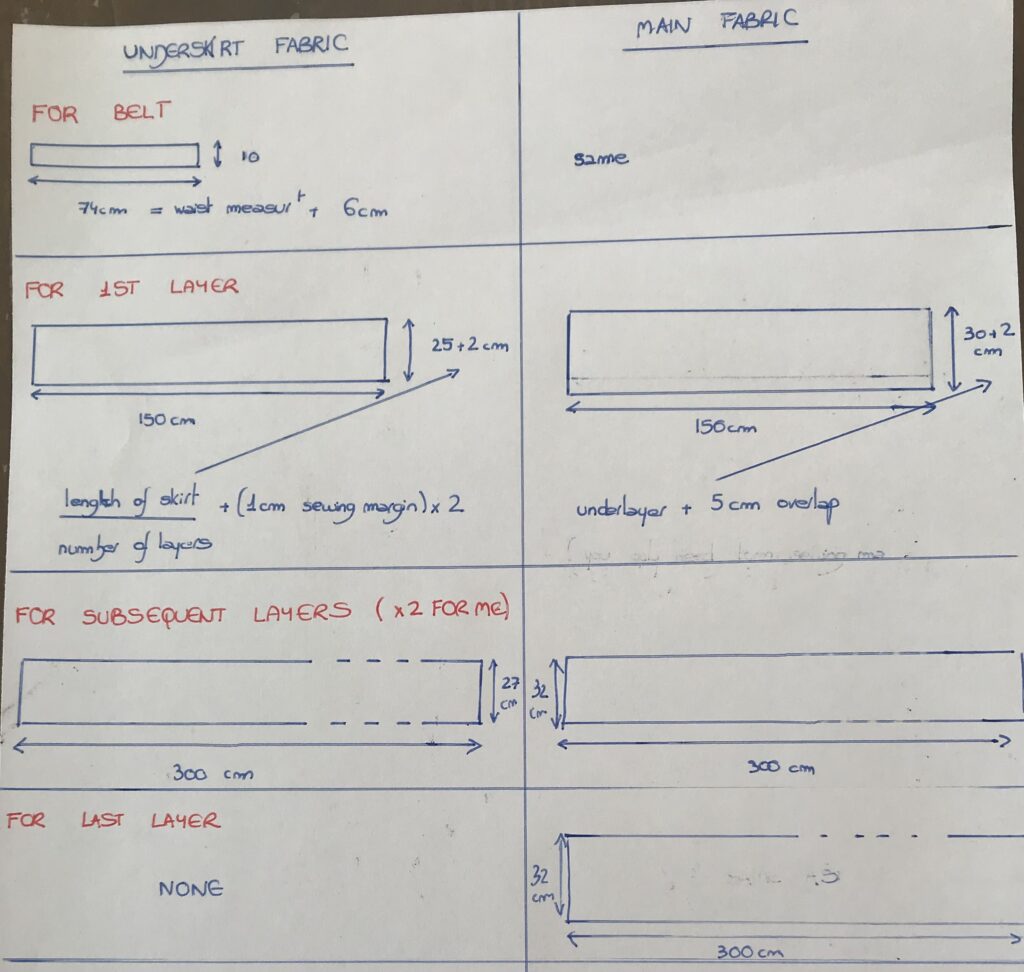
I haven’t taken picture of the sewing process, so you will have to take my work for it… and accept off-the-enveloppe charts, sorry! The tutorial is far less detailed than my previous ones so definitely targeted at intermediate seamstresses rather than beginners, sorry.
But first let’s have a closer look at the skirt.
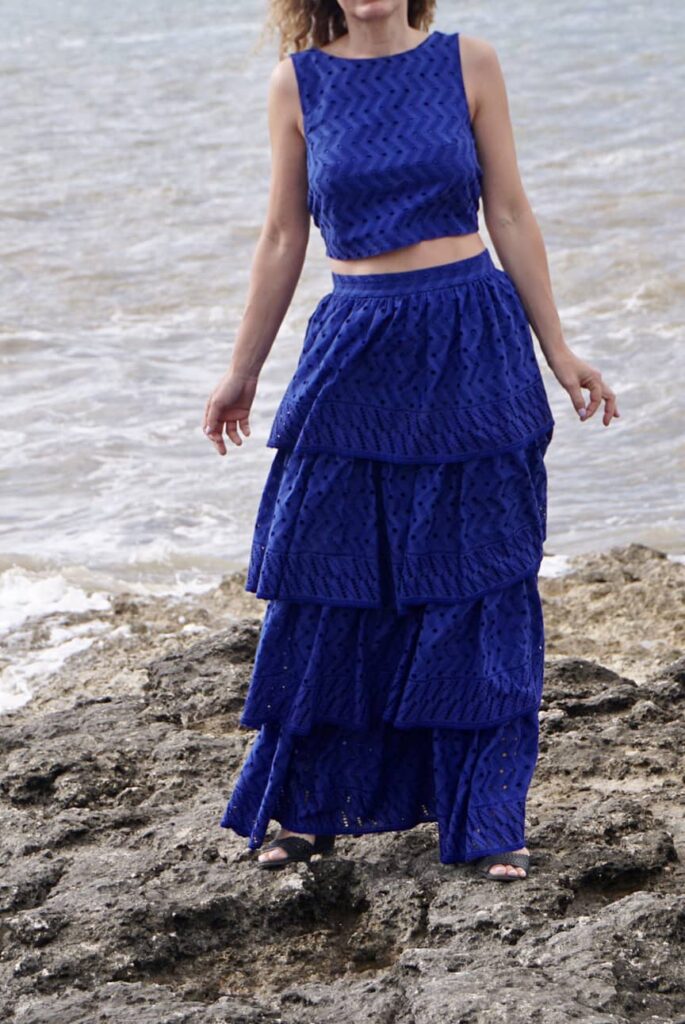
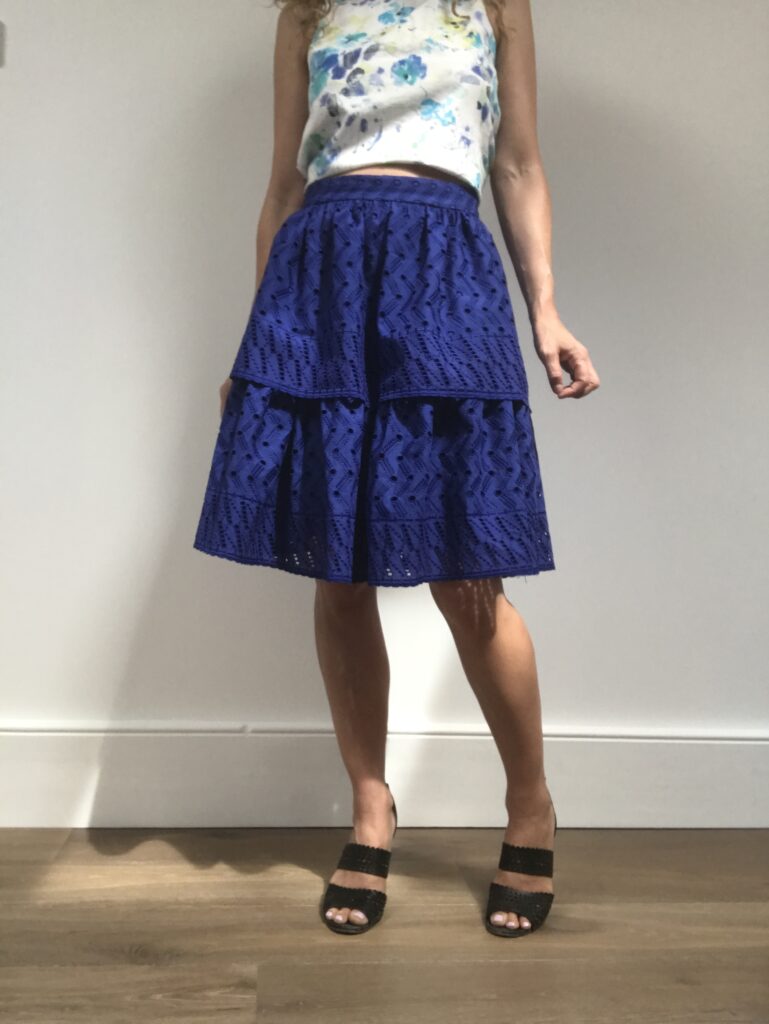
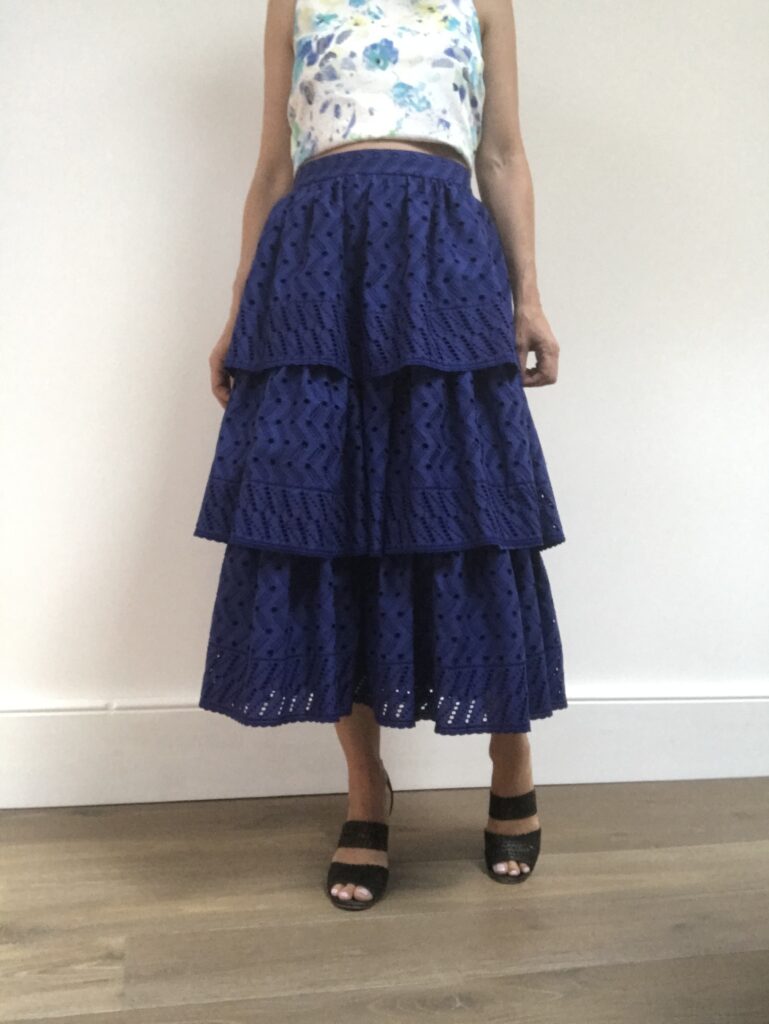
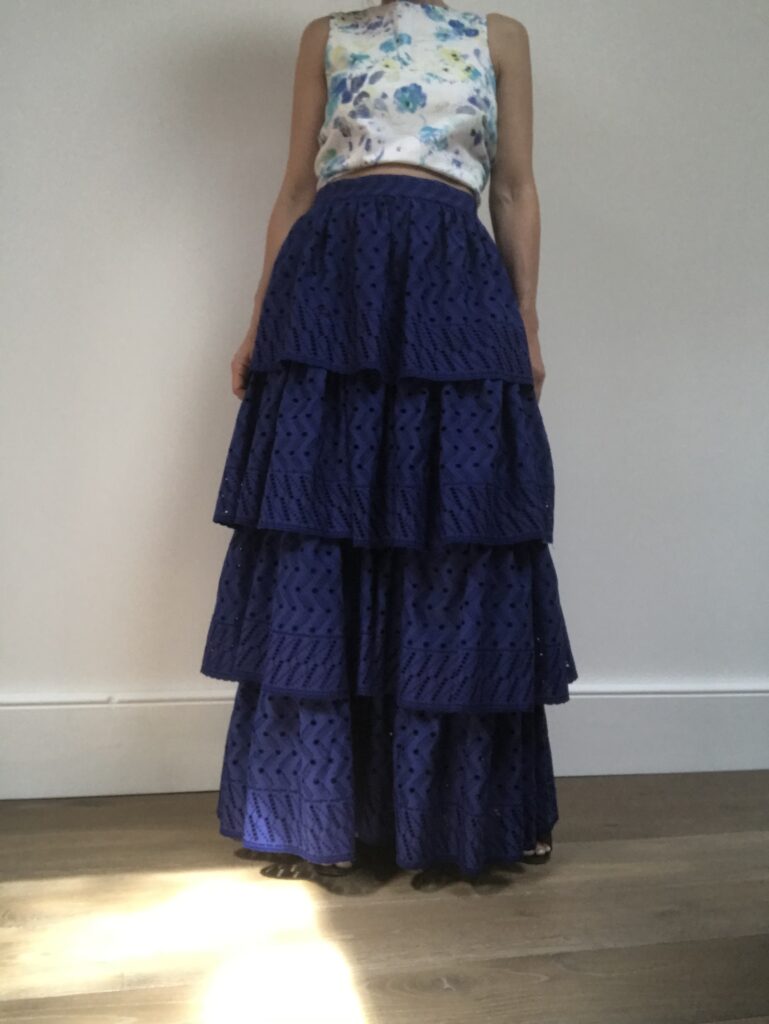
STEP 1: Choosing your skirt length and the number of ruffles
My skirt has four panels and is 1m-long, basically exact floor length for me. It means I can only wear it with hight heels but that was the plan.
To determine the length, I measured from the narrowest part of my waist to where I wanted it to reach.
And to determine the number of ruffles, I must admit I was limited by my fabric – I would definitely have preferred 5, as I think odd numbers are always better for these things. I took progress pictures of my skirt and I admit I really liked the 3-tiered midi one.
STEP 2: Drafting the skirt
The skirt is made of:
- a top layer, which are the ruffles. I used 6m of eyelet fabric from Les Coupons de Saint Pierre with a scalloped border, but you will need closer to 3m if you are working without borders. And even less if you go for a shorter skirt.
- a bottom layer, which is the underskirt the ruffles are attached to. I used about 1 m of voile cotton in a colour matching my eyelet fabric.
And here is the beautiful, very professional looking drawing of my skirt draft – no shame!
STEP 3: Sewing the skirt
- Create your belt: interface the lining fabric, attach lining and main fabric together, fold in half with main fabric out.
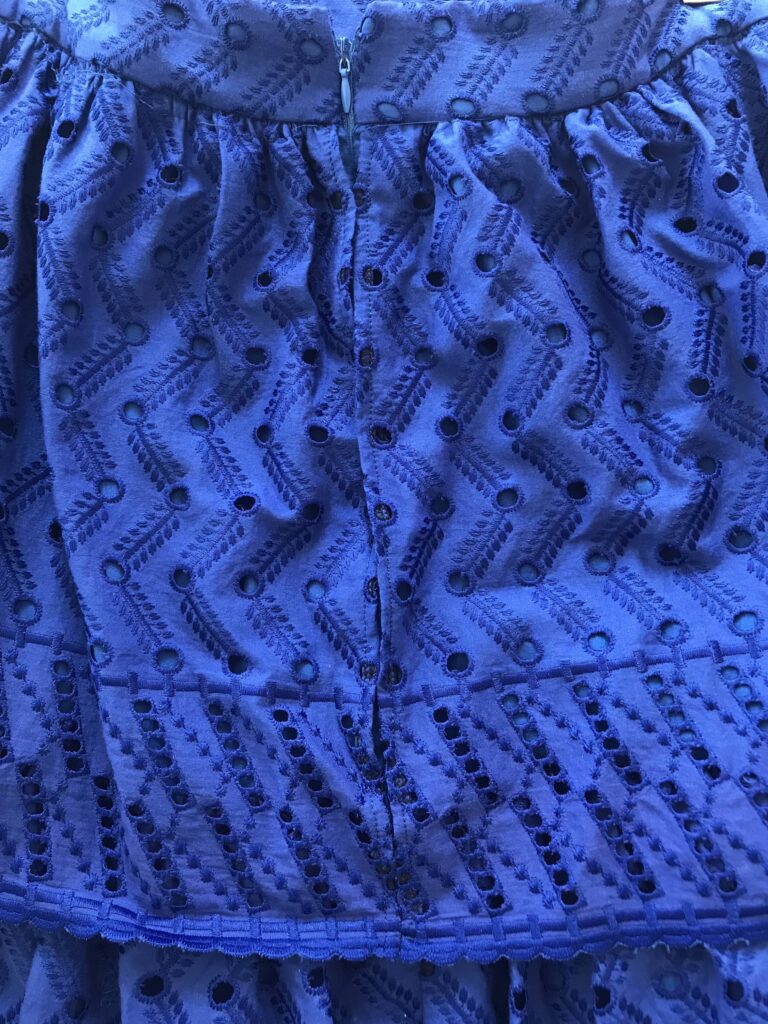
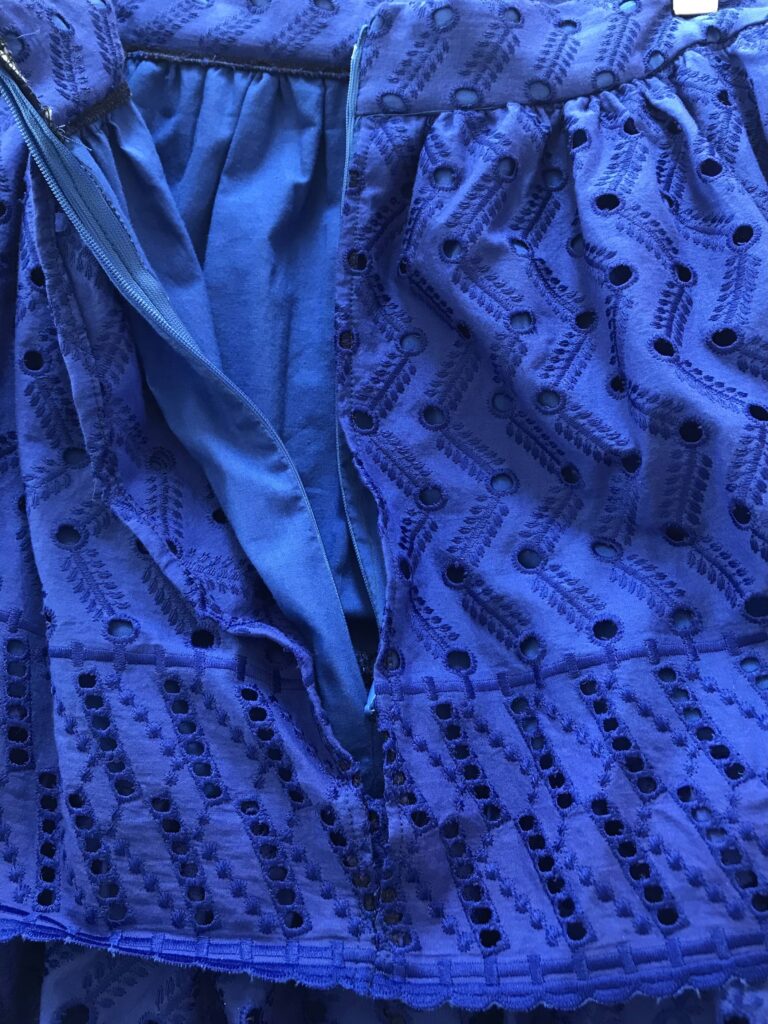
- First skirt: on main fabric, hem small sides turning each 0.5cm twice; hem main fabric on large side if needed (ie no scalloped edge); attach lining and main fabric together on large top side (main fabric will need to be kept free of lining at the back so that zip if only attached to lining); gather to belt width and attach to belt.
- Insert zip: from top of belt to bottom of first skirt lining, insert invisible zip. It should not catch the main fabric layer.
- Subsequent skirts: hem main fabric on one large side if needed; gather main fabric to width of its lining and join together at the top; attach to the previous layer lining.
- Last skirt: no lining here! Hem main fabric on one large side if needed; gather main fabric large top side to previous layer lining width and attach the previous layer lining.
Appart from the boredom of all the gathering, the trickiest part is the zip insertion. The zip mustn’t catch the main fabric ruffle, so that it can float freely. Here is a picture at what it looks like on my skirt. You will notice I have end-sewn the end of my top ruffle where the zipper finishes, so that it stays in place.
And you’re done! Hurrah!
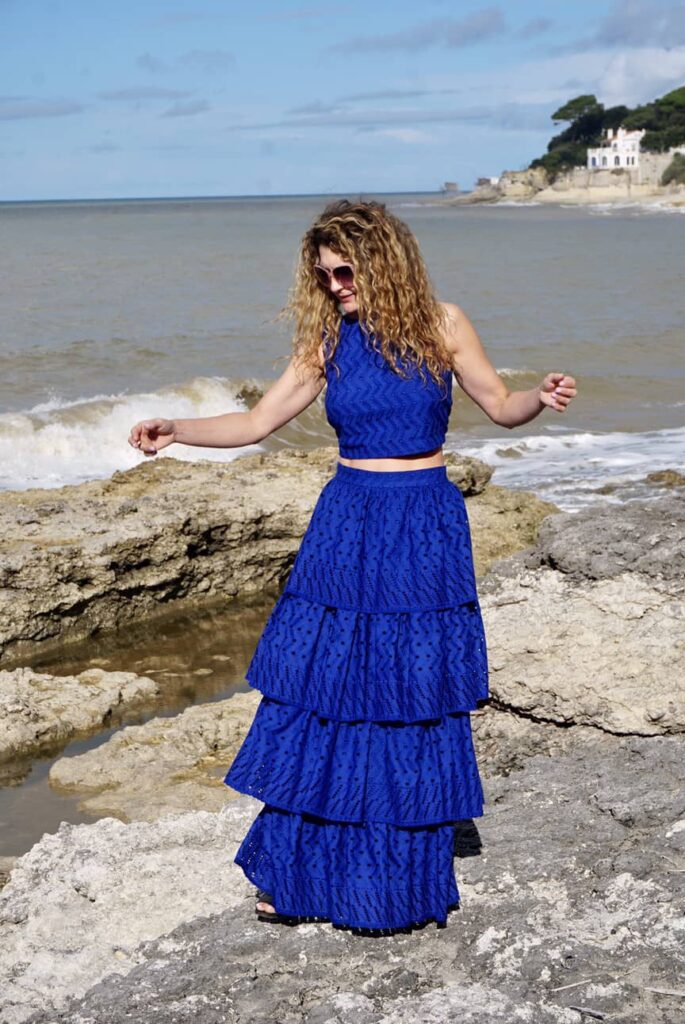
Adding a Glory Top to make it a matching set
As you know, I much prefer dresses to skirts, but here I was worried the weight of the skirt would be too much for a bodice to bear. So instead of sewing a dress, I made a matching set, using the Top Glory by Clematisse patterns
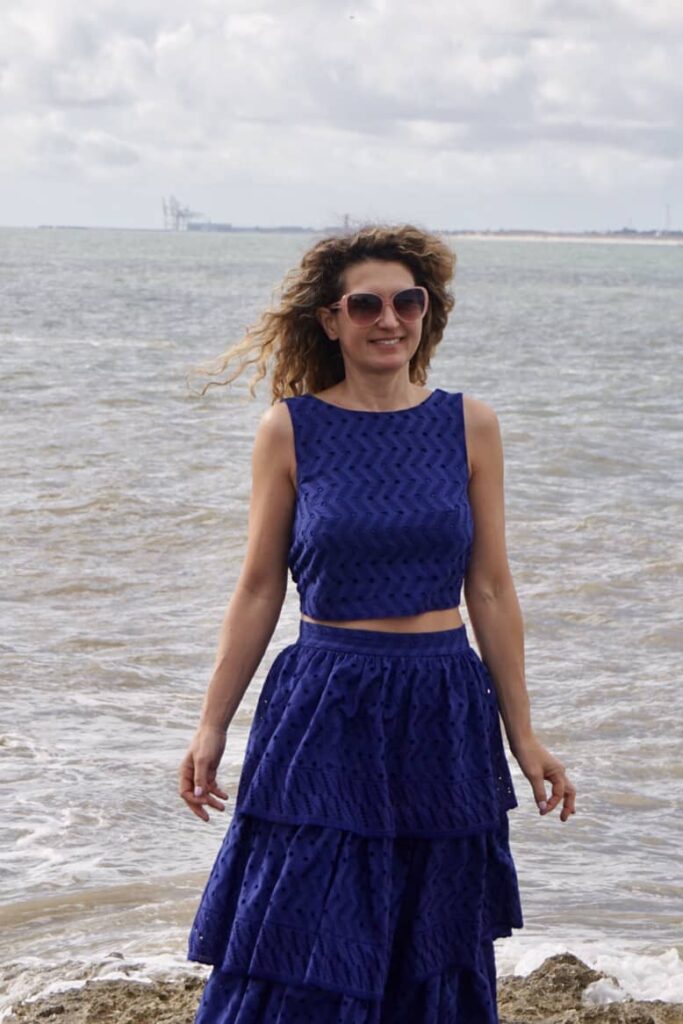
I adore this top, it is super cute and immensely easy top to sew. I made three tiny changes to the pattern: I shortened quite substantially as my skirt is high-waisted; I made an FBA; and I lined it. I think overall less than a 2-hour job, how nice is that.
Conclusion
I will not be wearing this set immensely as with such a long skirt, it is more of an evening outfit. But I am over the moon to have finally managed to draft a tiered ruffle skirt!
