Three Elegante skirts for the winter
My ever-growing collection of hand-knitted cardigans has been calling for matching skirts since the beginning of the winter. What better excuse to make a few Elegante skirts, a pattern by Popeline Linon I had been eying for a while. So here is version 1, in an embroidered denim fabric from Selvedge and Bolts:
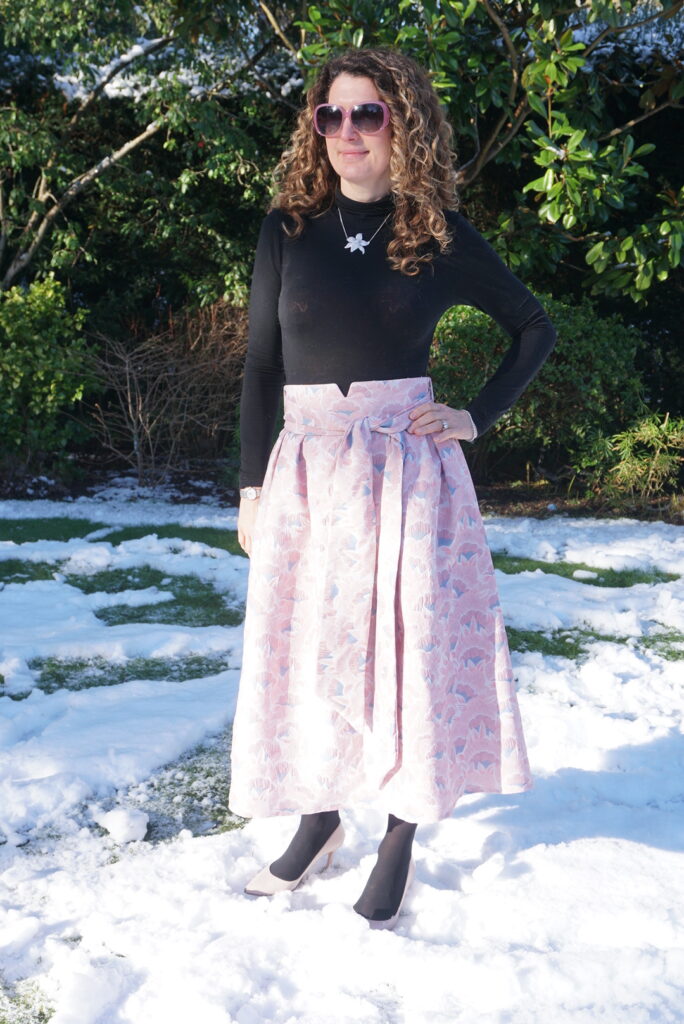
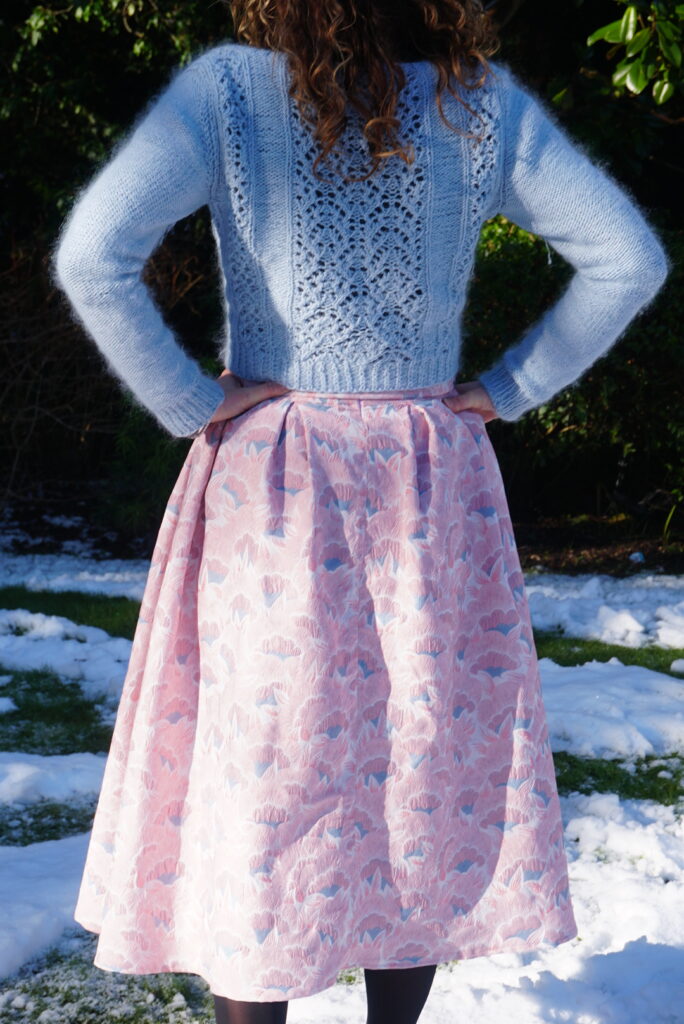
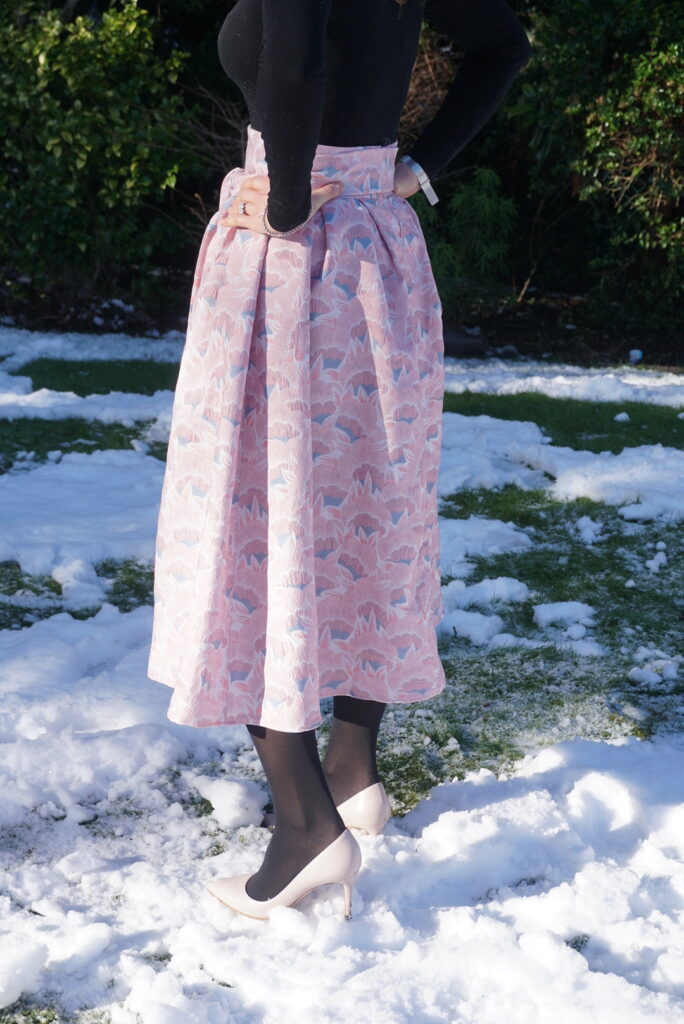
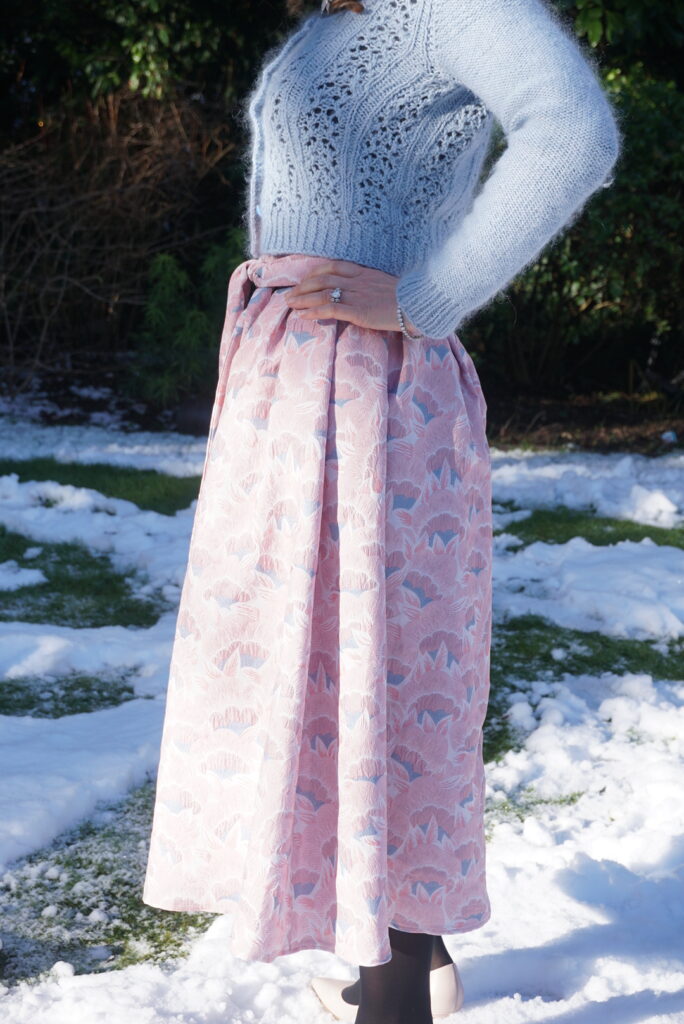
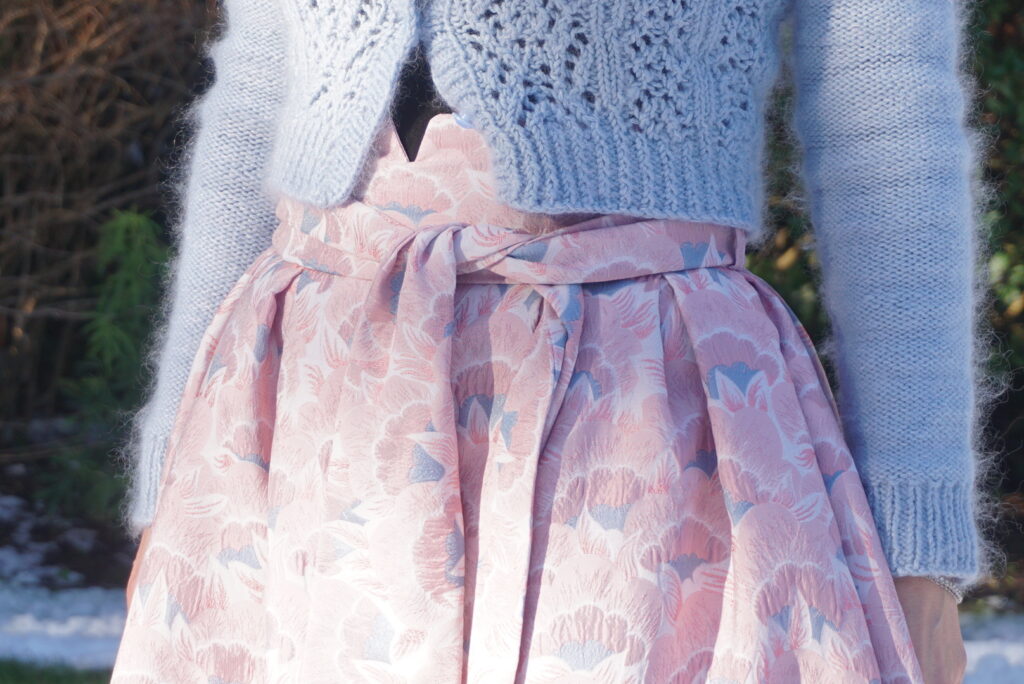
… version 2 in a candy pink and baby blue brocard, also from Selvedge and Bolts:
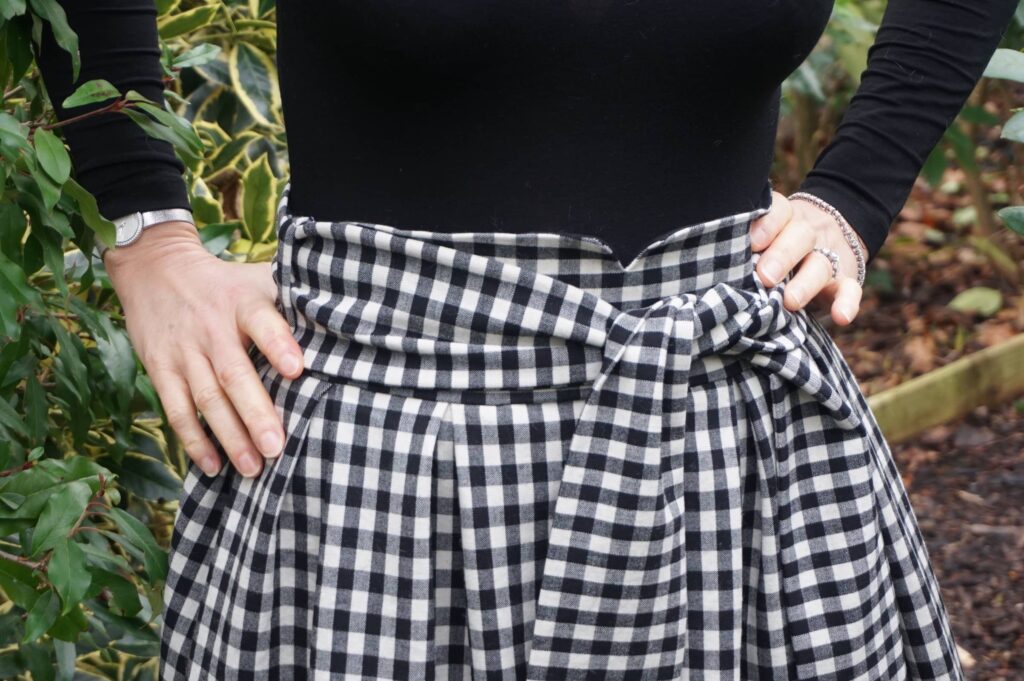
… and version three, in an off-white and black checked wool from Croftmill:
L’Elegante by Popeline Linon: pattern review
L’Elegante is a midi (on the longer midi side actually) skirt, pleated at the waist with box-pleats and with a very pretty shaped waist. It comes with a large belt, which in my view is absolutely necessary to make – without it, the skirt loses a lot of its appeal.

The pleats are well-proportioned and well-positioned – not funny effect at the back, I assure you!
The pattern was issued a while ago and was a success among French Instagram seamstresses – now I know why! It is quite straightforward to make, very comfortable to wear and consumes a relatively modest amount of fabric for a big skirt (2.3m in my case).
I cut a size 36, which corresponded exactly to my waist measurements, and the fit is perfect – the waist measurement is crucial but the hip measurement is pretty irrelevant, as the skirt is not fitted. I am 1m68 and the skirt is quite long for a midi skirt and could easily be shortened – I personally like it this way.
The instructions are very clear (although I am not sure using a busy floral fabric for the pictures was the best idea) and the only change I made to te pattern was lining the skirt (I’m sure you could have guessed that!!). I basically cut a rectangle of fabric of 150x70cm, gathered the top to the belt width and sandwiched it into the belt.
Fabrics used
I used very different-looking fabrics and I am very pleased with each of them. The one thing they have in common is that they are reasonably heavy and structured (but not overly so), which I think works well with the box-pleats.
Fabric one is an embroidered denim from Selvedge and Bolts. The denim is quite light in itself but the amount of embroidery makes it much stiffer and heavier. I really like the fact that there are some blue threads in the embroidery, allowing me to mix and match with my blue Belladonna cardigans (number 2 here).
Fabric 2 is a light brocart, from Selvedge and Bolts too. I absolutely adore the colours – I am a candy girl at heart – and I think I will be able to transition this skirt easily into Spring. Here too a perfect match with Belladonna, version 1 this time.
Fabric 3 is a slightly stretchy checked wool from Croftmill – the stretch was definitely not necessary but never mind. As ever for Croftmill’s wools, the quality is to die for – if I was not worried about pattern matching (definitely not a success here), I would definitely buy more to make a fitted dress. This one will be worn with my off-white Agatha and my black Belladonna cardigans.
Conclusion
I must admit that I was hugely tempted to make dresses out of these fabrics – I always am – but I am very pleased I didn’t. This winter has been quite cold by London standards and skirts are so much easier to wear than dresses when it’s colder (especially with thermal turtlenecks!). They also perfectly work with my hand-knitted cardigans – and I definitely needed a justification to continue knitting more. A never-ending virtuous circle of garment making!
Icon: my first knitted dress
You probably guessed that 90% of my wardrobe is dresses – I seem to sew them by the truckload, fit-and-flare preferably (see my 2020 sewing review if you don’t believe me)… But ever since I started knitted, it had never occured to me that you could knit a fitted dress.
It seems I was wrong: let me introduce you to Icon, my first (and definitely not last) knitted dress. Hurrah!
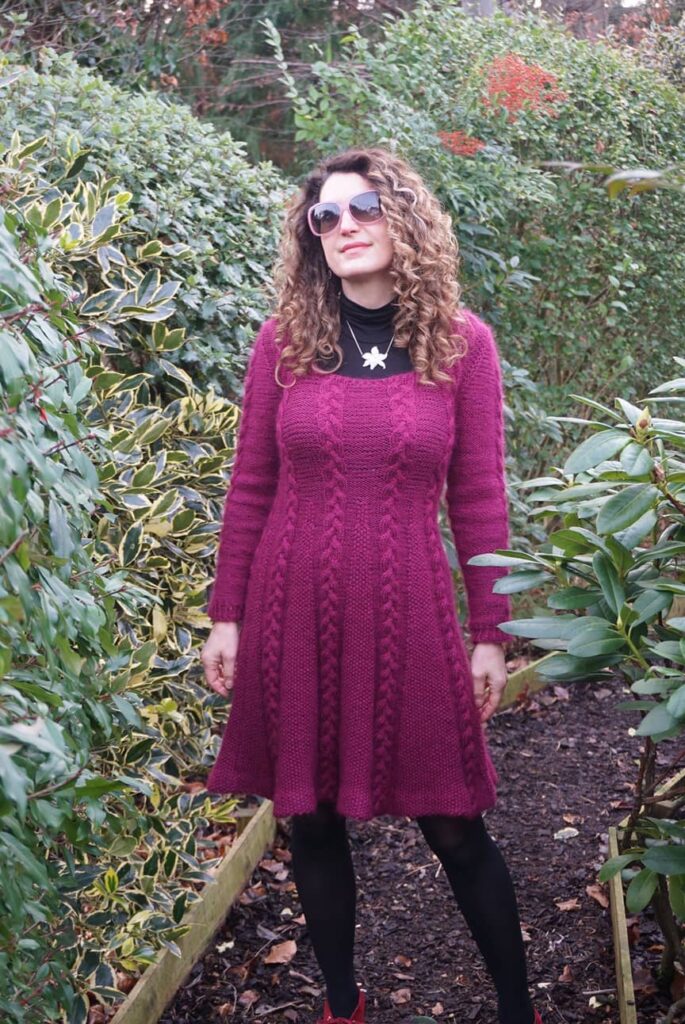
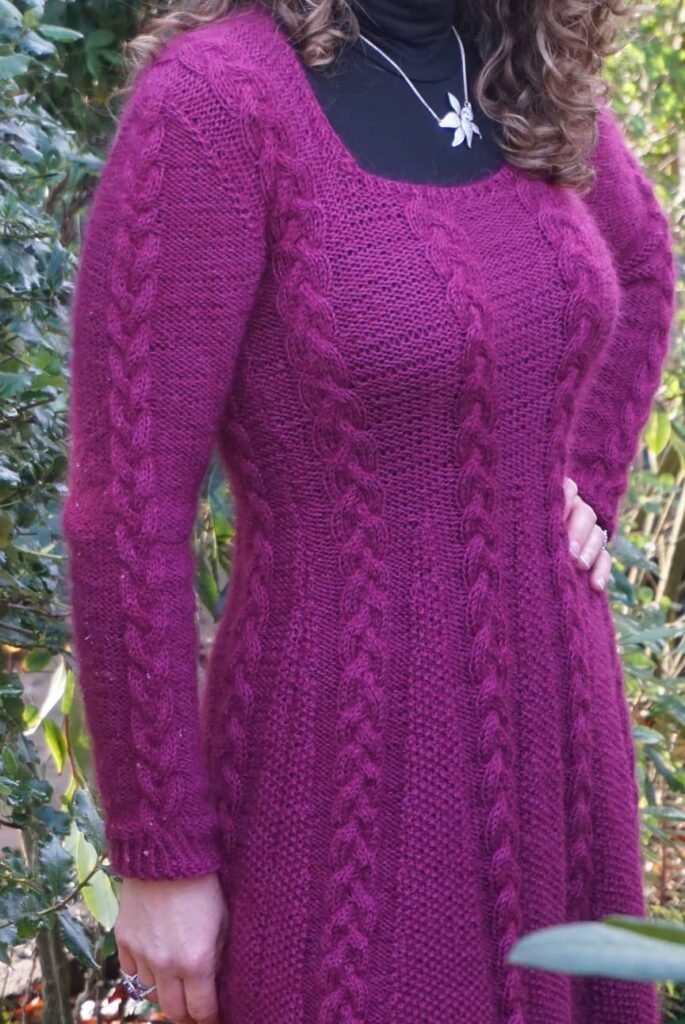
The Icon dress
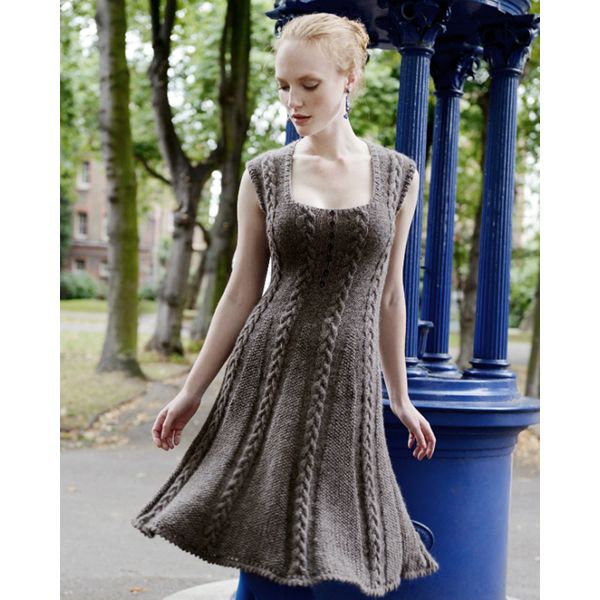
This is the Icon dress by Purl Alpaca Designs, to which I added sleeves for extra warmth in the middle of the winter. The initial dress looks like this – how pretty!
I got tempted to knit a dress by Sam_Sew_Good recent Instagram posts of her two gorgeous Miko dresses, also from Alpaca Purl Designs). Miko has very large pockets though, and I am not a pocket person, but Icon and Maddie definitely caught my eye. After an unfortunate try at Maddie – 480 stitches casted, ten rows knitted in the round, and then I realised I had twisted my first round, arrggghhhhh!!!!), I went for Icon and I am very pleased I did.
Pattern and wool details
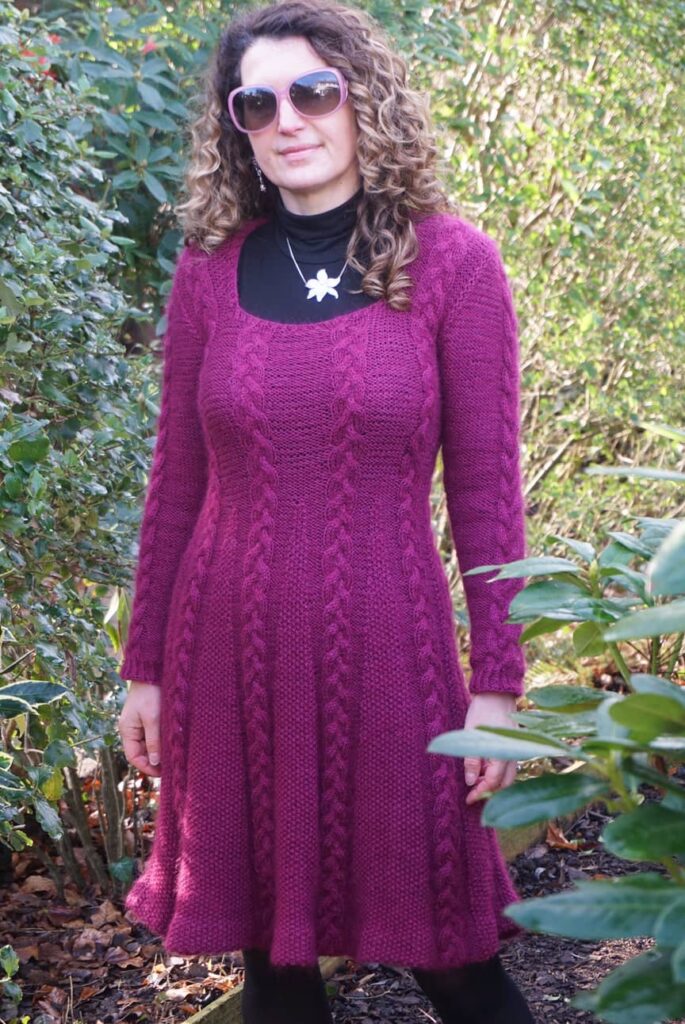
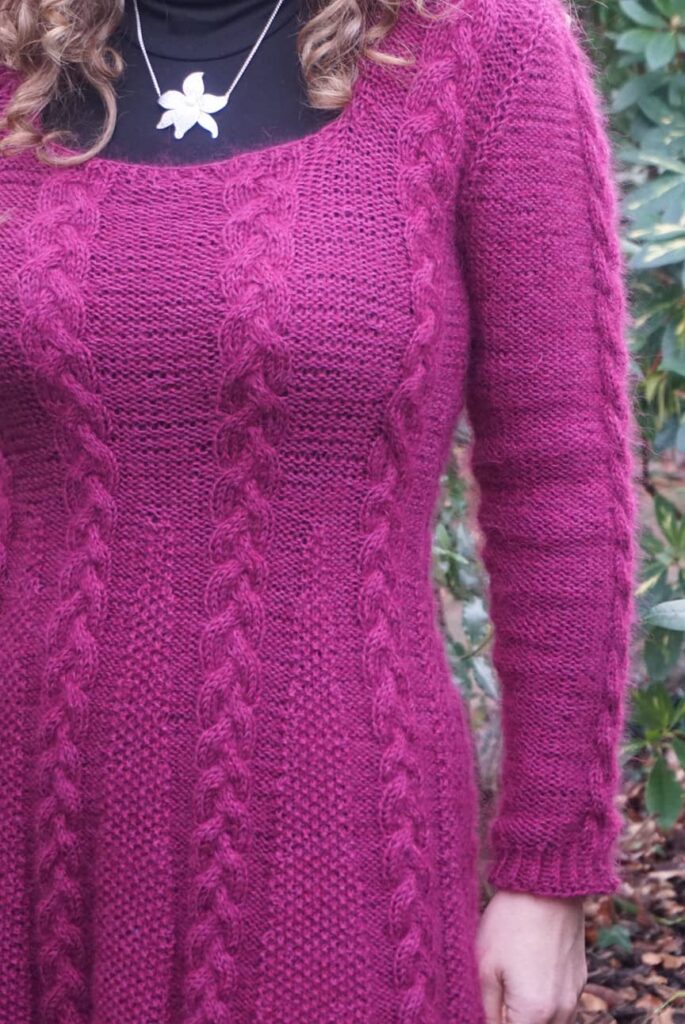
The Icon dress knits bottom up, flat (ie not in the round). You knit the front of the dress, then the back, stitch both together, finish off the neckline and armholes and there you are. Well, actually, it seems quick but it isn’t: it took me four weeks to make this dress… with no other project going on… and I am quite a fast knitter! With a flared skirt there is just a lot of knitting to be done. And adding sleeves wasn’t exactly a time-saving option…
This is not very complicated knitting though: you need to know how to knit, purl, create a seed stitch and make cables – all quite easily achievable. Once the pattern is established, there is not even that much counting required.
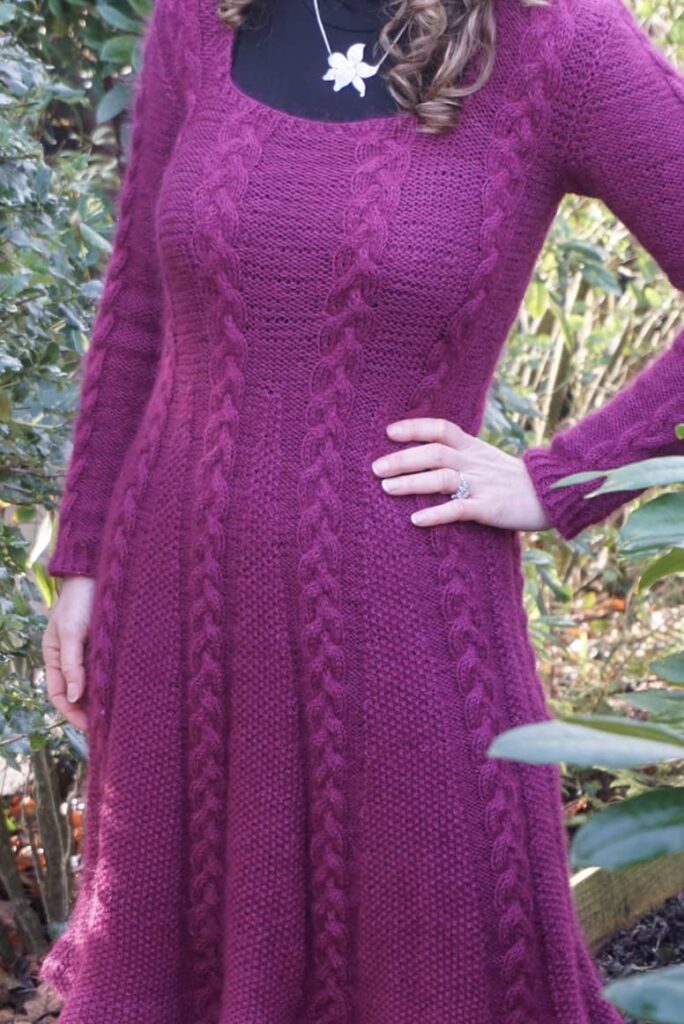
The flared skirt is cleverly designed: you start with the bottom of the skirt, so with the higher number of stitches, then you decrease on the seed stitch sections, which form a triangle until they disappear.
Then when working with the bodice you have to make a few increases and decreases around the armholes, but nothing too difficult either.
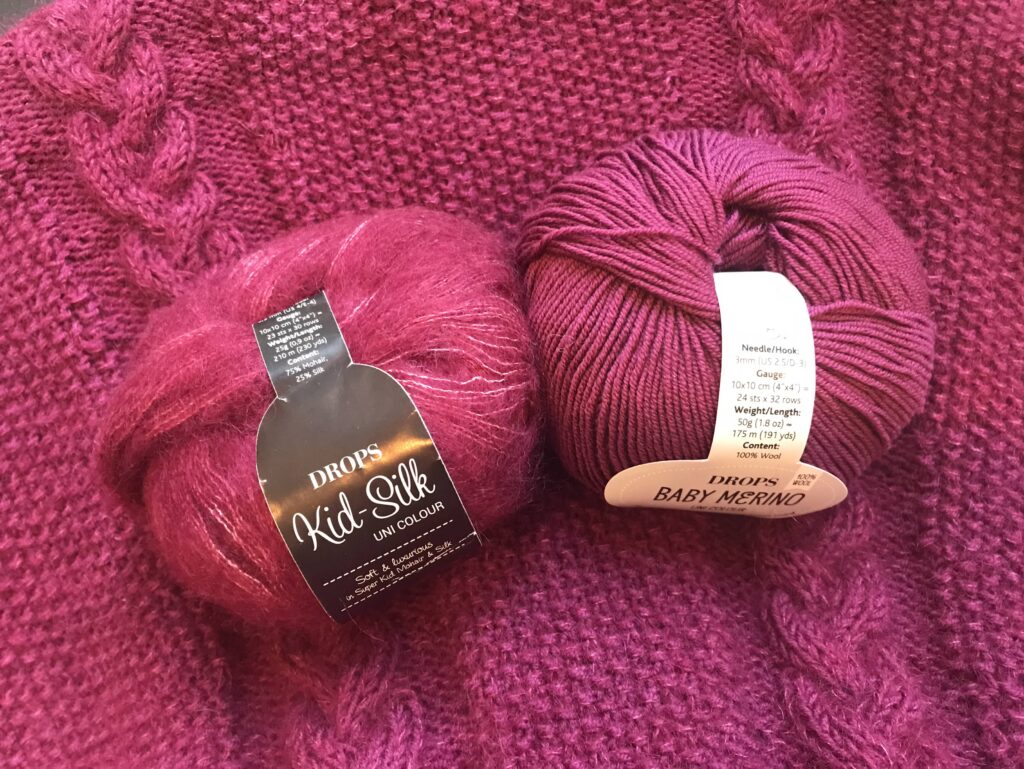
The pattern recommends using Alpaca Fine Wool (from Purl Alpaca Design own herd of Alpacas, how cool is that!) but sadly I find Alpaca wool quite itchy. So I knitted in double-strand, using a combination of Baby Merino and Kid Silk from Drops (colour codes 34 and 17 respectively), which I adore and had already used for my Blossom Shawl and my Chuck jumper. I used size 4 needles for the entire dress, as recommended by the pattern, and knitted a size XS because my sample was a bit bigger.
Changes I made to the initial pattern
The initial pattern is completely fine as it is but I couldn’t help making a few changes to it:
- Instead of the picot stitch at the bottom of the dress, which I am not a fan of, I knitted 10 stockinette rows, which when the dress was finished I turned and hand-saw on the inside.
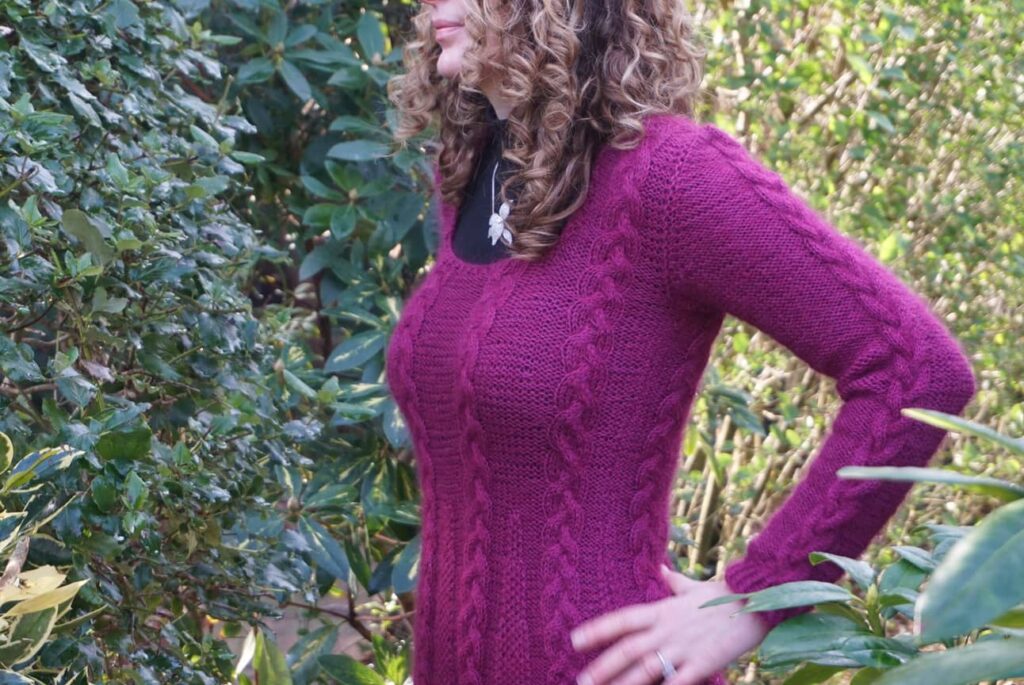
- I substantially reduced the length of the bodice, so that the end of the seed stitch would sit on my natural waist (slightly above the navel) rather than on my high hips. This is due to my personal body shape: I am very curvy so I always prefer to draw attention to my narrow waist that to my wide hips!
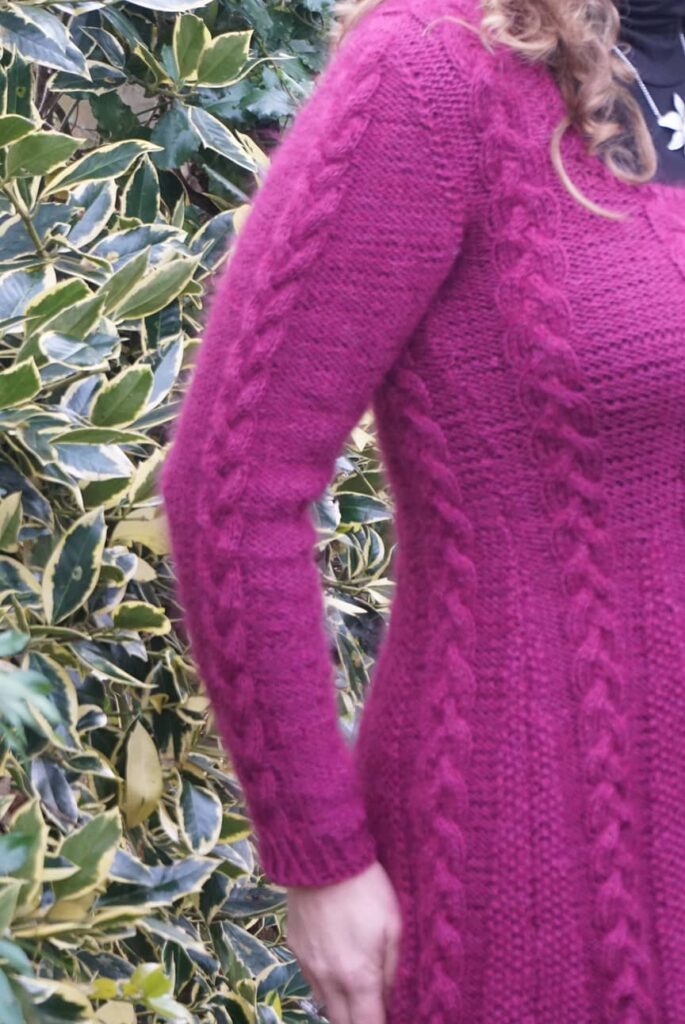
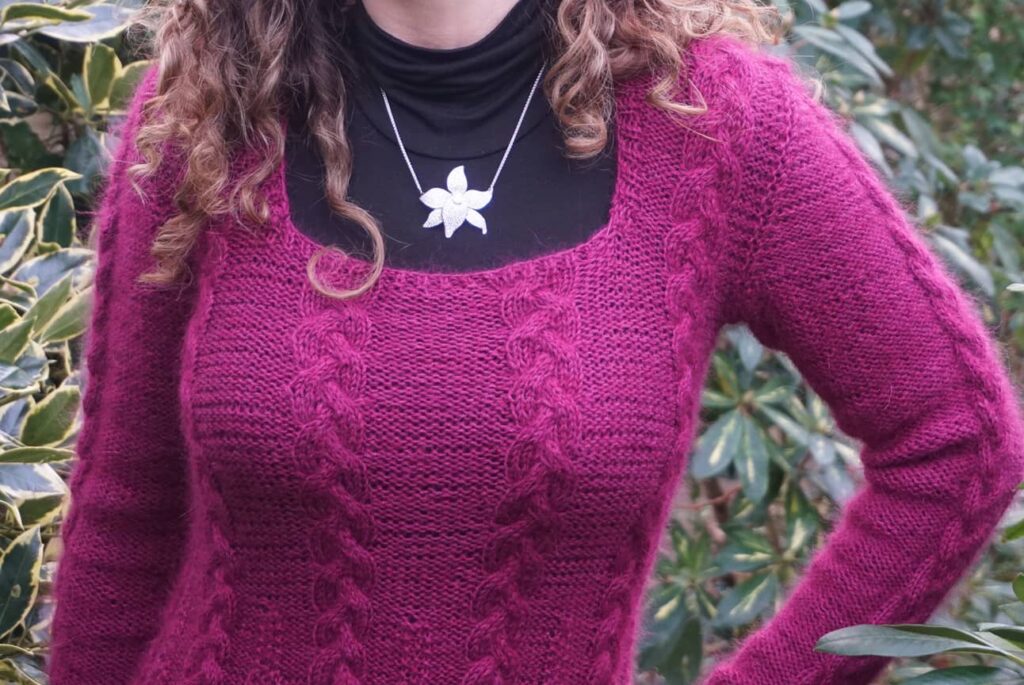
- I attempted some sort of Full Bust Adjustment, to avoid my E-cup boobs pulling on the cables. When I reached the under-bust, I added one stitch before and after each of the cable sections, on two front rows (8 stitches added twice); and then took these extra stitches off over the next two front rows. A bit trial and error but I am very pleased with the end result.
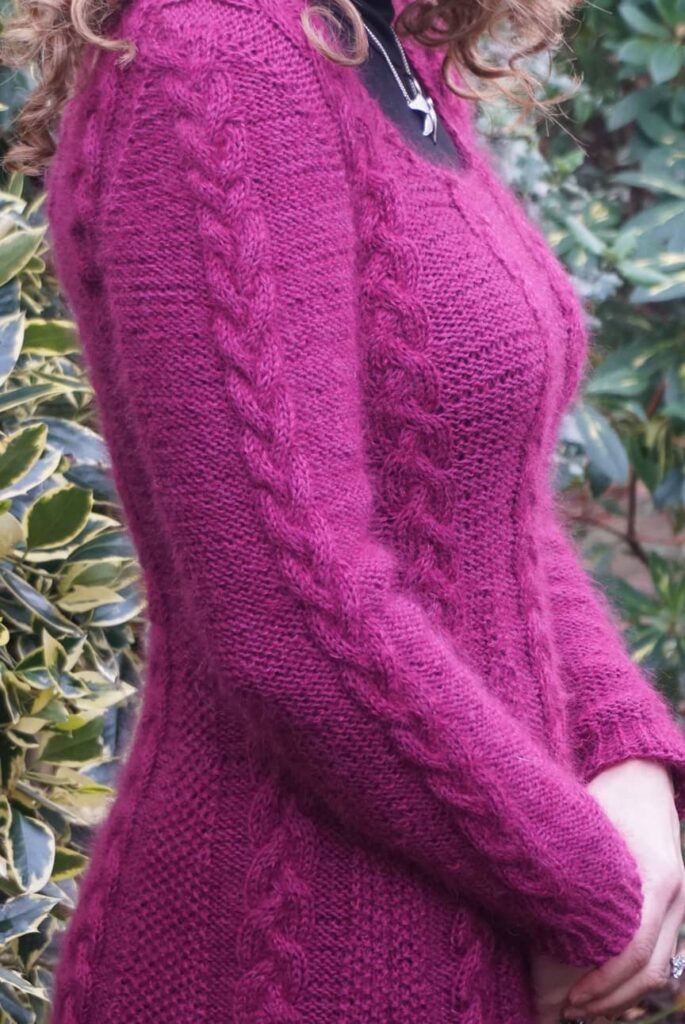
- I added sleeves – a LOOOONNNNG process but absolutely necessary for me in the winter!
My two regrets are that I should have make more decreases around the waist area, which is not fitted enough to my taste. And that my stockinette stitch is not super regular, but it never is for an obscure reason… Next time…
Conclusion
This was a long process and I am still trying to work out how to make the waist a bit more fitted; but overall I’m very pleased that I made this dress. It completely demystified the process of knitting a dress and I am ready for another Icon with lace instead of cables maybe. I may even be brave enough the try and tackle Maddie again. We’ll see! In the meantime I am frantically making hats because they only take a couple of hours!!
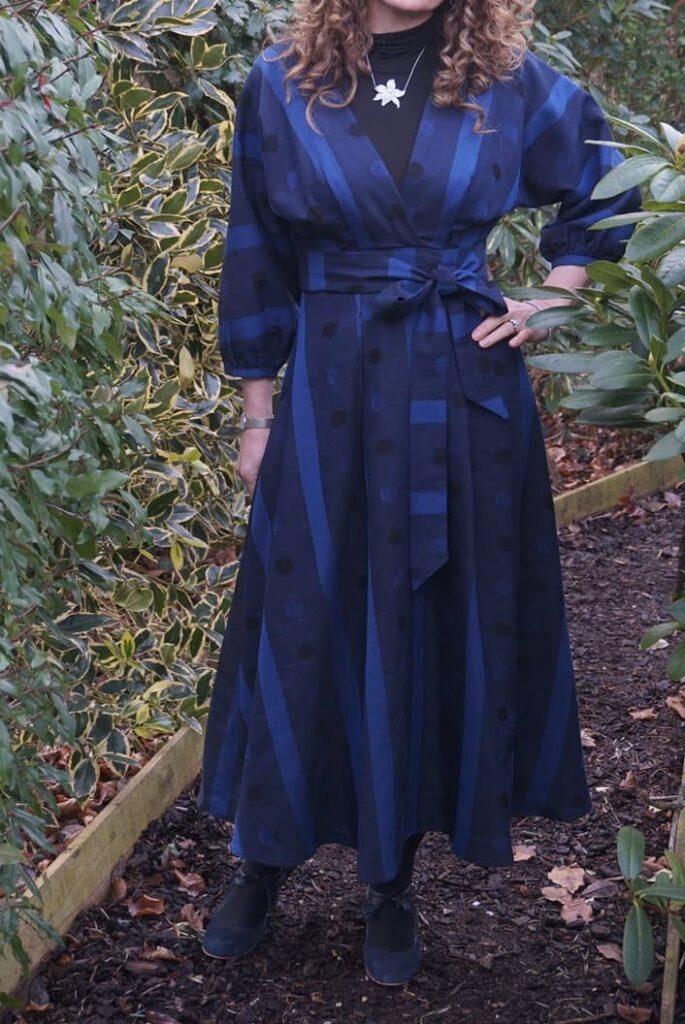
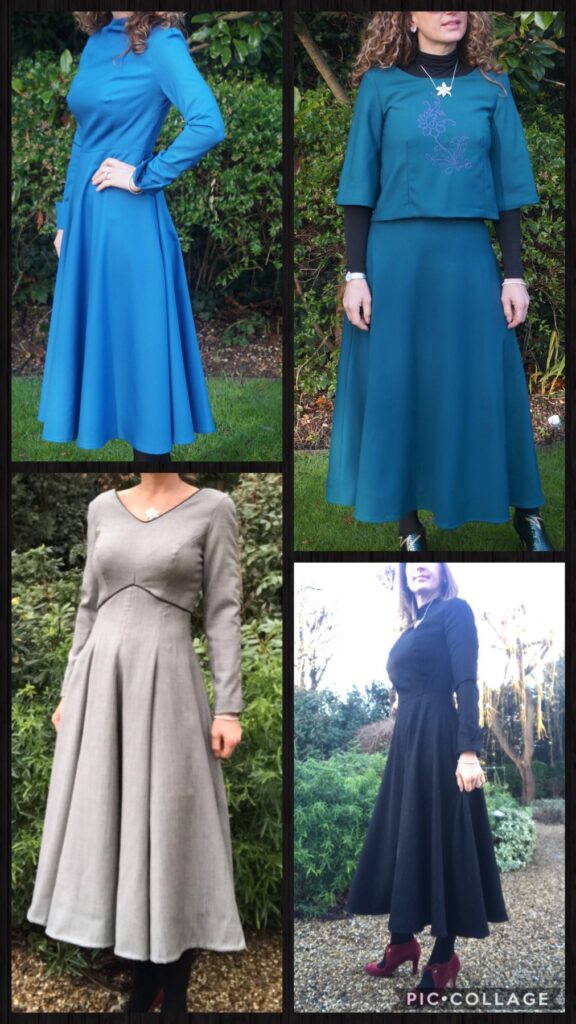
Taking the V9253 dress from summer to winter
You will remember that the V9253 dress was one of my favourite patterns of summer 2020 (you can see my two versions here and here). So much so I promised myself to make it into a winter version. And here it is, warm and cosy!
Using wool suiting… for a summer pattern!
The V9352 pattern is definitely designed to be made for summer, in lightweight fabric. This is visible from the enveloppe drawing…
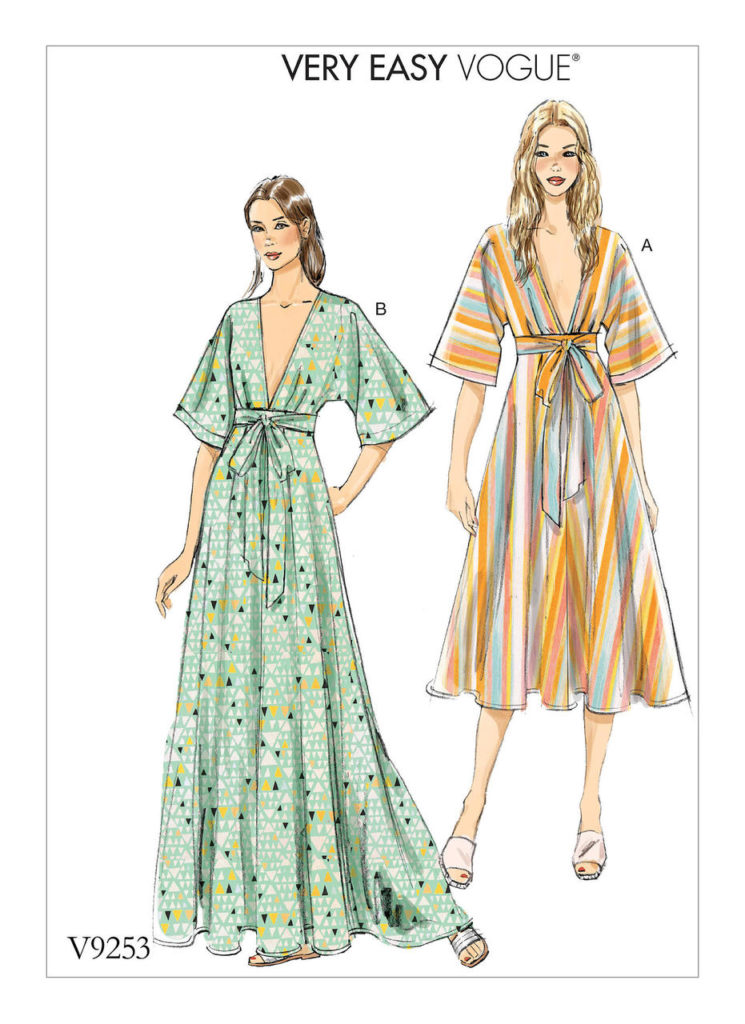
… and this is definitely what I used for me summer versions:
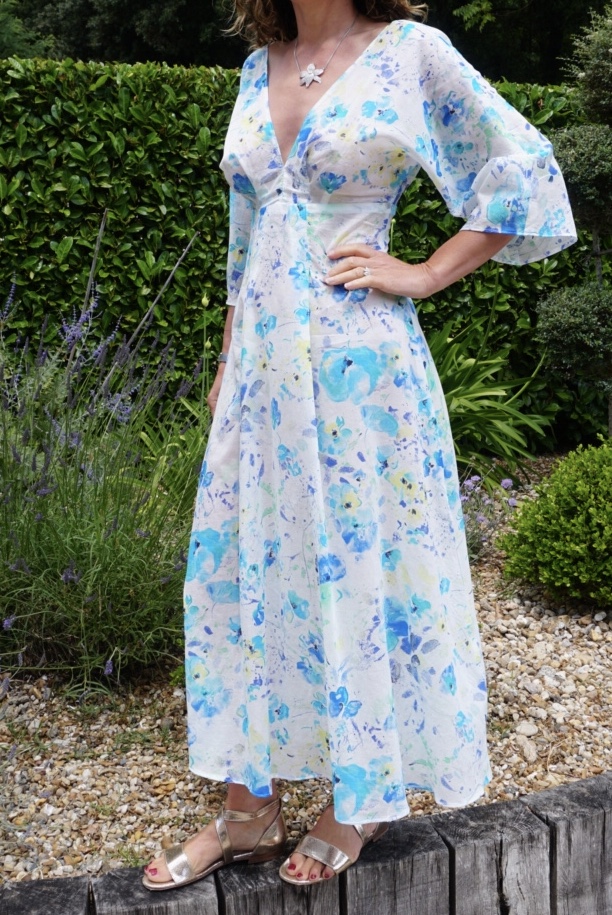
However, I thought wool suiting would work well for a winter version. I love this fabric quality for winter dresses, as it is warm without being bulky and very easy to work with. Actually I have already used it quite a bit in the past!
The fabric used from this dress is from Bennytex, my main source of very good quality wool at very good prices. The weight and composition are always specified on their website so no nasty surprises. Another of my trusted wool sources is Croftmill, although their prices are definitely higher.
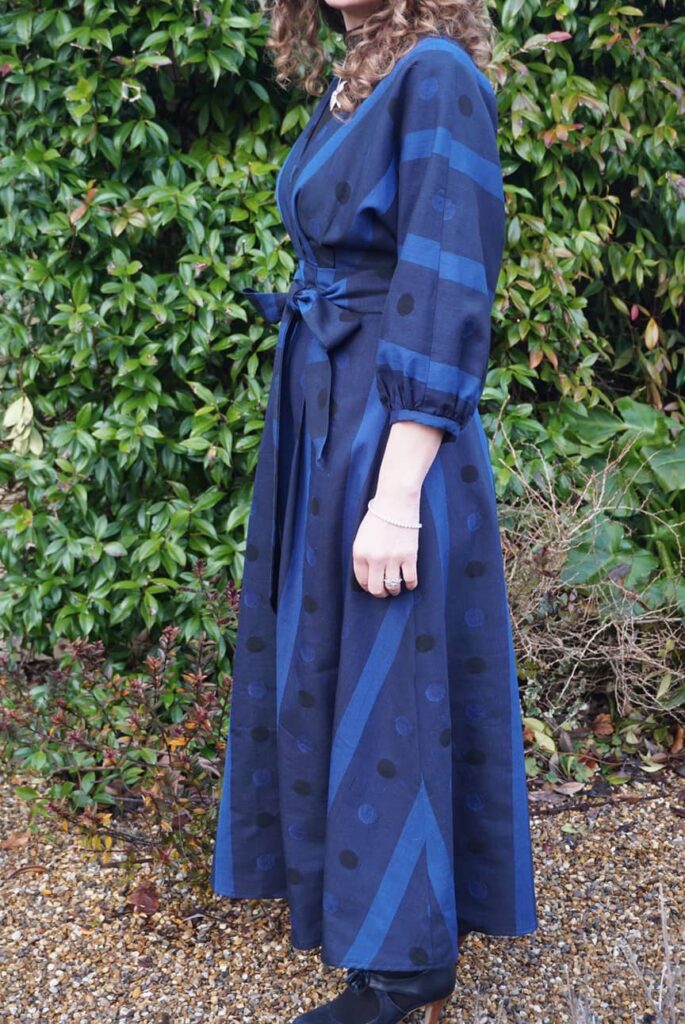
I had bought this fabric a while ago and was scared to use it due to the pattern matching needed with all these stripes. I definitely did not do the best job here (I forgot about the sleeves!!!) but it does not bother me too much as the front and back are somewhat acceptable…

Tweaks the original pattern
I made four changes to the original pattern.
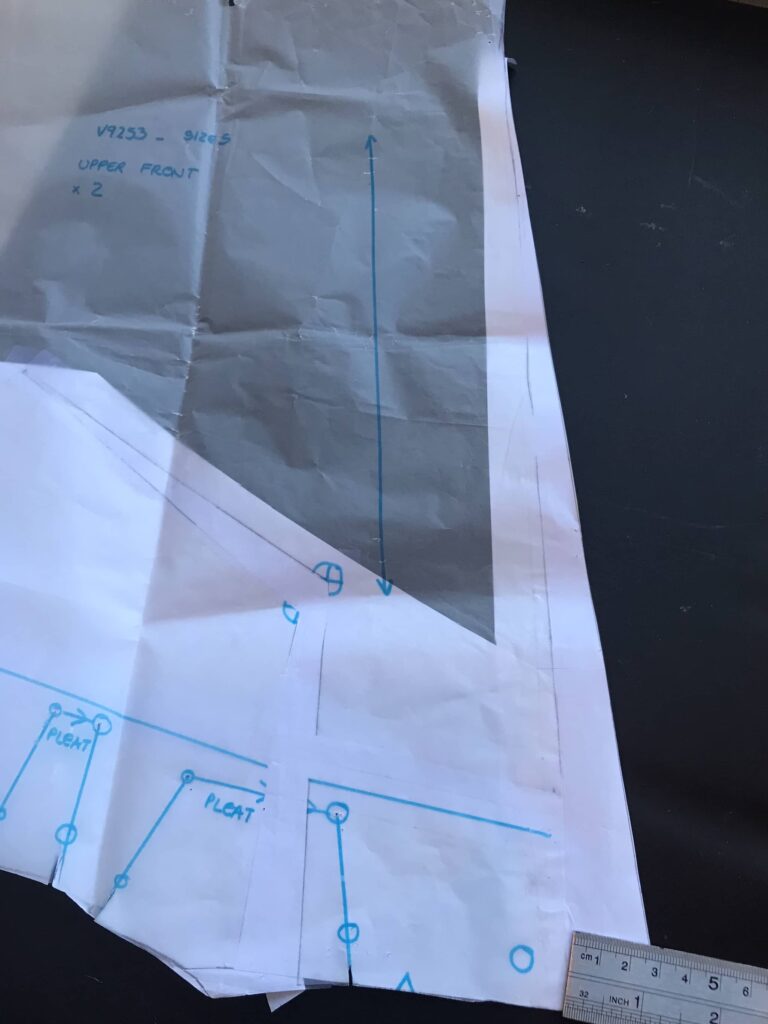
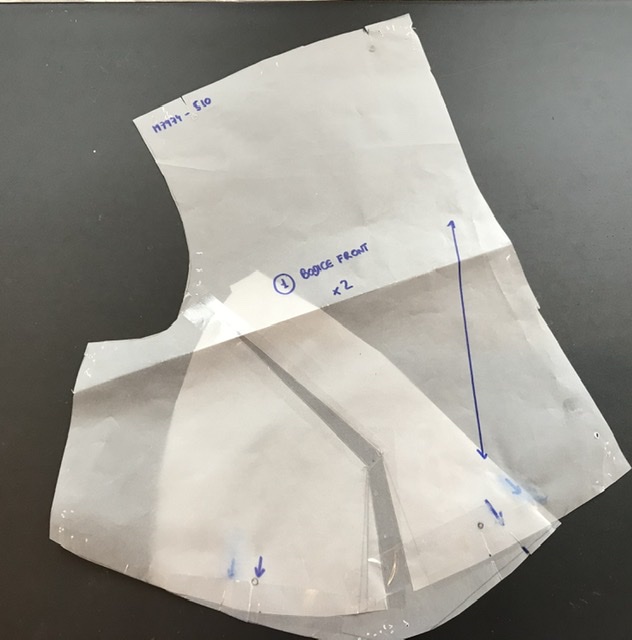
First, my usual size 10 fit perfectly except at the bust (I am an E cup, which creates constant FBA headaches). So… like for my previous two dresses I made an FBA. Here is a picture of the modified bust piece, it makes the change quite explicit:

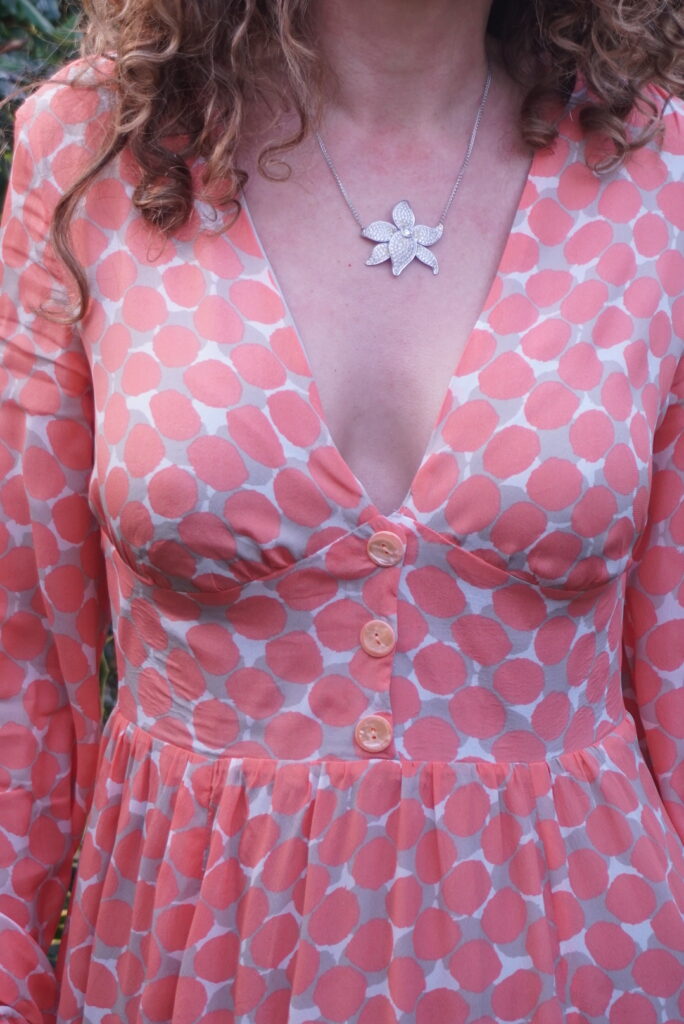
Second, I had been quite bothered by the very low neckline on my summer dresses. So I 100% copied my sewing crush Emily Hallman (do read her wonderful article) and raised the neckline by adding 3cm /1 inch at the bottom of the neckline, which progressively blends in as you move up.
This creates a faux-wrap effect at the bodice, which works wonders for more modesty!
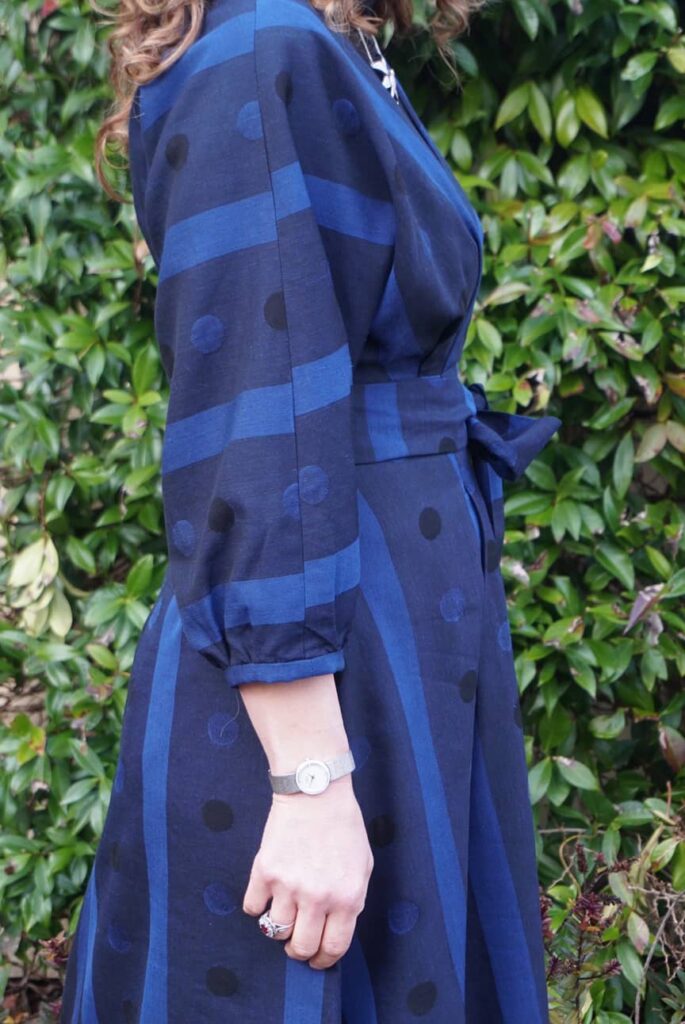
Third, I also copied Emily Hallman for the sleeves. She made another version of this pattern, sadly only shown briefly in her Instagram stories, where she gathered the sleeves with a bracelet – and so I did the same (while also lengthening my sleeves by 5cm).
Lastly, I fully lined the dress, because I am a lining addict as you know… Actually, this is mainly to avoid the wool against skin effect, which I cannot bear. Here is the reverse of the dress (sorry for the ugly pictures!):
The one thing I should really have changed and which I didn’t is the positioning of the belt. Each side of the belt is inserted at the back, before sewing the back zip. As result, it pulls on the zip when the belt is tightened – which make the invisible zip very visible (especially when you have run out of matching zips)! Oh well, next time…
Conclusion
Despite the belt issue, I am very pleased with this dress. It is incredibly comfortable despite its fitted look, as the waist ease is just perfect and the sleeve shape is super comfy. To make it even cosier despite its very low neckline, I wear it with a turtleneck thermal bodysuit and 40-denier tights – pretty much my uniform under all my dresses this winter.
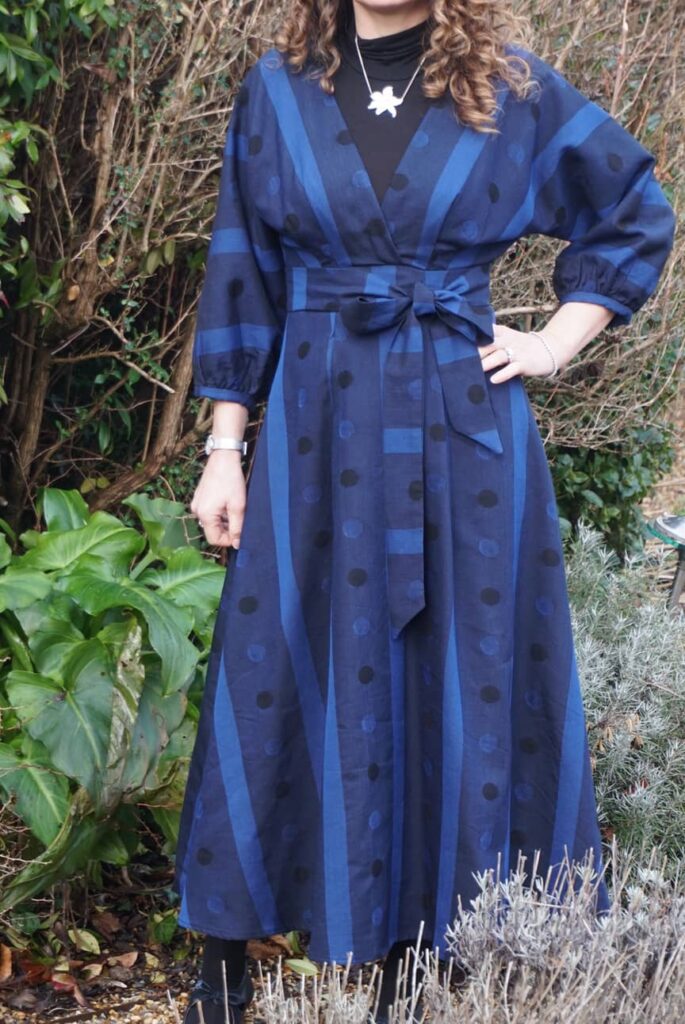
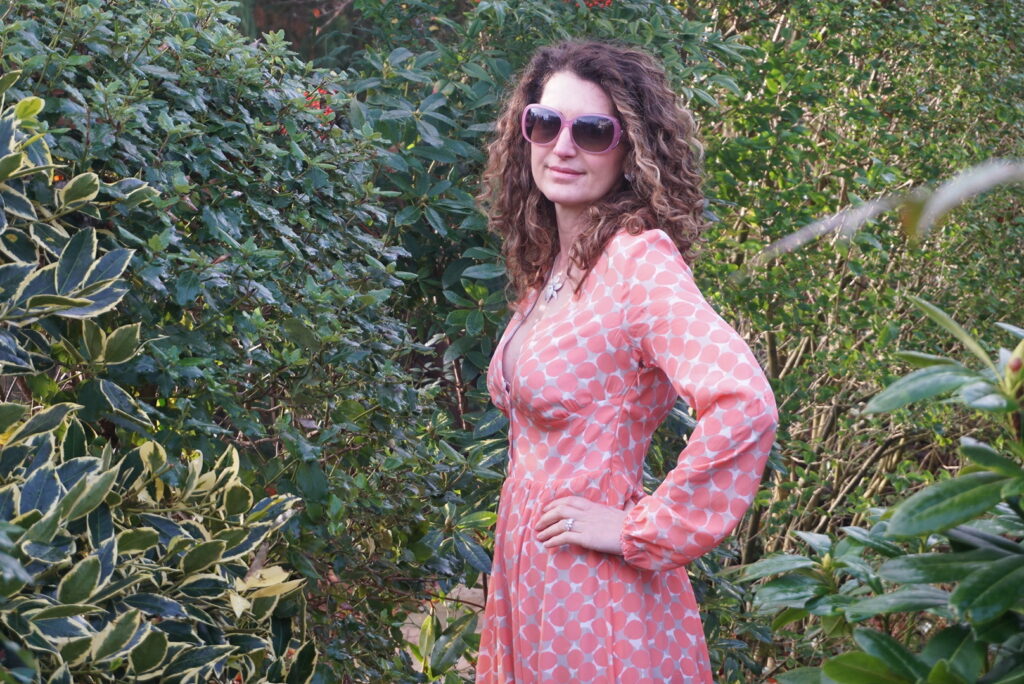
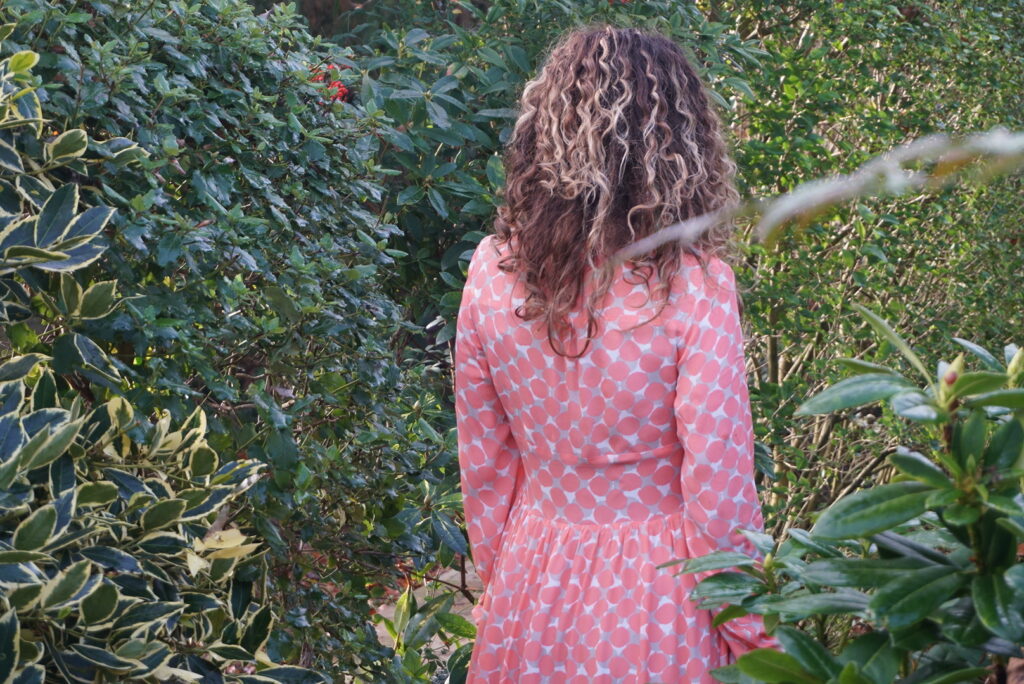
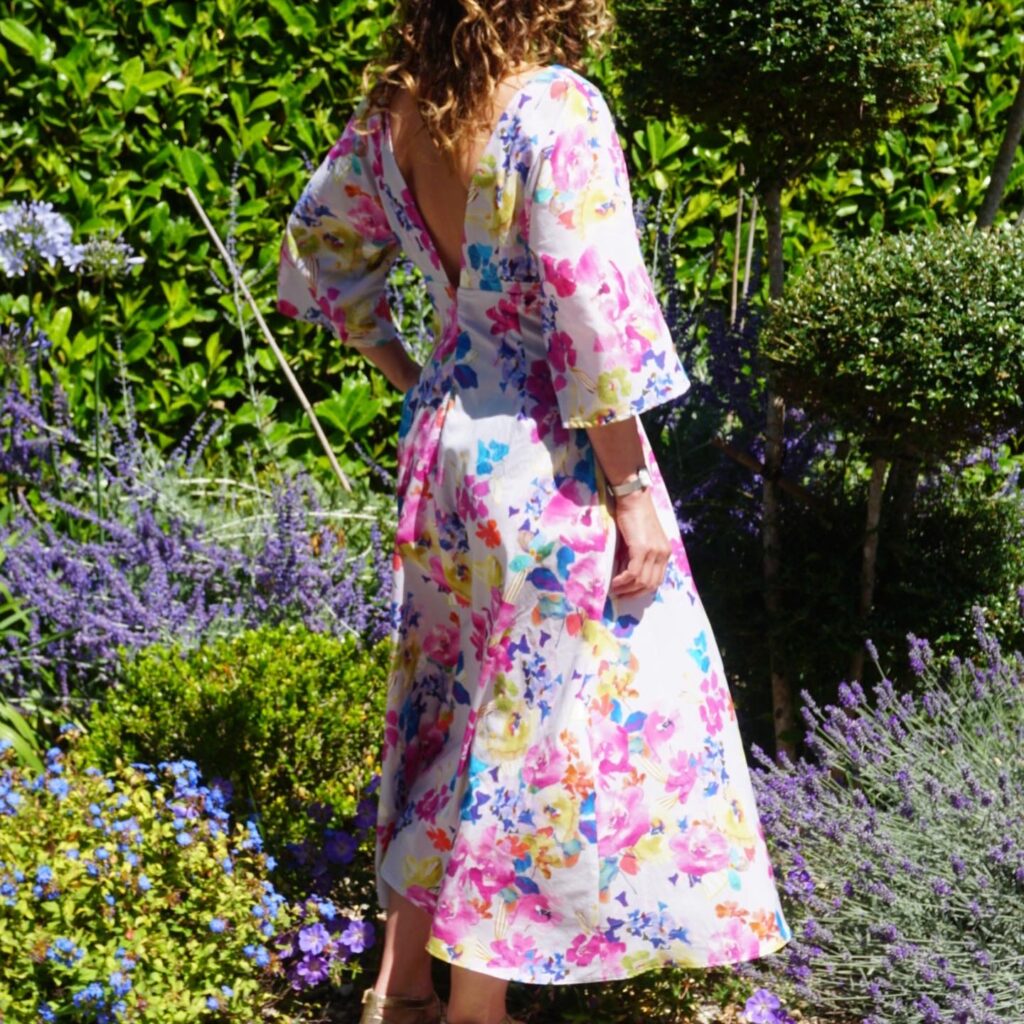
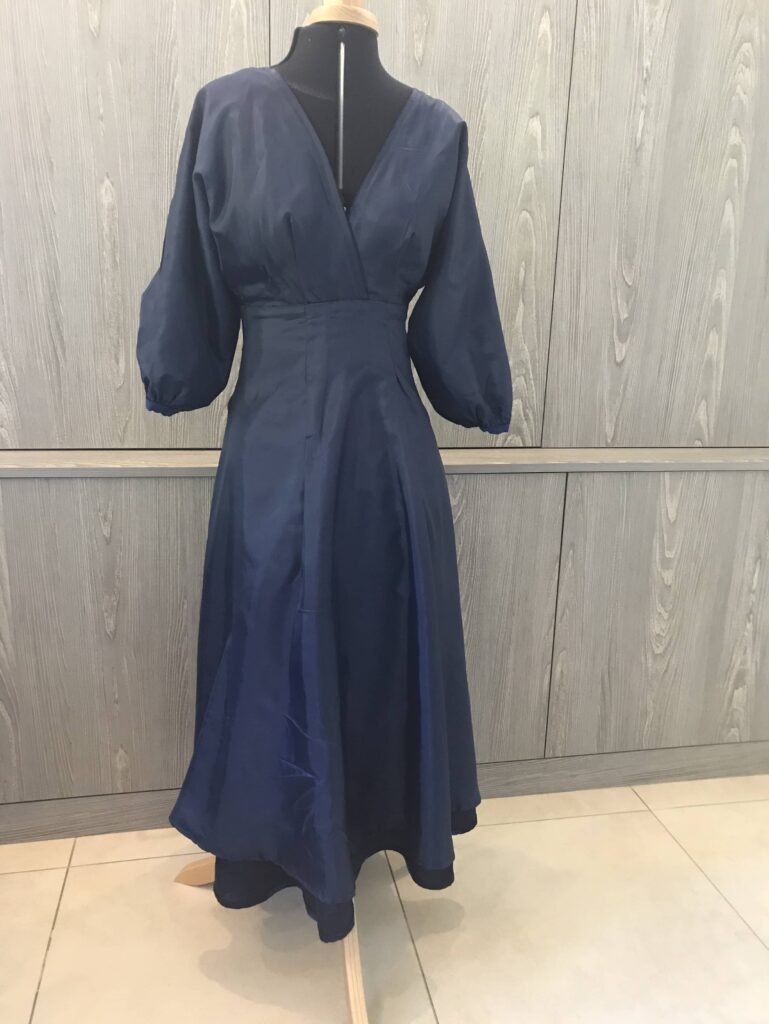
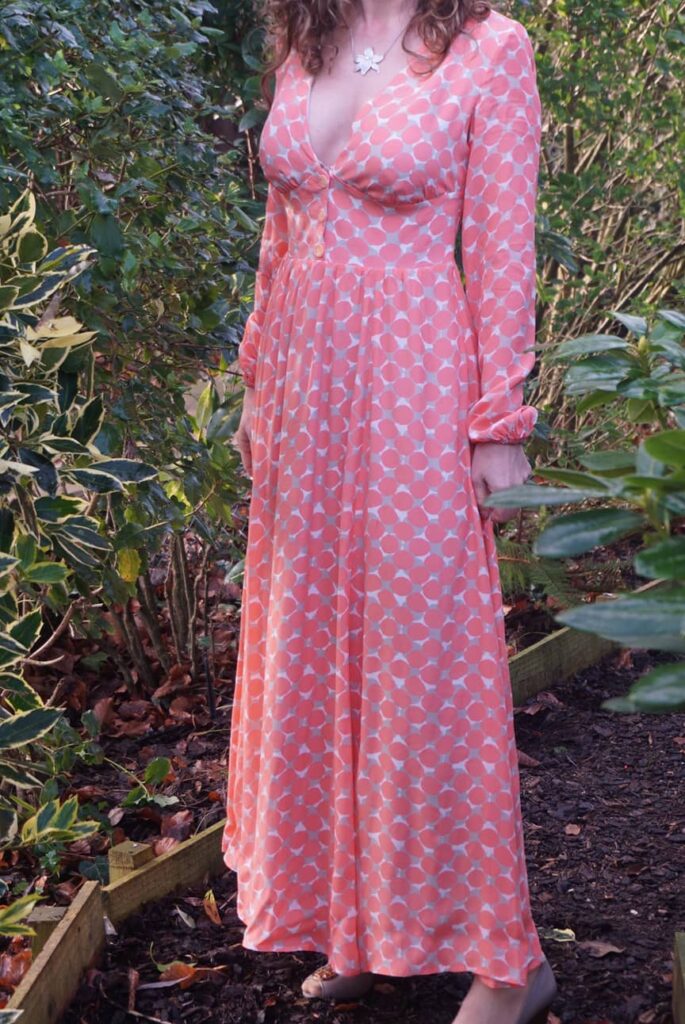
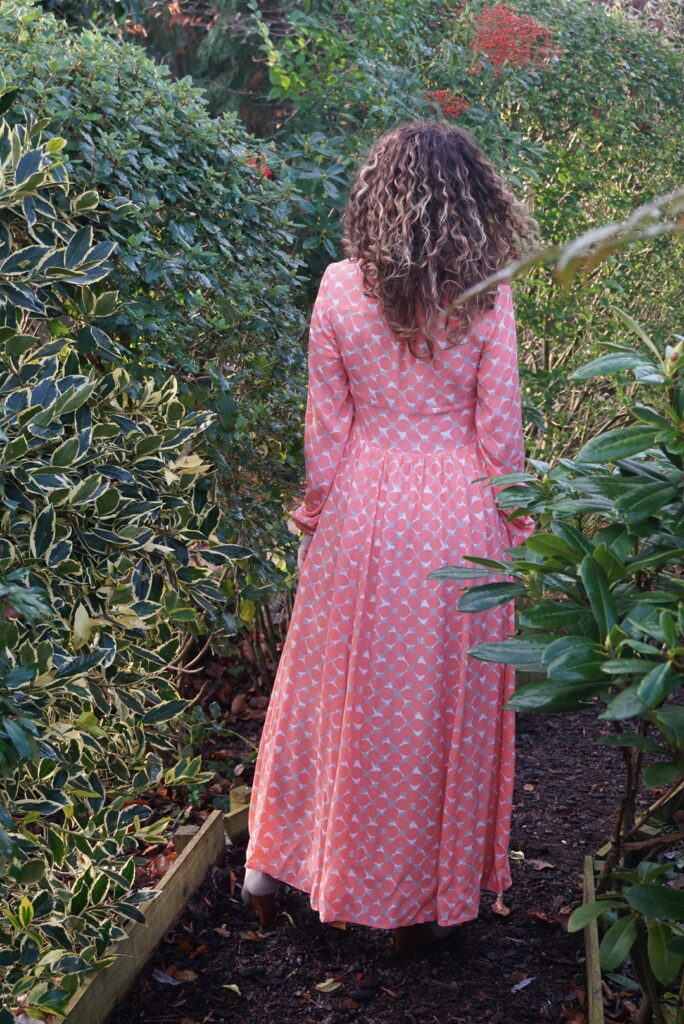
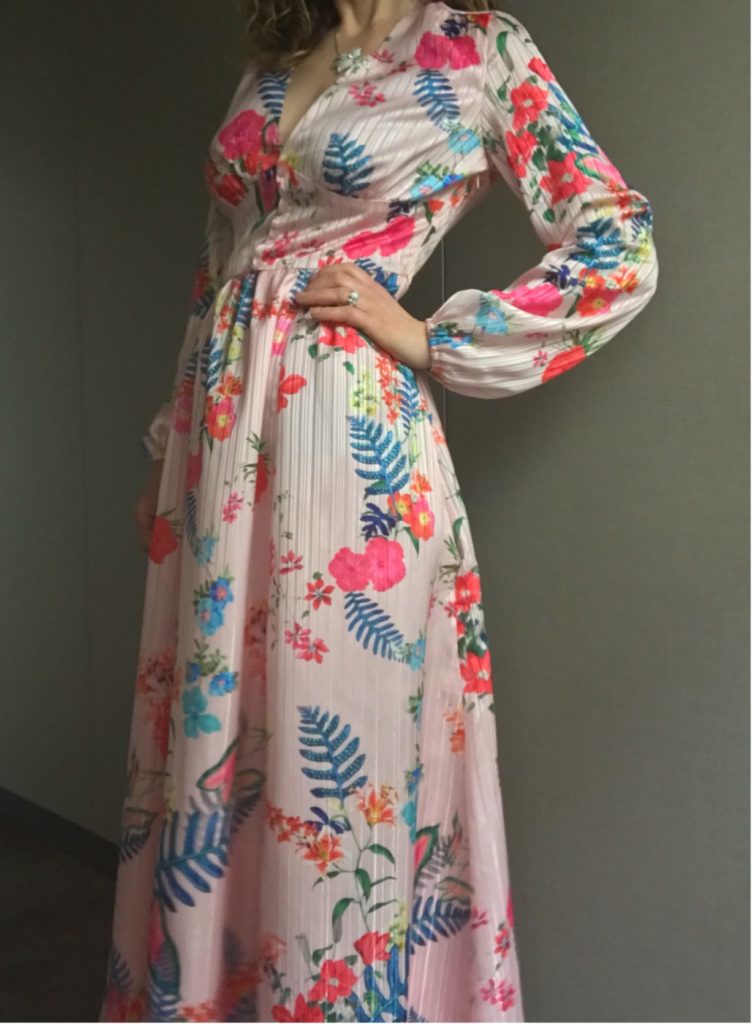
Sewing with silk: a new M7974 dress
In my 2020 sewing review, I mentioned that one of the 2020 achievements I was proudest of was to have mastered sewing a silk dress. But the dress was actually never posted on this blog. So here it finally is, in all its silky beauty!
I am all the happiest that I have recently managed to accumulate a substantial silk fabric stock. I was until recently terrified to sew it but not anymore, ha ha!!!
Key advice for sewing silk
This dress was a great learning experience for me. So here are the tips I would give you if you are keen to start sewing silk:
- Don’t overspend on the fabric. The more you spend on silk, the more terrified you will be to use it. So for your first silk piece, I would recommend not spending more that GBP15/EUR18/USD18 per meter. My best source for reasonably-priced silk of good quality is Bennytex. Looking for deadstock is also a good option – I regularly browse through Amotreads‘ stock.
- Pre-wash and iron you fabric as you normally would, except if you are planning to have your dress professionally cleaned in the future. I personally only sew and knit clothes I can machine-wash… but I am the woman who puts all of her husband suits in her Miele washing machine! Wool program, no temperature, 600 spin, it works a wonder for wool, silk, cashmere…
- Go for silk that is slightly thicker or that has texture. I find that silk crepe and silk dupion are easier to work with, as they are less slippery that silk satin for instance. In any case look at the material weight, the heavier the easier.
- USE A MICROTEX NEEDLE, absolutely, even if you can’t find it on Amazon. Using a super-thin (60) general needle will not work a well, with some silks it may pull off strings and damage your fabric for good. And also use thin pins, not standard ones.
- Use a pattern you have already sewn, to reduce the risk of mistakes. Having to unpick stitches is particularly dangerous with silk.
- Line silk with silk if you can afford it, it would be such a pity to lose the softness and floatiness of silk because of a synthetic lining.
- Go SLOW – no need to rush, you are unlikely to want tens of silk dresses in your cupboard (except if you are me), so you have all the time in the world!
Details of my dress
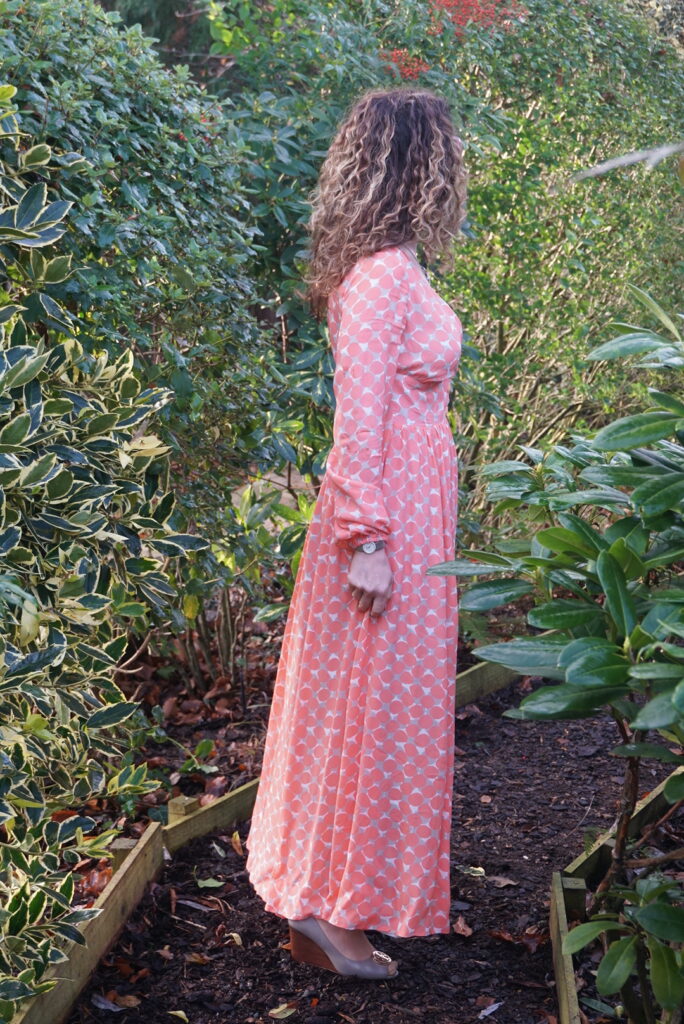
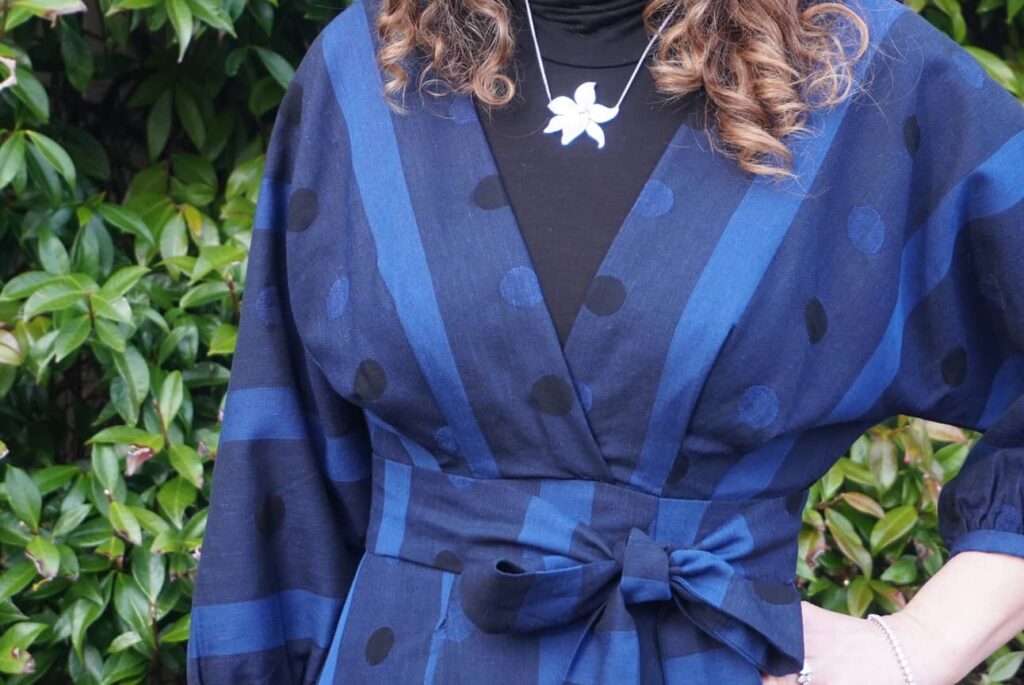
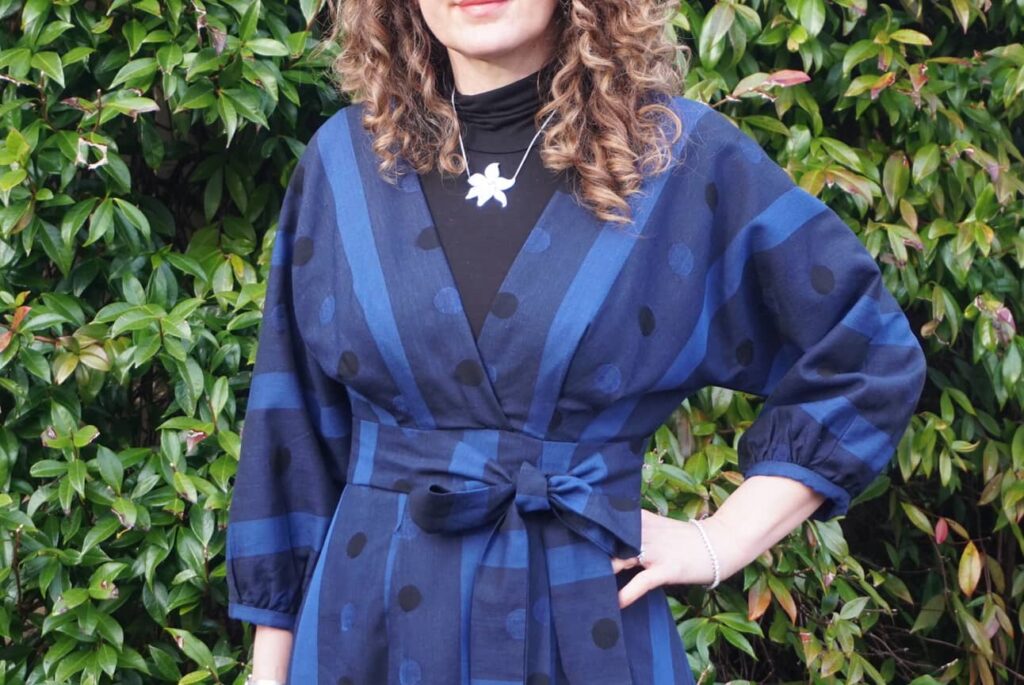
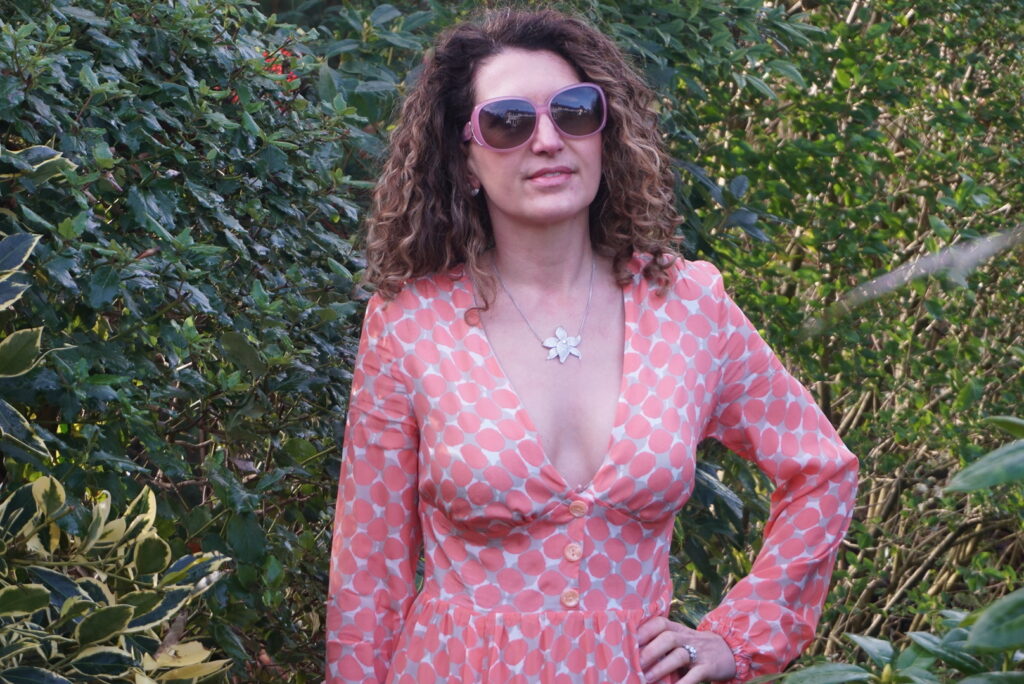
As for my new dress, you may or may not have recognised M7974, which I already sew last Autumn in a pretty polyester fabric with metallic yarn.
I had made an FBA at the time, but it turned out to be insufficient – so I followed the same methodology but made it even bigger.
As for the other changes I made to the pattern, they are exactly the same as those I had made previously:
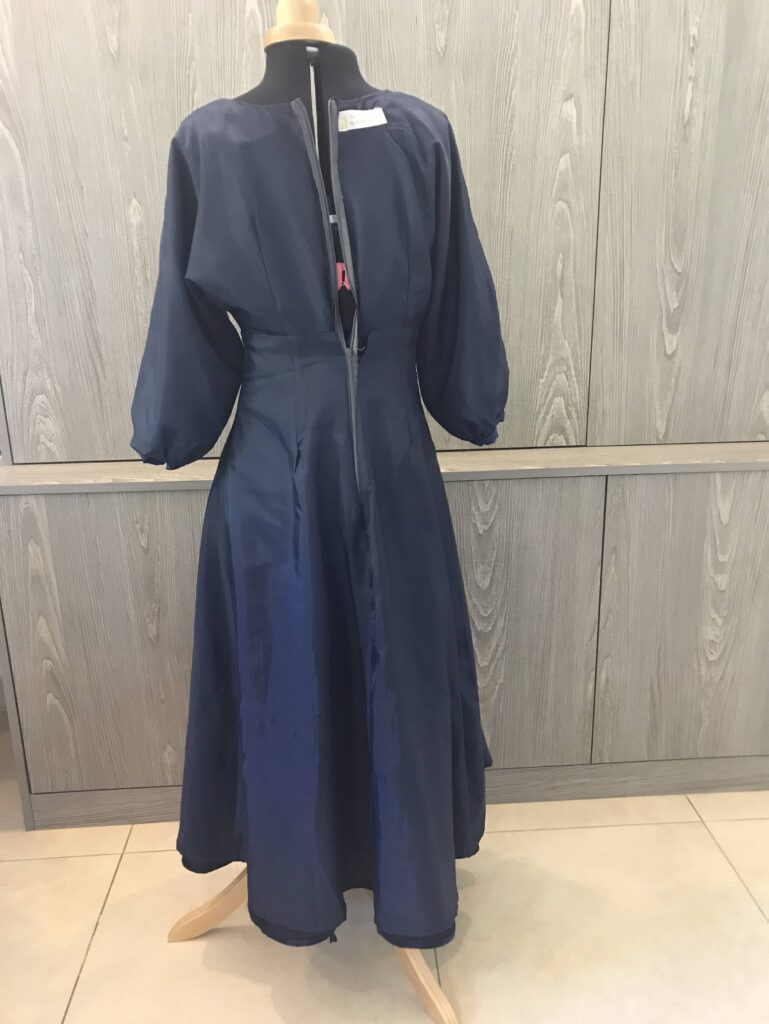
- no buttons along the skirt front but a side zipper to open the dress;
- longer sleeves elasticated at the bottom to make them more puffy;
- fully underlined bodice and fully lined skirt (with silk lining of course) – because you know I am a lining addict…
And that’s it. Next time I will try and up the neckline, as it is truly too low as it is, even with a very very low bra (forgive the creases, this dress had been worn quite a bit pre pictures).
Apart from this, I am very happy with this dress, but the winter has been so cold that I haven’t had much chance to wear it – looking forward to spring…