M7081: my new favourite winter dress
New season, new pattern…
Every seasons seems to come to me with a favourite dress pattern – winter 2019 was Magnolia‘s season…
… summer 2020 was V9253’s …
… and autumn 2020 is definitely all about V7081!
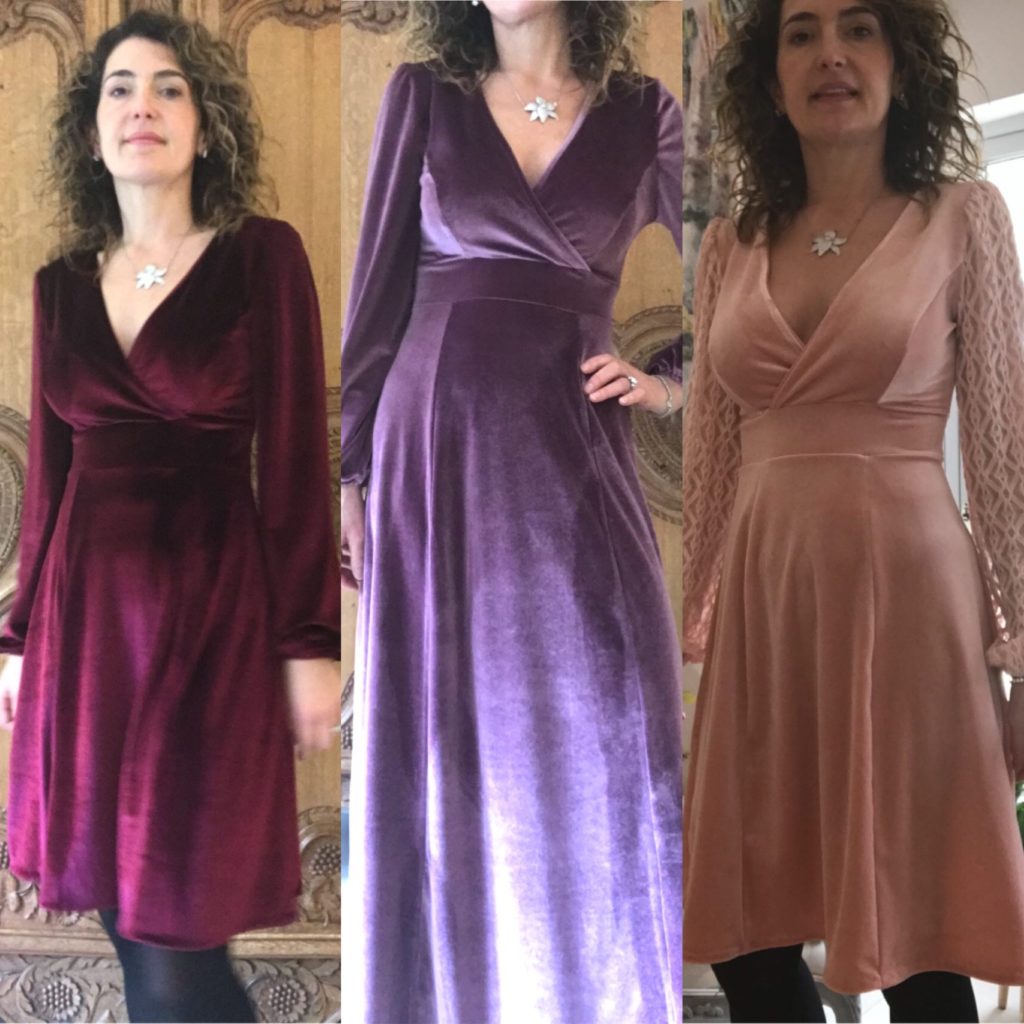
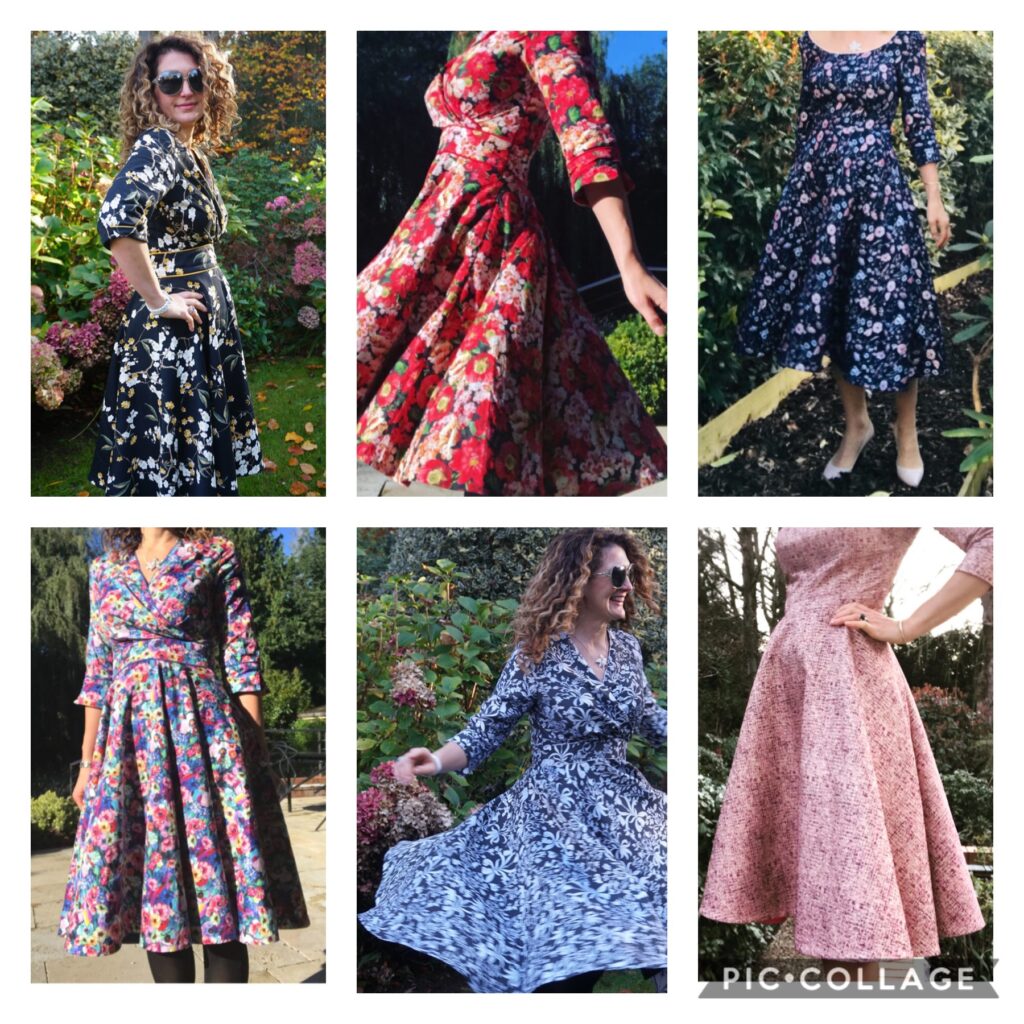
My “old” versions of M7081
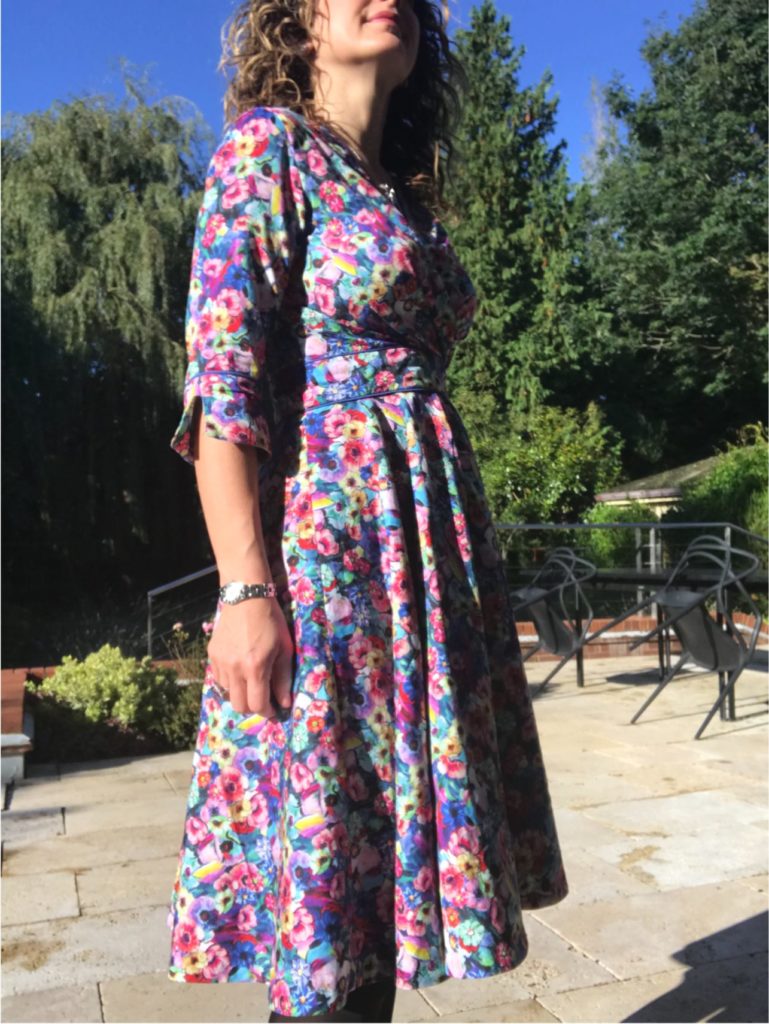
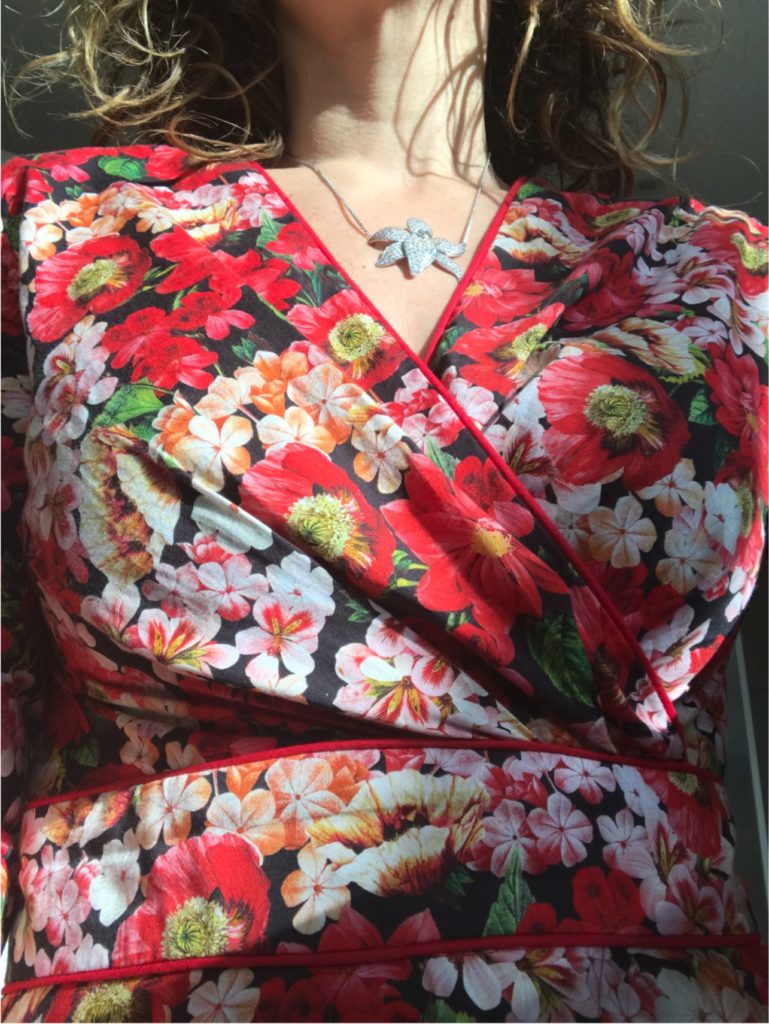
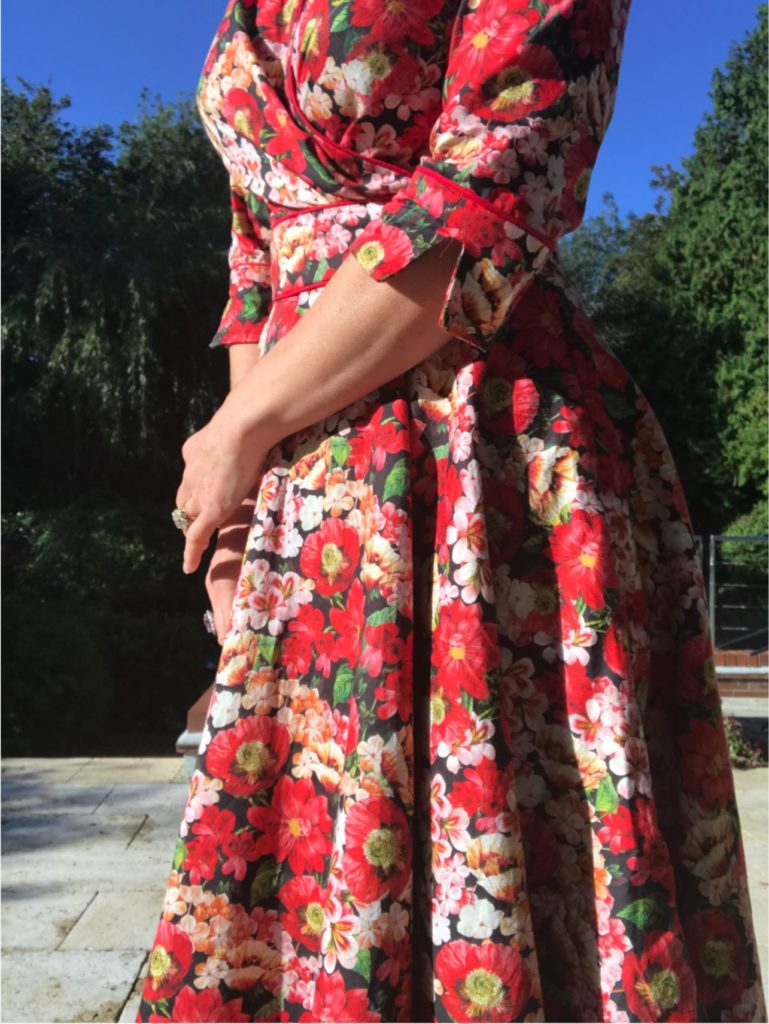
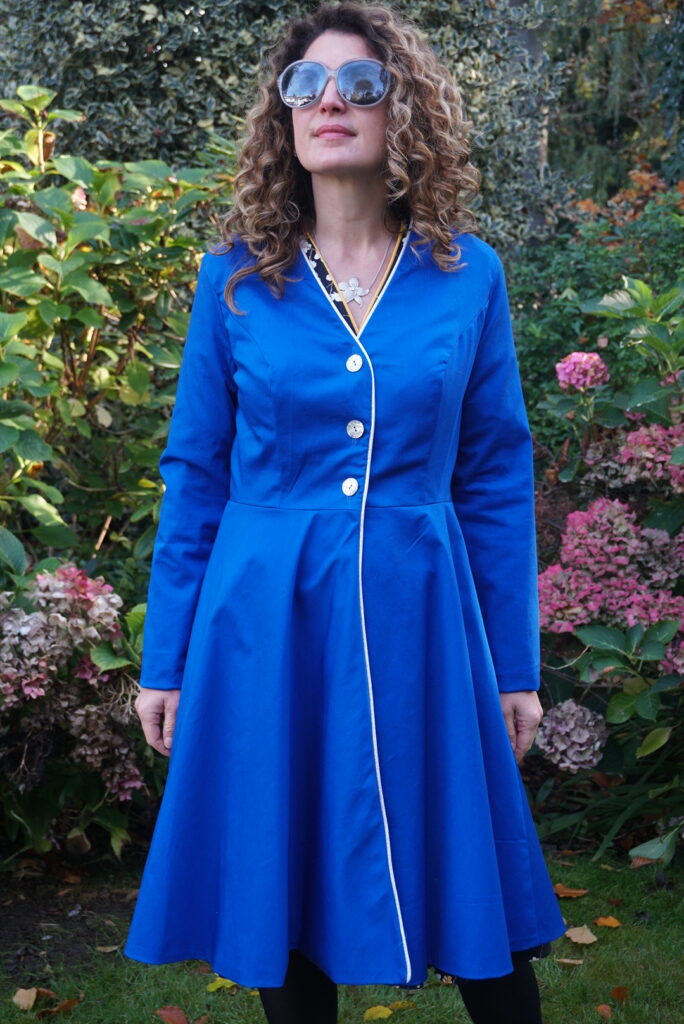
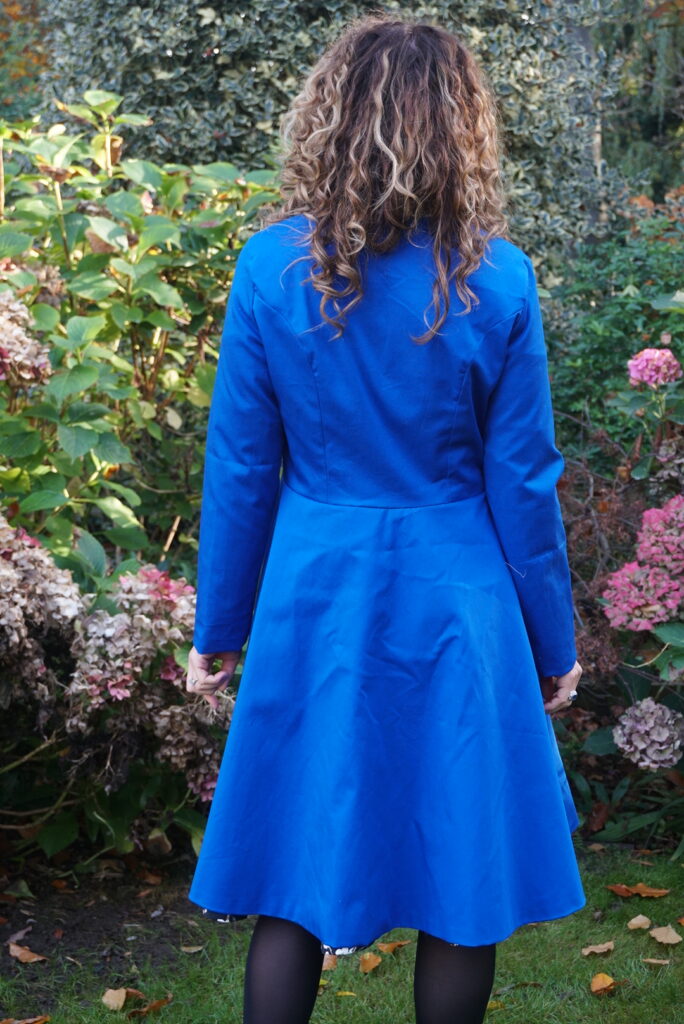
In all honesty, the red and blue versions of these dresses were sewn last year (for those following my curl journey you can tell from my hair!). I got my hands on these magnificent Dolce & Gabbana floral fabrics and couldn’t resist making each of them into twirling twin dresses.
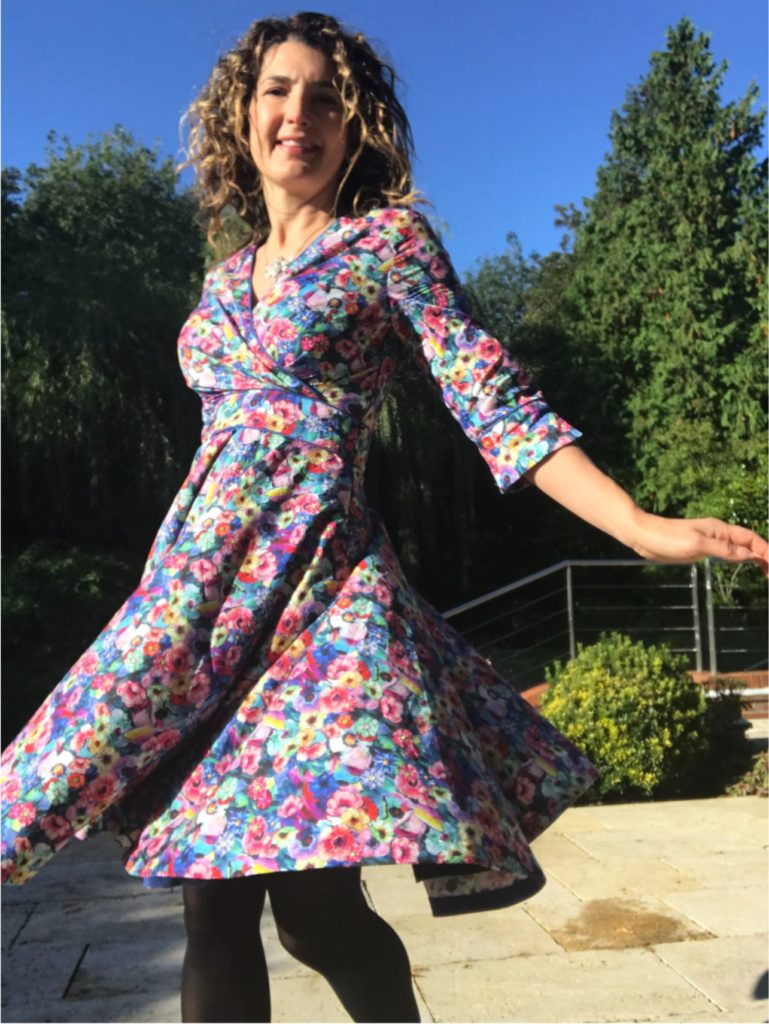
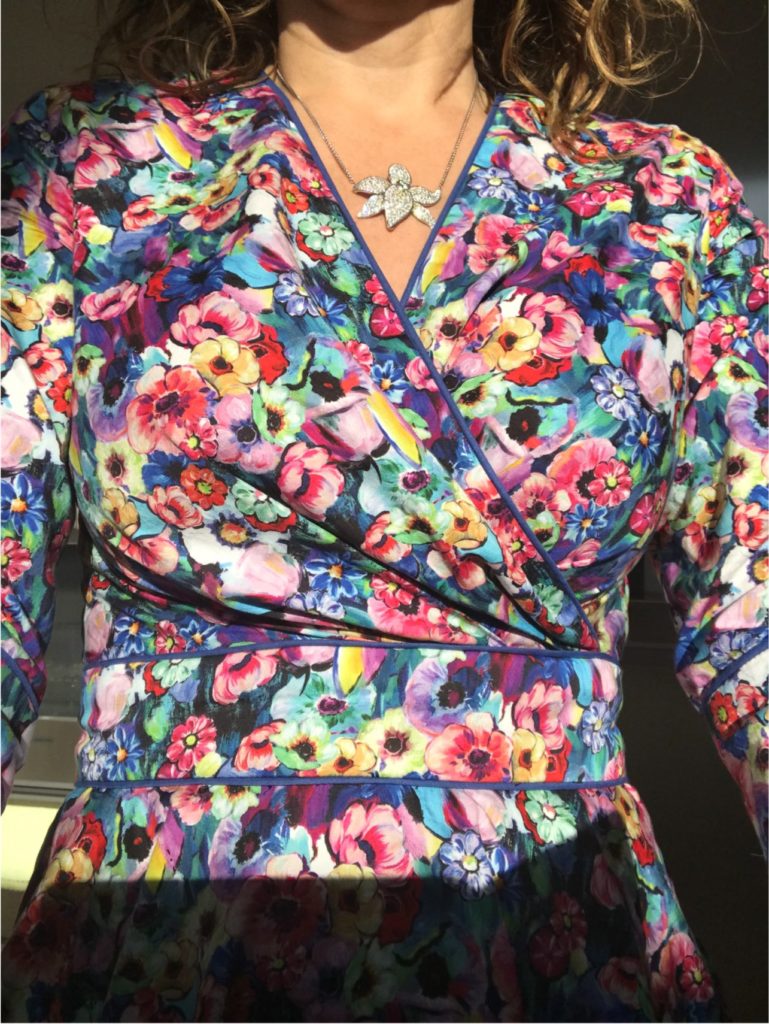
They are constructed exactly in the same way as my two new versions: no collar, piping at the neckline and the belt and modified sleeve cuffs – but more on this later.
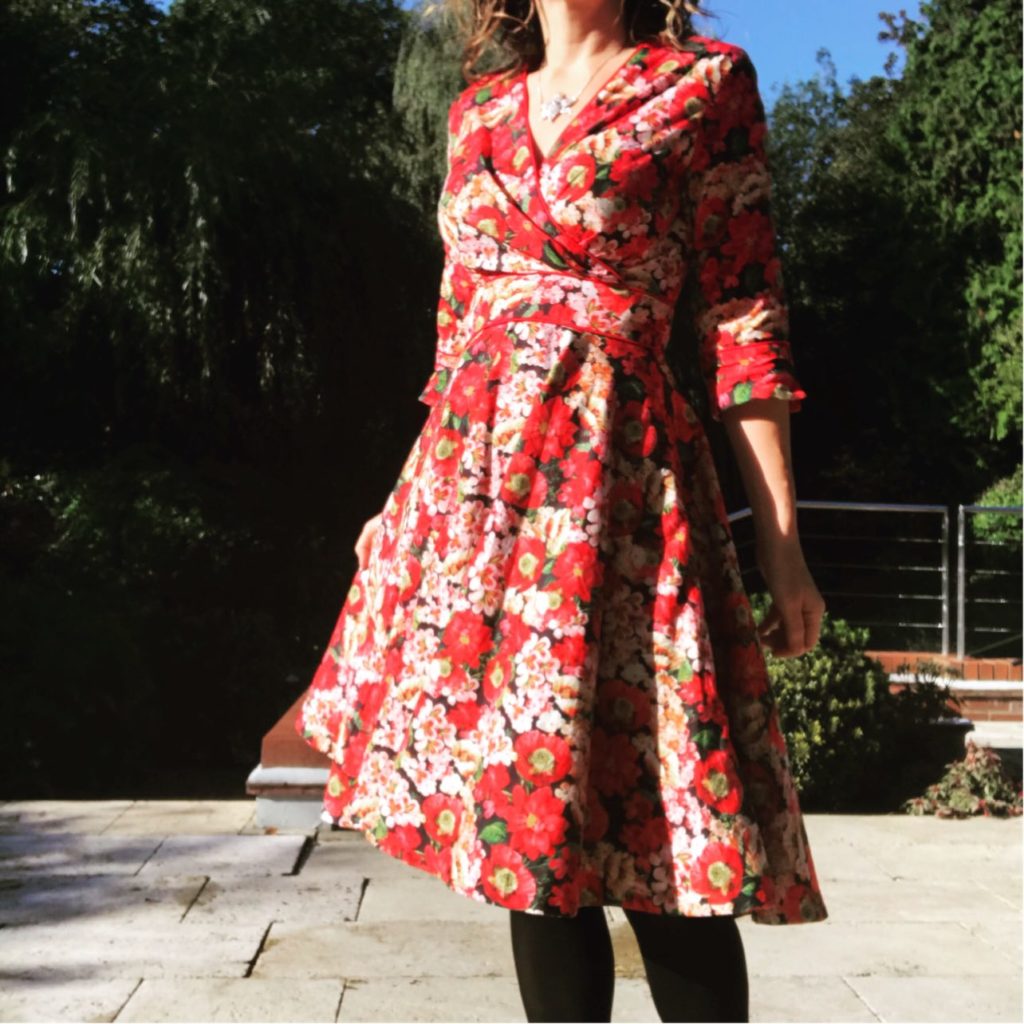
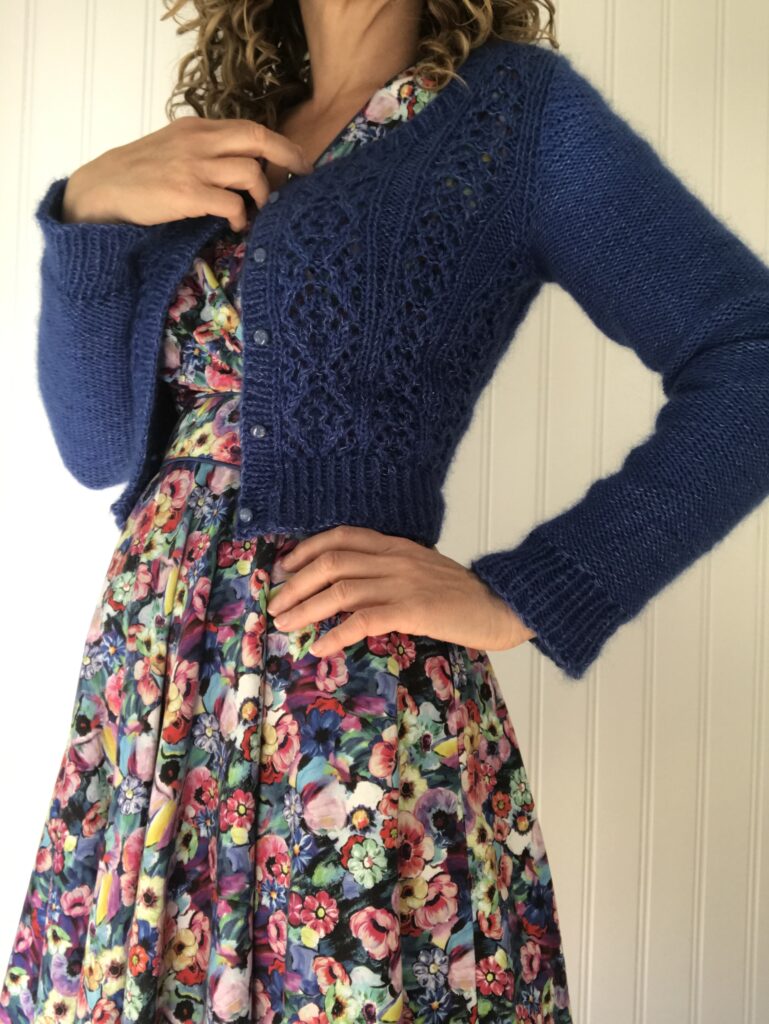
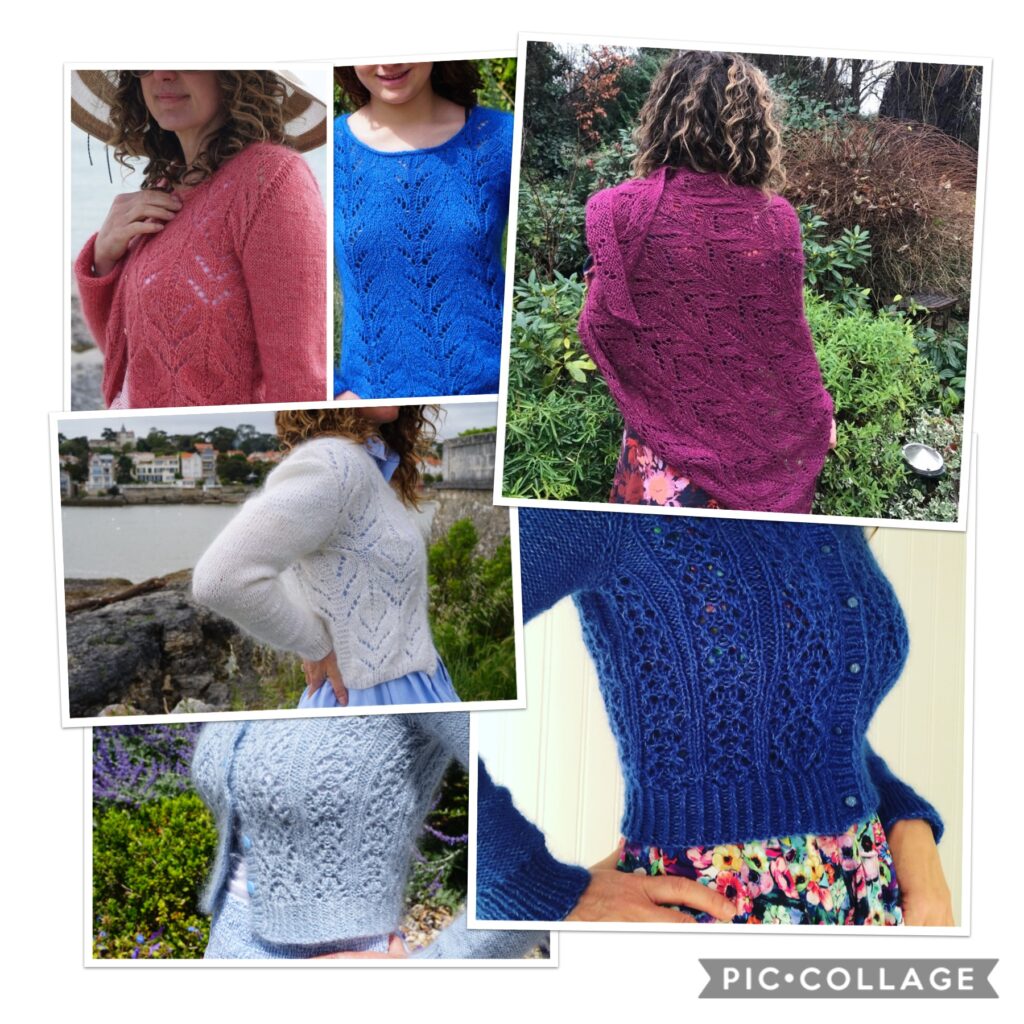
I only posted recently about the blue one recently though, when I knitted a matching Belladonna cardigan. No post about the red dress, lazy girl!
M7081 pattern review
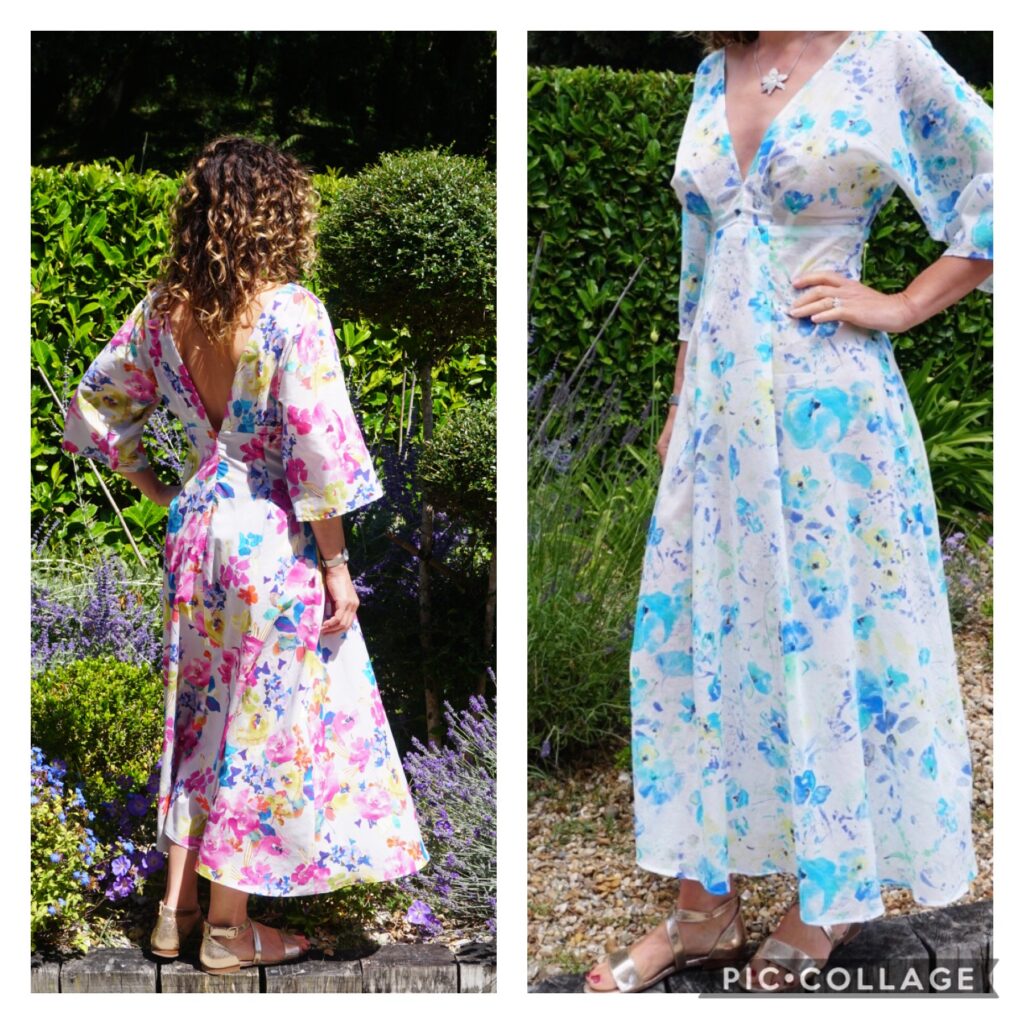
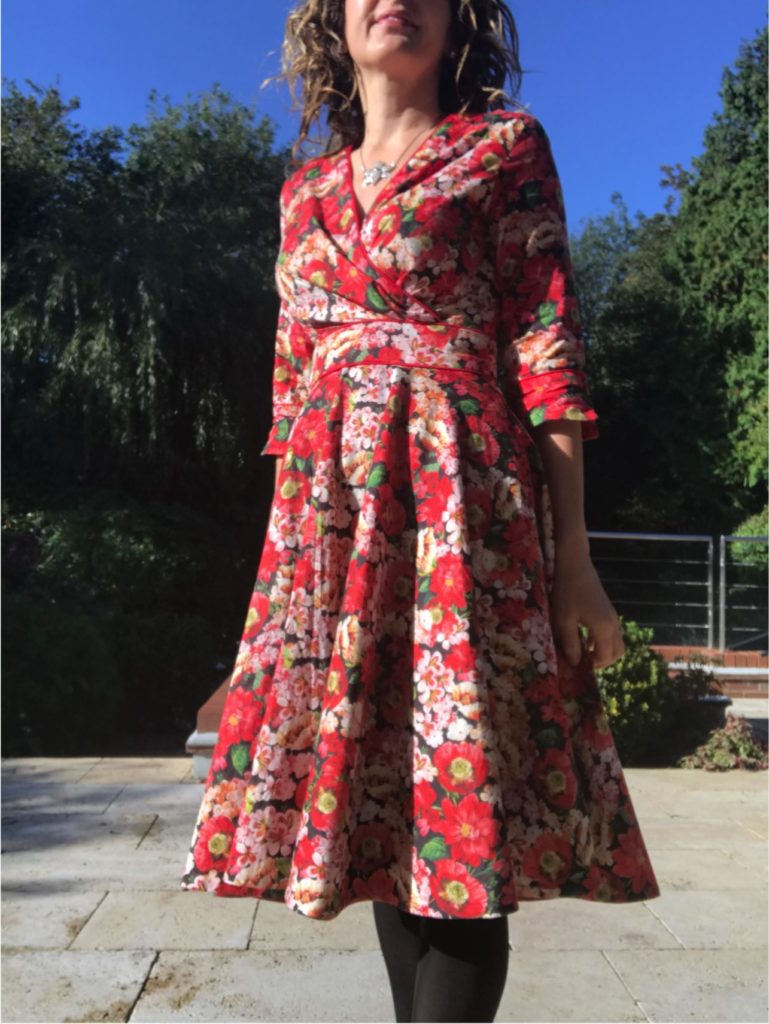
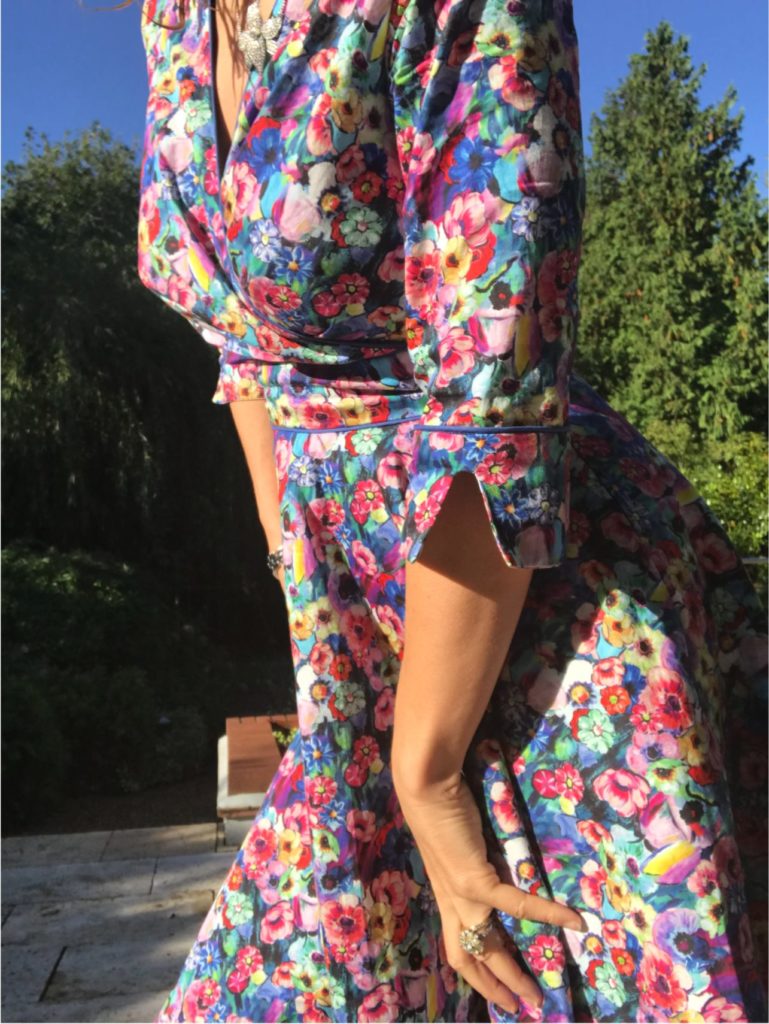
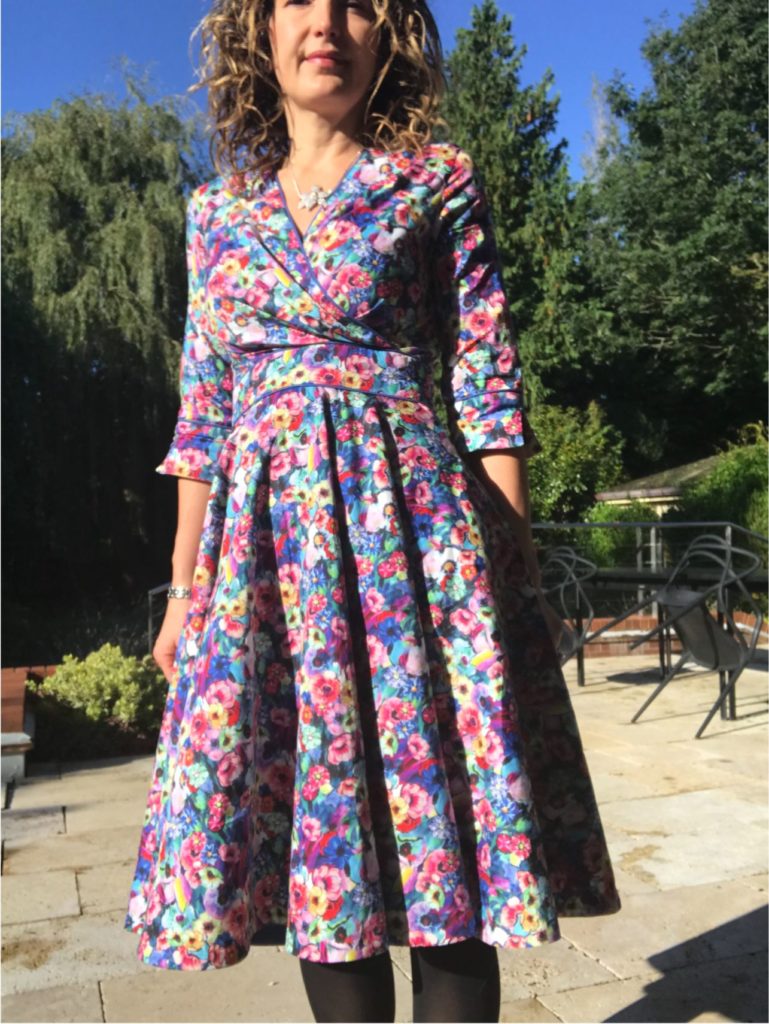
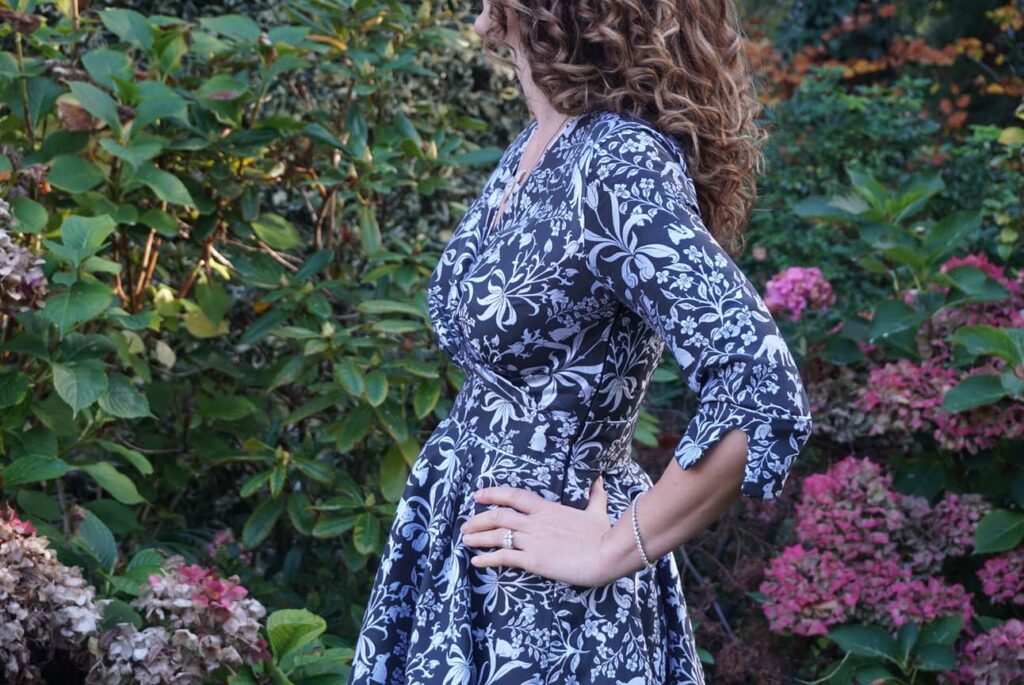
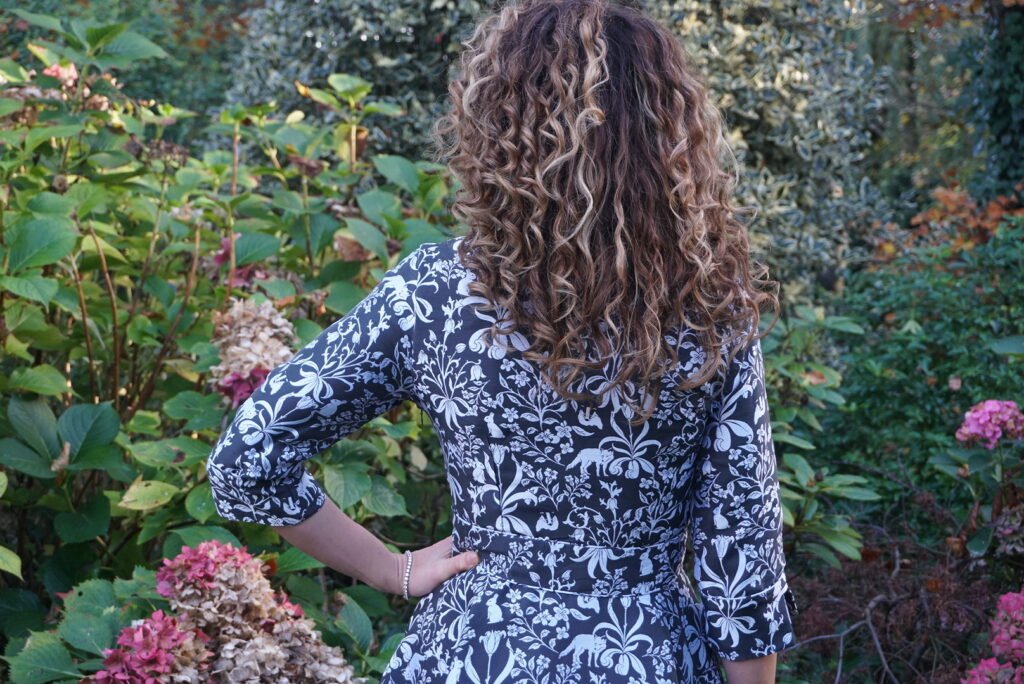
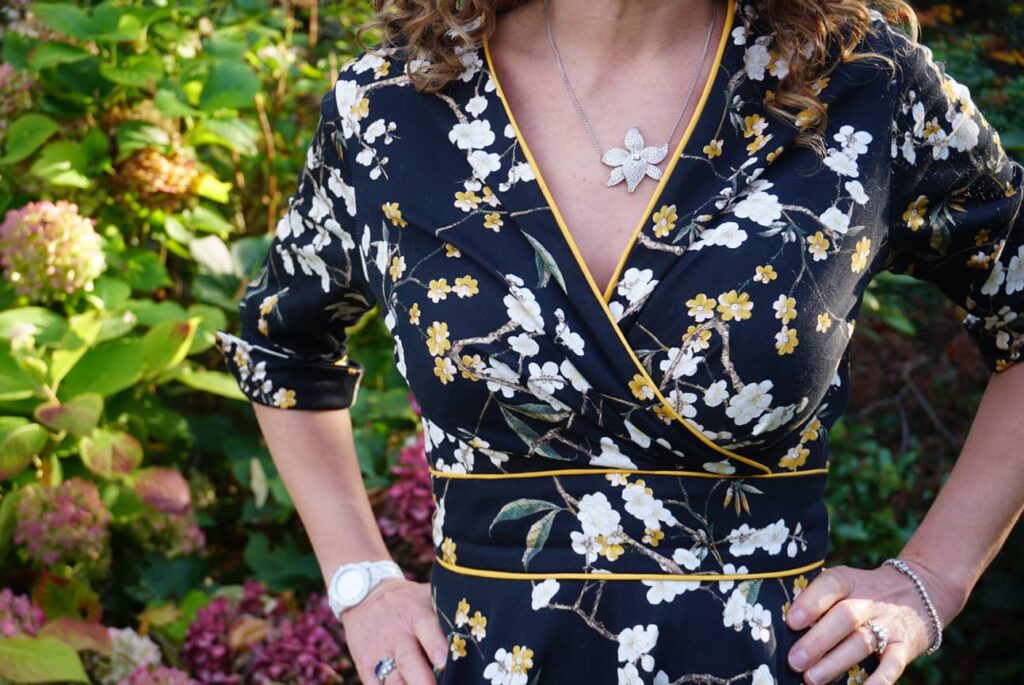
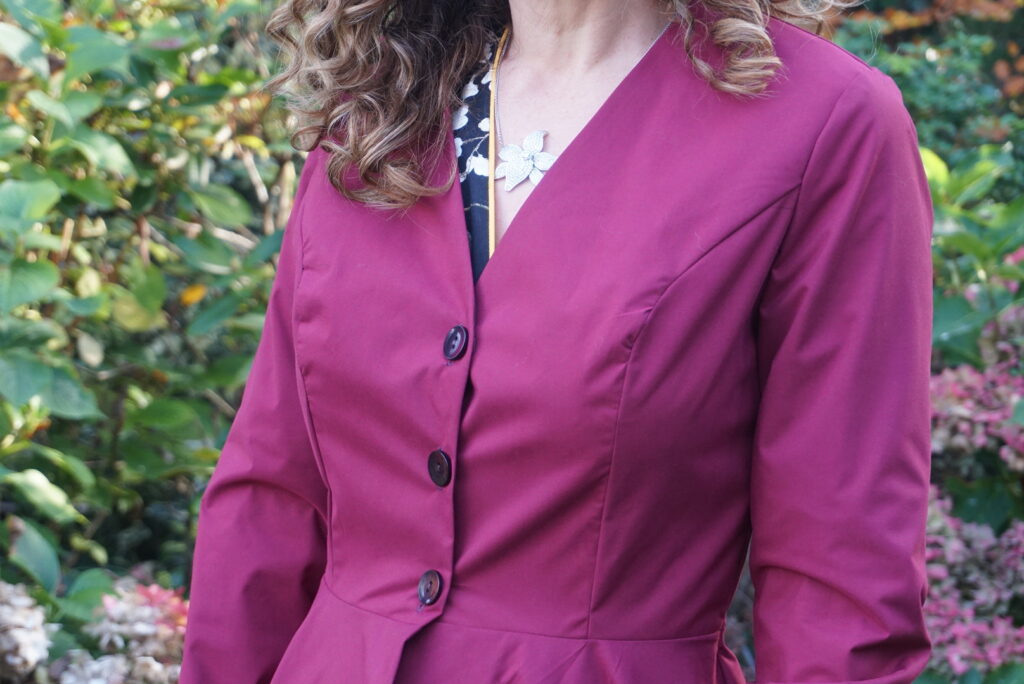
But going back to M7081. This is a wonderful pattern of a fit-and-flare dress with a faux-wrap bodice, and middle belt joining the bodice and the skirt, and a full circle skirt – absolutely everything I adore. Depending on the sleeve option you choose, it can be made into a winter or summer version (I admit, I also have two summer versions, here and here). The only flaw of this pattern in my view is the collar, which can be easily omitted.
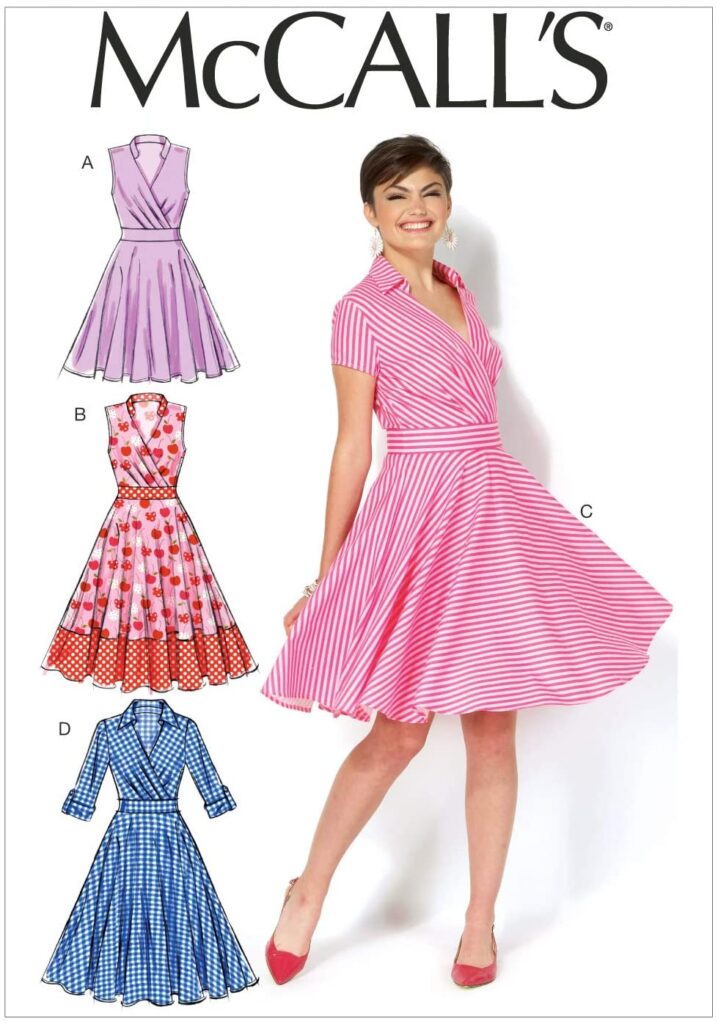
The fit is, as usual for me with McCall’s and Vogue patterns, absolutely spot-on – even though there is no cup options here. For my UK size 8 / FR 36/ US 2, I chose as usual a size 10 but (unusually) had to create a tiny bit of extra ease at the waist (about 1cm on each side). I find it very necessary with stiffer fabric; but not so much so when there is a bit of stretch.
The other changes I made for all my dresses were:
- omitting the collar and finishing the neckline with bias binding;
- adding contrasting piping at the neckline and the waist;
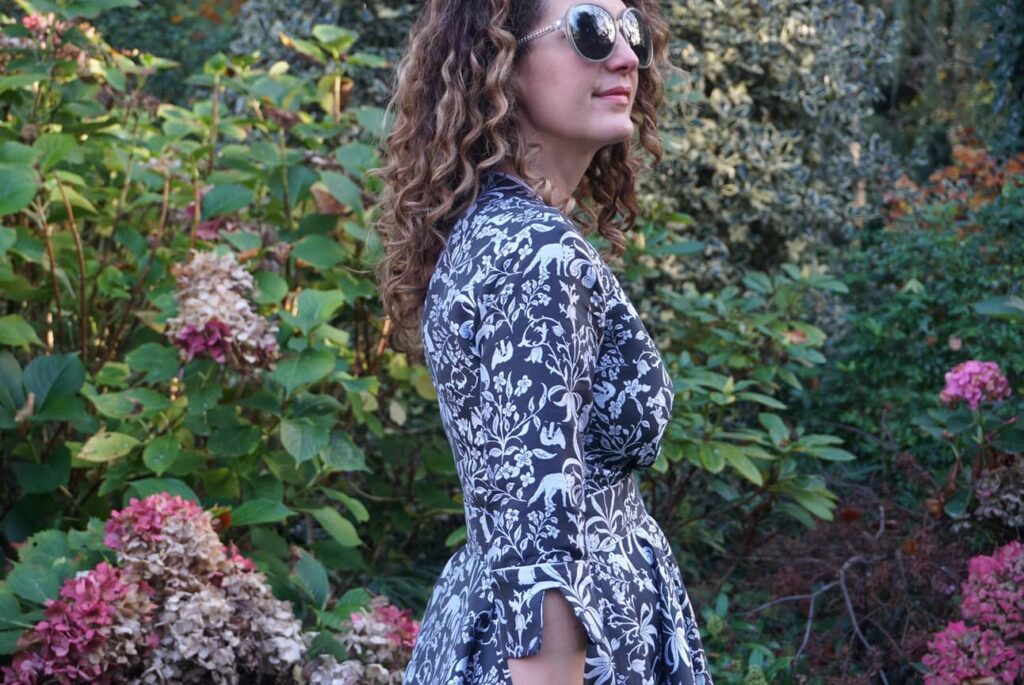
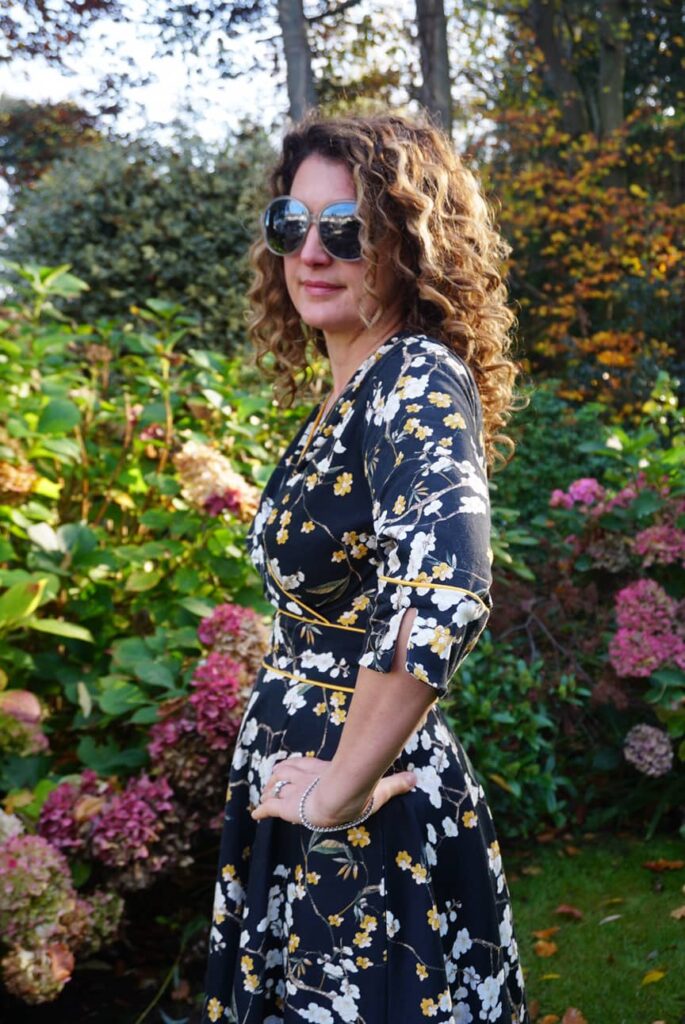
- using my pattern of the Cami dress by Pauline Alice for the sleeve cuffs – this is not hugely necessary but I adore these cuffs.
- lining the skirt – I am a lining addict…
My latest winter versions of M7081
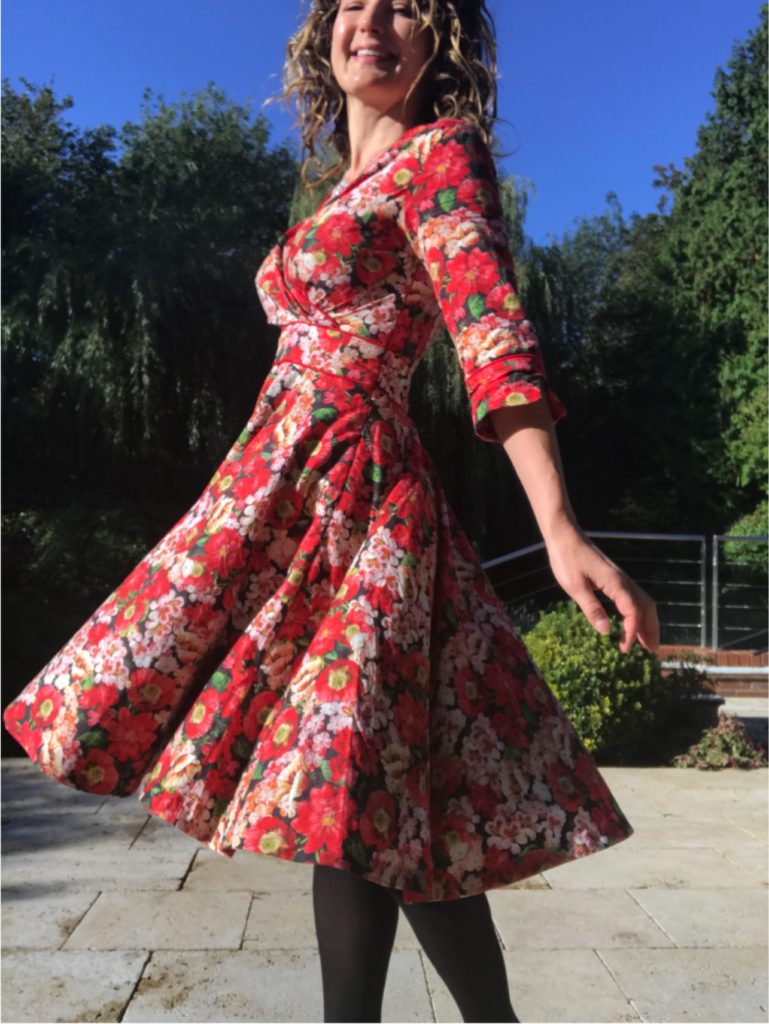
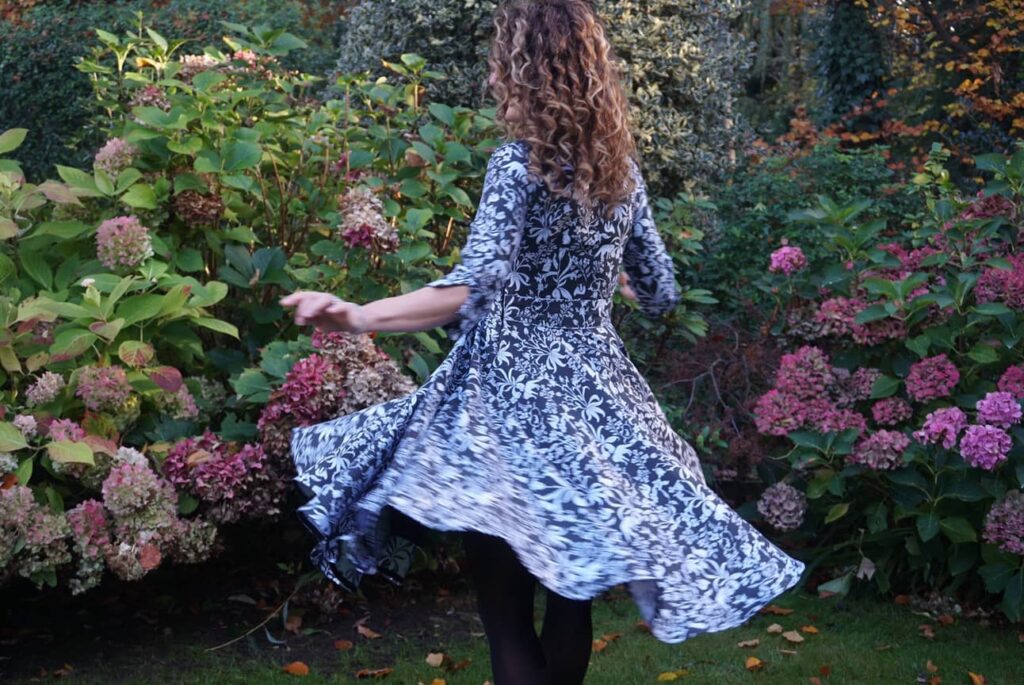
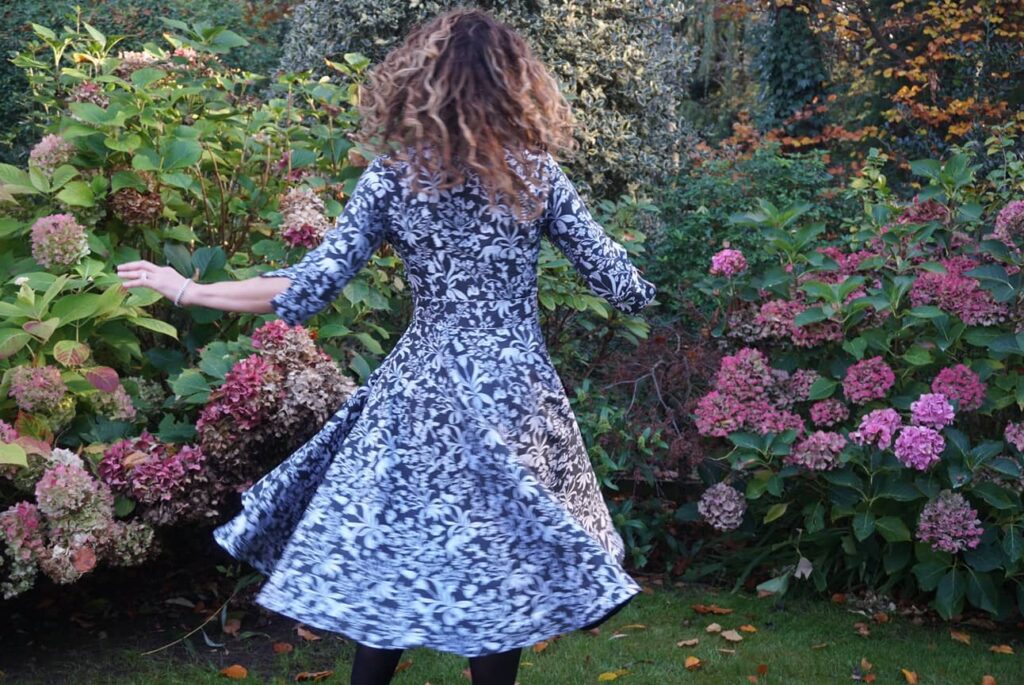
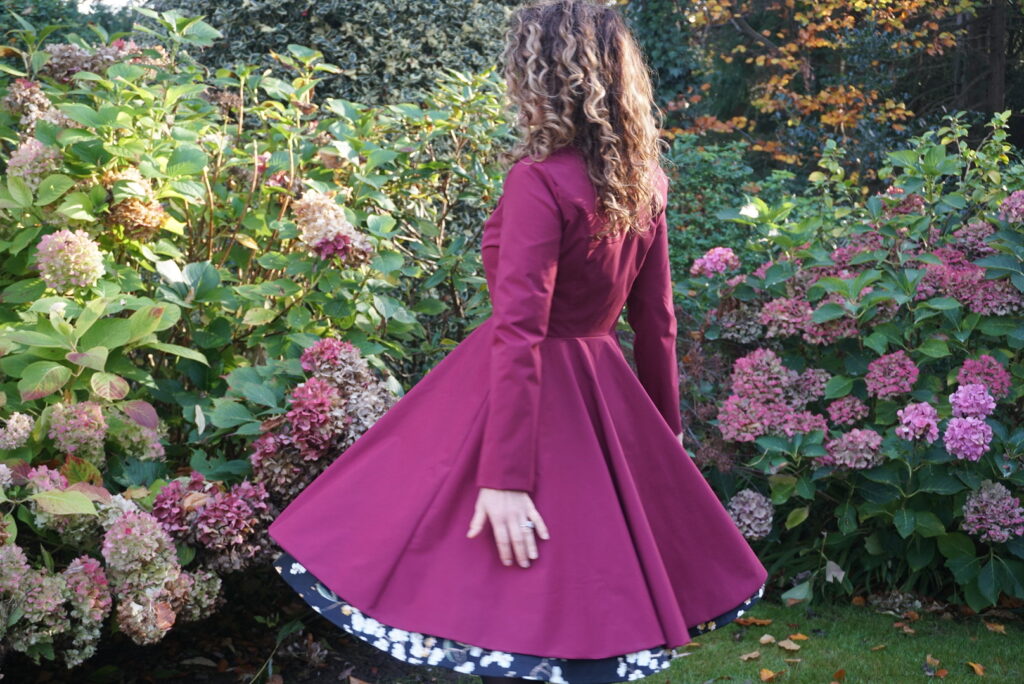
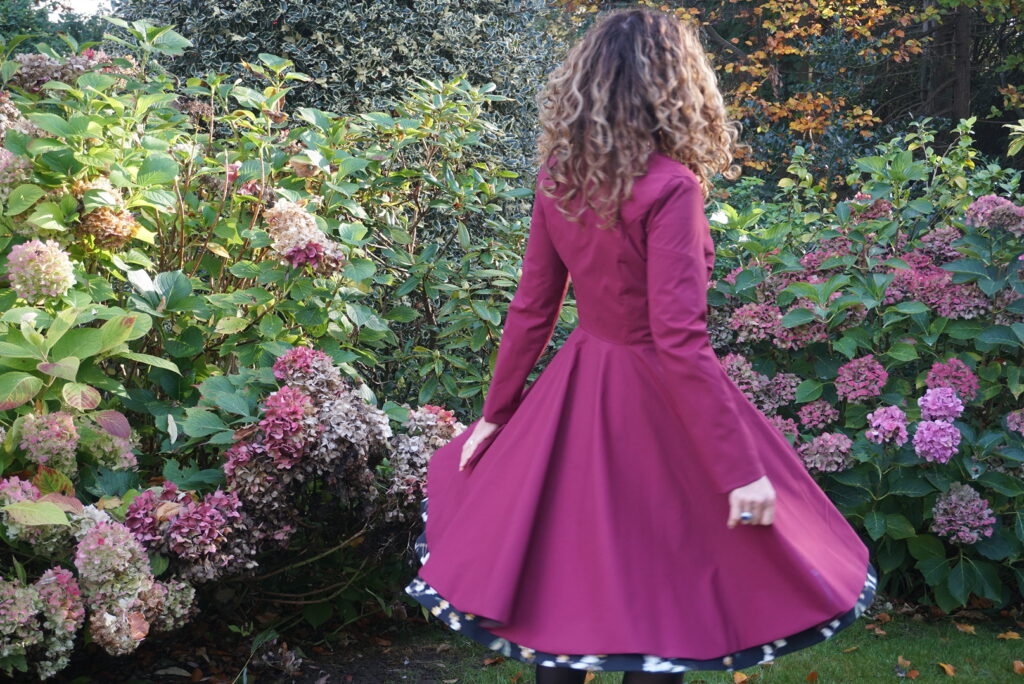
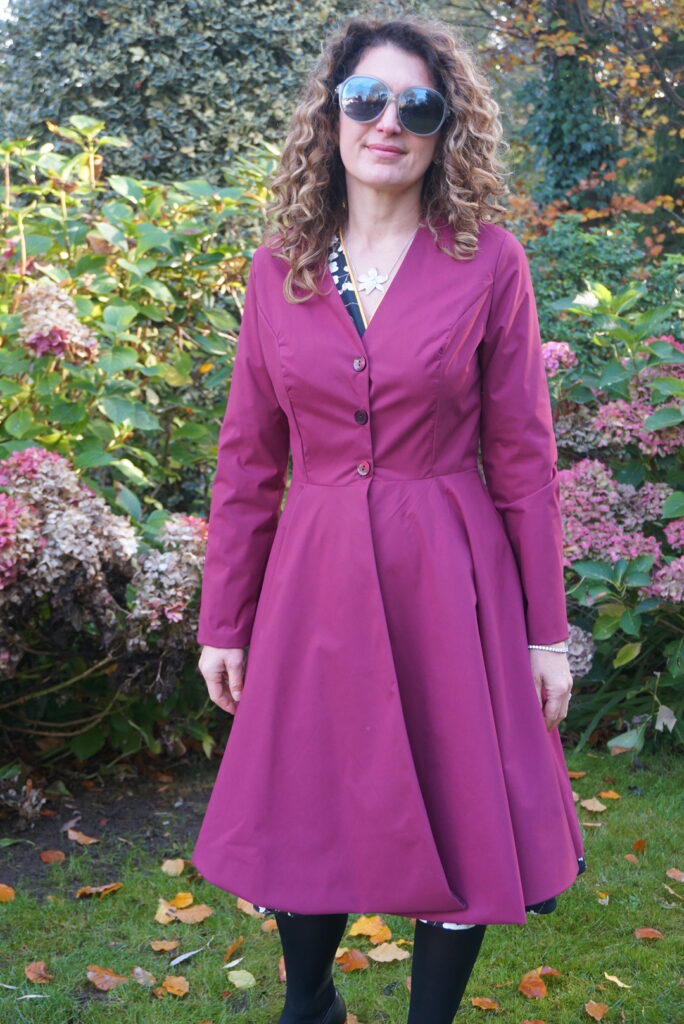
And here they are! My two latest winter versions of the pattern.
The first one is in a beautiful brocade I got ages ago from Bennytex.
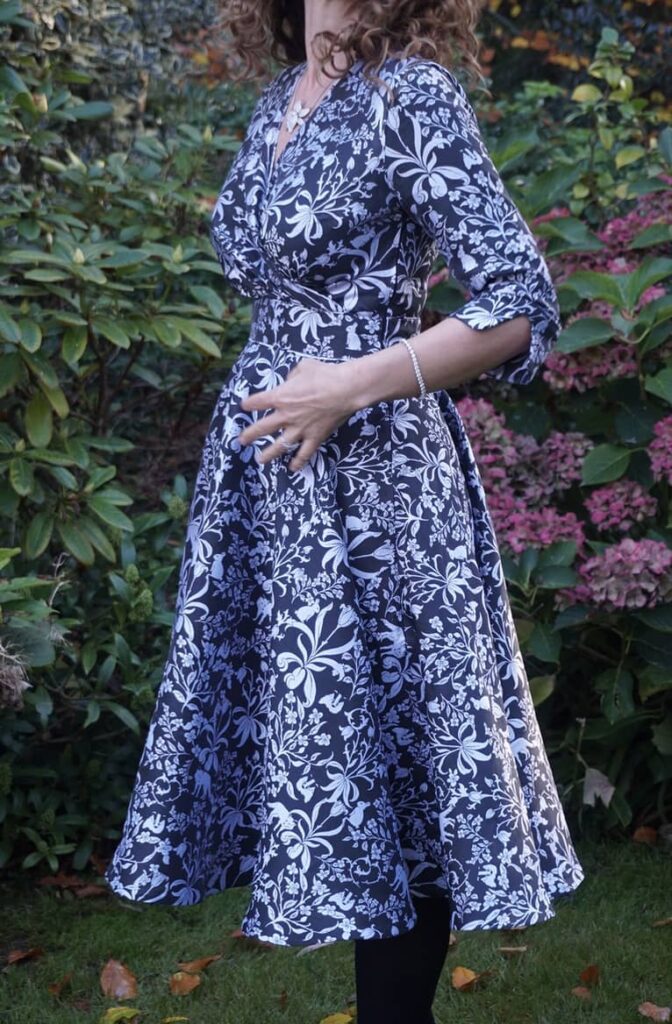
The fabric is lightweight enough for a dress but, being brocade, it has no stretch whatsoever so this is probably the tighter of my versions.

I used the other side of the brocade for my piping, not my best ideas as it makes it nearly invisible… Never mind!

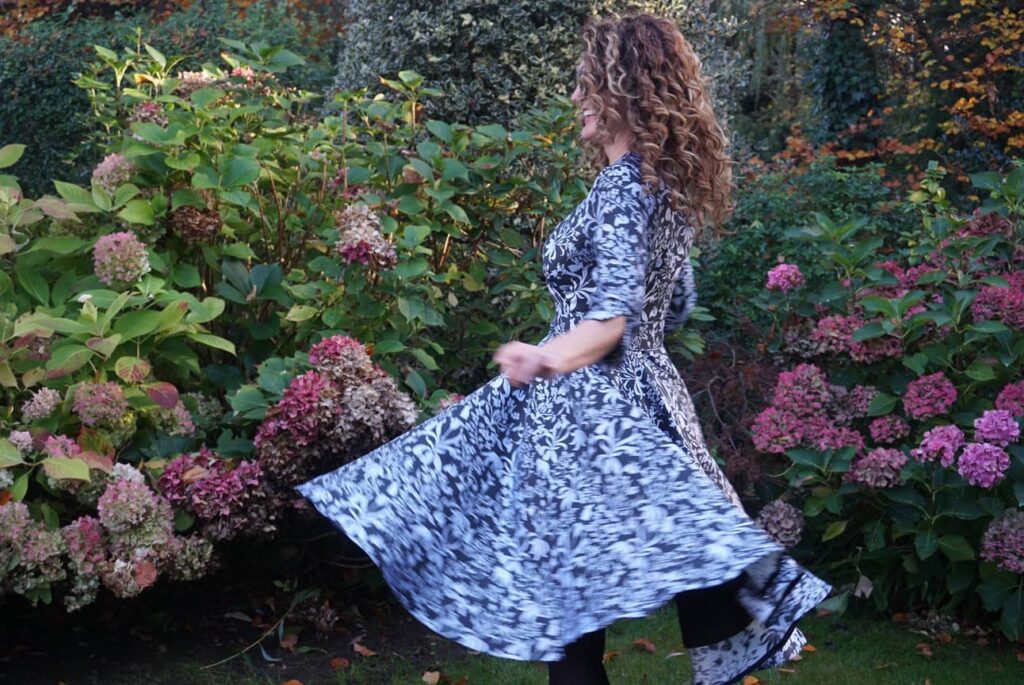
And obviously this dress has a big circle skirt, which I LOVE!
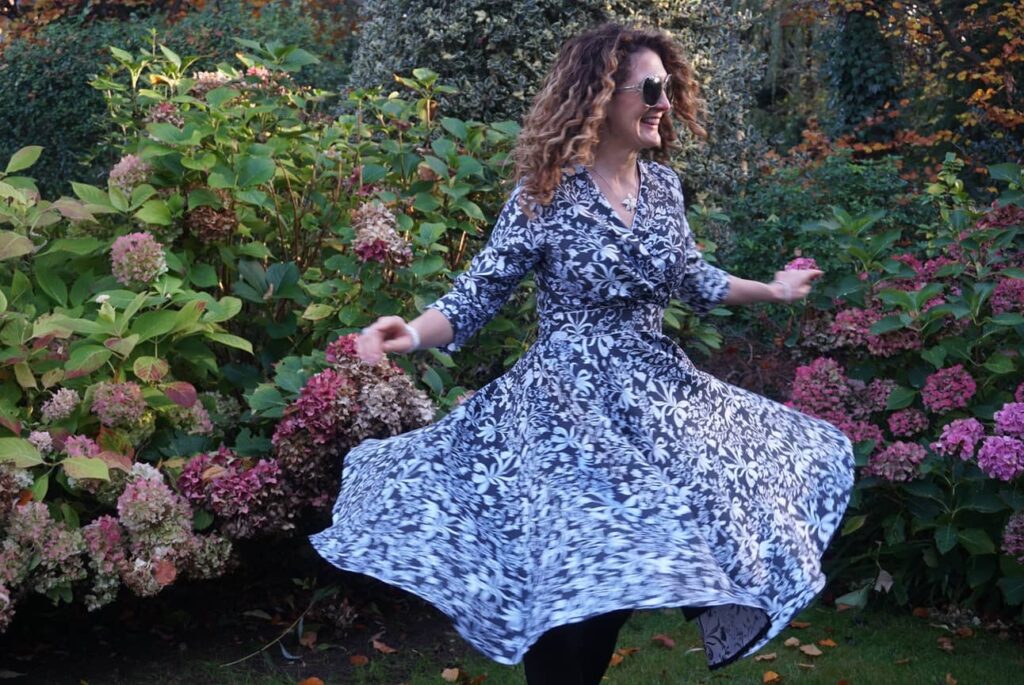
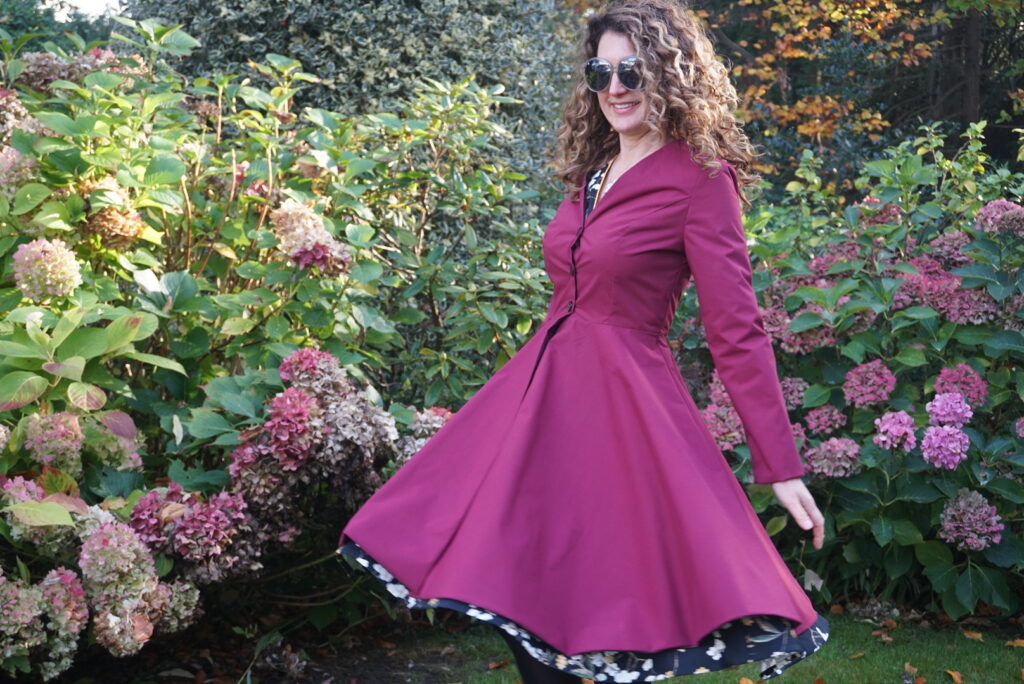
My second version is also in a fabric from Bennytex, this time a floral cotton satin with a reasonable amount of stretch. Using this fabric was on my Autumn to-sew list and although I changed pattern, I am very pleased with my stash-reduction accomplishment!

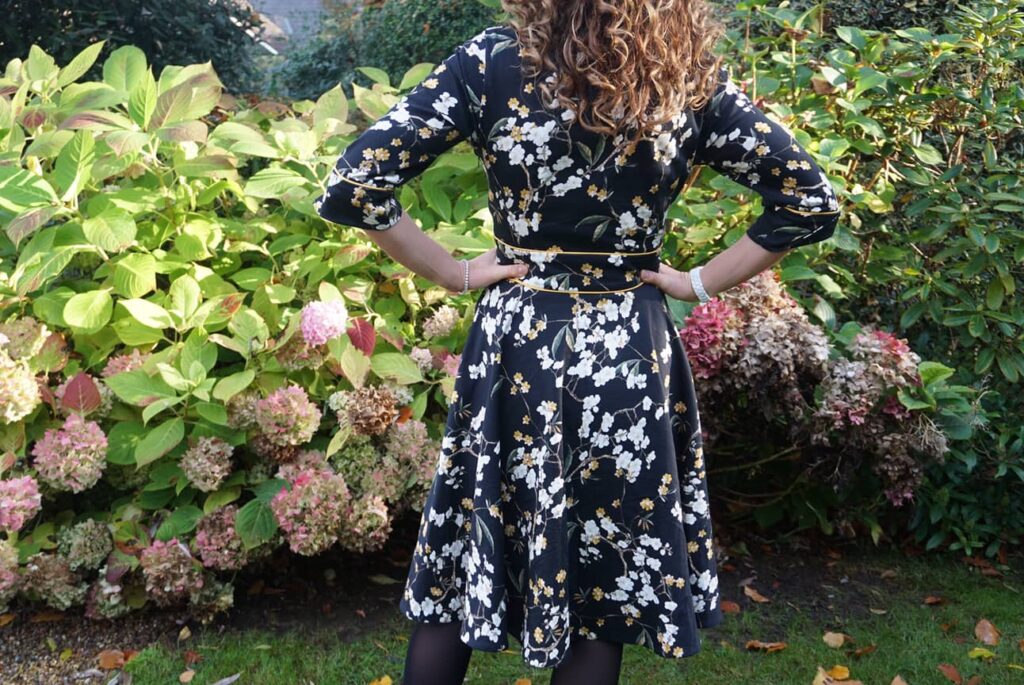
The piping definitely worked better here!

And here we are with these dresses! I love this pattern so much that I need to refrain myself from sewing more if these dresses… Next I need to show you the two cardis I knitted to match – watch out!
Suspended Leaves: an easy lace shawl for Fall
Since my knitting revelation earlier this year, I have realised that I adore knitting lace – my two Belladonna cardigans (here and here) are probably my proudest makes up to date; although my Blossom shawl (actually my first lace knit of such scale ever) felt also quite an achievement at the time!
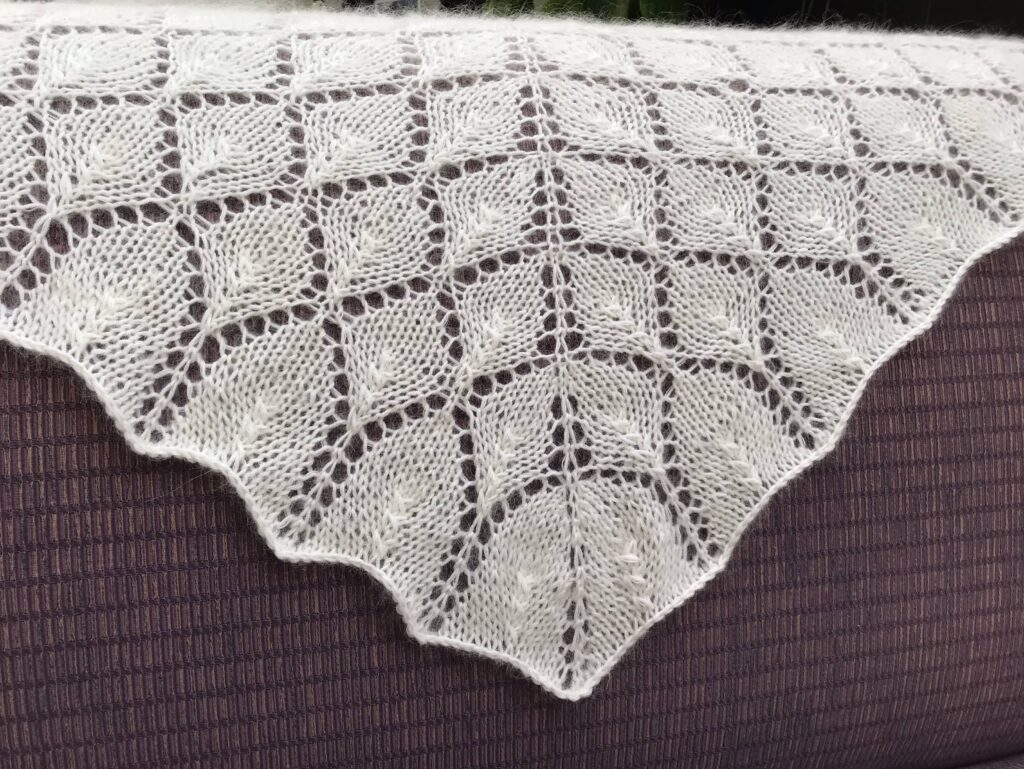
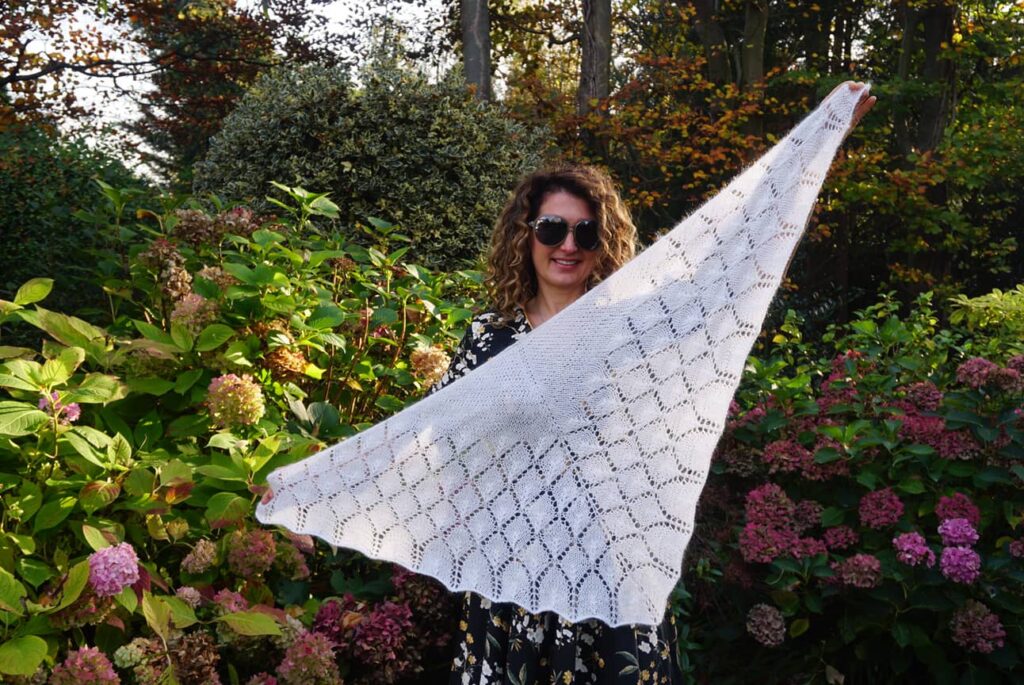
And in the lace family, my favourite patterns are leaves – particularly appropriate for the season you will tell me. I haven’t knitted them much are they are not that common. So when I stumbled across the Suspended Leaves shawl on Ravelry, it was really love at first sight.
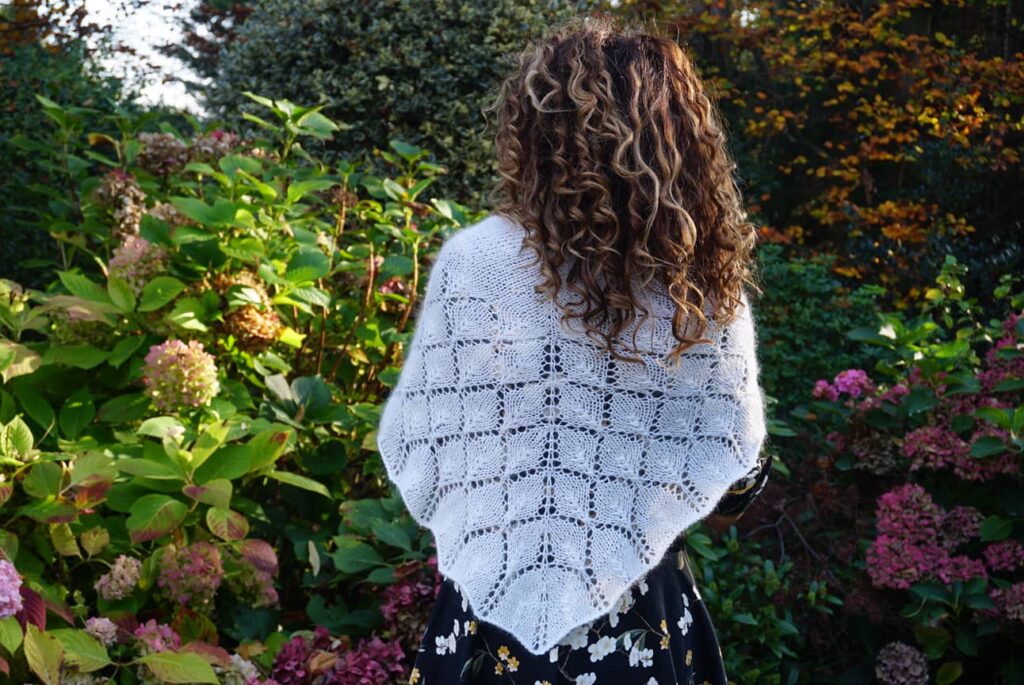
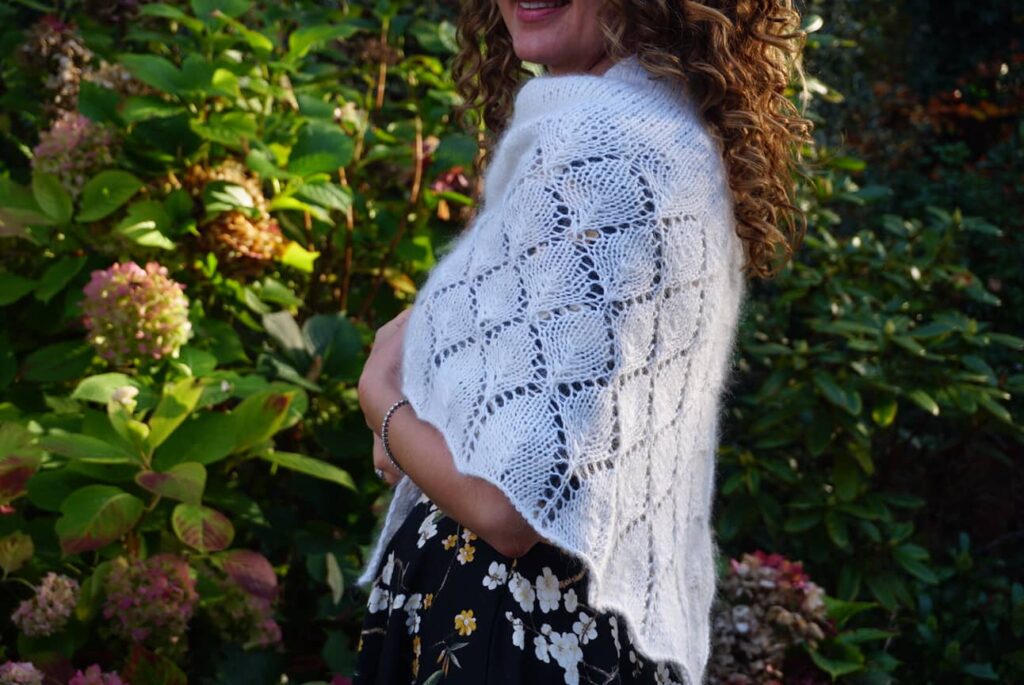

I knitted in double yarn, with my usual favourite combination of Drops Kid Silk (1/ off white) and Drops Baby Merino (1/ white). I used size 4.5 needles by pure laziness, not a good idea, next time I will revert to size 4. I wish I had made it a bit longer so next time I will add one or two more leaves motifs.
As for the pattern, such a gem! It is free and actually very straightforward. Instead of a chart, the knitting instructions are written down – which I personally find easier when you are knitting flat (ie not in the round). If you are a lace beginner, on top of the usual k: knit and p: purl, you will need to know how to make the following four stitches:
- s: slip
- yo: yarn over
- sk2p: slip 1, knit 2 together, pass slipped stitch over
- m1L: make 1 left; and m1R: make 1 right
This website is my favourite for understanding knitting abbreviations (I think it also exists as an app). Before starting a lace project, I always make sure I have watched videos on how to knit all the stitches – and I strongly recommend you do the same!


Apart from that not much to say. I enjoyed knitting this shawl a long and I enjoy wearing it as much!
The Perfect Coat Quest
This will not come to you as a surprise – I am an absolute fan of fit-and-flare dresses, in particular for the cooler months of the year. And obviously the flarer (is this really a word?) the better! Circle skirts are my absolute favourite if they work with the fabric I am using.
However, circle skirts create a major issue when combined with outwear: very few coats work for them! I am the lucky owner of an extensive collection of cropped jackets, which are a perfect match. But sometime you really want to wear a coat (particularly in the London winter) – that’s why I got quite excited when I discovered M8048! Even more so because it has bust cup options, hurrah!!!

M8048, also called #JessaMcCalls, is actually more a jacket than a coat pattern. If like me you hate anything asymmetrical, you will be put off but the enveloppe picture, but you really you shouldn’t. Imagine the potential of view B lengthened to knee-height– this is exactly what I did.
First things first, I initially made a toile to check the fit. Given that the presentation pictures where in mid-season rather than full winter fabric, I decided that both my toile and final project needed to be mid-season. So for my toile:
- I chose a non-stretch mid-weight gabardine fabric I’ve had unused in my stash for ages – like most of my royal blue fabrics actually, very strange!
- I cut my usual size 10/ C cup in McCall/ Vogue, which usually fit like a glove;
- I lengthened the view B skirt pattern piece to 63cm.
The bodice looked so promising than instead of leaving it at that ( only one sleeve, unlined, not buttons, no skirt) and starting the real project, I decided to actually finish it as a wearable coat. And what a good idea it was – with the skirt added, it is actually very obvious it is far too big!!! Especially at the waist and the underarm level! And contrasting piping is definitely not a good idea!
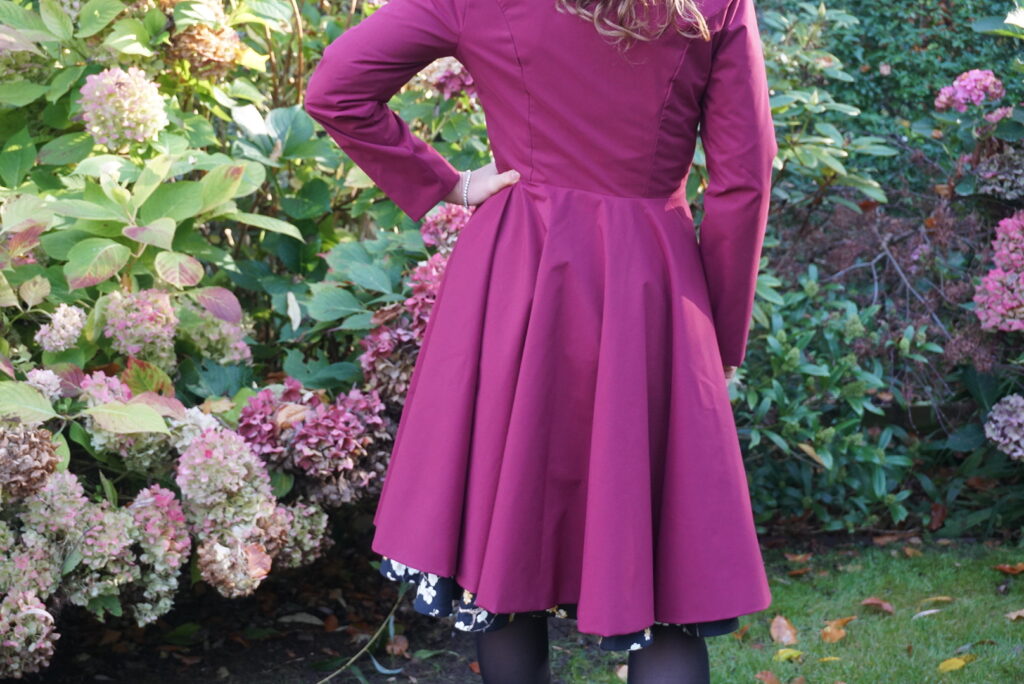
Not so obvious from the back and with a good swirl, but that’s a bit limiting for everyday wear isn’t it?

With that in mind, I decided to go ahead with size 8/ C cup for my final coat. I used a waterproof raincoat fabric I bought for a bargain from Croftmill, in a vibrant wine colour I absolutely adore for Autumn! The fit is now perfect at the waist and the underarms…
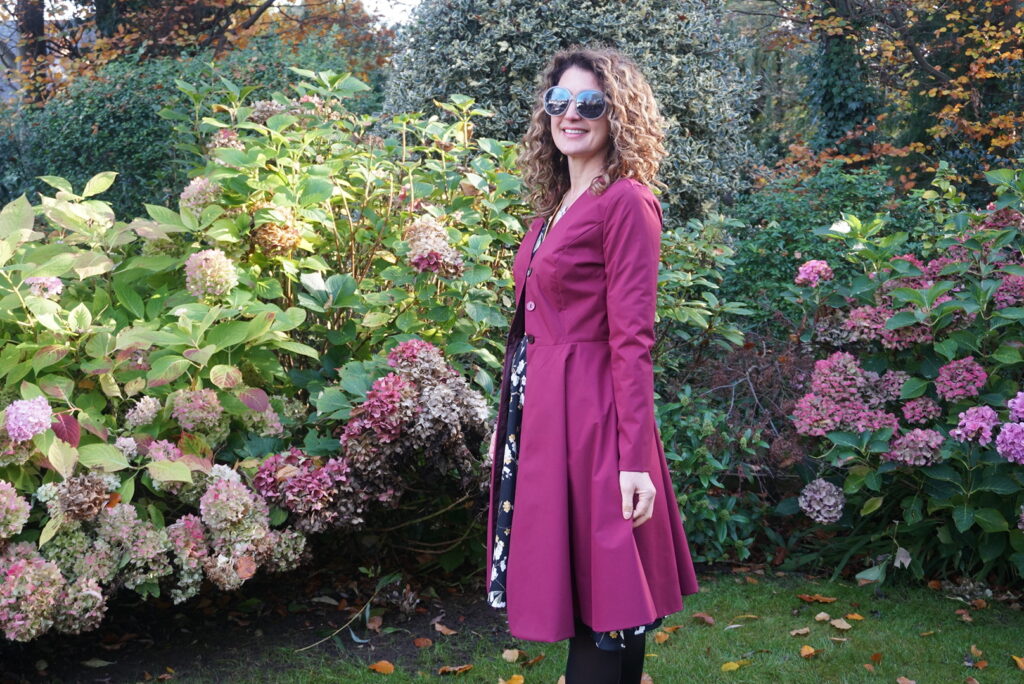
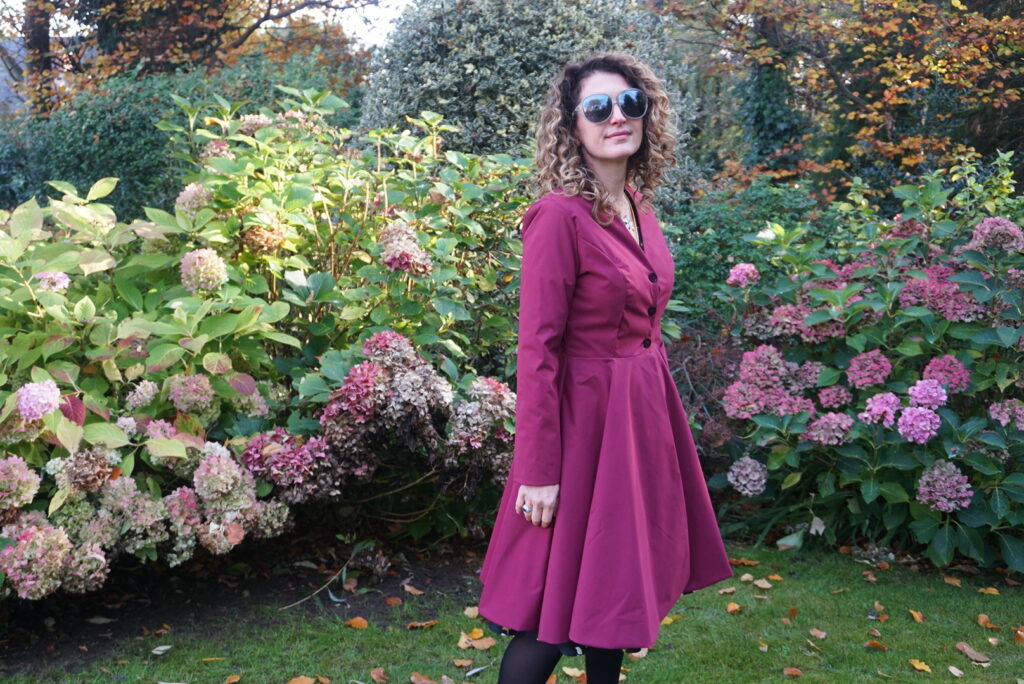
but… the coat is now too tight around the bust! Bouhouhou…
There also seem to be an inherent issue with the circle skirt, which without buttons does not fall properly at the front.
Another issue I have with this pattern is that there is not much sophistication in the way the lining is constructed . It is largely based on the same pattern as the coat, which shouldn’t be the case. The first coat I ever made was Ernest by Republique du Chiffon and the inside finish was proper coat technique!
Going back to my coat, what are my options now? Either try and make the coat again with a different size for the bodice: should I go for a mix of size 8 and size 10? Or just size 8 with a D bust? Or continue my search for a different pattern? I am unsure so your advice is very welcome. The good news is that I purchased my fabric in bulk so I have another 3m left!
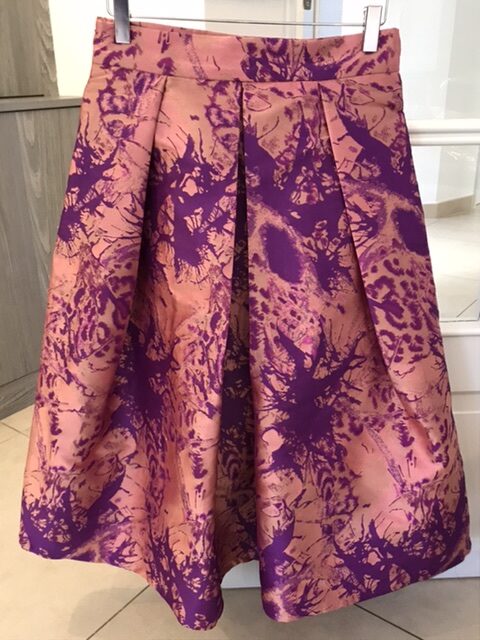
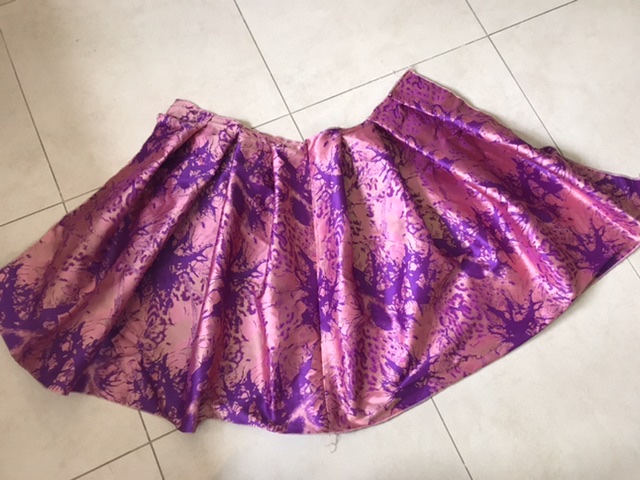
Step-by-step tutorial for a pleated midi skirt
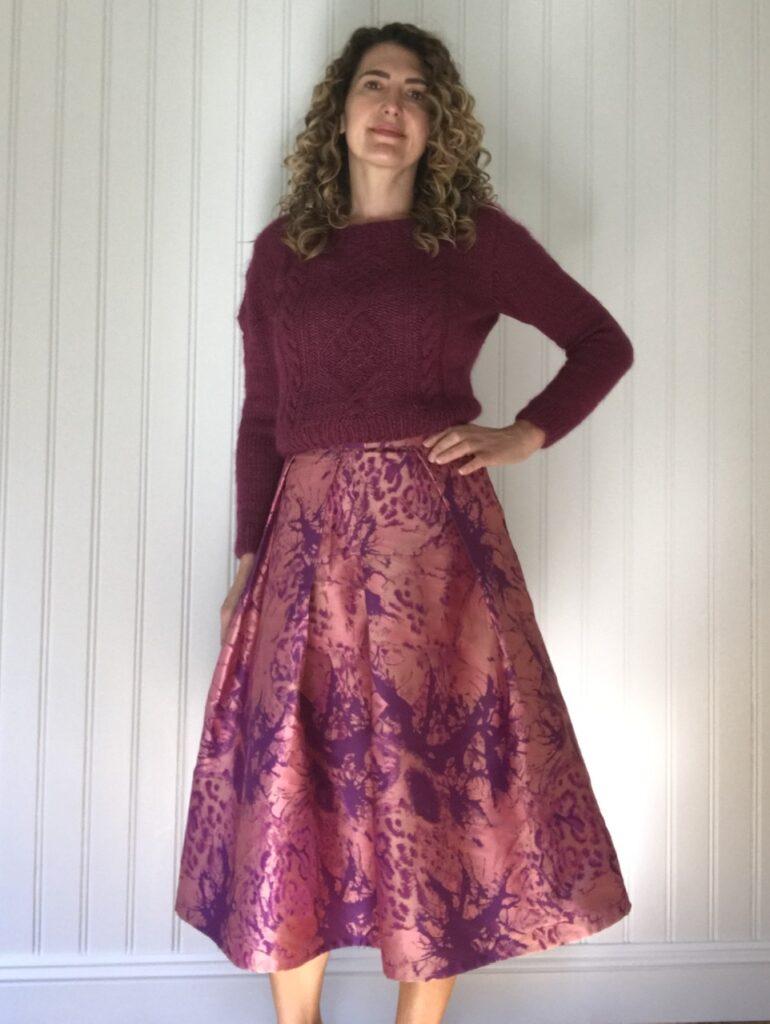
As you know from my skirt of choice for many of my dresses, I am an absolute fan of circle skirts. But every once in a while I feel the need for a voluminous pleated skirt – this was one of those moments.
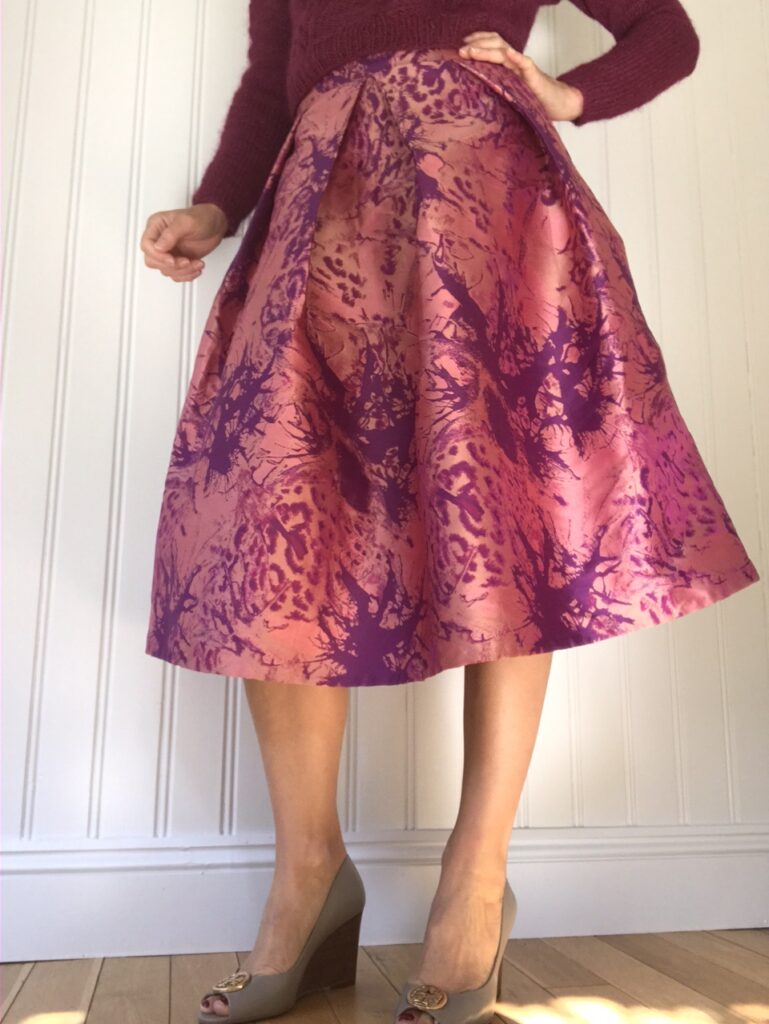
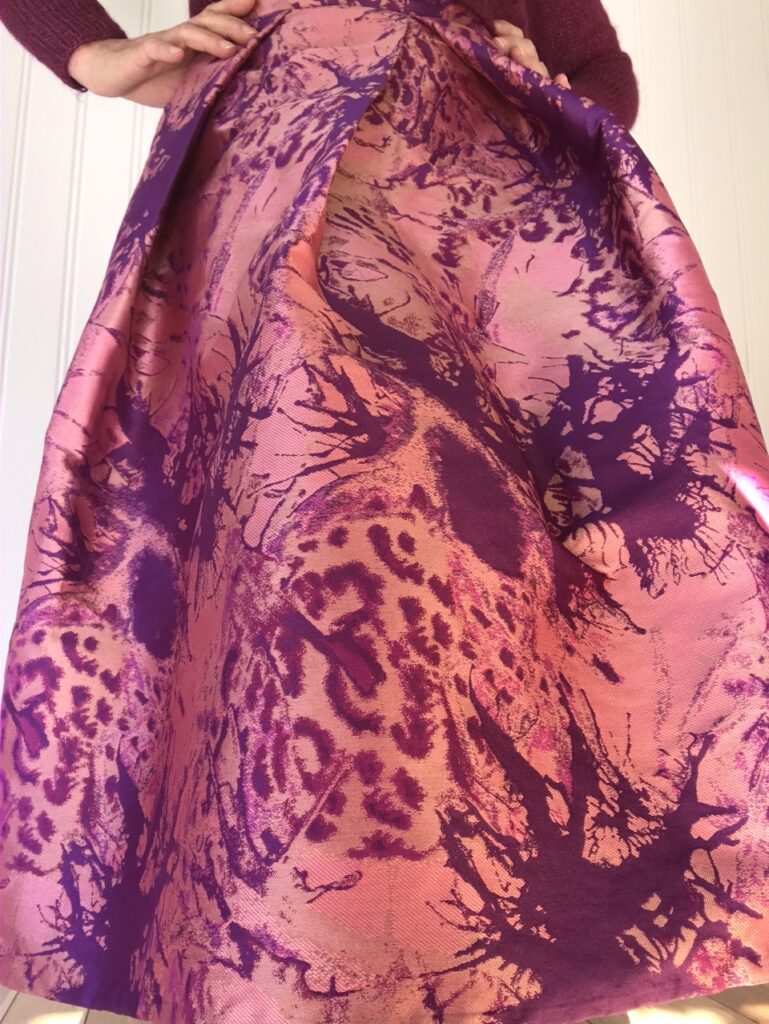
Pleated skirts are particularly appropriate versus circle skirts when you have a border print you don’t want to lose in the circle; when you have a strong directional pattern; or when your fabric is quite rigid and you are worried of a balloon effect – this was what worried me here. As much as I love this gorgeously brocade fabric bought from AmoThread for a bargain price, which I chose specifically to match my hand knitted Chuck jumper, it is definitely more on the rigid side.
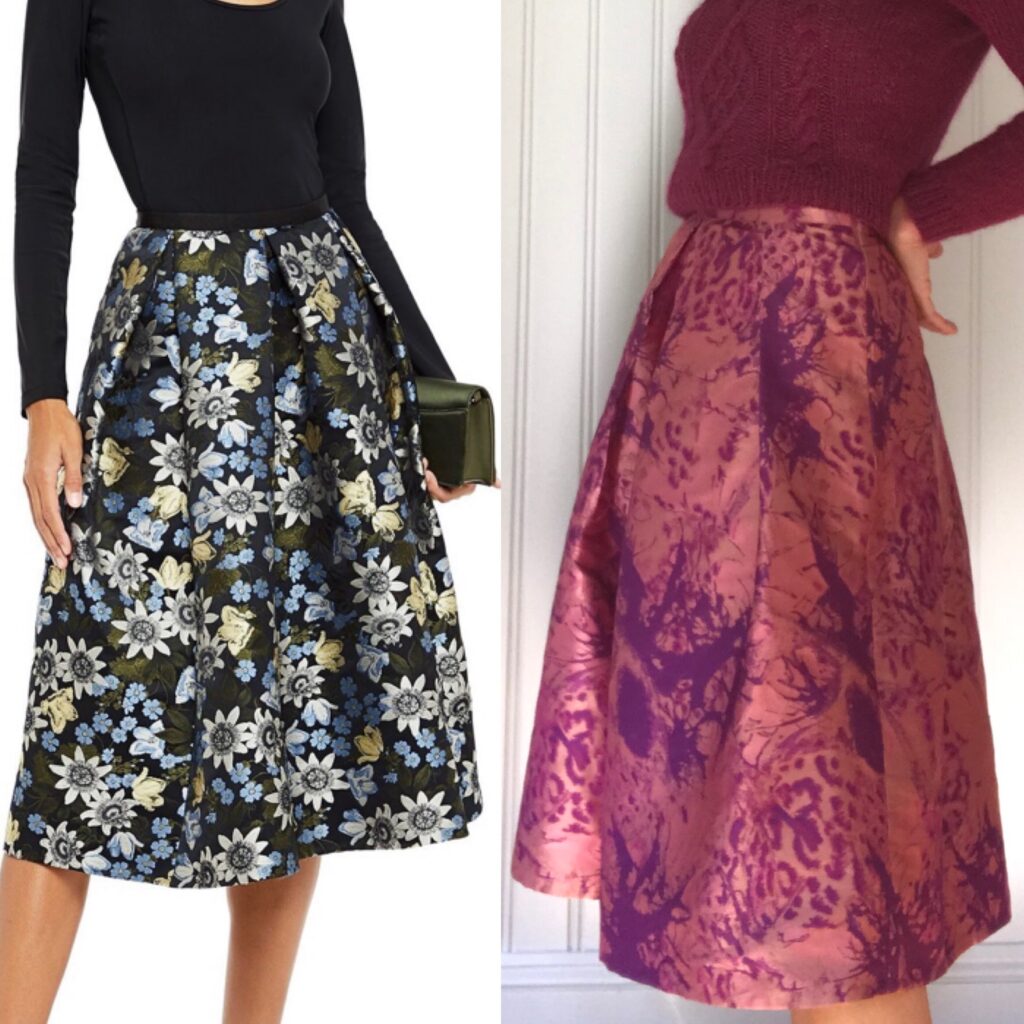
A few weeks after making my skirt (and incidentally taking pictures of all the steps), I stumbled upon an Erdem skirt which was its exact twin as far as shape is concerned (not for price though, my fabric cost was £20 while the Erdem skirt is £400!). So I thought that if even Erdem is into pleated skirts, a tutorial was definitely greatly needed!
MEASUREMENTS
Before you start:
- Measure your waist at its narrowest point – while breathing! And decide on the skirt lenght you want from that point.
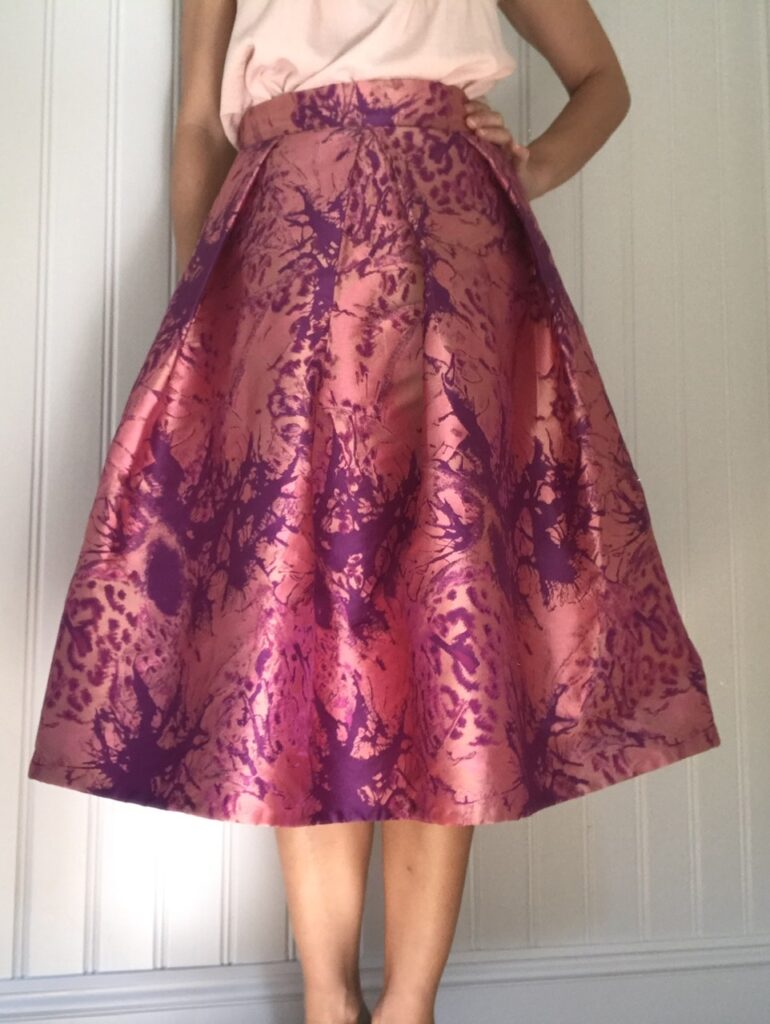
- Decide on your lenght. My skirt is 70cm long – perfect midi for my 168cm height.
SUPPLIES
- 2m of fabric (150cm wide) – washed and ironed
- 68 cm of lining (150cm wide) if you wish to line the skirt – washed and ironed
- A 10cm x1m band of fusible interfacing
- a c20cm invisible zip
CUT YOUR FABRIC
- For the skirt: 2 rectangles of fabric of 73.5cm long (chosen lenght + 3.5cm) x 150cm wide
- For the belt: 1 rectangle of fabric 10cm long x (measured waist + 4 cm ease + 3cm margin) ; and a similar rectangle of fusible interfacing.
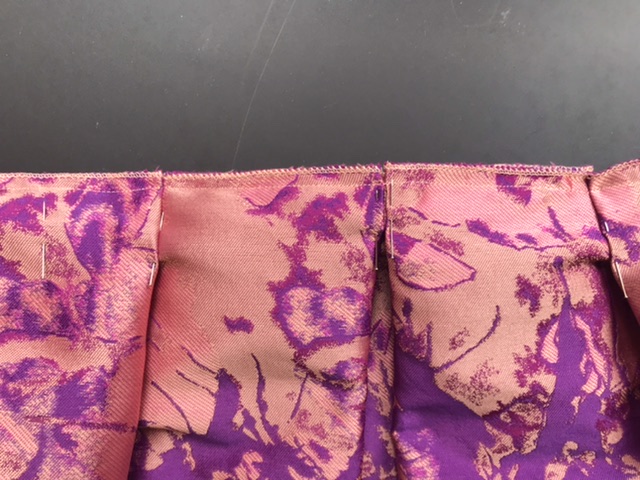
CREATE THE SKIRT PLEATS
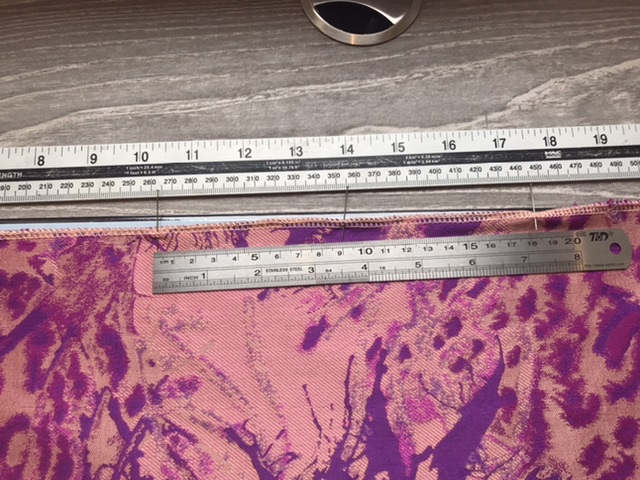
First define your pleats width. My skirt has 8 pleats: 4 at the back, 4 at the front. To define their width you therefore need to do the following calculation: pleat width = (waist measurement + ease) / 8. My waist is 68cm and I added 2cm of ease of each side or 2cm in total (in retrospect 1cm on each side would have been enough), so my calculation was : pleat width = (68+4)/8= 9cm. Each of my pleats is therefore 9cm wide.
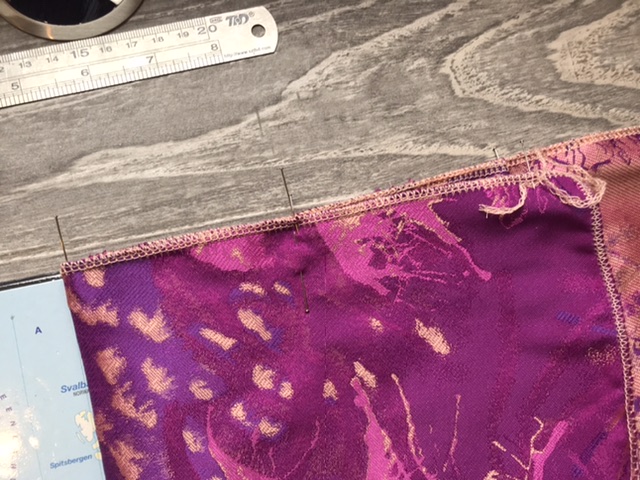
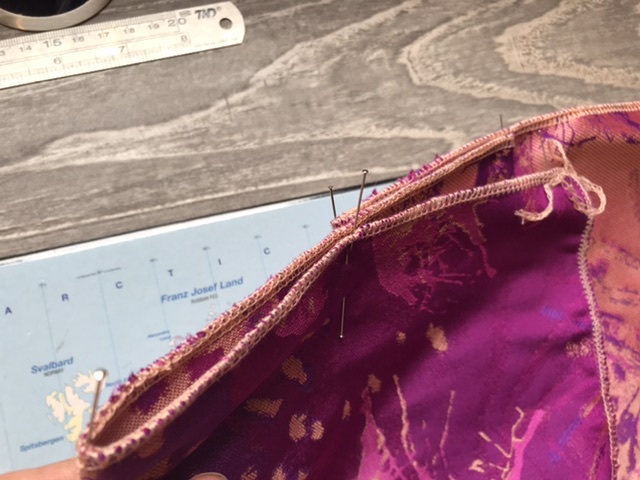
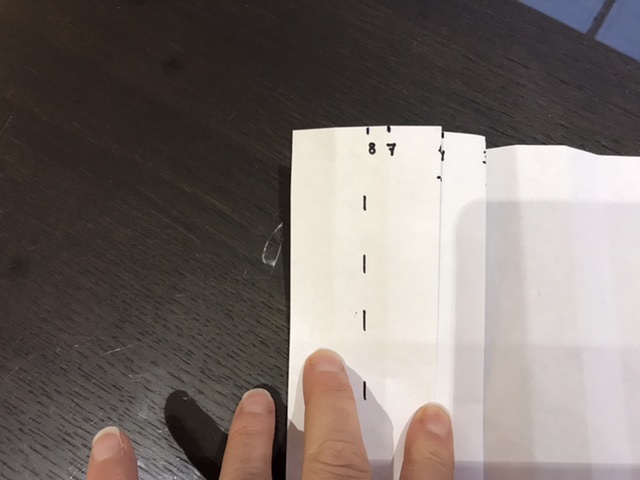
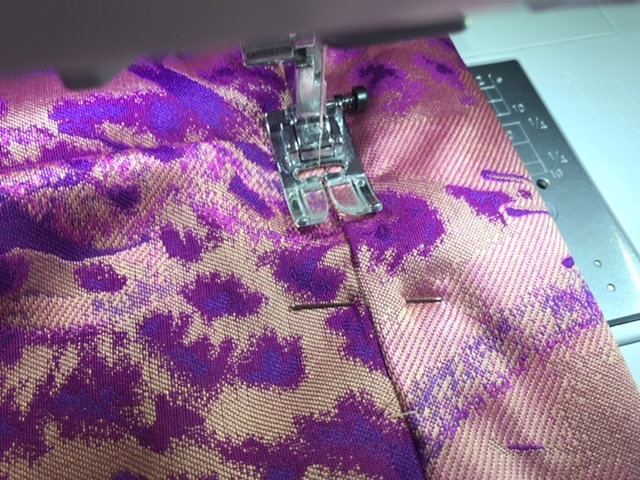
Working with one of the large rectangles, define the top of the skirt and then mark the middle of the waist folding the fabric in two. From the middle and moving to the left, place 7 needles each 9cm appart, then an 8th needle 1.5cm appart from the previous one.

Using your needles for positioning, make overlapping pleats directed towards the skirt center. Starting from your center needle on the right, fold the fabric right side to right side, overlapping needle number 1 (the centre needle) with needle number 3, while needle number 2 marks the pleat on the left.
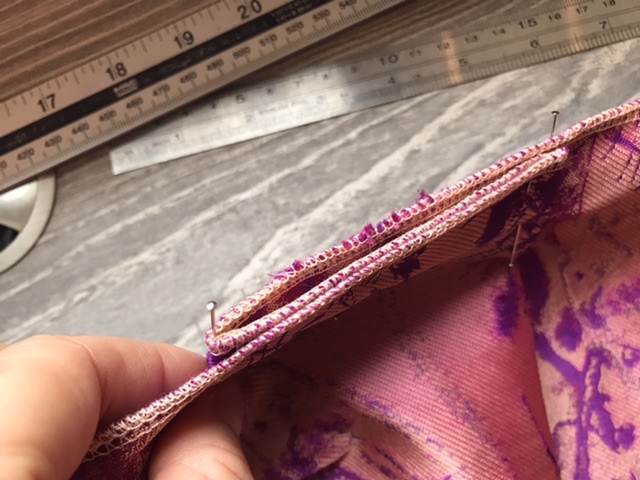
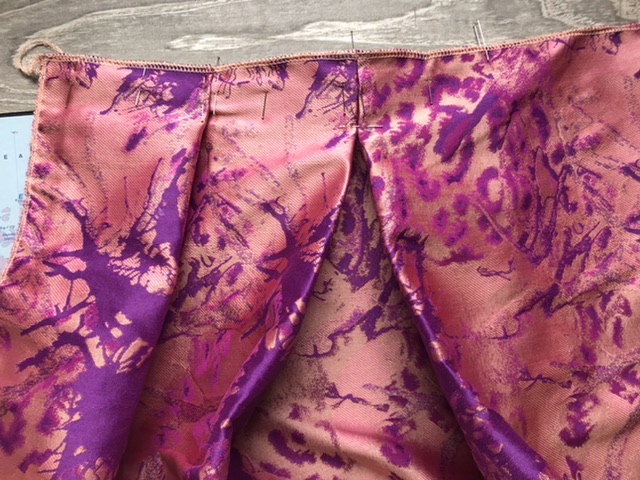
Then open the first pleat, and add loads of extra needles to keep the pleat in place.
The first pleat will look like this from the top, with three layers of fabric:
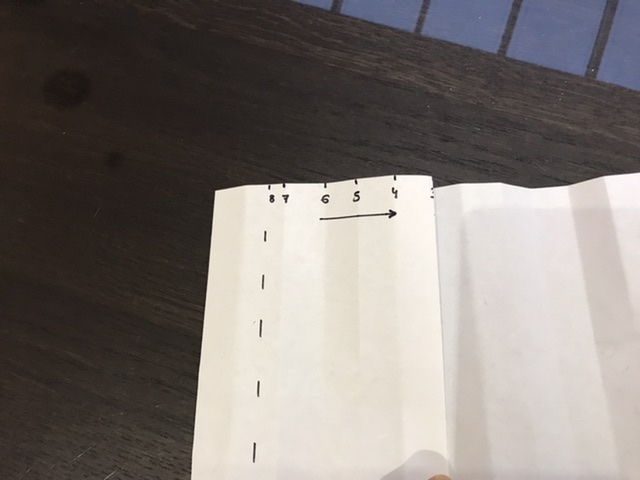
Proceed in a similar way for the second pleat: needle number 6 will overlap needle number 4 and needle number 5 will mark the pleat.
Needle number 7 marks the left end of the 2nd pleat, and needle number 8, located 1.5cm appart, marks the end of your needed fabric – you can cut the excess fabric on the left and overlock the side. (I only cut here in case I get my initial pleat calculations wrong!).
Here is a rough schematic of how it works:
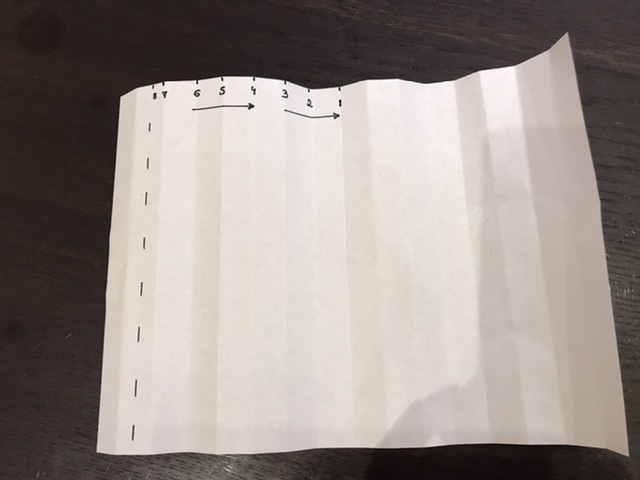
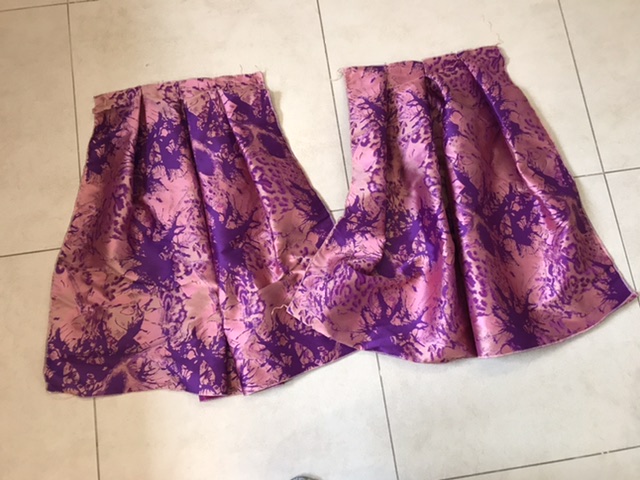
Proceed similarly for the right side of this skirt panel.

And then do the same to the other skirt panel.
JOIN FRONT AND BACK SKIRT ON ONE SIDE
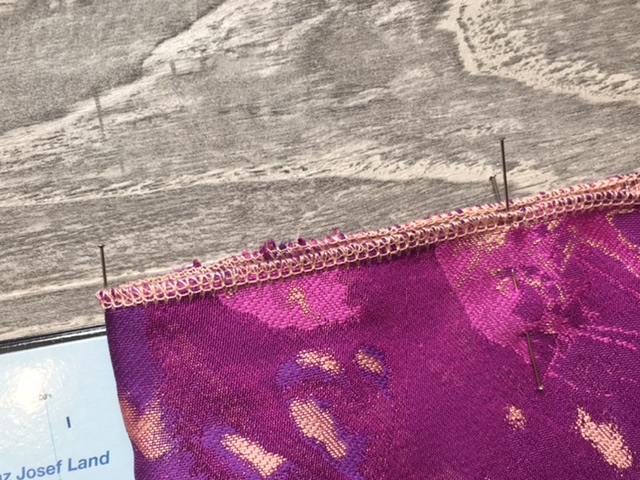
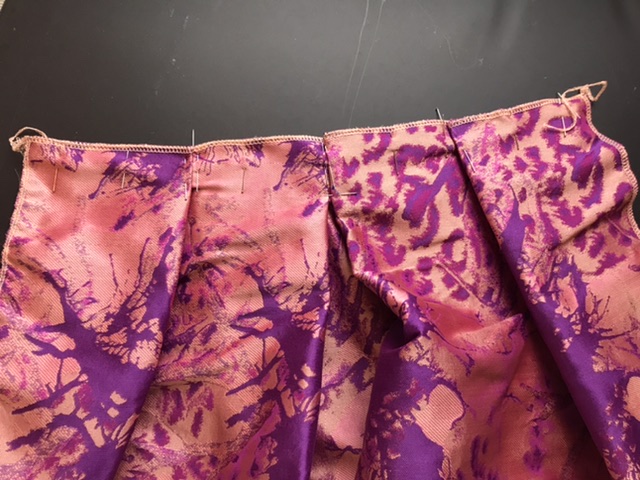
Make sure all side hedges are overlocked at this stage (if you don’t have an overlocker, a zigzag stitch is perfect). Sew 1.5cm for the hedge on only one side of the skirt (the zip will be positioned on the other side),
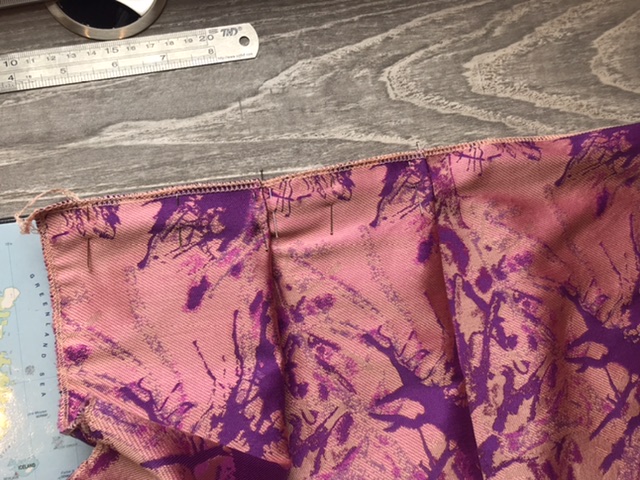
Also overlock the top of the skirt, to keep the pleats in place – but keep pins in place too.
ADD THE LINING
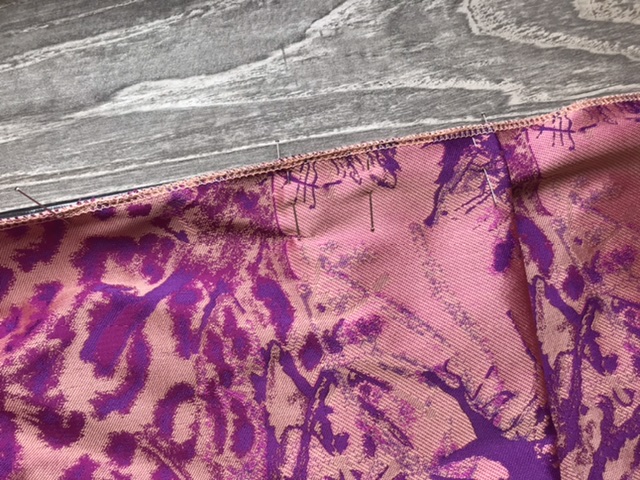
Here you can be totally lazy and not line the skirt at all (but read my article about sewing metallic brocade first if this is your fabric of choice, because you need to know that metallic brocade is very itchy!!!). You can be a complete perfectionist and reproduce the pleating to the lining. Or you can chose a quicker route and just gather a rectangle of fabric, 150cm wide and slightly shorter than you skirt. Once the rectangle is gathered attach it to inside of the skirt.
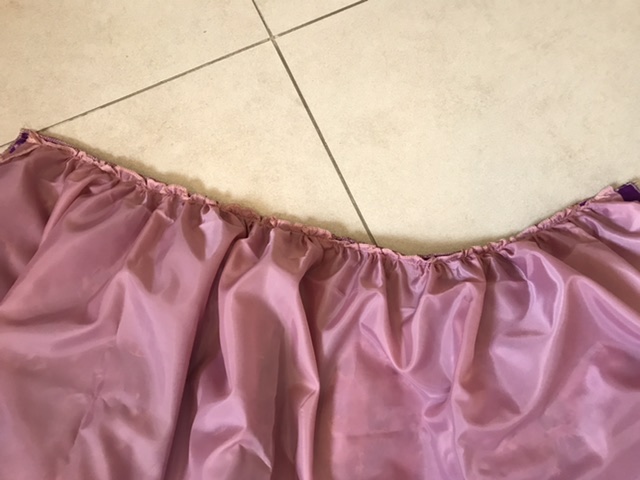
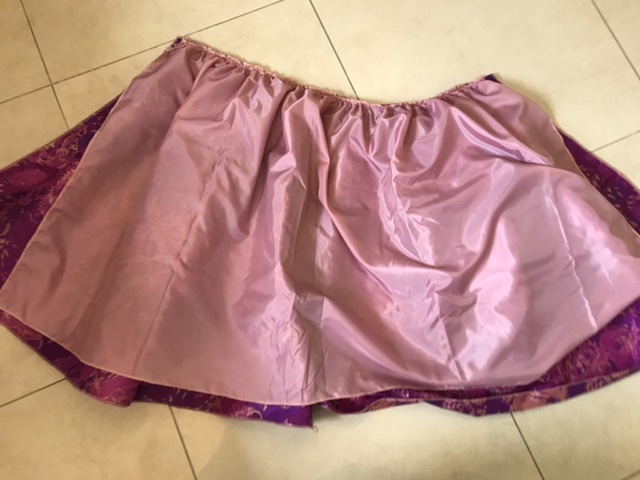
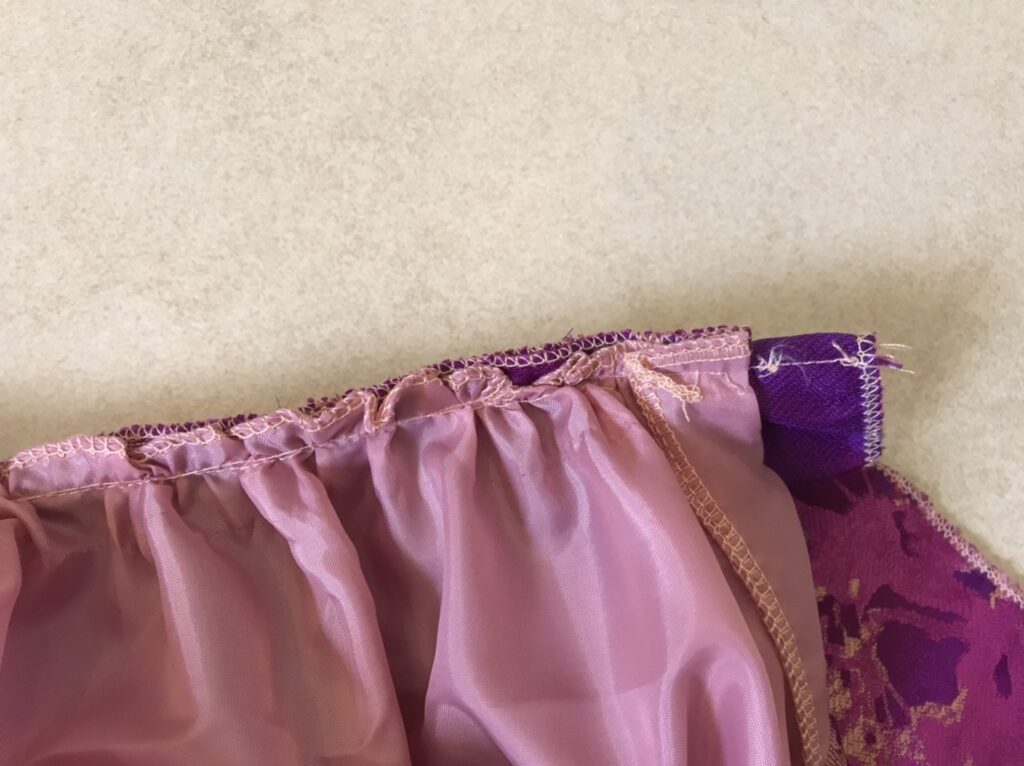
You want the side of the lining to be 1.5cm away from the side of the skirt; and the excess lining fabric to be folded on the inside (not on the outside like the picture!!!), so that you can attach the side to the skirt but not to the lining.
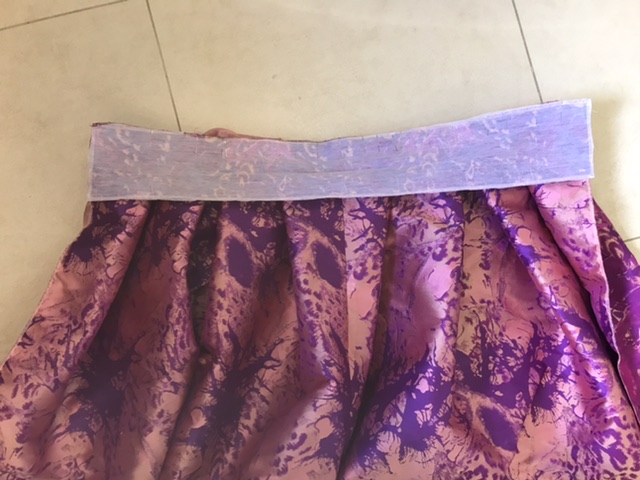
JOIN THE BELT
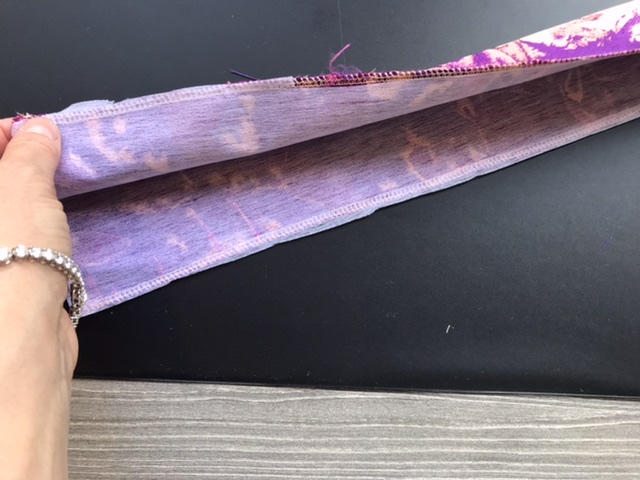
If you haven’t done it before, cut the belt piece to the width required (waist measurement + 2cm ease + 3cm sewing margin) and overlock the short sides. Do the same with the fusible interfacing and iron it on the wrong side of the belt fabric.
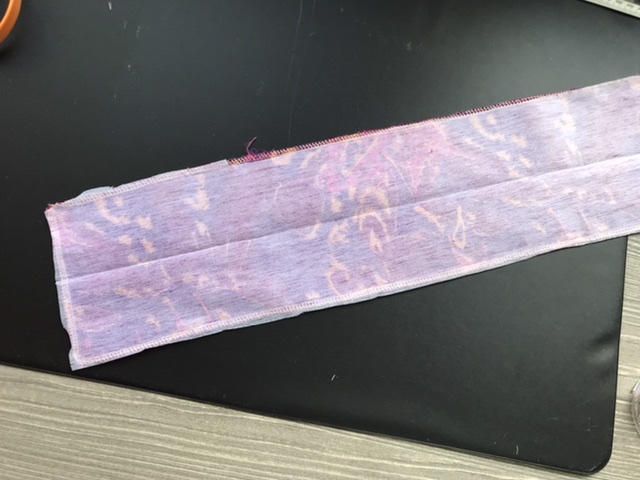
Fold the belt in two, wrong side of fabric to wrong side, to mark the 5cm center width.
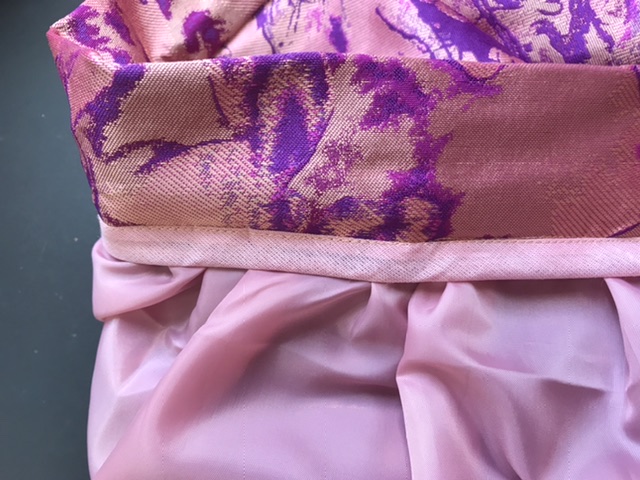
Attach the belt to the skirt, right side to right side, sewing 1.5cm from the edge.
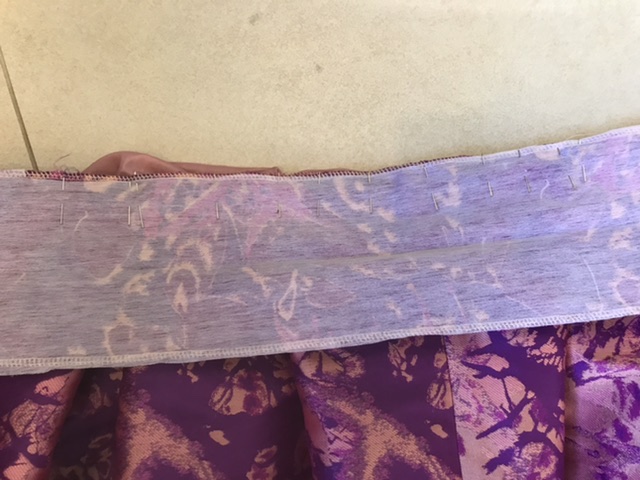
Fold the belt in two and overstitch from the right side of the skirt fabric.
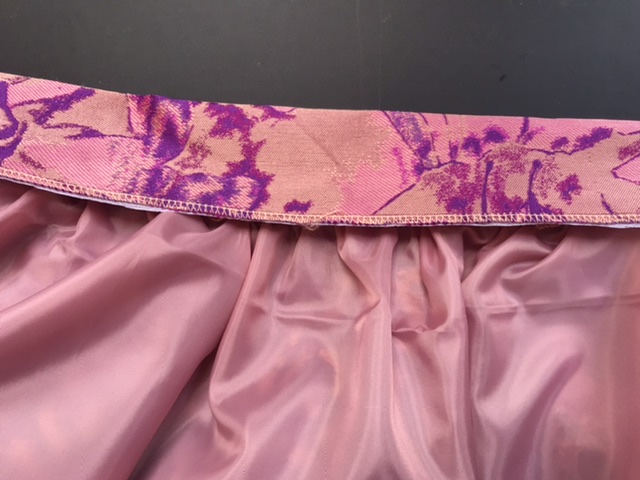
For a neater finish on the inside, you can chose to use bias to cover the belt exposed edge (do this before overstitching).
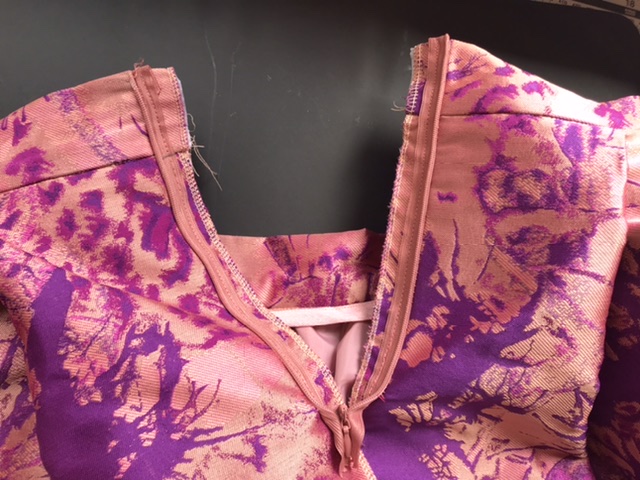
FINISHING LINE
- On the unsewn side of the skirt, add an invisible zipper.
- Sew the sides of both skirt and lining, 1.5cm from the edge.
- Hem both skirt and lining by folding the fabric twice by 1cm – you can hand-sew the hem of the skirt but I would strongly advise machine-sewing the lining!
ET VOILA!!!