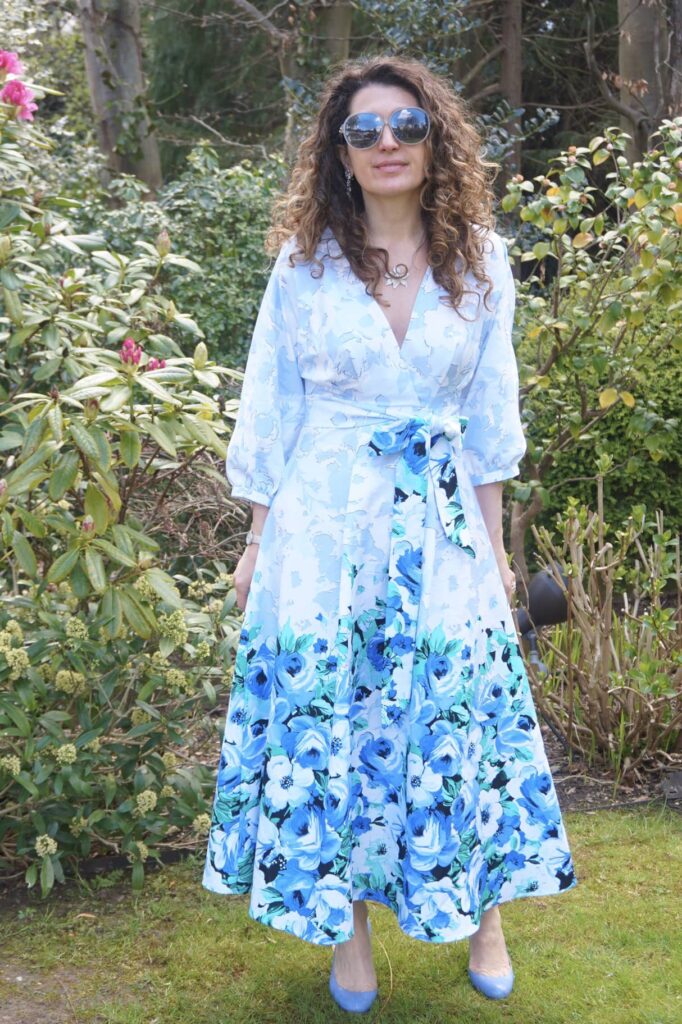
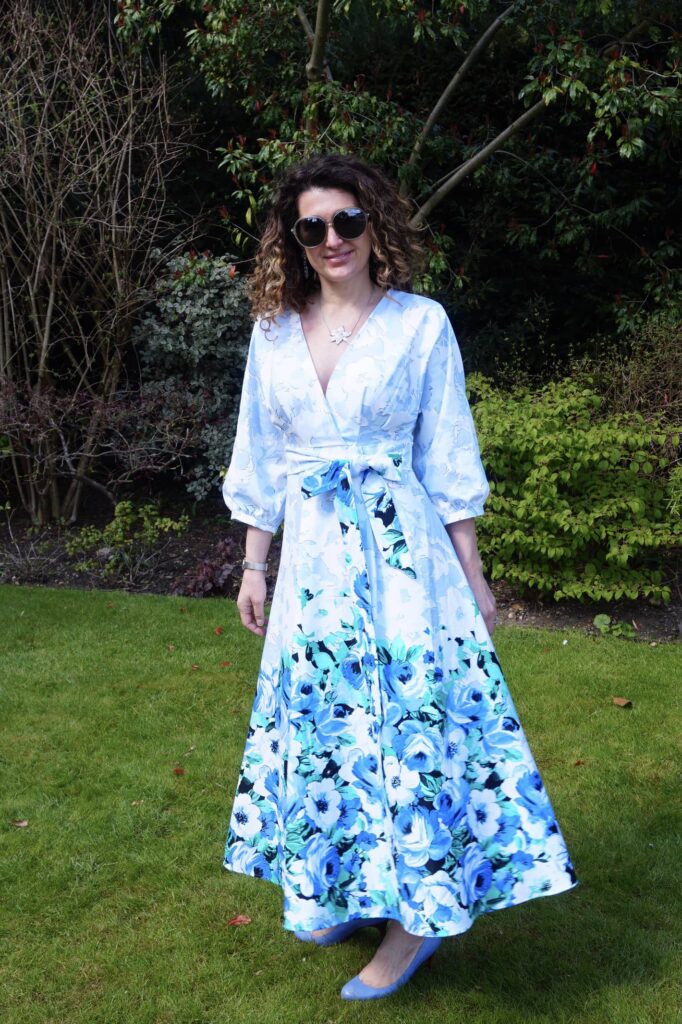
A Spring version of V9253
I fell in love with the widely popular V9253 dress pattern last summer – much later than anybody else for sure. But the love has not left me since. So after sewing two summer versions (here and here) and two winter versions (here and here), let me introduce you to my latest and definitely very Spring-in-my-footstep version.
My previous versions… and the lessons I learned
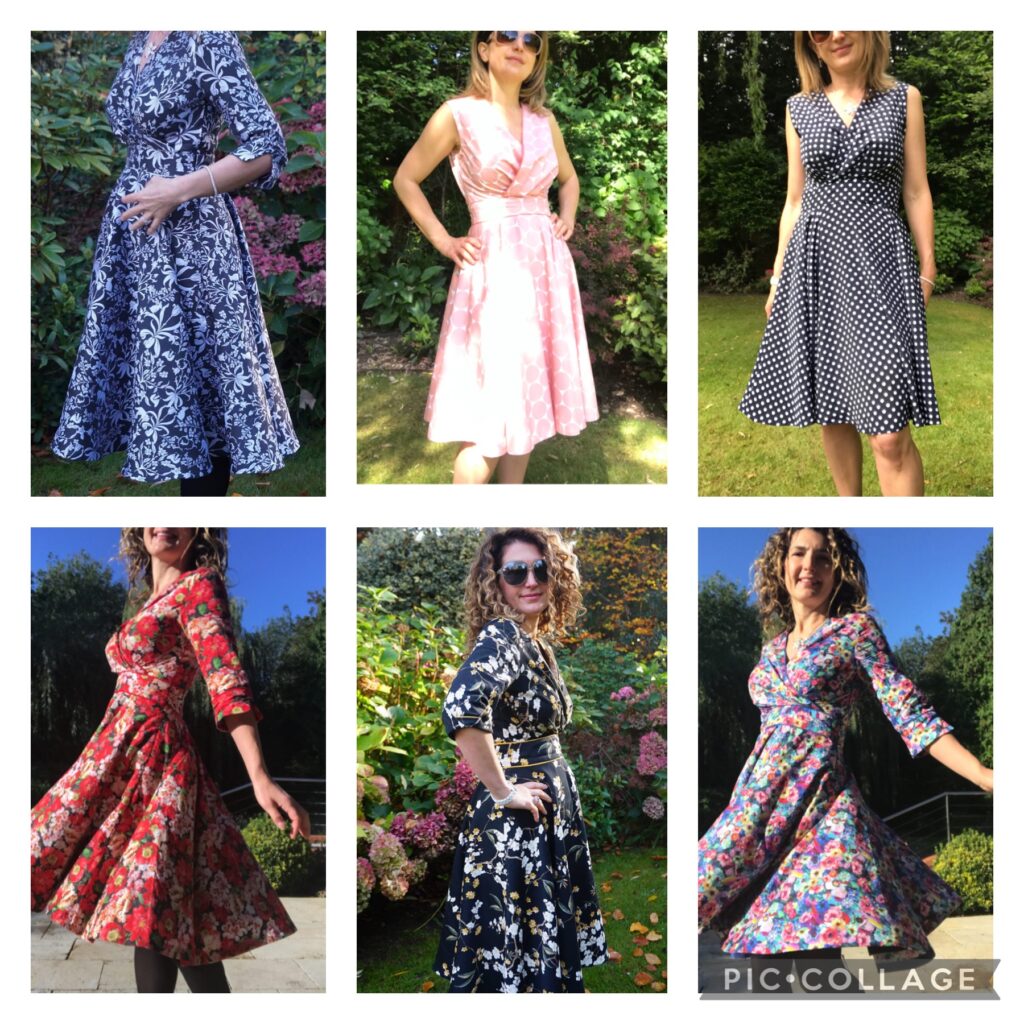
Here is a little overview of my four previous versions of this pattern – which were a great opportunity to learn a few lessons!
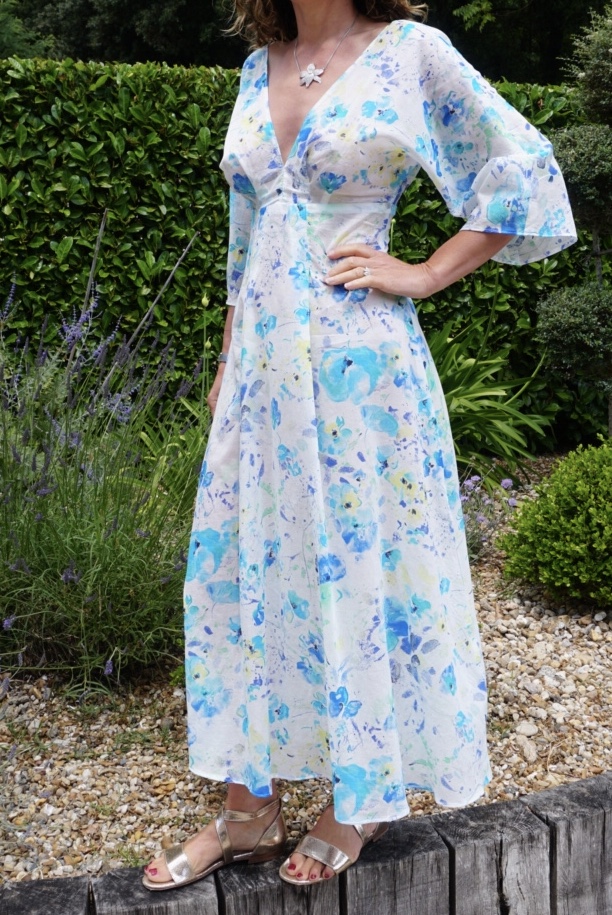
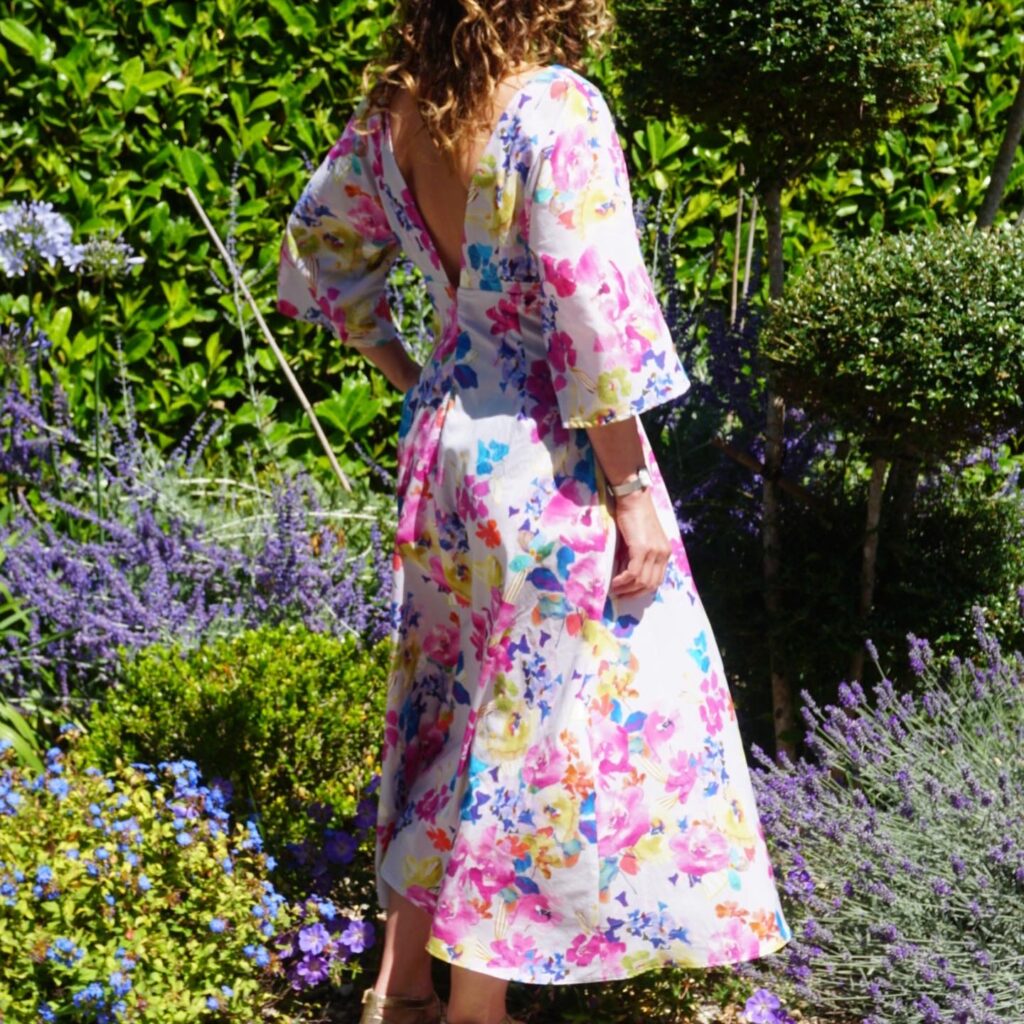
My first two versions (blue and pink) were full summer: both in very lightweight cotton, with a self drafted V back (all explained here). I did not modify the very plunging neckline at the front (except trying to slightly stitch it up), which combined with the V back made the dresses… quite risky if I move my arms to fast!!
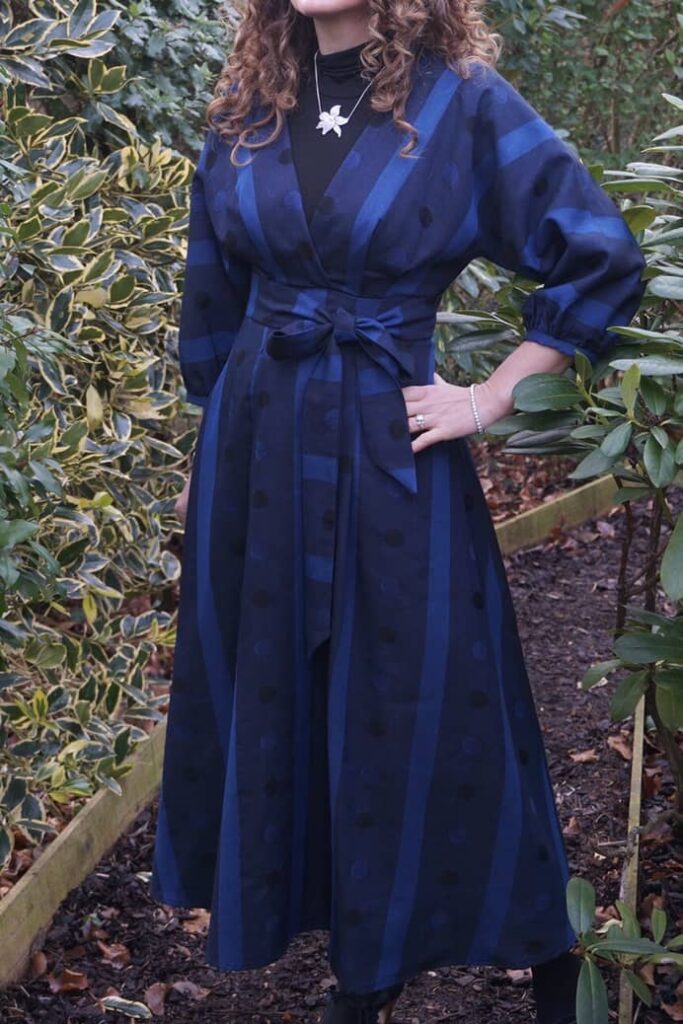
My next two versions were definitely for winter: one in suiting wool (which I adore) and one in thick silk (which I dislike). Here I kept the closed back (for insulation purposes!!) and slightly crossed the neckline, which makes the dresses so much more wearable!
The key lessons I’ve learnt from these previous makes are the following:
- Fabric choice is absolutely key. It is the case for most patterns but even more so for this dress. After my successful transition from very lightweight summer fabric to slightly heavier suiting wool, I thought everything was possible. My white and red version clearly proved me wrong. I used very thick silk with no drape whatsoever and it is as if the dress stood on its own – perfect for one’s own wedding but not for day-to-day wear. So my key conclusion here is that fabric weight does not matter that much but your fabric absolutely needs to have drape!
- Closing the neckline was the best thing I ever did. I followed Emily’Hallman technique to make the bodice front panels slightly overlap and it works wonder. I will never go back to the fully plunging neckline.
- This dress looks much nicer with the belt and I definitely regret omitting it in my summer versions. A mistake I shall no repeat.
V9352 for Spring: pattern review and modifications
For my Spring version, I used a cotton satin fabric bought from Bennytex many moons ago and previously kept in my stash. The beauty of this fabric lies in its border print of bold flowers; and I scratched my head for a long time to find a pattern that would both suit my style (fitted bodice and waist, unfitted skirt) and work with the fabric. Eventually I chose V9352 over Deer and Doe’s Magnolia.
I really like the V9352 pattern for several reasons:
- It is one of the easiest dress pattern I have ever sewn: with 4 pattern pieces, a few darts and an invisible zipper, you can sew it in a few hours.
- Despite this simplicity, the shape is perfect and incredibly flattering. I am not a fan of bat sleeves and would never have thought they could go well with a skirt fitted at the waist, but for obscure reasons here the match is perfect.
- The sizing is spot-on. I am a UK 8/ FR 36/ US 2 and the S size was perfect without any adjustment (except for an FBA, more on this later).
- As my various versions show, this pattern can be easily used for all seasons, with a completely different outcome depending on the fabric you use.
I made a few changes to the original pattern, because… well, I guess, I can’t help it!
- I made an FBA to fit my E-cup, which is explained in great details in this article and shown in the picture below.
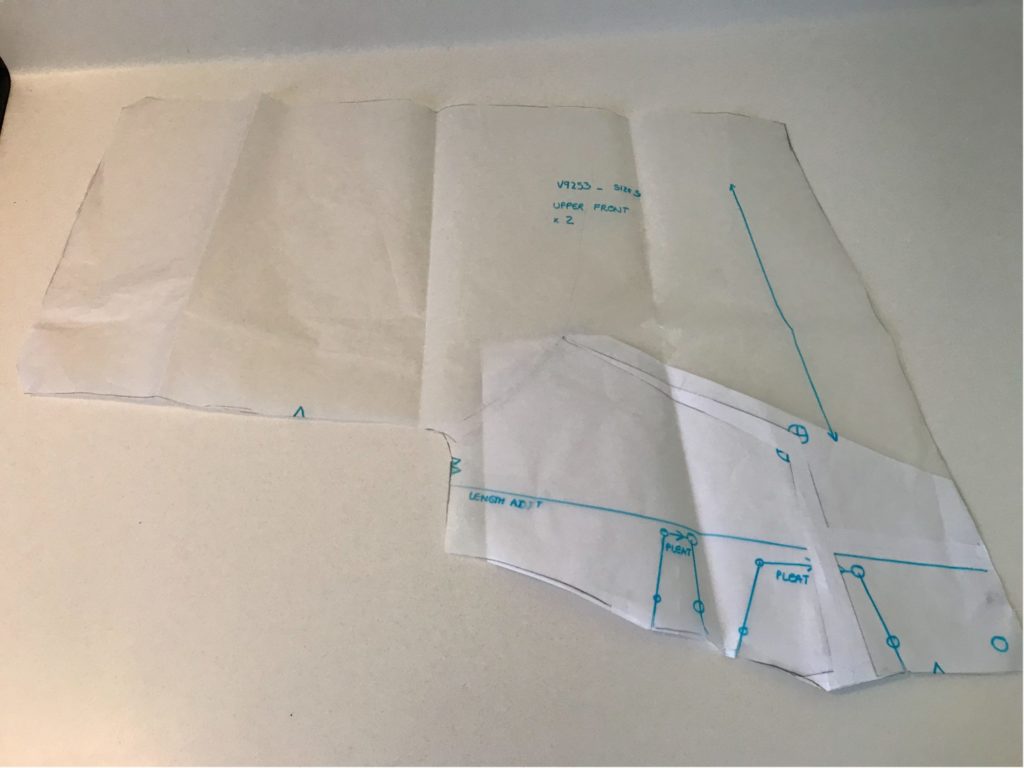
- I crossed the neckline Emily Hallman’s way.
- I went for a skirt in-between the mid and maxi lengths offered by the pattern.
- I slightly lengthened the sleeves and added some sleeve bracelets, Emily Hallman’s idea too you can tell I am a huge fan).
- I attached the belt slightly differently from what the pattern recommends (over the zip rather than within it), so that it would not pull at the back.
Conclusion: easy to make, easy to wear
This dress is just so easy to slip on and so comfortable to wear, I could actually spend all Spring in it! Thankfully Me Made Day is starting today so I will have to introduce a bit of variety in my day-t-day outfits!
Sewing for Spring: my denim shirt dress
While I was putting my Spring sewing plans together a few weeks ago, I got a sudden and irrepressible desire for a denim shirt dress. Thankfully I had a tried and tested pattern in stock and I easily found the perfect fabric online, so here it is – waiting for the buttons was the longer part of the process here!
Another favourite shape
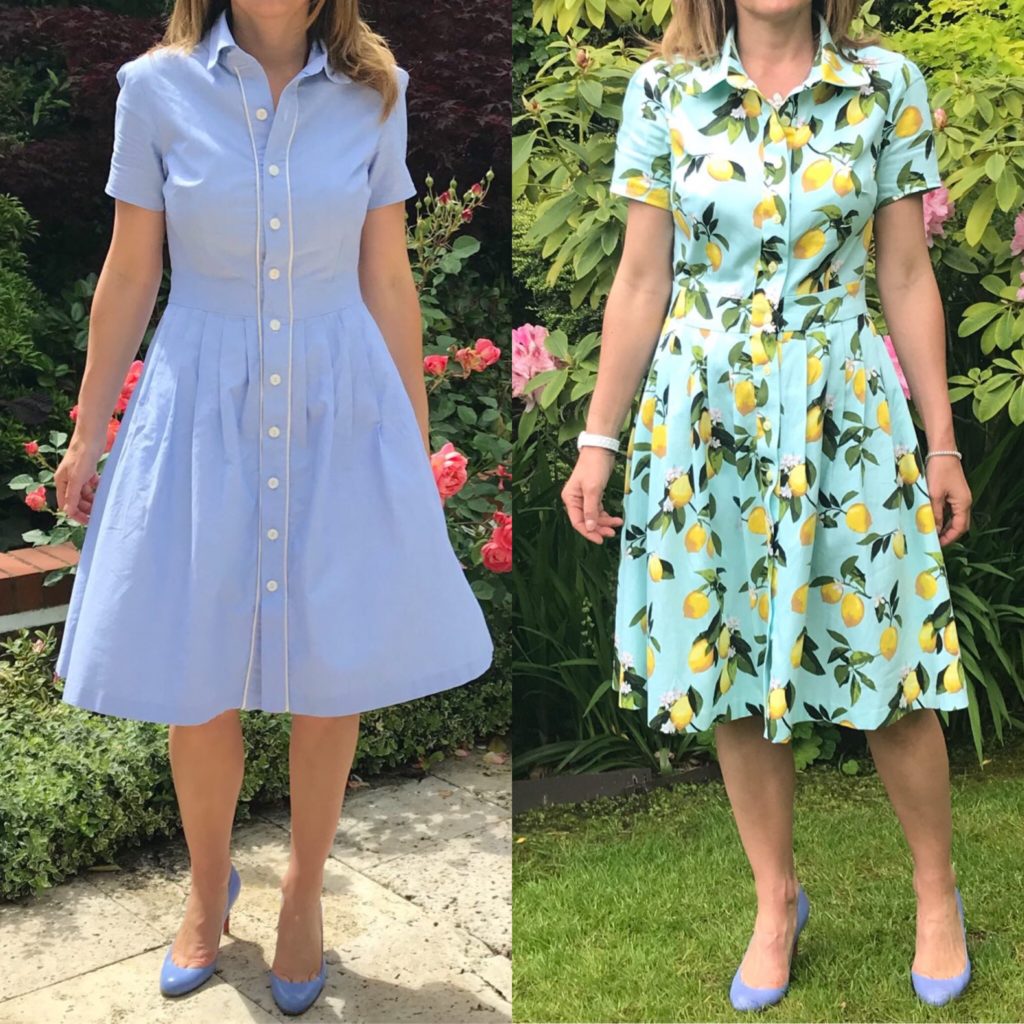
You may (or may not) have recognised McCall’s M6696, another McCall pattern I adore.
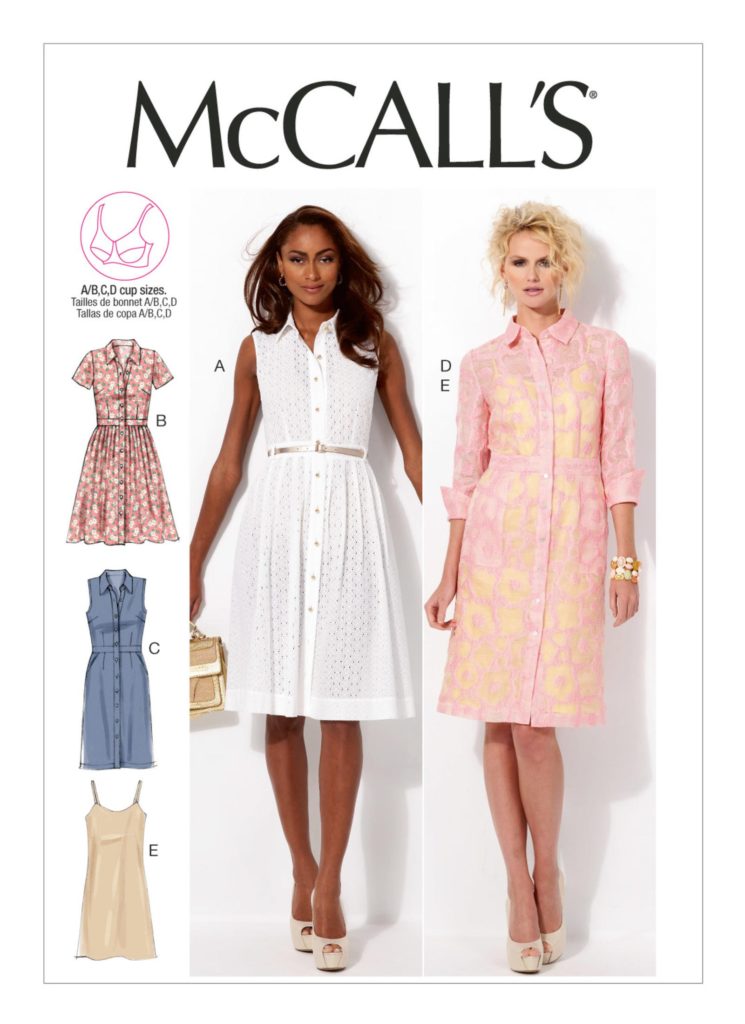
This dress has a fitted bodice and a pleated, knee-length skirt which are joined by a middle belt. This middle belt is a feature I really like in fitted dresses, as it accentuates the waist and avoids the skirt pulling on the bodice – M7081, another favourite of mine, has the same – just a few of my versions below…
Anyway, back to M6696! I already made two versions in Spring 2019 and was itching to make another one as soon as the weather would be appropriate (I still haven’t worked out how to fully line it, otherwise I would have made a number of wool versions too). Here are my previous dresses, still featuring high in my Spring wardrobe – and I even managed to write blog articles about them, here for the blue chambray version and here for the lemon version.
M6696 pattern review
I really have only positive comments about this pattern so… let’s start:
- Perfect shape, as I discussed above.
- Perfect fit. This is definitely a very important point for me, as I like dresses with fitted bodices. McCall and Vogue patterns rarely disappoint me on this front. This pattern has the added advantage of offering custom bust cups, which mean perfect bust fit without an FBA, even for my E cup, hurrah! I am a 36 FR/ 8 UK/ 2 US, I cut a size 10 with C cup and did not have to make any fit adjustment whatsoever.
- Crystal clear instruction. The shirt style makes this dress a bit more complex than a basic fit and flare, due to the collar and the button placket. However the instructions are so clear that the pattern is completely accessible to everyone – as long as you know how to use the buttonhole function of your sewing machine! (it took me several years to master I admit…)
I made only two changes to the initial pattern:
- I added some metallic bronze piping on each side of the button placket – very easy to insert while you join each side of the placket to the dress. I had done the same thing with my chambray dresses and really liked the effect.
- I replaced the gathers of the back bodice by a pleat – much neater in my view, especially with slightly thicker fabric like denim.
The only minor negative of this pattern is that it does not have a waist-stay, i.e. an inside closure which avoids the buttons pulling out, particularly at the waist level. I will definitely experiment with my next shirt dress. To make matters worse, I sew my buttons a bit too far on the outside. I did rectify this since these pictures, so now the placket sits better. But I did not have an volunteer to take new pictures, sorry!
Fabric used: 6oz is the perfect weight for a denim dress
I usually struggle to buy denim, even more so online. I got lucky this time : I ordered this 6oz denim from Fabrics Galore and it was both the perfect colour and weight.
The piping had been in my stock for years, bought in France when it was difficult to get metallic piping in the UK (plenty on E-Bay now). And I found the buttons on Etsy, after a long search for bronze buttons that would match the piping.
Conclusion: shirt dress frenzy
I recently brought my sewing machine for repair, after damaging it by sewing over a pin (I know….). Since then, the automatic buttonhole function has been working perfectly – although for 10 buttons, you still need to turn the machine on and off a few times, otherwise at some stage the function goes crazy…. Oh well…
I am very pleased with this dress, which reminded me how much I like shirt dresses. With the buttonhole situation now under control, do expect more shirt dresses on the blog soon!
Sewing for Spring: the improbable trousers
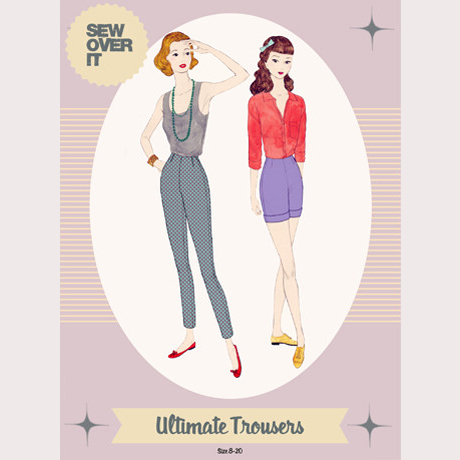
Incredible but true: I have sewn trousers! They are the Ultimate Trousers by Ready to Sew and I think I am actually going to wear them!
My search for the perfect trousers pattern
You know that I rarely wear anything else than dresses – skirts with hand-knitted cardigans at a stretch. I actually own very few pairs of trousers, which I mainly use for weekend family walks in the countryside.
However I have been wanting to have a go at trousers ever since the Loulou trousers pattern by Maison Fauve crossed my path. Cigarette is my favourite shape for trousers; and I much prefer an invisible side zip than any other type of closure, as it makes the silhouette more elongated in my view. Another big plus of Loulou is its gorgeous pockets.
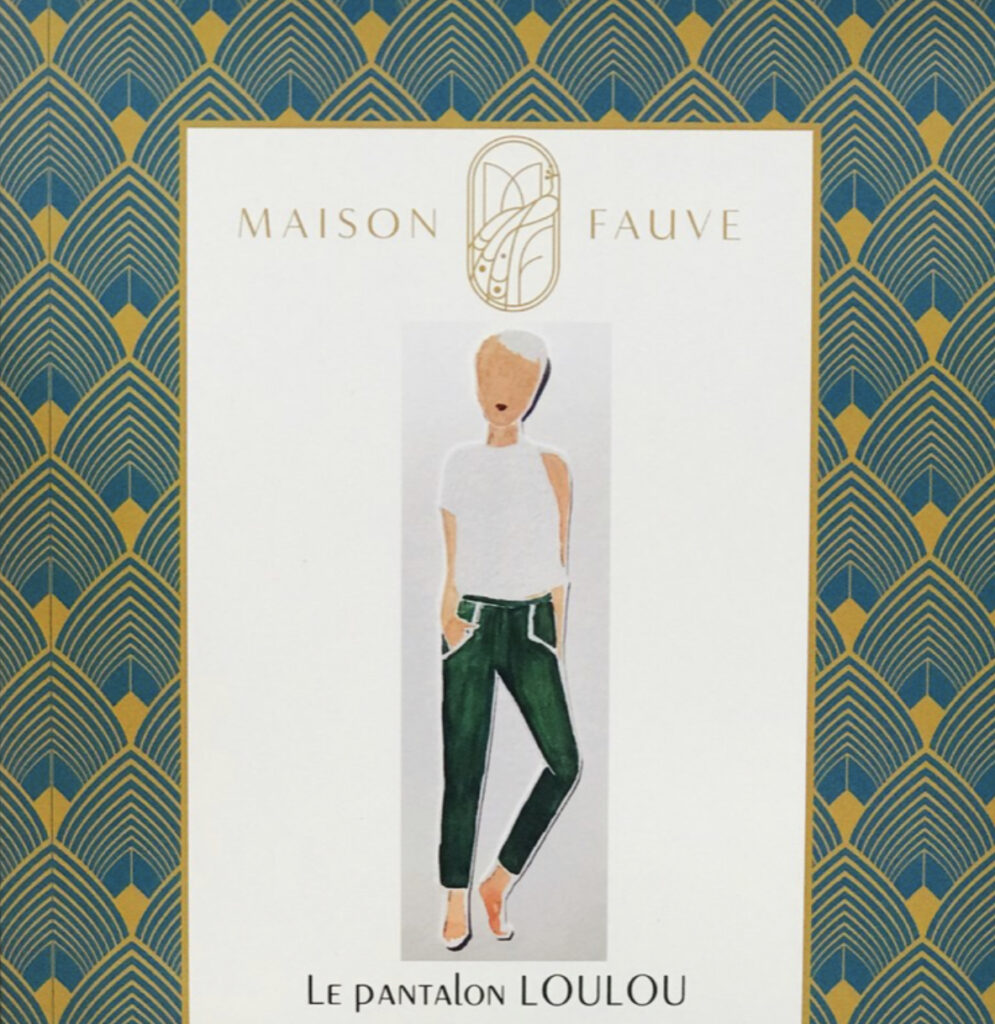
But the stars weren’t quite aligned. First, until very recently, the pattern was only available as paper, not PDF, so getting it to the UK was prohibitive (so says the girls who buys cashmere and silk on a regular basis… no comment). Second I was struggling to get the right fabric, I wanted a semi-weight cotton with slight stretch but it never seemed to appear in a colour I liked.
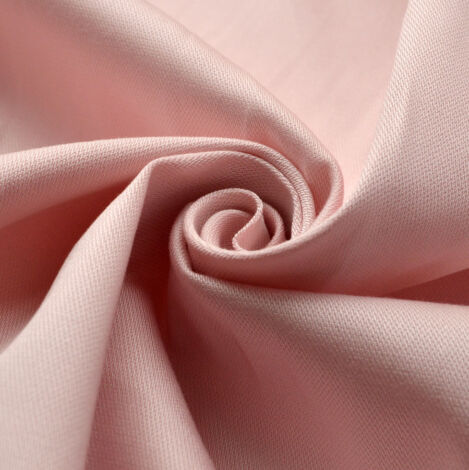
Eventually we got there. Loulou’s PDF was released and I ordered it. I also found this great baby pink stretch cotton fabric from Croftmill, and… I actually found a more suitable pattern!!! My only reservation with Loulou is that it is quite low-waisted, while The Ultimate Trousers by Sew Over It have quite a similar shape but a higher waist. So here we are now.
Pattern review: the Ultimate trousers by Ready to Sew
A perfectly streamlined pattern
The Ultimate Trousers have in my view the perfect shape. They have a reasonably high waist (they just cover the tummy button) and fitted cigarette legs; perfectly sit on the waist thanks to front and back darts; and close via an invisible zip on the side, which removes any potential bulk at the waist while making the sewing much easier than with a flap!
They are, in my view, the perfect pattern for beginners. There is a very limited number of pattern pieces (4 including facings). And the 1.5cm/5.8in sewing allowance gives some room of manoeuvre for easy fitting.
Pattern adjustments
Purely out of laziness, I did not make a muslin to check fit ahead of cutting into my fabric. However I had a lot of extra fabric available in case things went completely wrong; the fabric I chose has a bit of stretch, which I do recommend to make fitting easier; and the pattern sewing allowance was sufficient to make fit adjustments afterwards. If you want to go with a fabric without stretch or if your fabric is very valuable, I would definitely recommend a muslin though.
My body measurements sat between a recommended size 8 at the waist and a size 12 at the hips – but with the finished measurements my hips fitted into a 10. So I cut a size 10 everywhere, assembled the trousers without zipper, tried them on and then made the following modifications:
- I took off 1cm (x2, ie on each side) at the waist;
- I had some bagging at the front of the crotch, so I trialled and errored and ended up taking 1cm(x2) off here as well;
- I have quite muscly calves and the trousers weren’t falling very well there so I added 1 cm (x2) of width to the legs from 3/4 thight – it slightly enlarges the cigarette shape but I can’t see any better way.
- I removed 6cm at the bottom to get a 7/8 length.
I was able to make all these changes within the seam allowance and that was quite lucky! Overall this fitting exercise was quite easy.
I am particularly happy with the perfect fit around the waist and hip area…
The back leg fit is far from perfect but I think I’ll go with this for the moment. Maybe making the legs completely straight would sort out the problem.
Making a matching blouse using the M7542 pattern
As you can see in the above pictures, I made a matching blouse to go with my trousers – because never mind that it looks a bit too much, I cannot help being a matchy matchy girl!
I used the McCall’s M7542 blouse pattern, which I had already used for this set, and which is the perfect length for high-waisted bottoms . It is a super quick and easy sew, with perfect fit thanks to the custom bust cup options. I cut a size 10/ C cup, as always with my Vogue and McCalls patterns, and no fit adjustment whatsoever was needed.
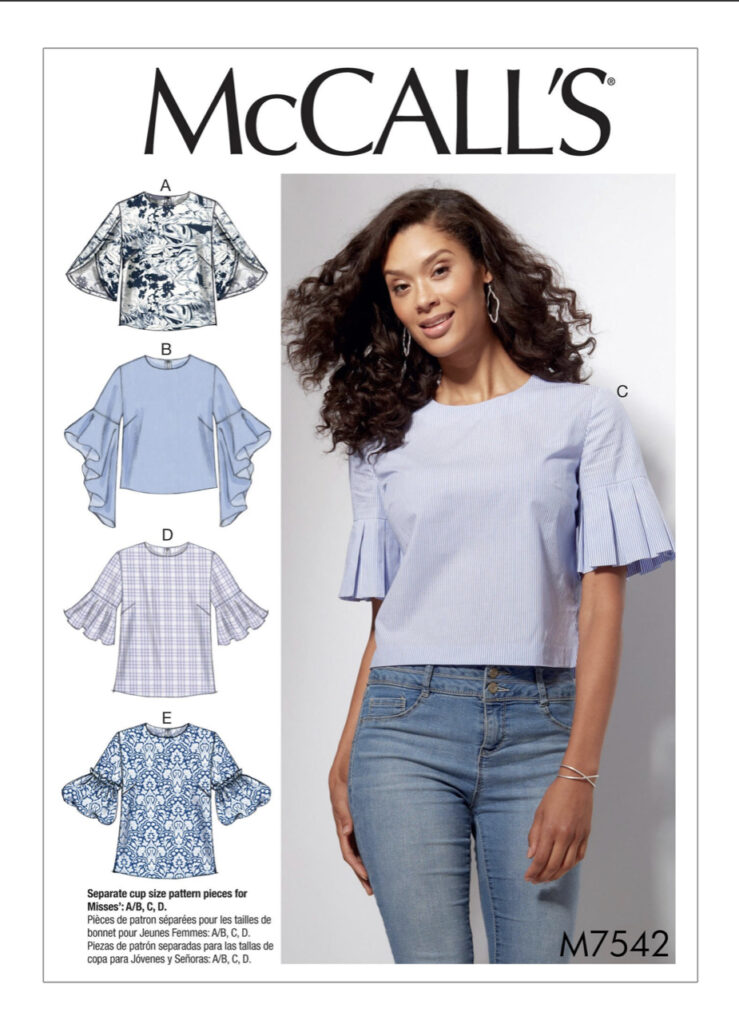
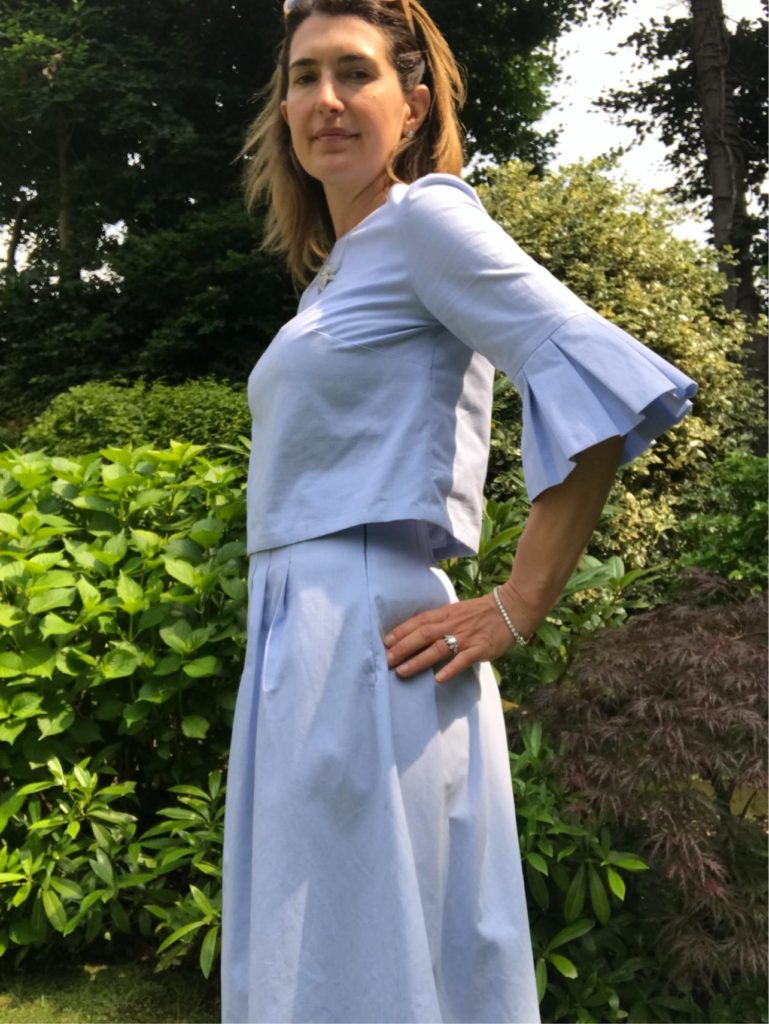
The only change I made was adding sleeve cuffs, but I really shouldn’t have bothered as they are hardly visible with this fabric (a Liberty Tana lawn bought on sale a while ago. such a pleasure to work with). Oh well…
In conclusion
I am very pleased with this set and I have been wearing it much more often than I thought I would. I am definitely planning a repeat of the trousers, maybe with wider legs if I manage to draft them. We’ll see! But the next few articles will be all about dresses, it has been far too long!
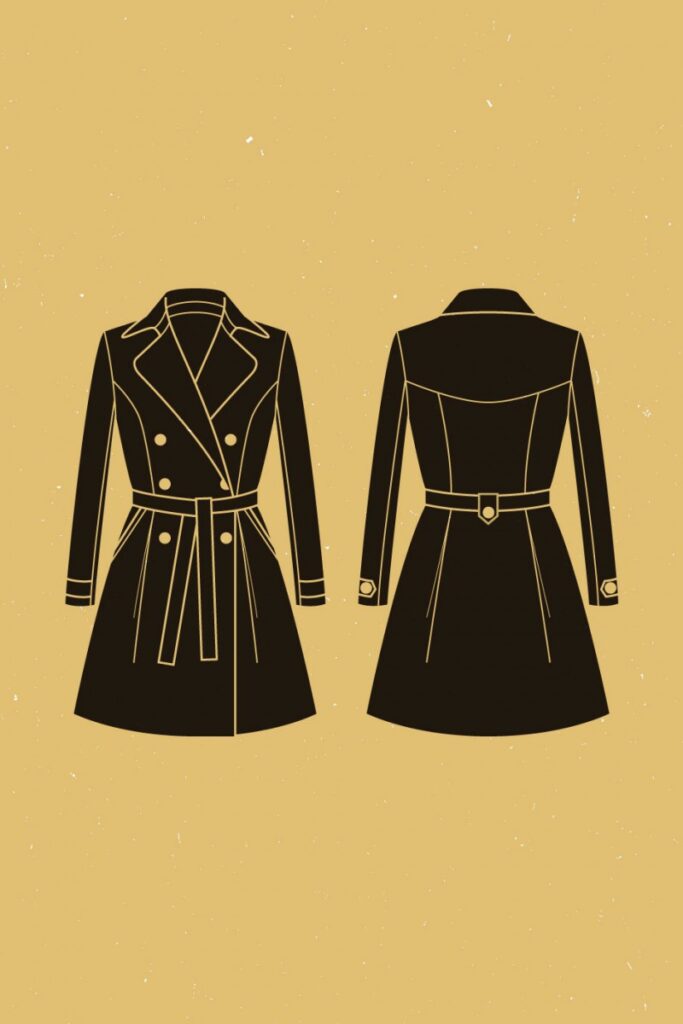
Sewing for Spring: my Luzerne trench coat
I warned you in this article: my Spring sewing has been progressing at supersonic speed (well, maybe not supersonic but quite fast). So here is my second completed Spring piece: my burgundy Luzerne trench coat.
This picture reflects very well how I feel about it: very smug! Despite a few hic-ups (which I’ll explain later), I am very pleased with how this project turned out.

Inspiration and long gestation
I already explained the gestation of this project in my “What to sew for Spring” article; but let’s repeat it for newcomers to my blog.
The Luzerne trench coat by Deer and Doe has been in existence for years so I am quite late to the game of sewing it. When it was released, I actually had very limited interest: I am not a huge fan of trench coats, as I find their details quite masculine; and I had plenty of recently purchased, very nice mid-season coats in my wardrobe at the time.
But then Lise Tailor published this article about hers… (3 1/2 years ago!) I literally feel in love and wanted the exact same – in a deep cherry/burgundy colour (the picture on the right is from Lise’s blog).
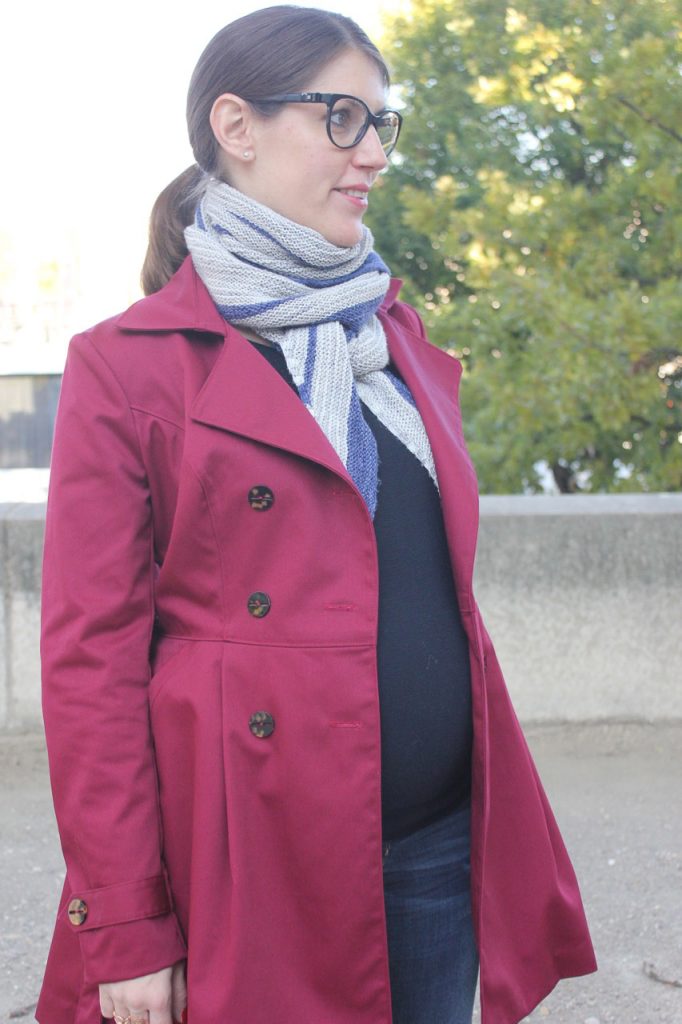
It took me a good 2 years (October 2019 to be precise) to find the right fabric in Europe: a burgundy cotton twill by Robert Kaufman, which I had tracked on a US website but finally managed to get from SewMeSunshine in the UK. Amazingly, there is still 9m left at the time of writing – I think because the website picture really does not reflect the gorgeous deep and warm burgundy of the fabric. And then it took me another year and a half to get going… to finally get my coat done in a few days in March 2021. Hurrah!

Luzerne coat pattern review and modifications
Length is my only disappointment with this pattern
Much has already been written about this pattern so the first thing I want to mention is what I would have liked to know before starting: Luzerne is really short!!! The pattern envelope does not indicate the finished length – it is about 82cm in size 38, which is mid tights. It’s fine if you want to wear your coat with trousers, but it does not work at all with skirts or dresses. Especially if like me, you are in the knee-lenght-at-the-very least team…
I obviously realised this after having assembled most of the coat – for me, it made the coat completely unwearable as I do not wear trousers at all! I had to stop and ponder for about 48 hours before reaching an acceptable solution…
In the end, I added 20cm to the coat by drawing additional skirt pieces in the continuity of the existing ones; and connecting them with bronze piping to the assembled coat. I was really scared it would look terrible but in the end I think it actually looks quite nice; and now the coat works perfectly with my wardrobe. Thank God I had enough fabric! – I consumed the entire extra metre I had left of my 110cm wide fabric.

Buttonholes are quite fiddly and done too early
The pattern calls for hand-sewn bound buttonholes and that’s actually the first thing you have to start with, before starting assembling any of the coat pieces together. I did practice several times beforehand on a leftover piece of fabric. Despite that, my buttonholes are far from perfect, which is not the end of the world as they are not that visible.
Much more problematic is that as you’re working on independent pieces of fabric ( bodice and skirt non assembled), the probability of getting button placement wrong is quite high. That’s exactly what happened to me! My coat has two rows of 4 buttons instead of 3 only because I got the placement of the skirt button wrong, so I had to add and intermediary button just below the waist line. Luckily it is not too obvious; but next time I will definitely tackle the buttonholes after having assembled bodice to skirt pieces. And I may well explore traditional machine-sewn buttonholes to be honest…
All the rest is just plain sailing
From all these warnings, you will think that I had a terrible time with this coat, but I didn’t, I actually enjoyed sewing it a lot! The very big positives of the Luzerne pattern are the following:
- The instructions are so good that the coat feels actually very easy to put together (once the buttonhole phase is over that is). You just have to follow meticulously absolutely all the steps – something I rarely do for easier pieces I am used to sewing (did I hear someone say dresses?). Here, I even followed the cutting layout, which I had never ever done before, can you believe? Very silly of my because it does make your life much easier.
- The sizing is absolutely spot on, with enough room at the bust and perfect ease at the waist. I really could not be bothered making a toile for this coat, for an obscure reason (I make toiles for most of my dresses). So I cut my usual Deer & Doe size 38 and it worked perfectly, I would really change nothing to the fit.
- The finished coat is impeccable, both outside thanks to a lot of topstitching and inside thanks to having all visible seams bound with bias tape.
- The shape is exactly what I have been looking for all these years! In its lengthened version, this coat is the perfect version of the fit-and-flare (but not too flare) coat I was looking for. I am definitely planning a wool version now, as there is enough ease to use thicker fabric I think.
A few pieces of advice
If you’re planning to make this coat, here are a few words of advice:
- Make up your mind on whether you want to lengthen it or not immediately, as if you do you will need to order more fabric than what is advised on the enveloppe.
- Get all your supplies ready before starting: buttons, interfacing, bias tape. There is nothing more frustrating on a project of this size than having to stop due to lack of supplies! On the pictures, you may notice that the back flap of my coat is unfinished, because I was missing one single button (after my buttonhole drama), arrggghhh!! All sorted now, just after the pictures, no comment
- Cut directly into the pattern rather than reproducing it. I never ever cut my patterns and instead reproduce them on tracing paper, as I want to save them for my daughters if they end-up being smaller or bigger than me. However with Luzerne I did cut directly into the pattern, just to make sure not to get mixed up with the sheer number of pattern pieces – and I am very happy I did. The one thing you need to be aware of, though, is that there is a slight overlap of two skirt pieces – do reproduce this small bit before cutting.
- Take your time and enjoy the process. This is not a quick make and it makes it all the more enjoyable in my view.
Conclusion: how many more Luzerne to come?
I am so pleased with this coat that I already have two other versions in mind: one in a powder pink version of the same fabric; and one in baby blue double-face cashmere (if it managed to cross the France-UK border, fingers crossed). This will not happen immediately though, as I want the process to remain as enjoyable as this one was. So I think we’re done with the outwear side of my Spring wardrobe now. The rest can now follow (did I hear someone say dresses again? – well, you may be surprised!).