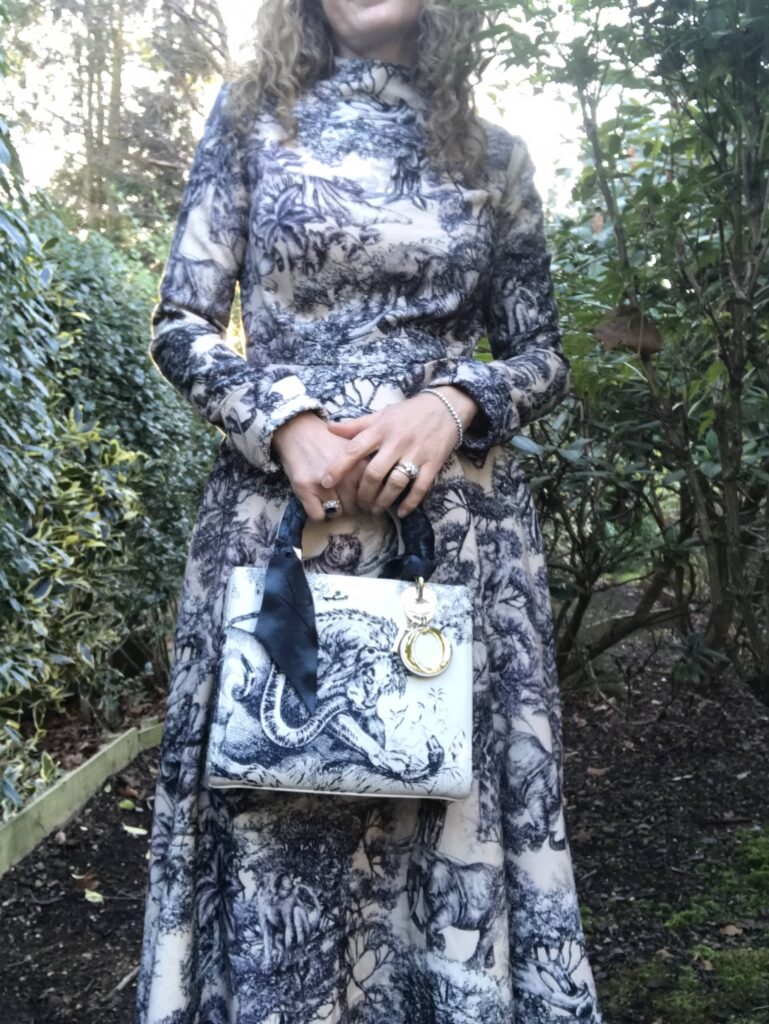
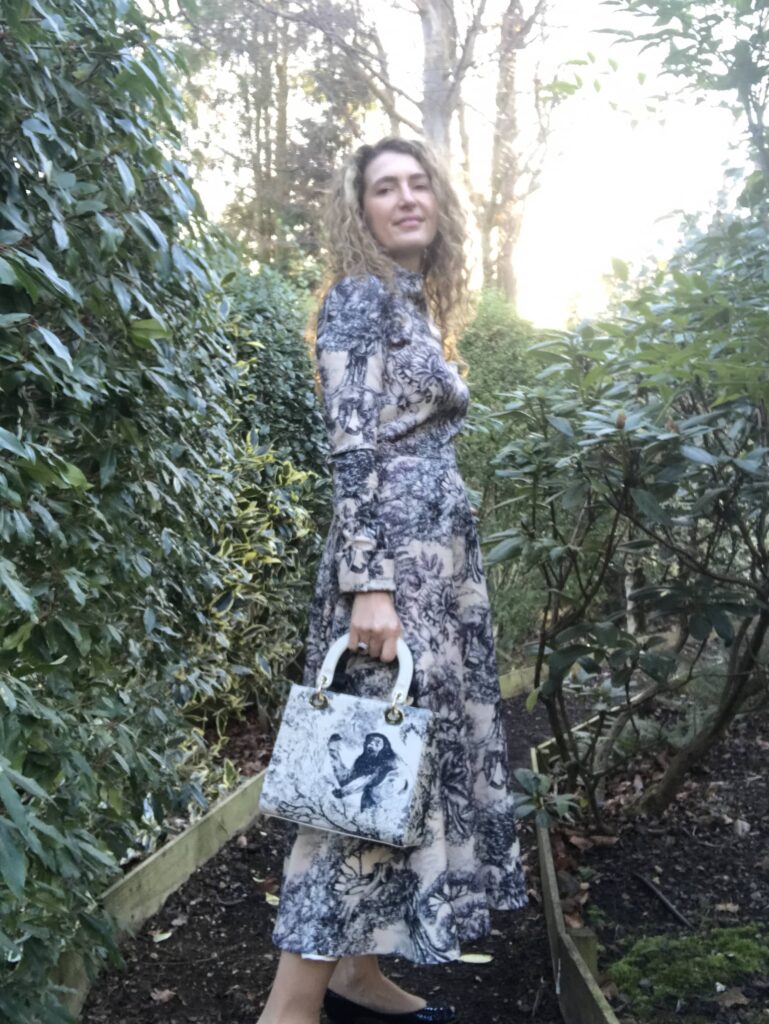
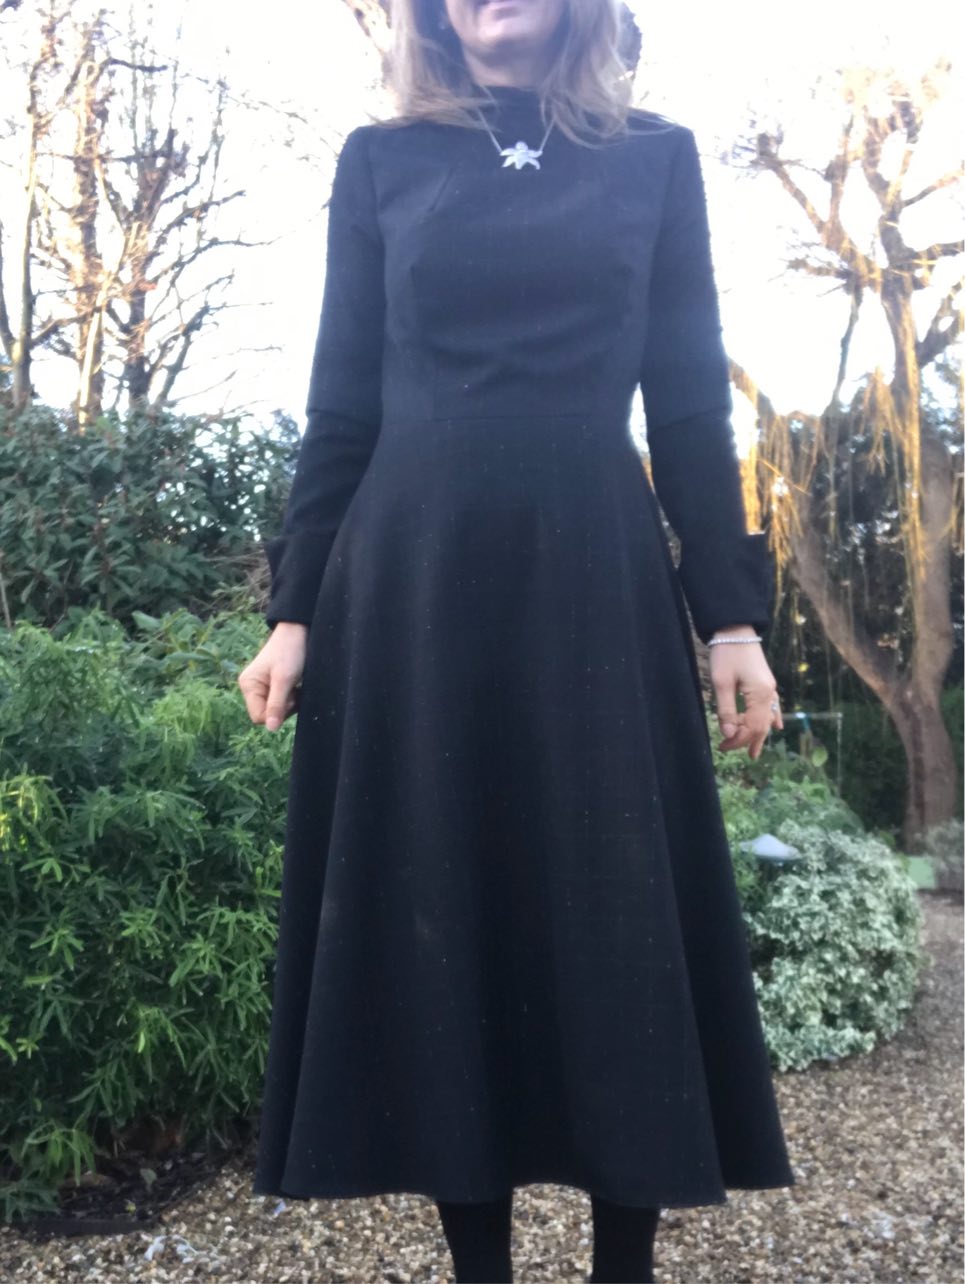
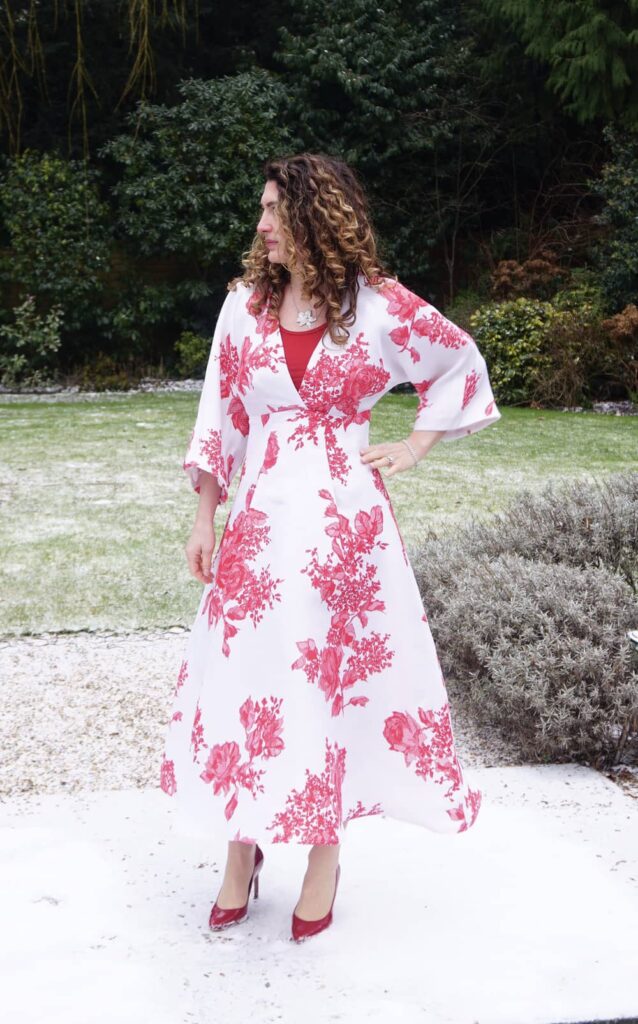
And another” nearly Dior” dress: sewing a couture V9327
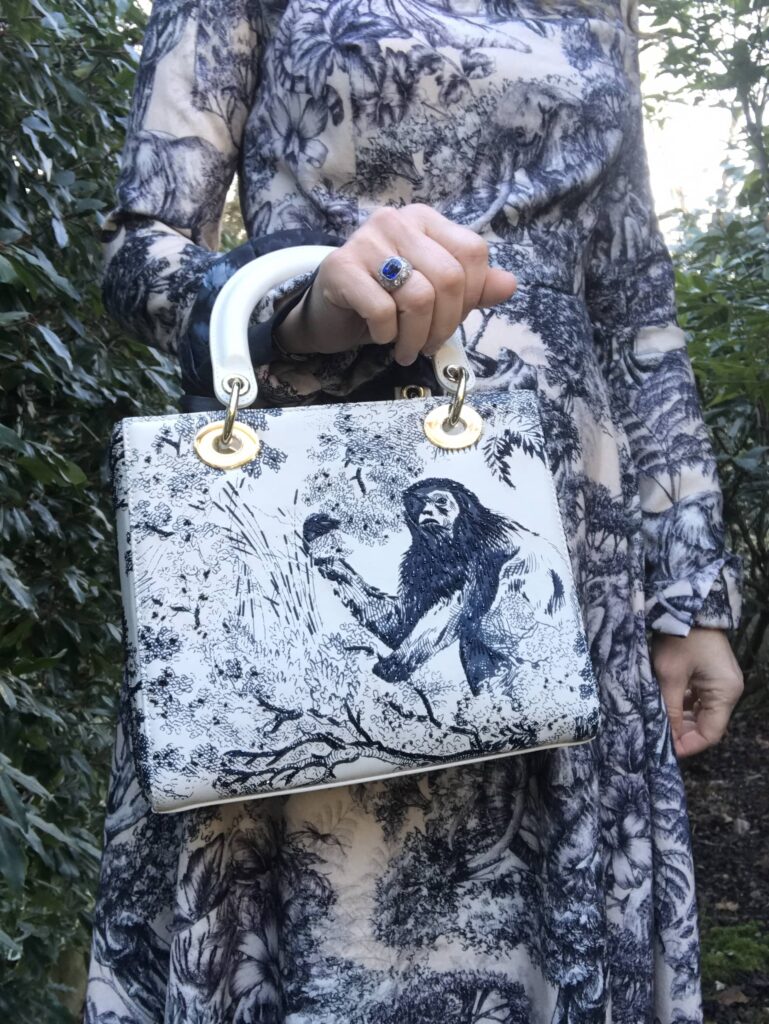
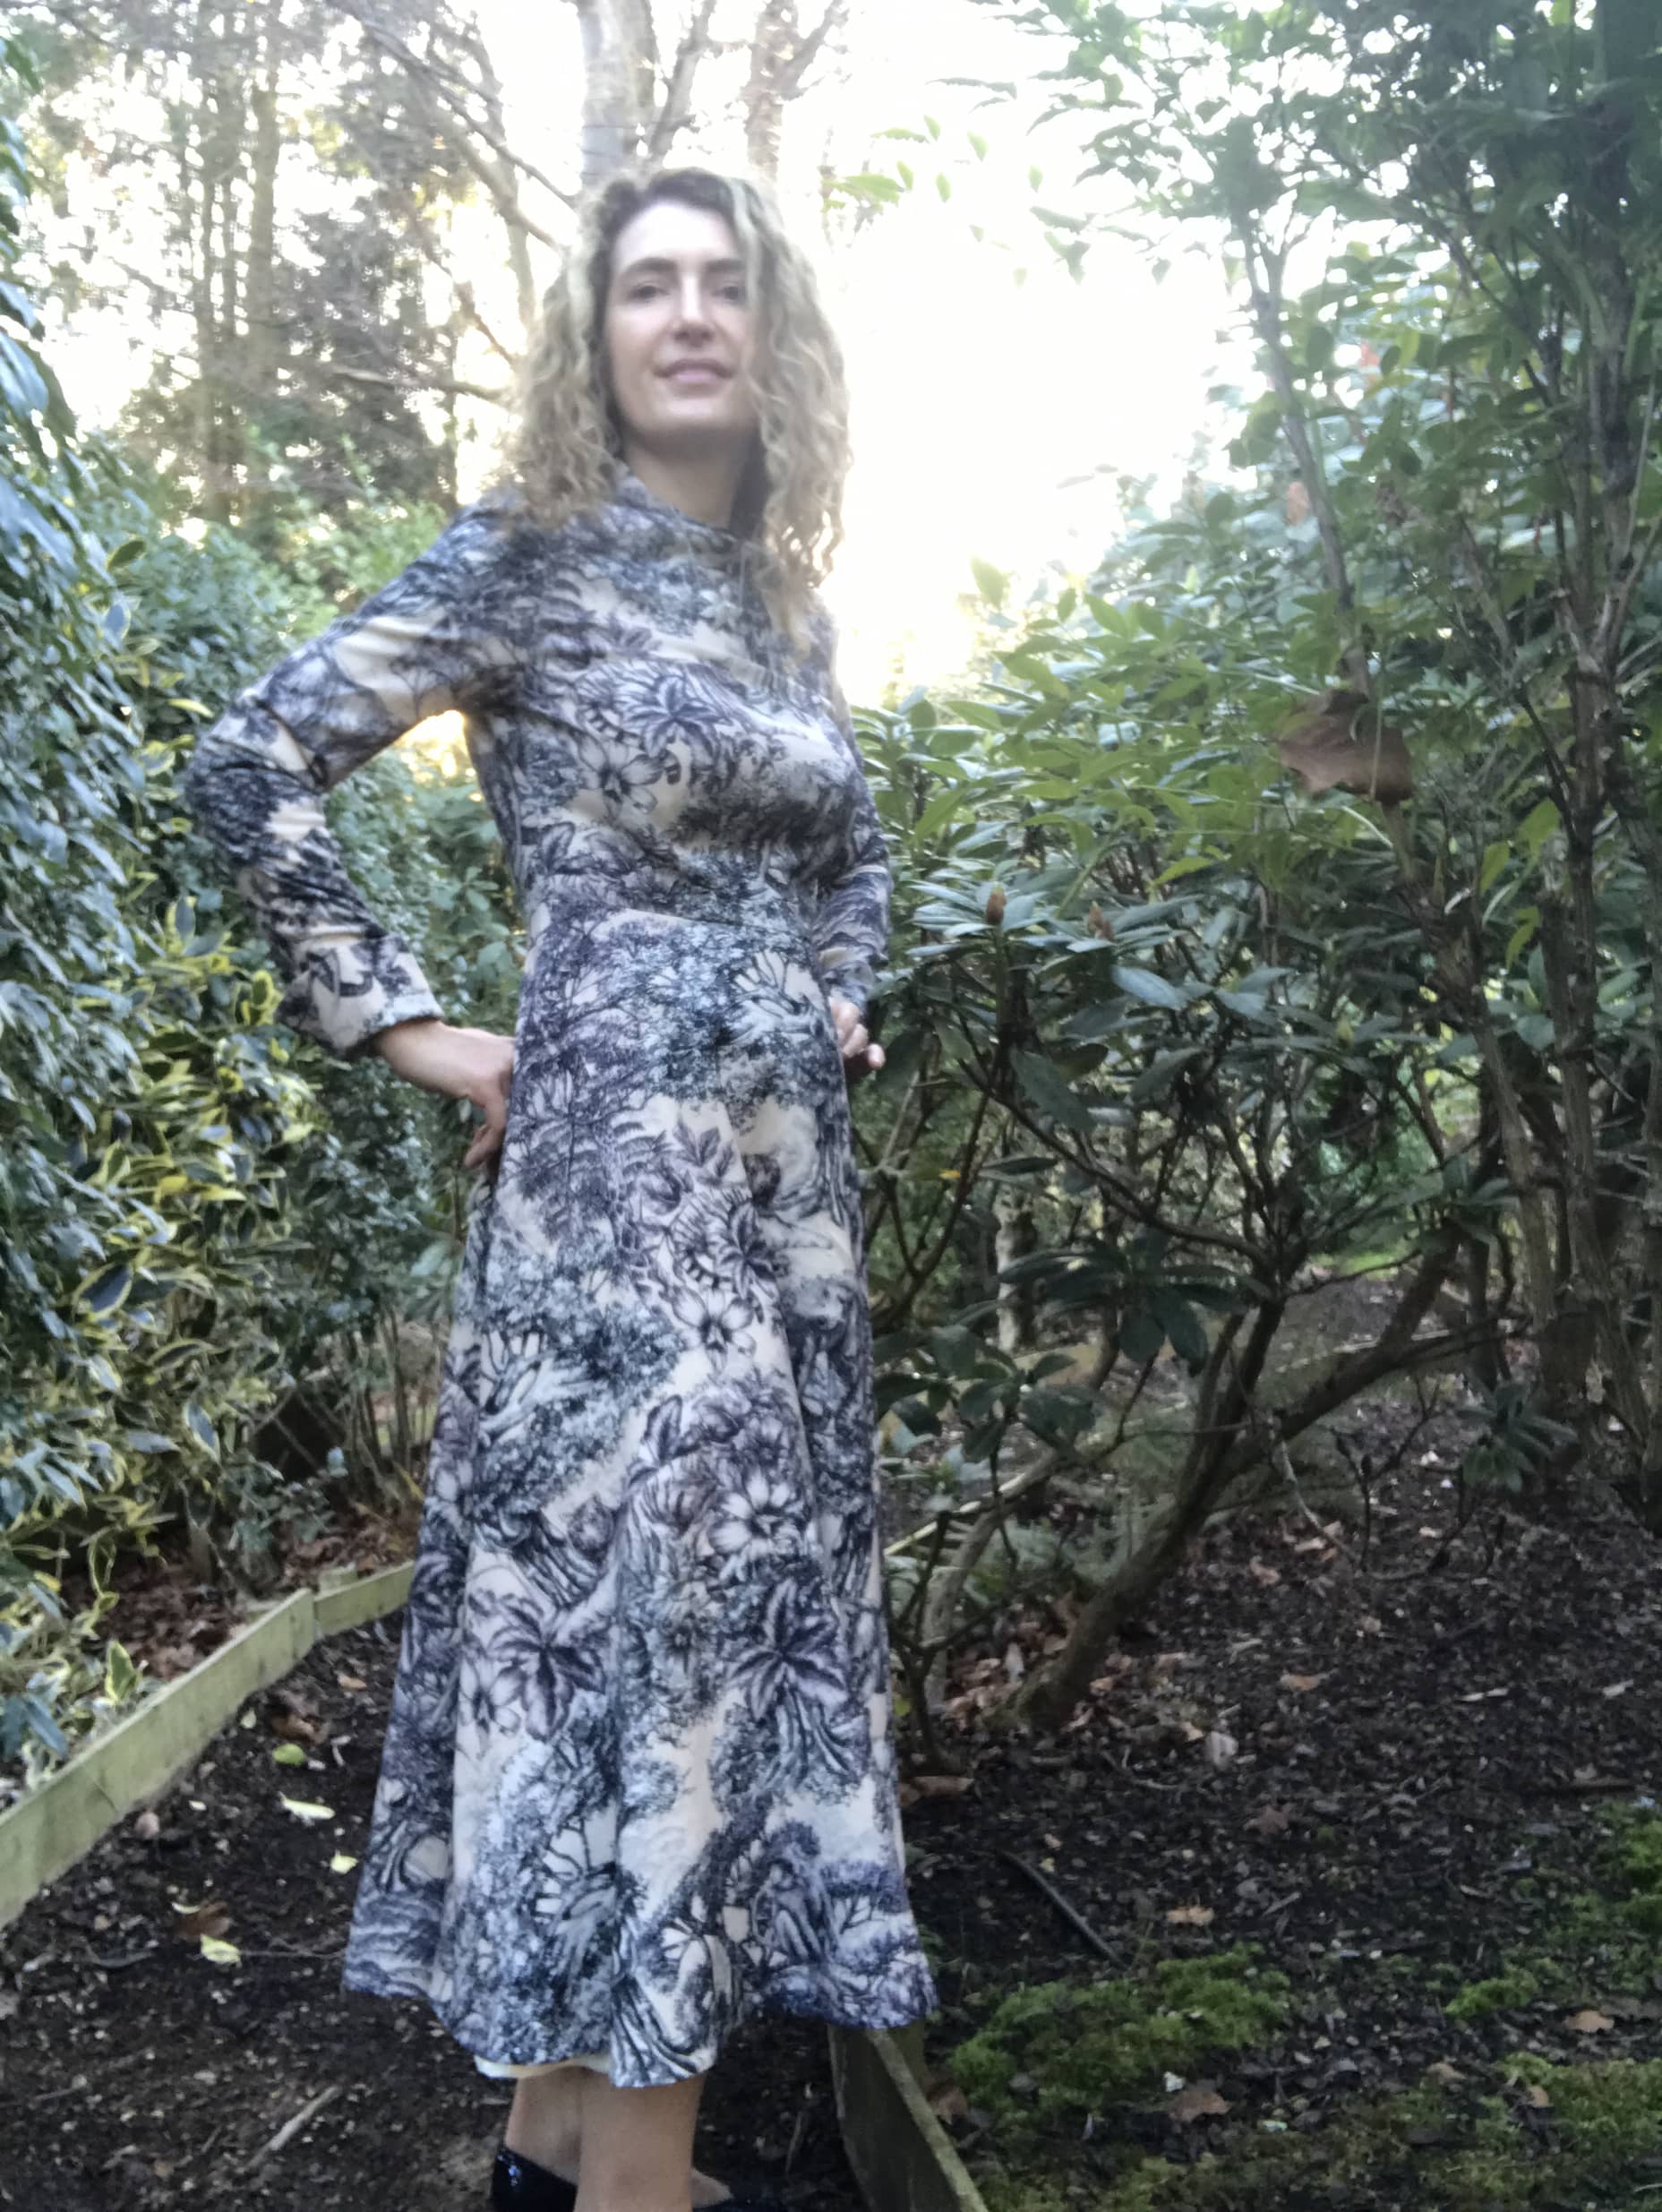
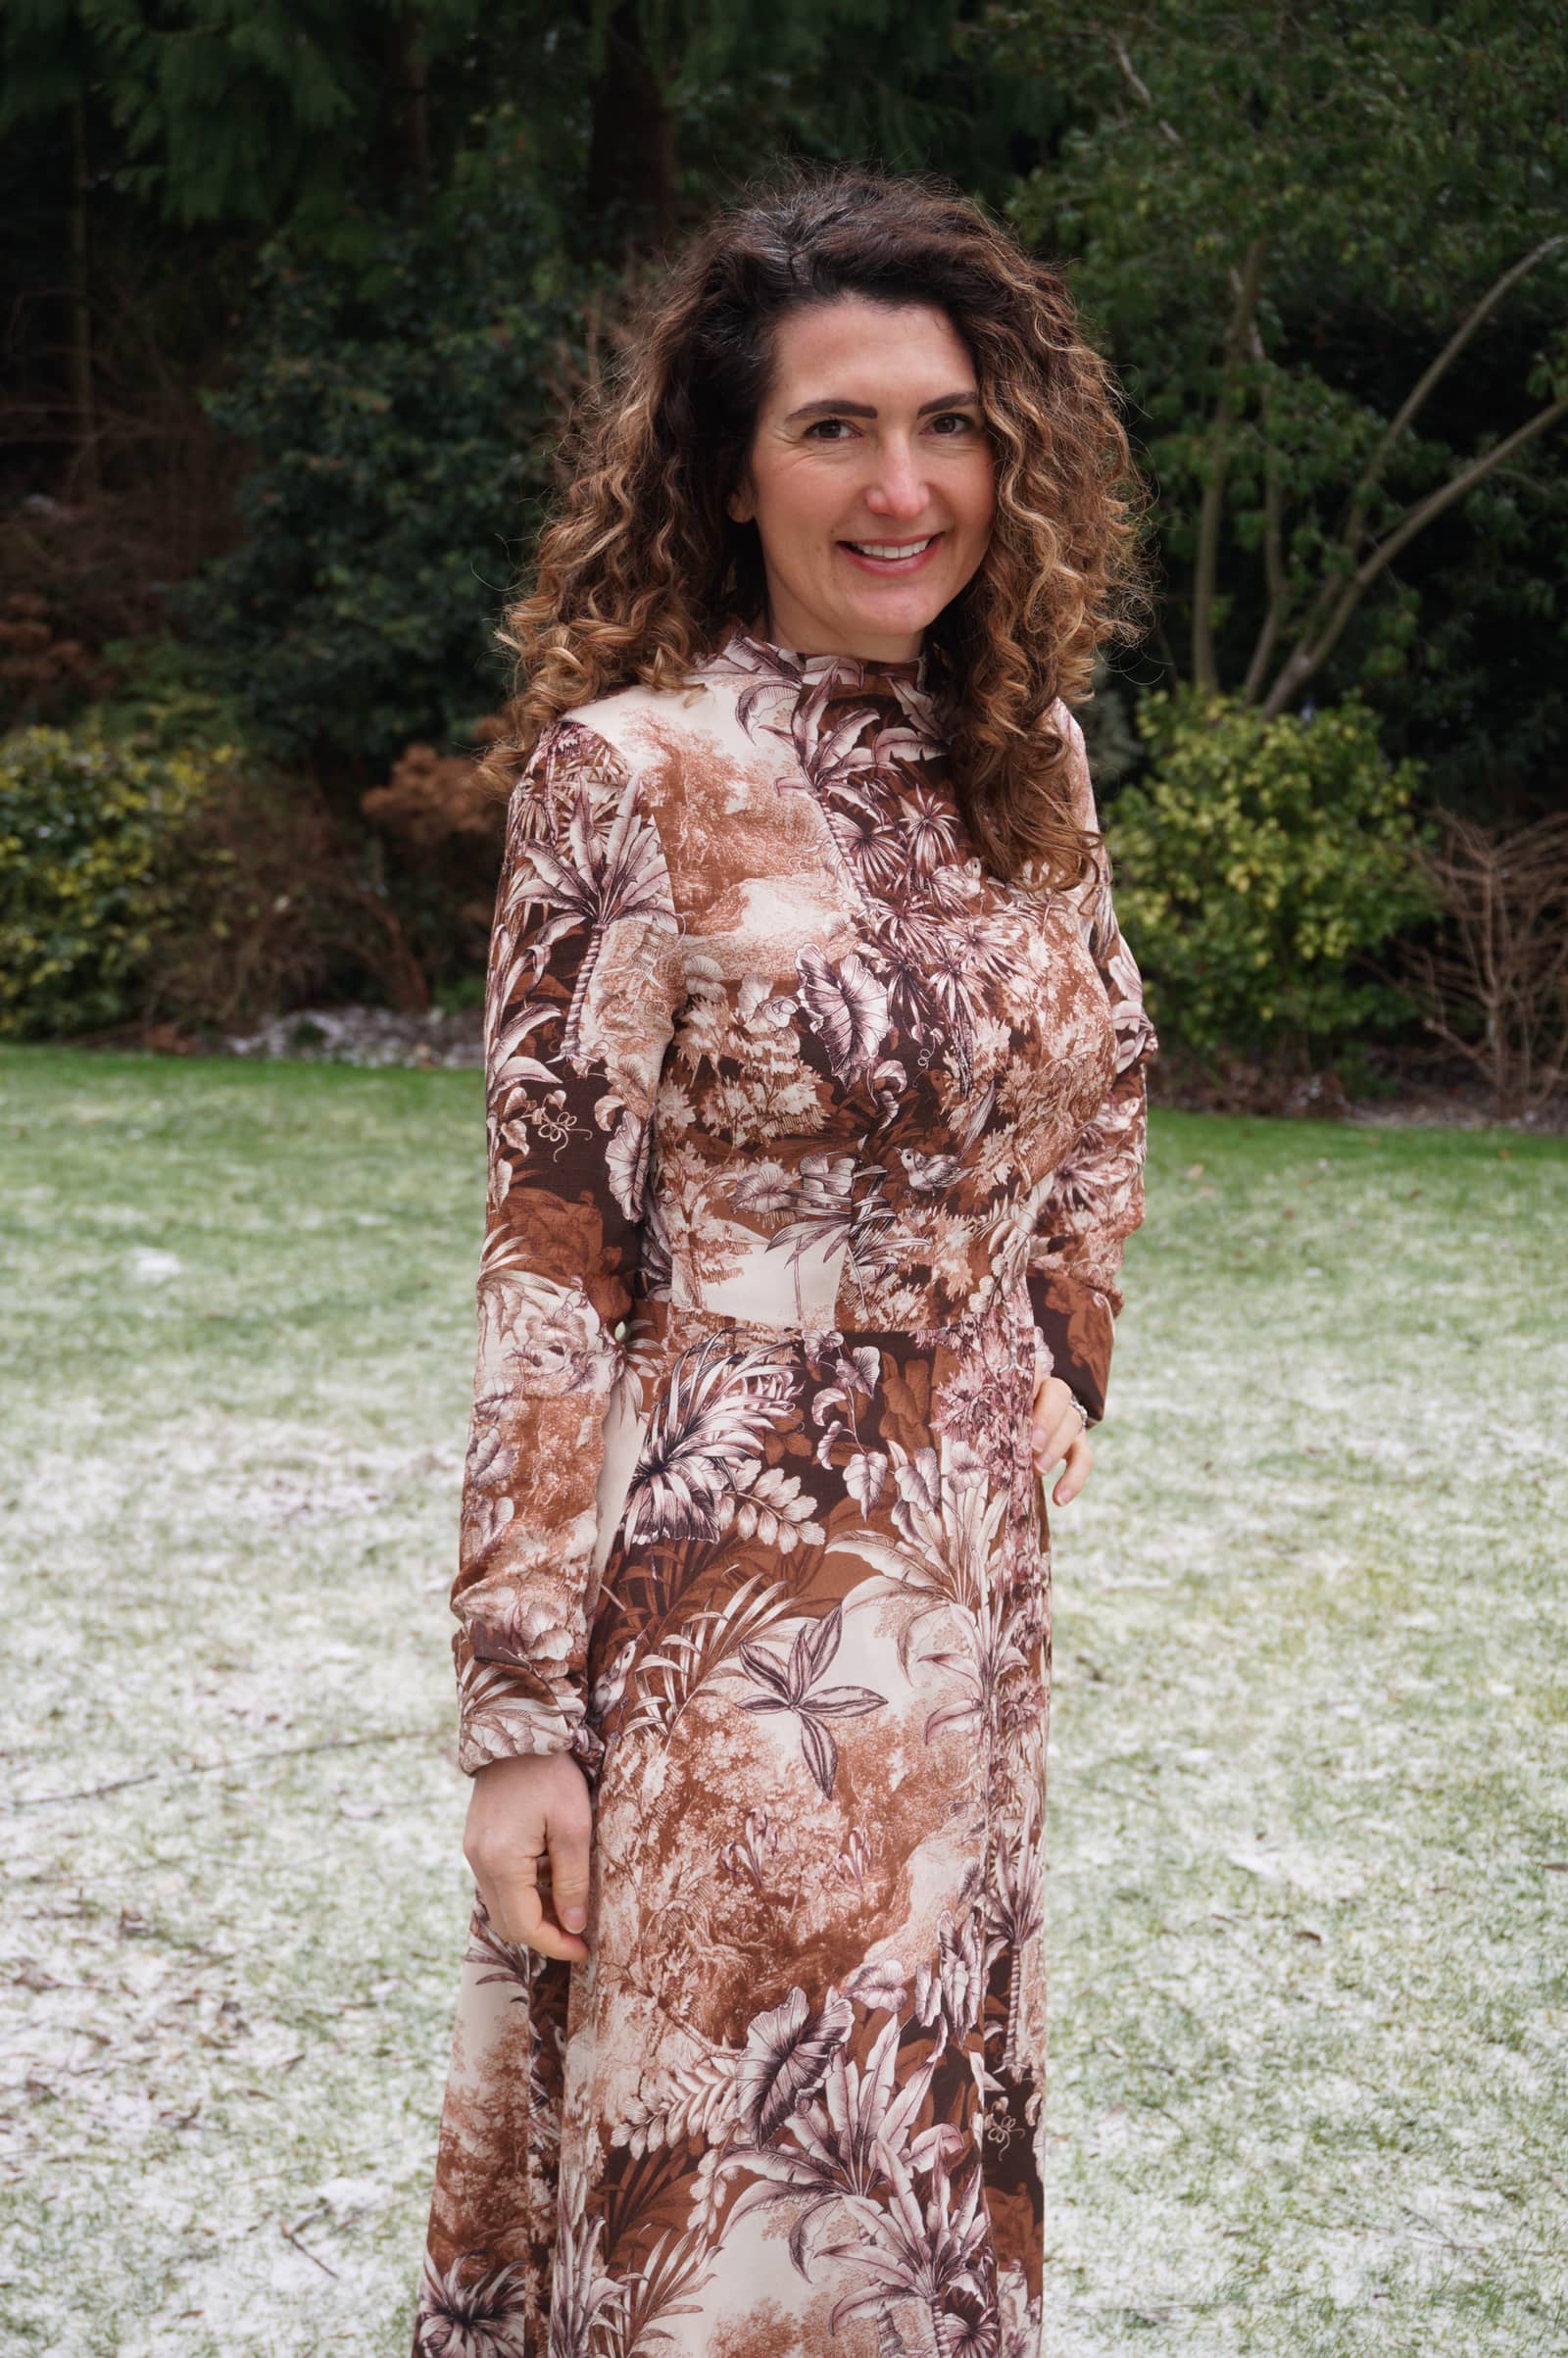
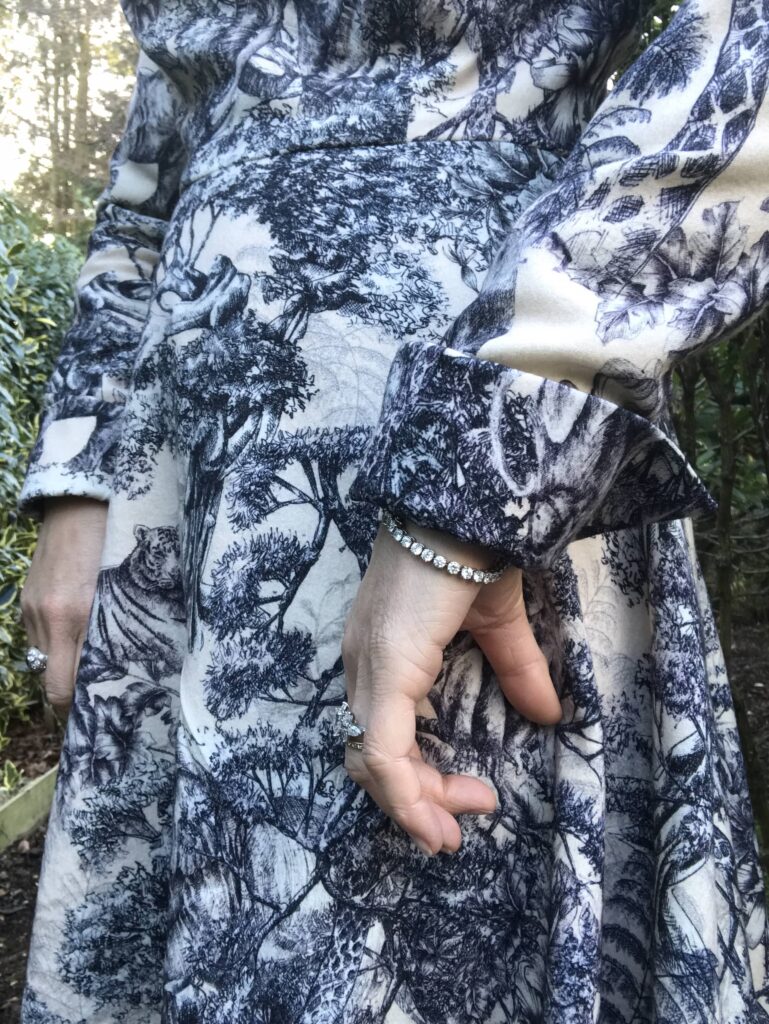
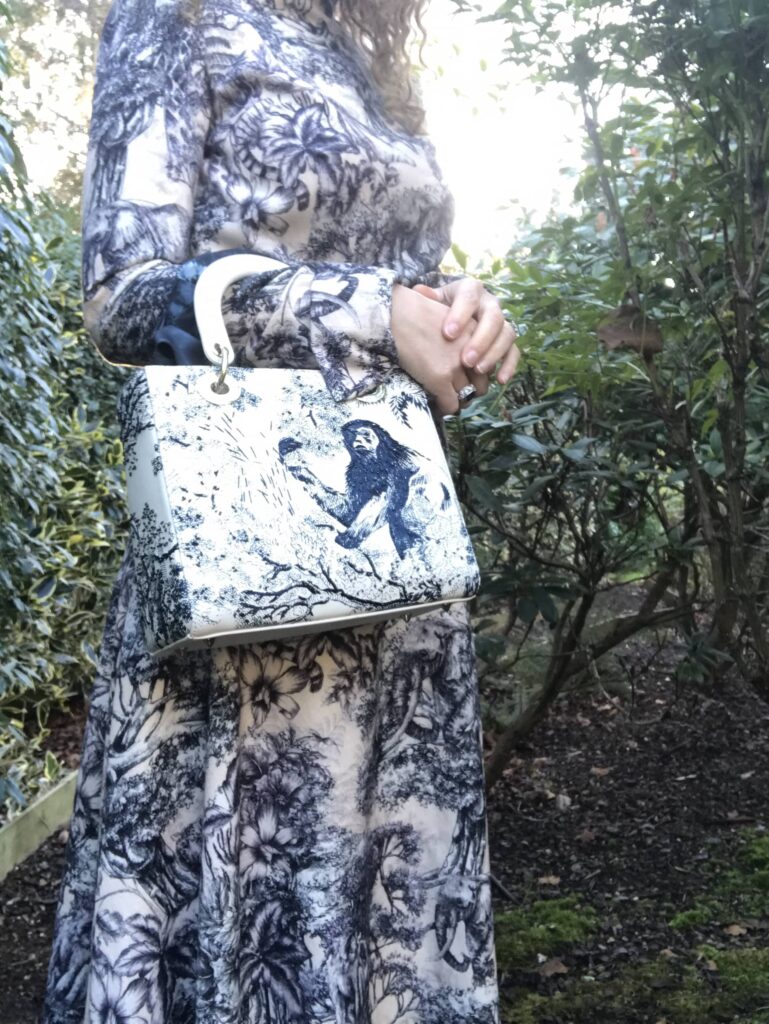
A few years ago, I received an amazing present: a stunning Dior handbag with a modernised Toile de Jouy pattern. I would never have thought I would get my hands on the exact matching fabric but I eventually did – and here it is, sewn as a couture V9327 dress, in a perfect matched outfit!
Toile de Jouy and me
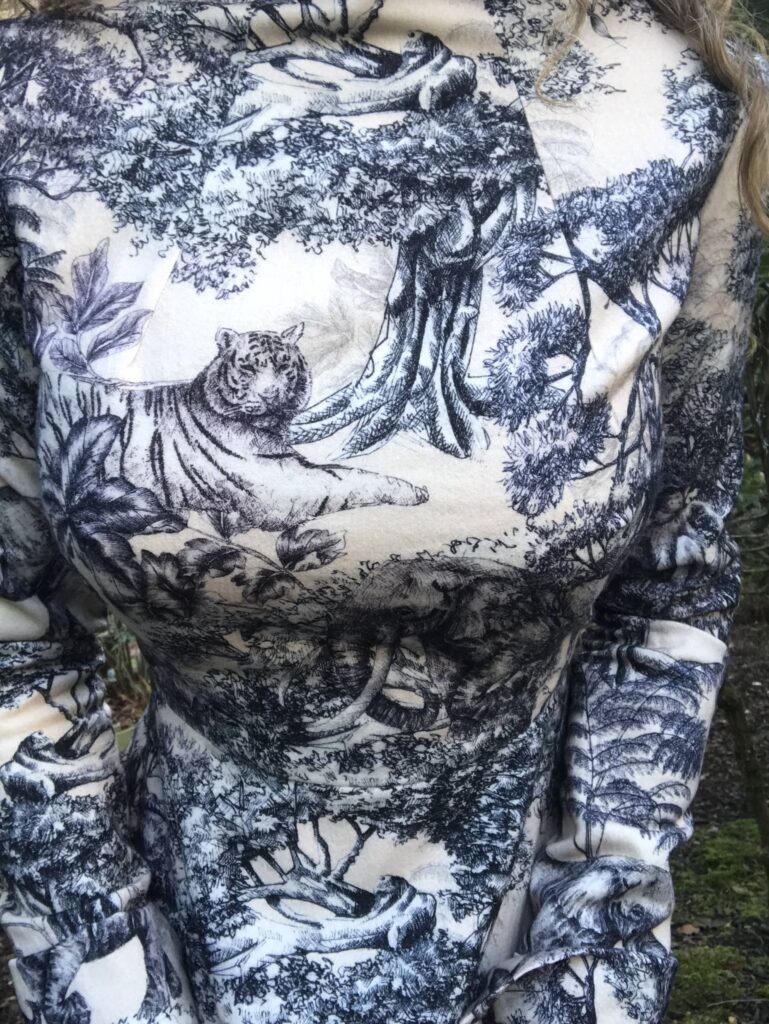
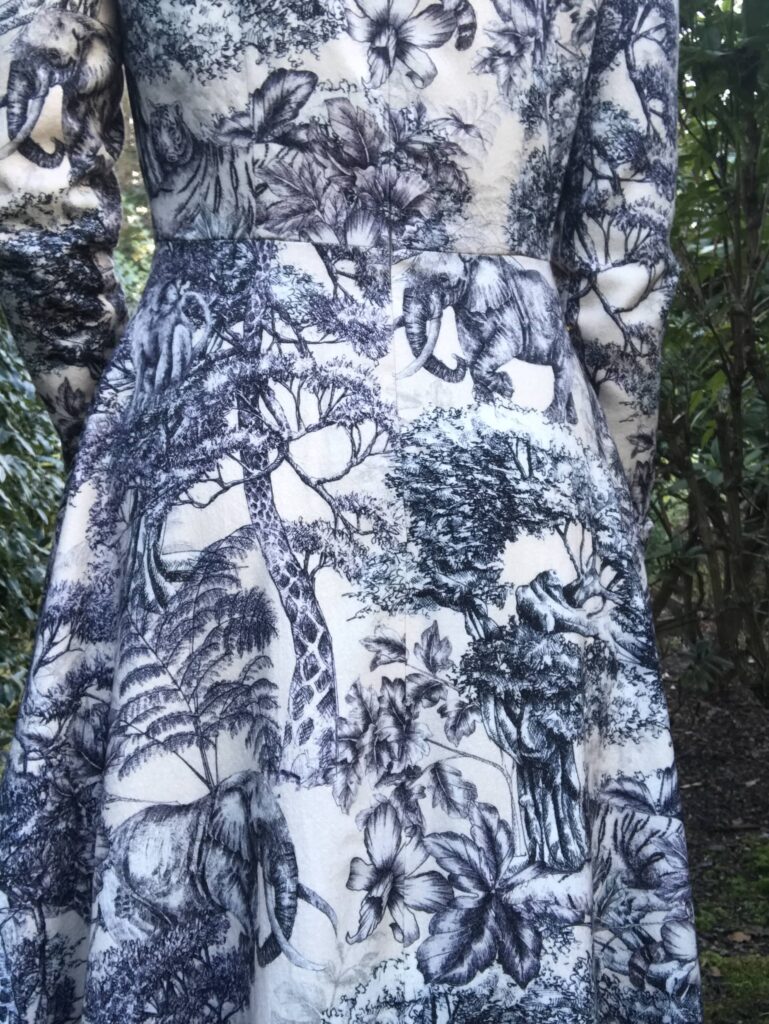
Toile de Jouy is characterised by pastoral scenes with 17th century characters depicted in countryside backgrounds. A few years ago Dior reinterpreted it with animals in jungle backgrounds, making it far more funky. It was initially used for the 2019 Cruise collection but has been reused ever since.
Jouy en Josas, the little village South of Paris where toile de Jouy originated from, holds a very special place in me and my husband’s hearts: this is where we studied and started dating. So this Toile de Jouy handbag was definitely much more than a posh present: it is a very romantic reference to the early days of our relationship.
I initially stumbled upon some fabric from the Dior collection on the Selvedge and Bolts website (one of my best sources of designer fabric). Although it as not within my colour scheme, I (obviously) snapped 3m as soon as I could, sat on it forever not daring touching it, and finally made a V9327 dress of it (which I reviewed here).
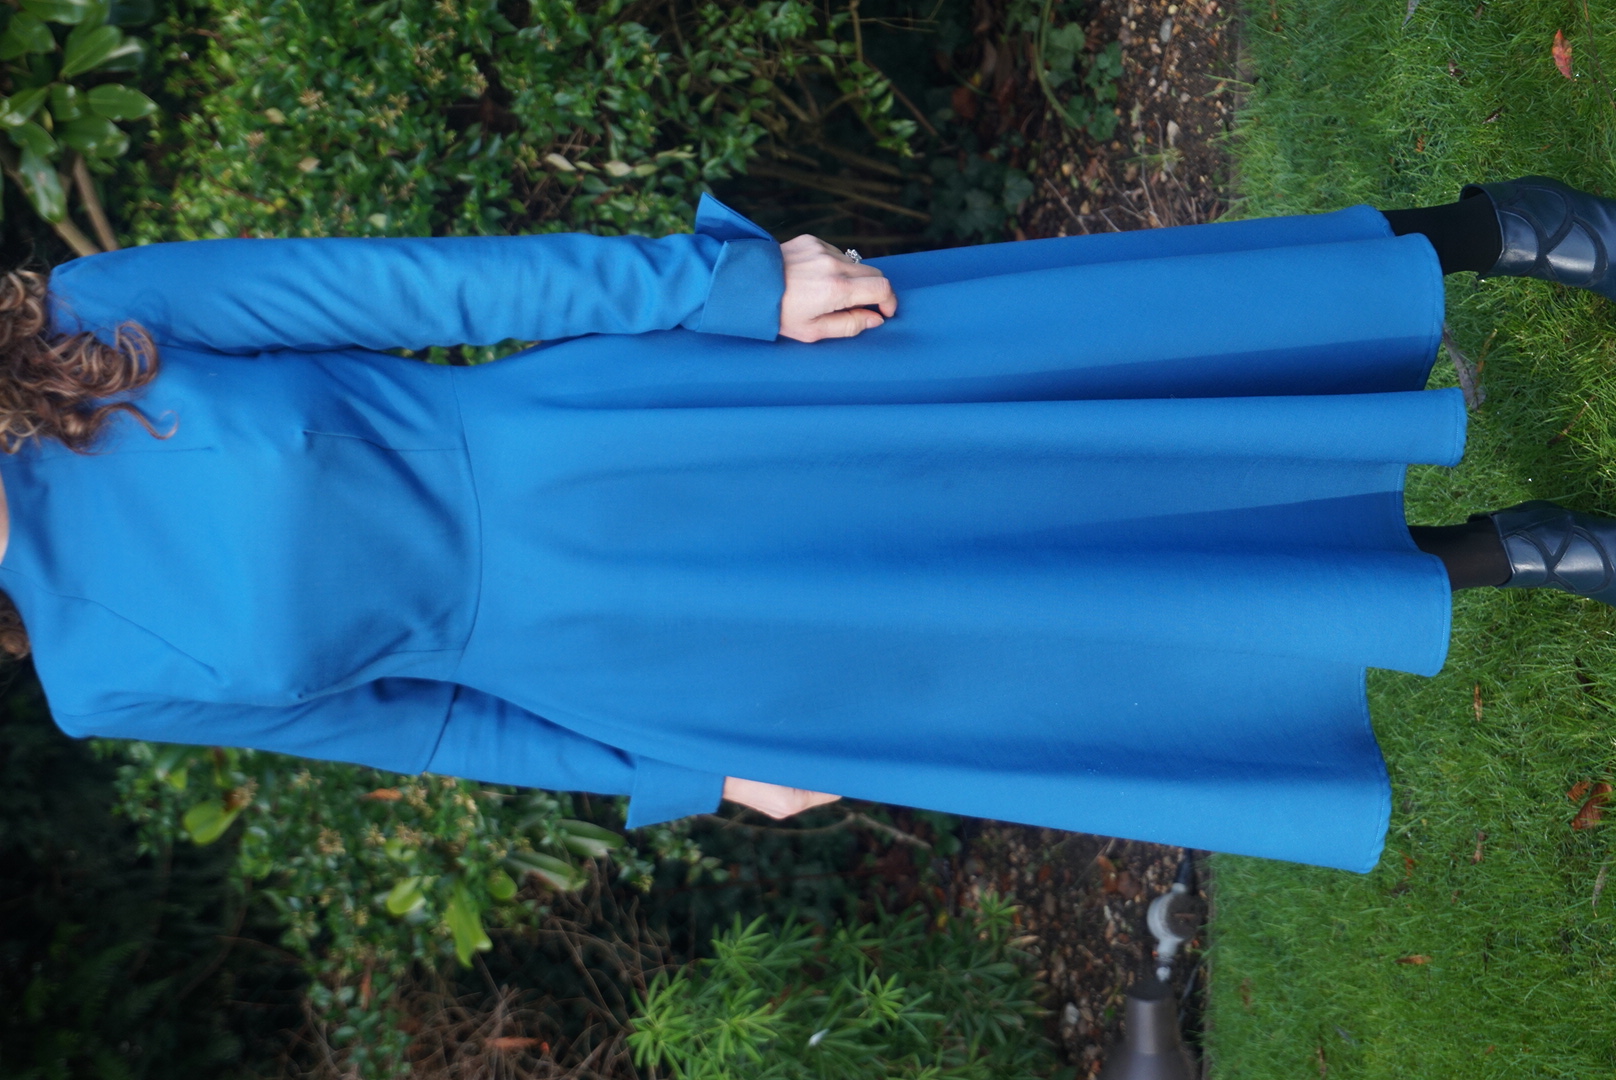
Sadly, this fabric did not match my handbag at all. But this wasn’t the end of a story… Two years later Selvedge and Bolts had its blue twin and… here we are!
V9327 pattern review
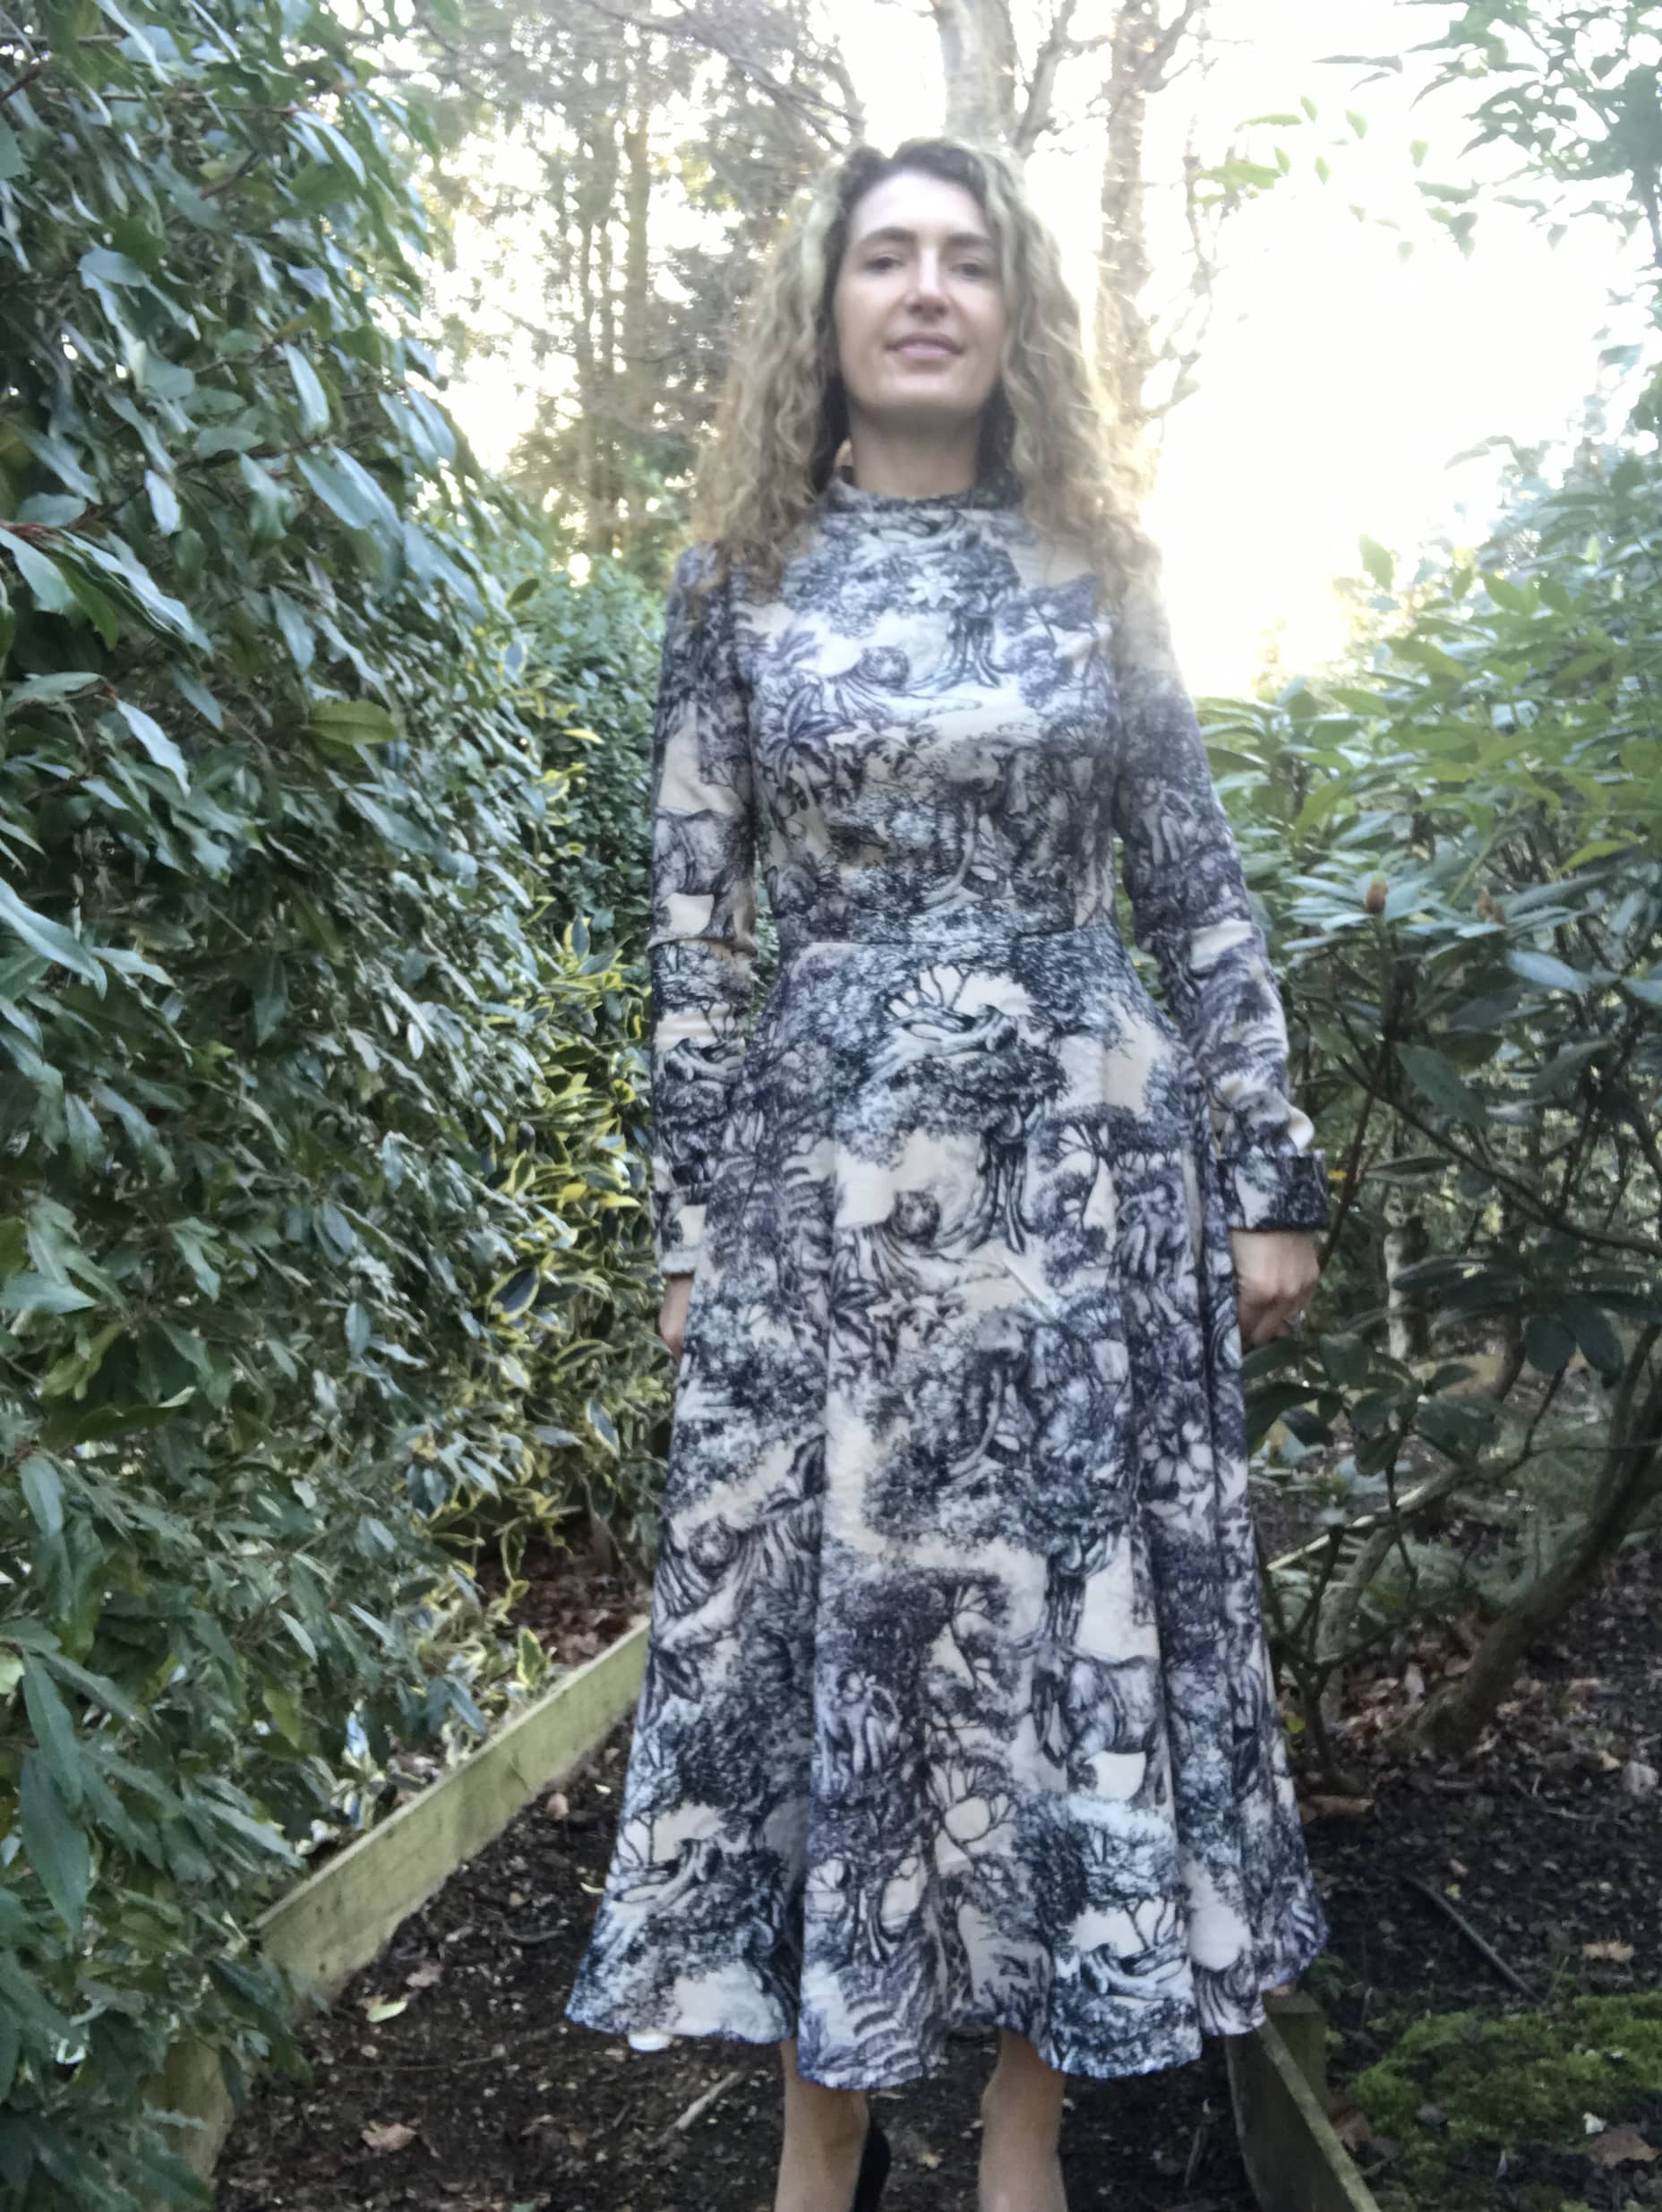
This is my fourth time sewing this pattern, as I find it particularly appropriate for the winter with its raised collar (I reviewed two of my previous makes here and here).
They are many things I really like about this pattern:
- It fits perfectly, in particular (but not only) at the bust as it offer custom-cup options. I cut my usual size 10 Vogue and C cup (for my UK 8/ FR 36/ US 2 and E cup) and made no changes whatsoever.
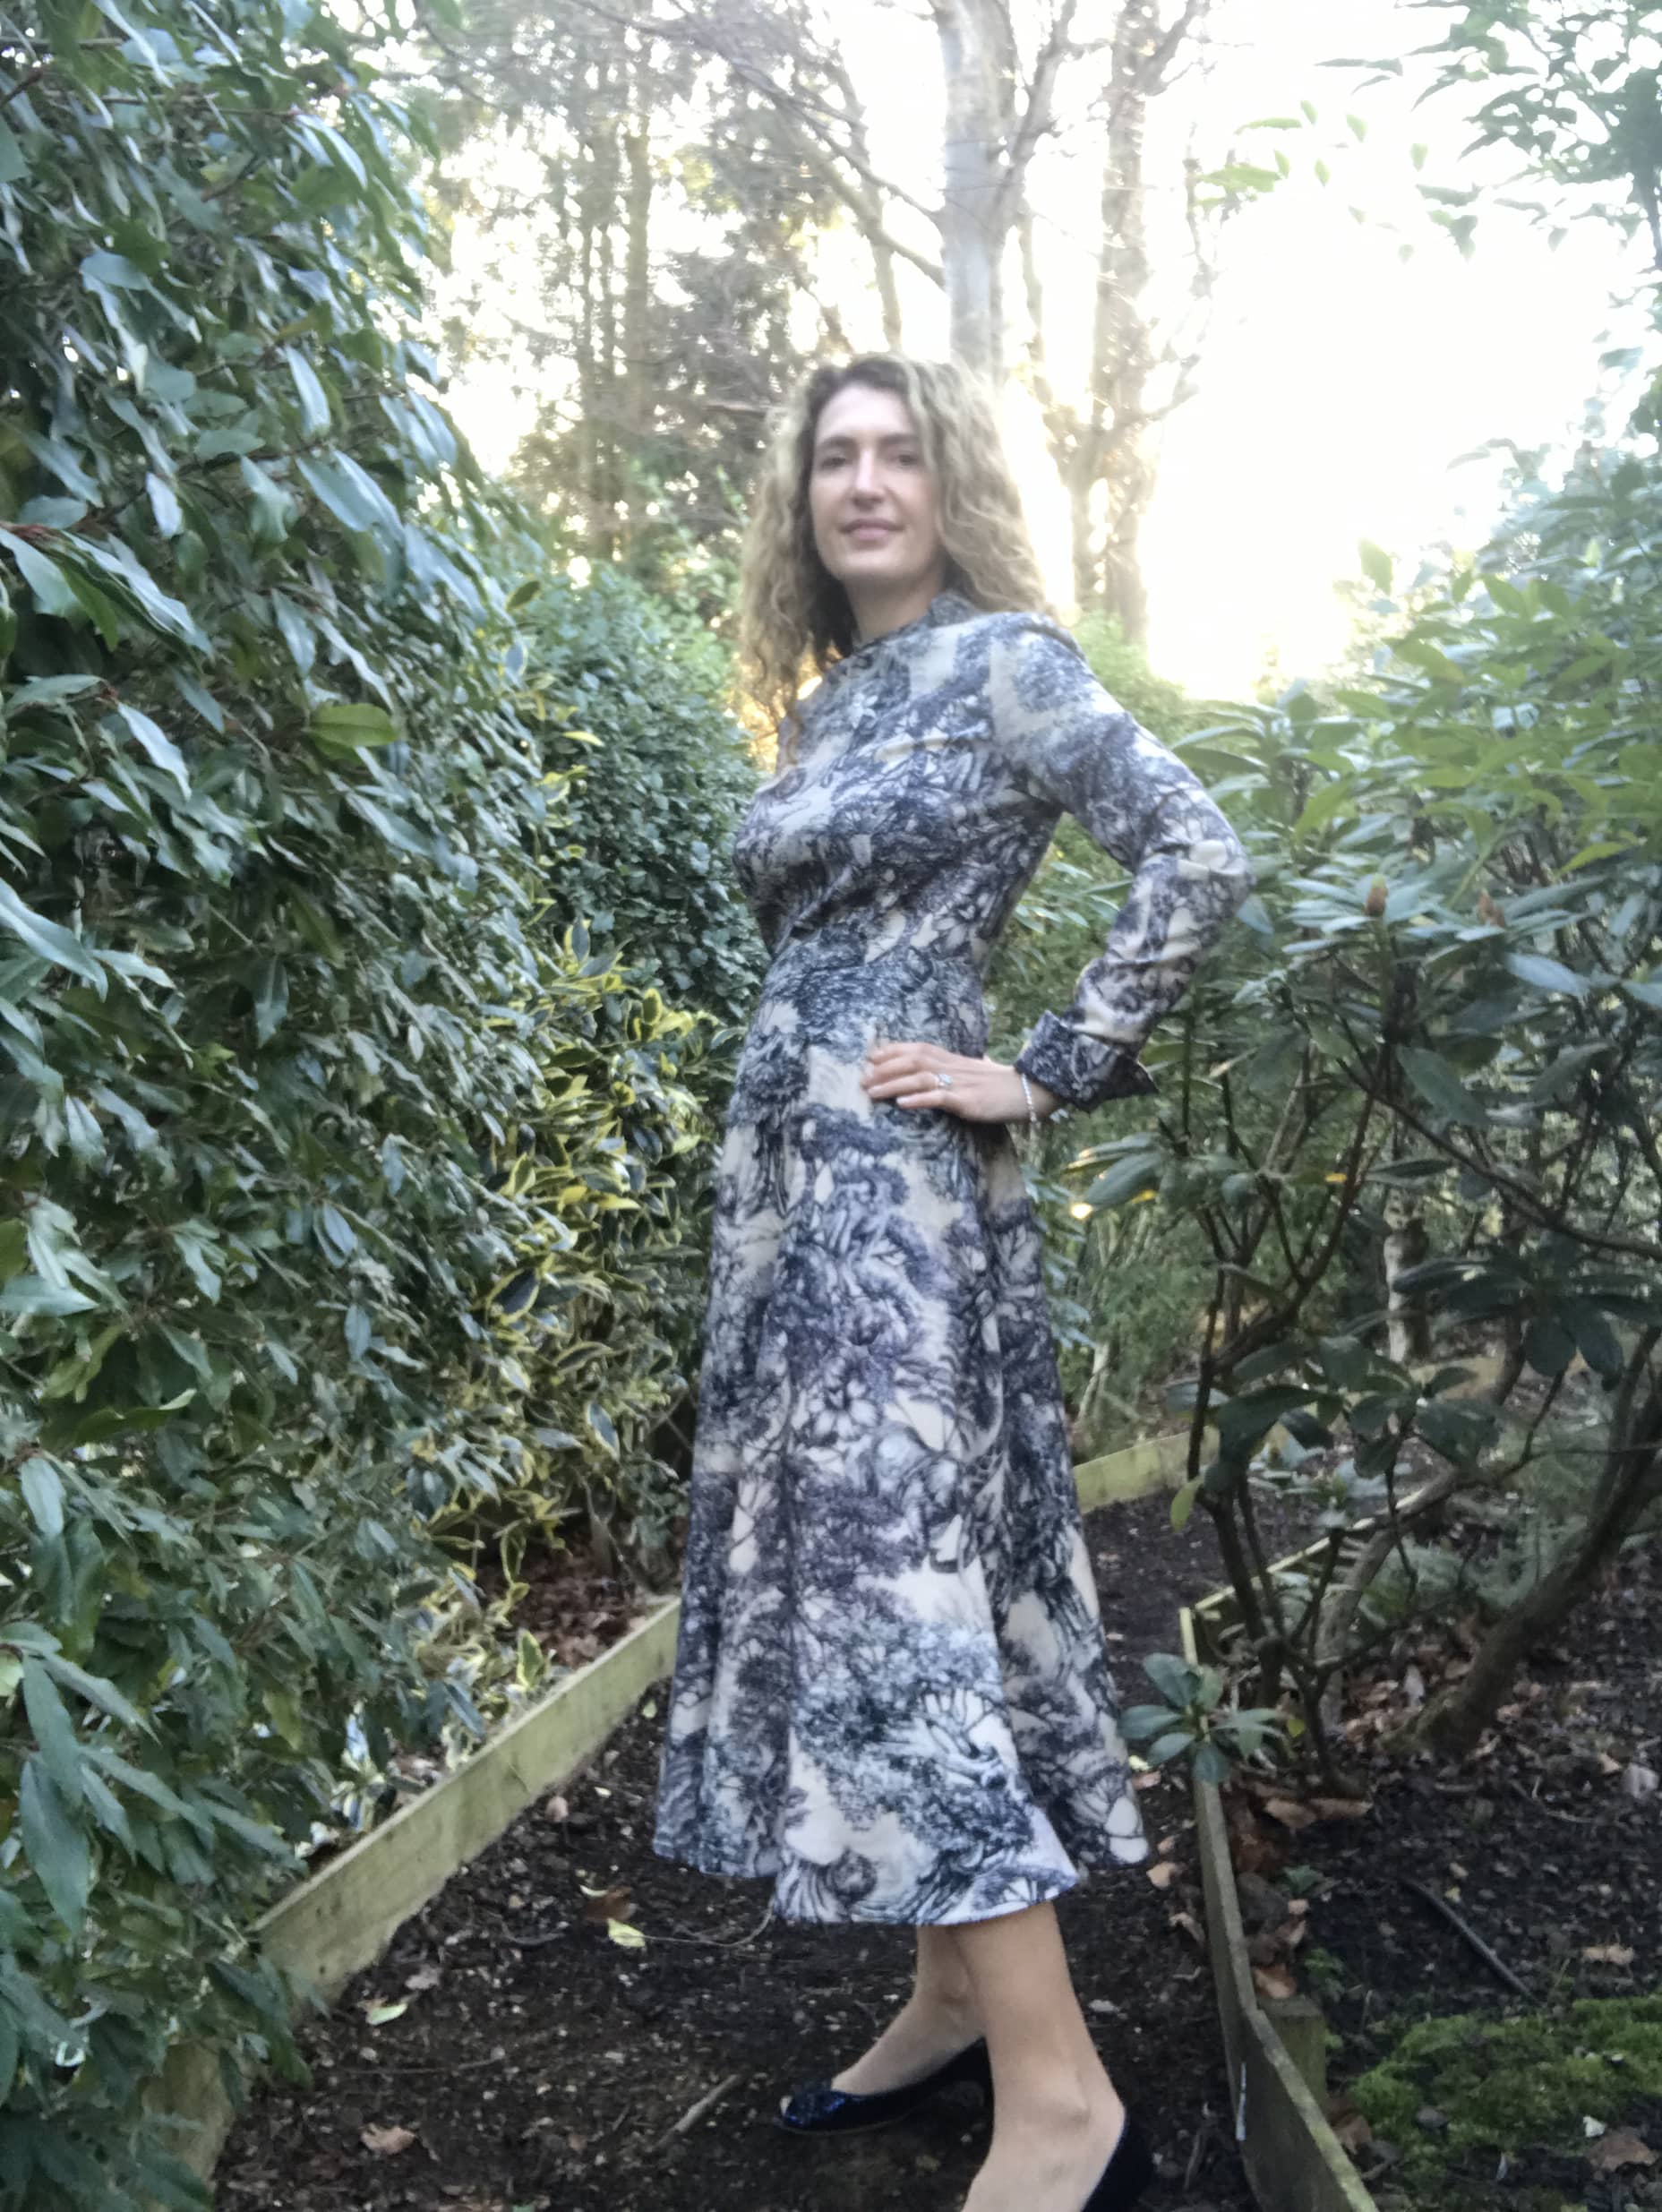
- The shape is very flattering: fit-and-flare is my favourite dress shape ever, but having a skirt which is a bit less voluminous makes this dress very elegant in my view. I also really like the cuffs.
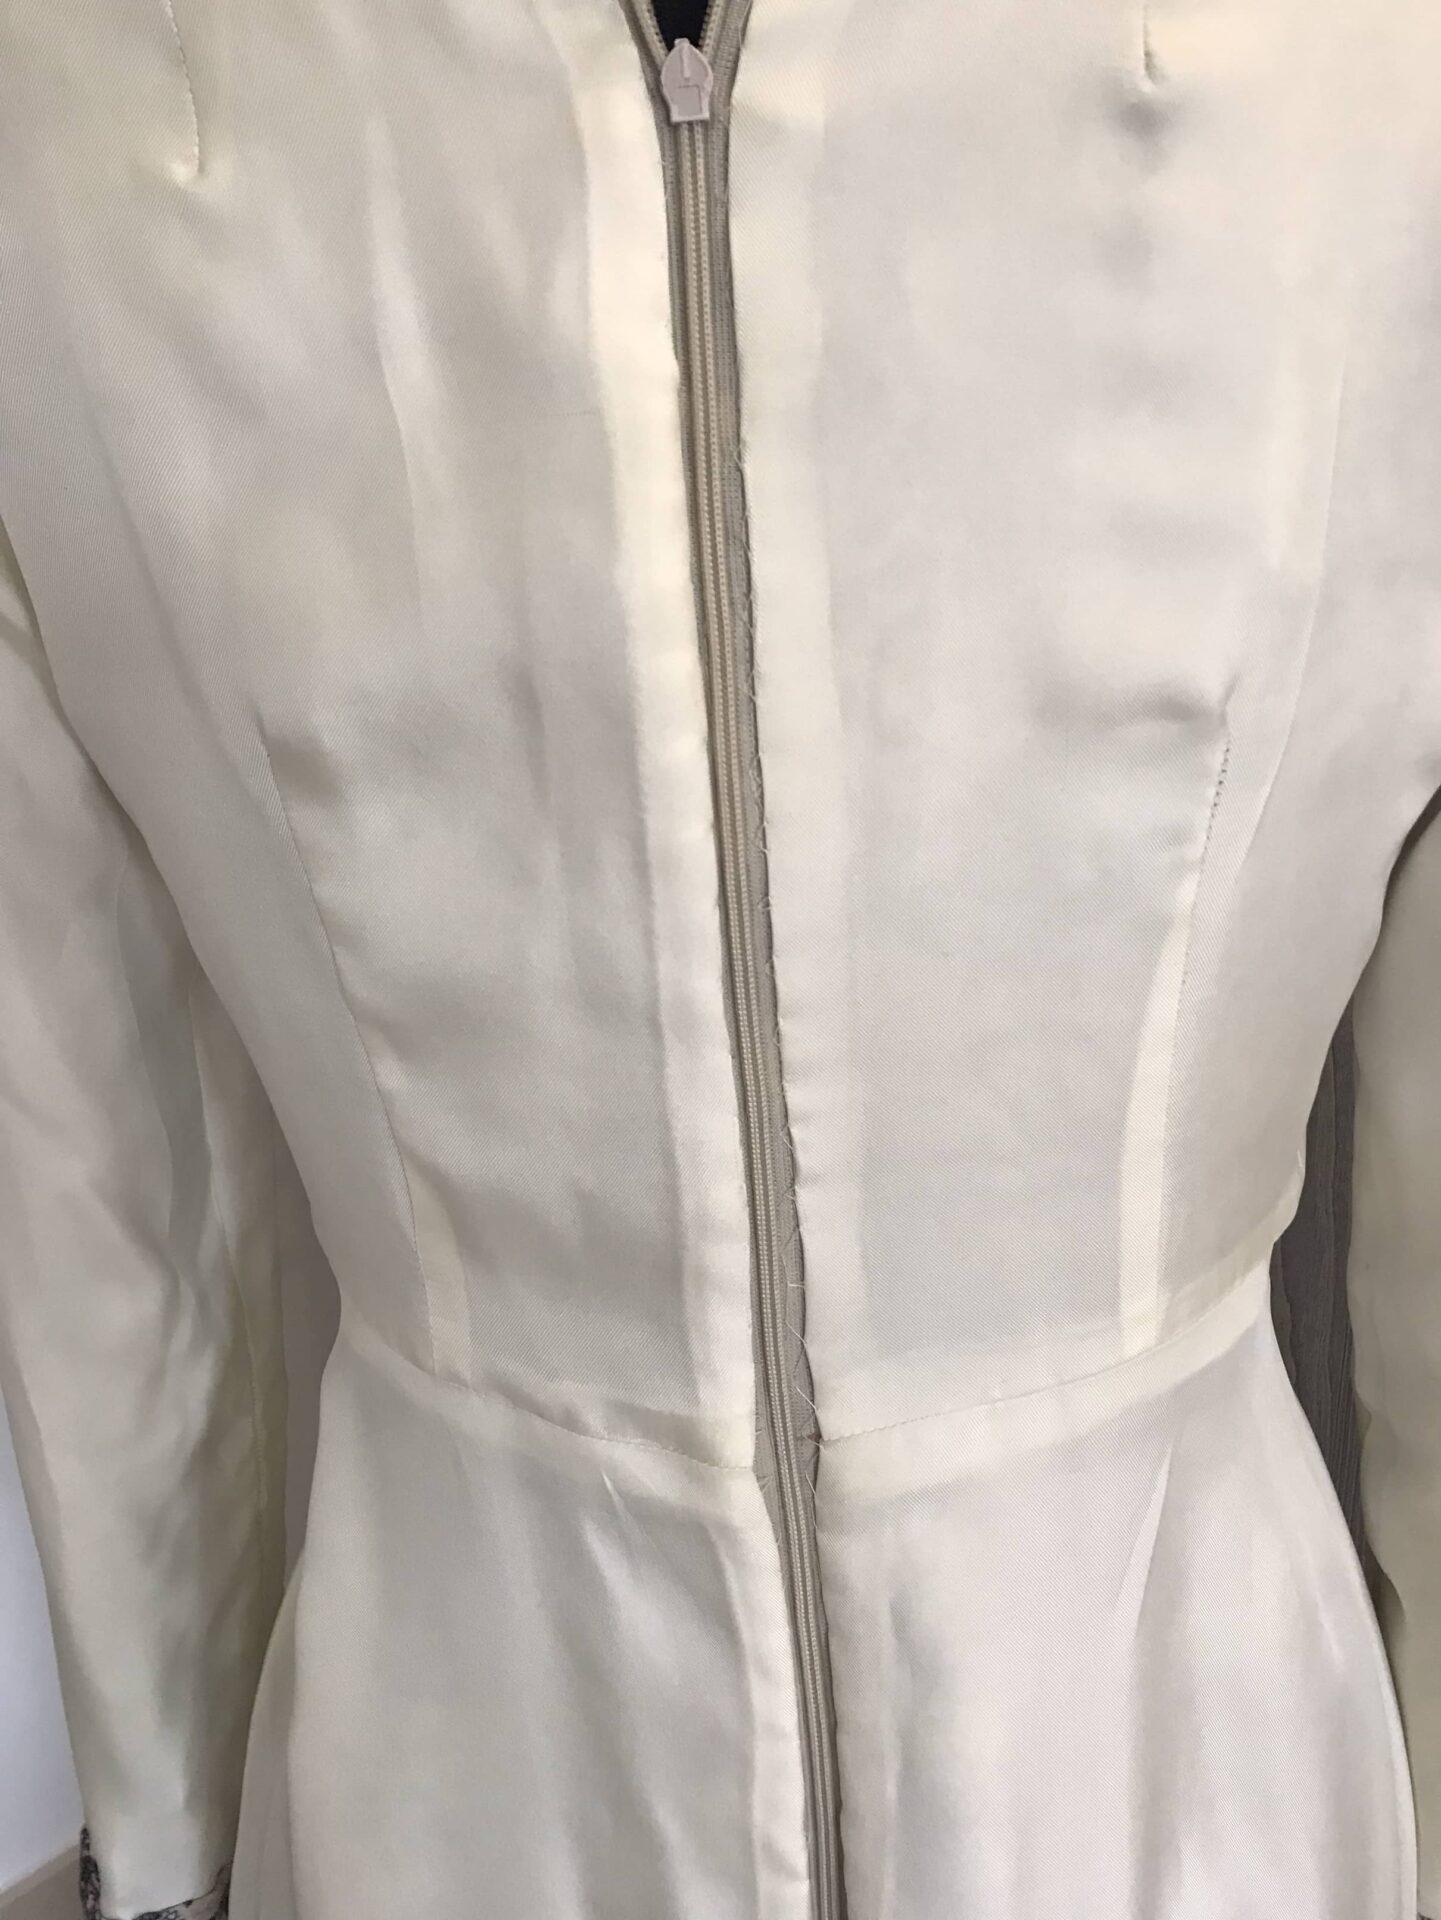
- It is quite an easy pattern to sew, with limited pattern pieces and only the back zip as technical difficulty.
- After making two plain-colour dresses with this pattern, I actually realised it was very appropriate for “pattern-heavy” fabric: due to the bodice darts positioning and the midi half-circle skirt, the fabric pattern is really shown in its best light, without being cut or put at a weird angle.
Working on a perfect finish
This time, I put of a lot of time trying to achieve a perfect finish.
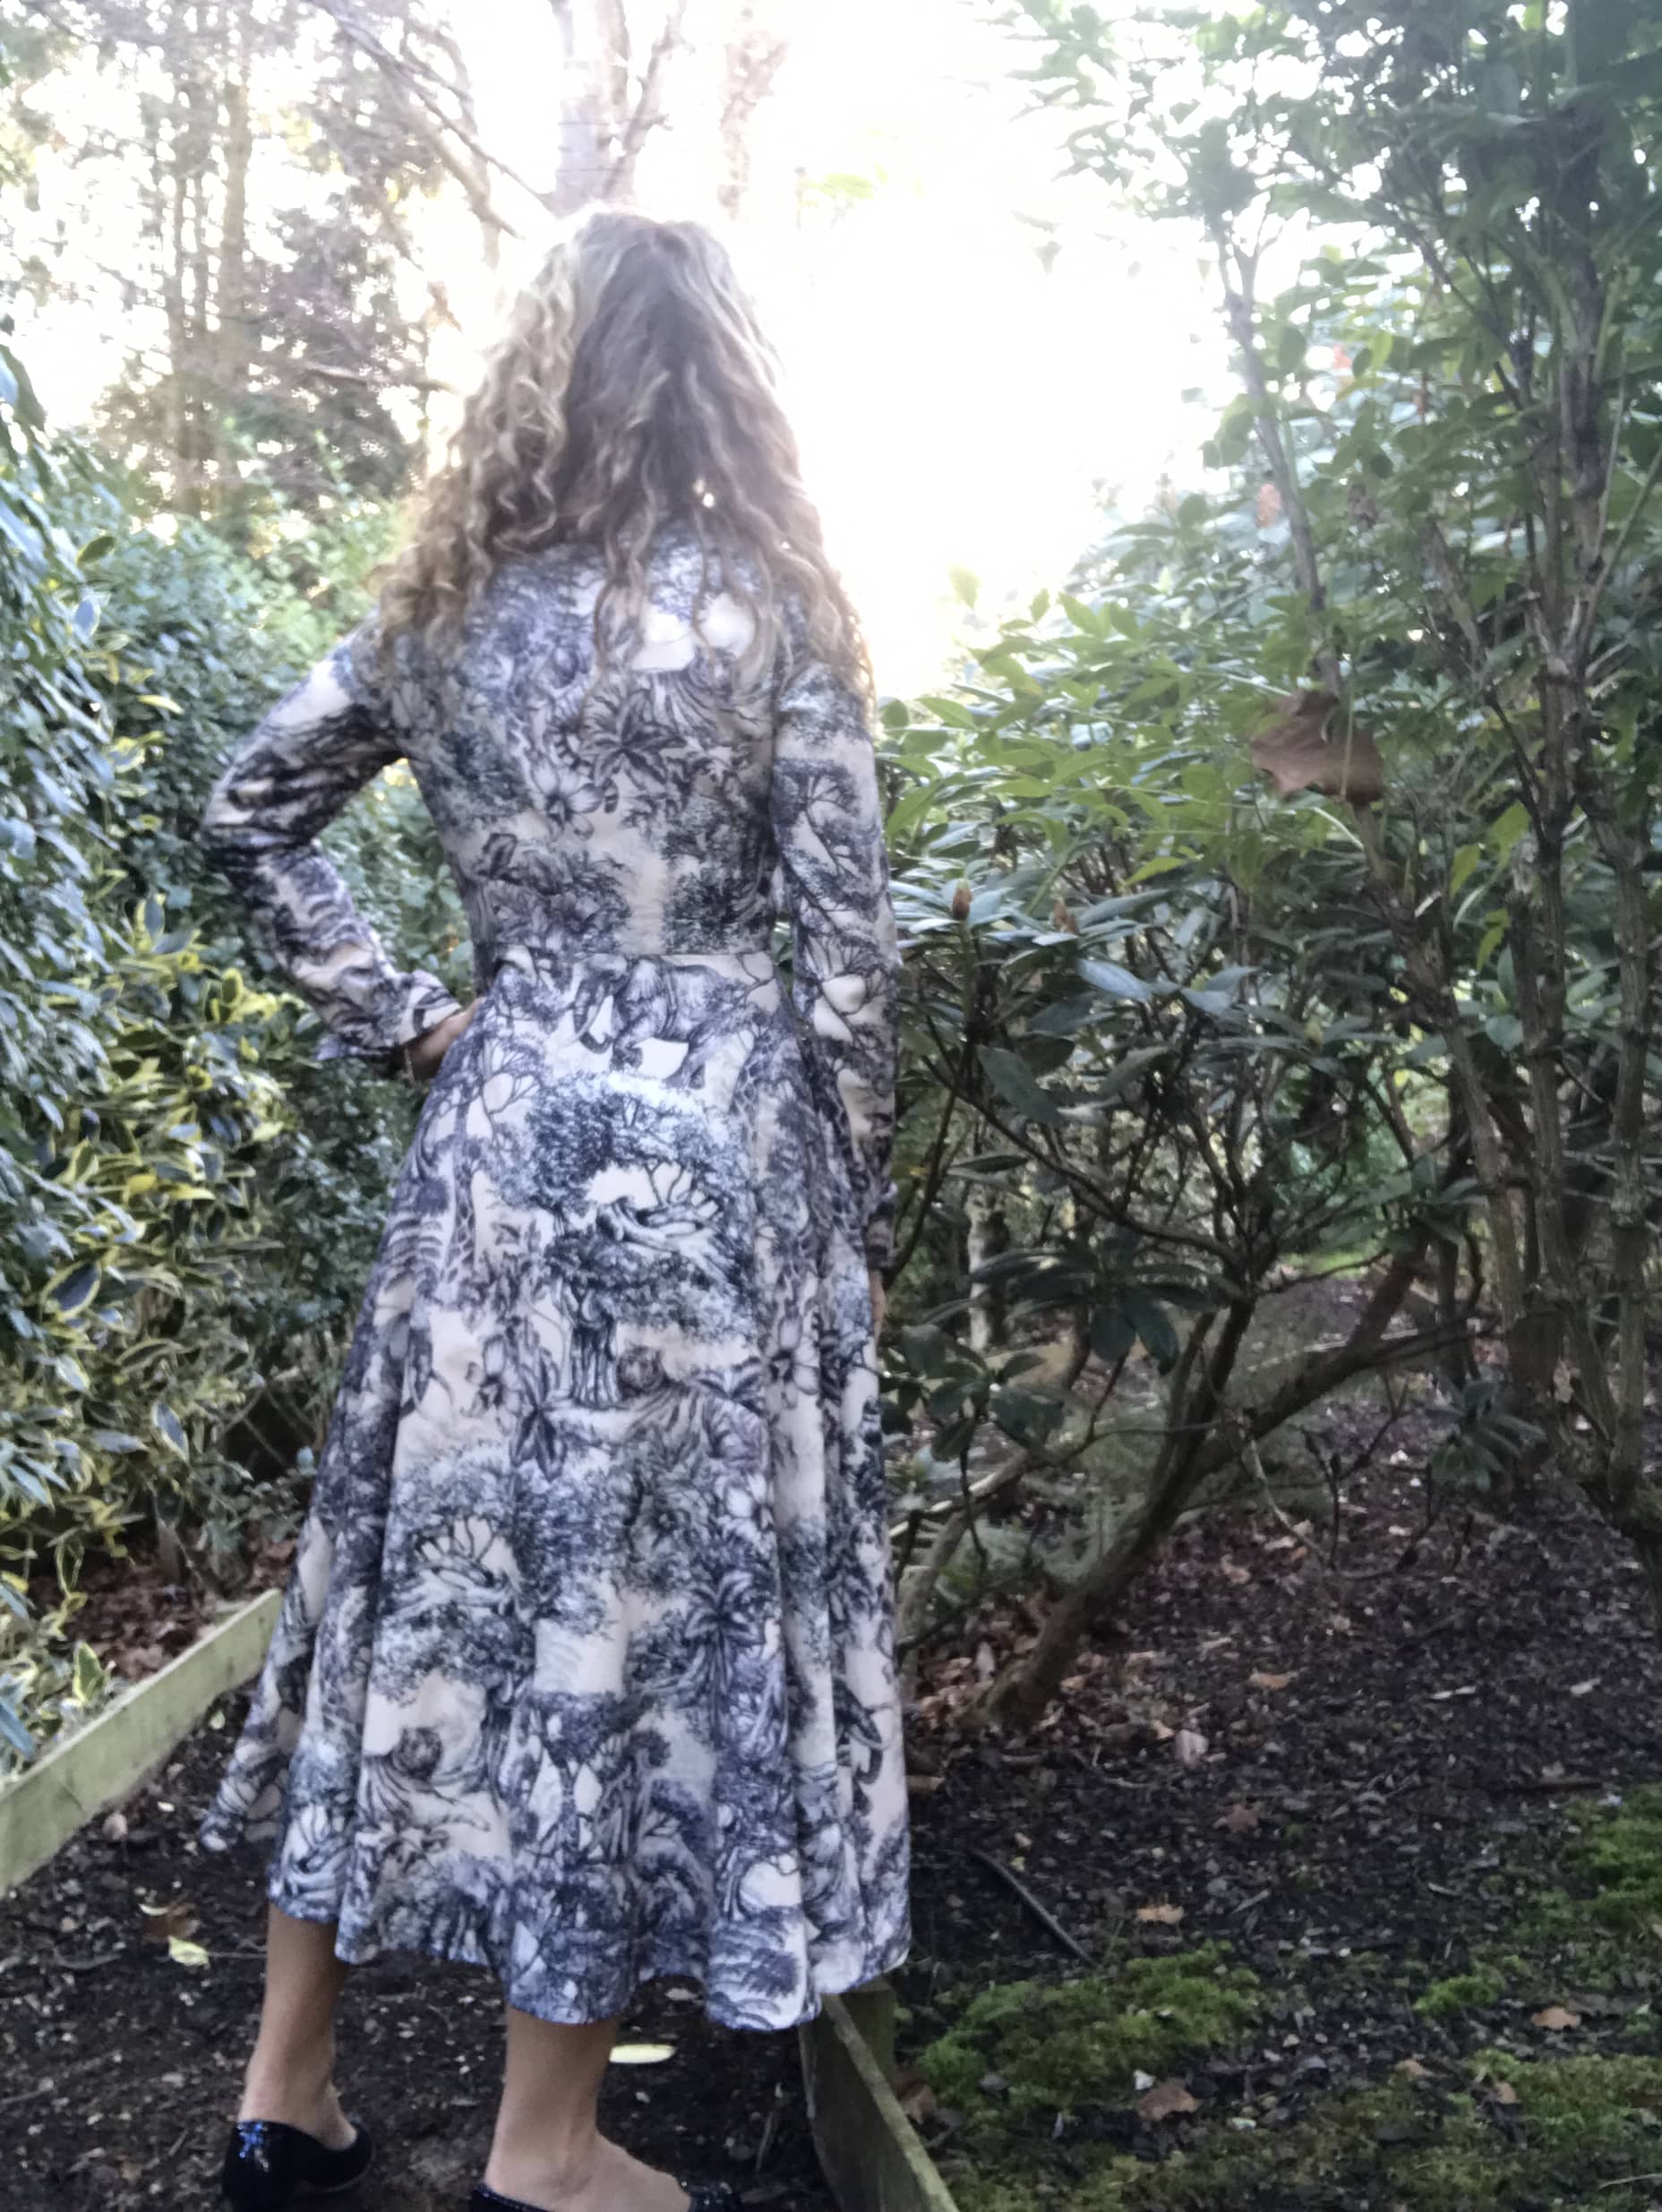
Firstly, I took great care to pattern match my fabric at the back, where the zip is installed. I rarely bother doing that and I am extremely proud of my achievement here, so much so that even made a Instagram reel of it!
Secondly, I entirely lined the dress with white silk and here are well paid more attention to a neat finish. So instead of sewing both the zip to both fabric together (quick and dirty), I actually only attached it to the main fabric and then end-saw the lining (much longer but much nicer).
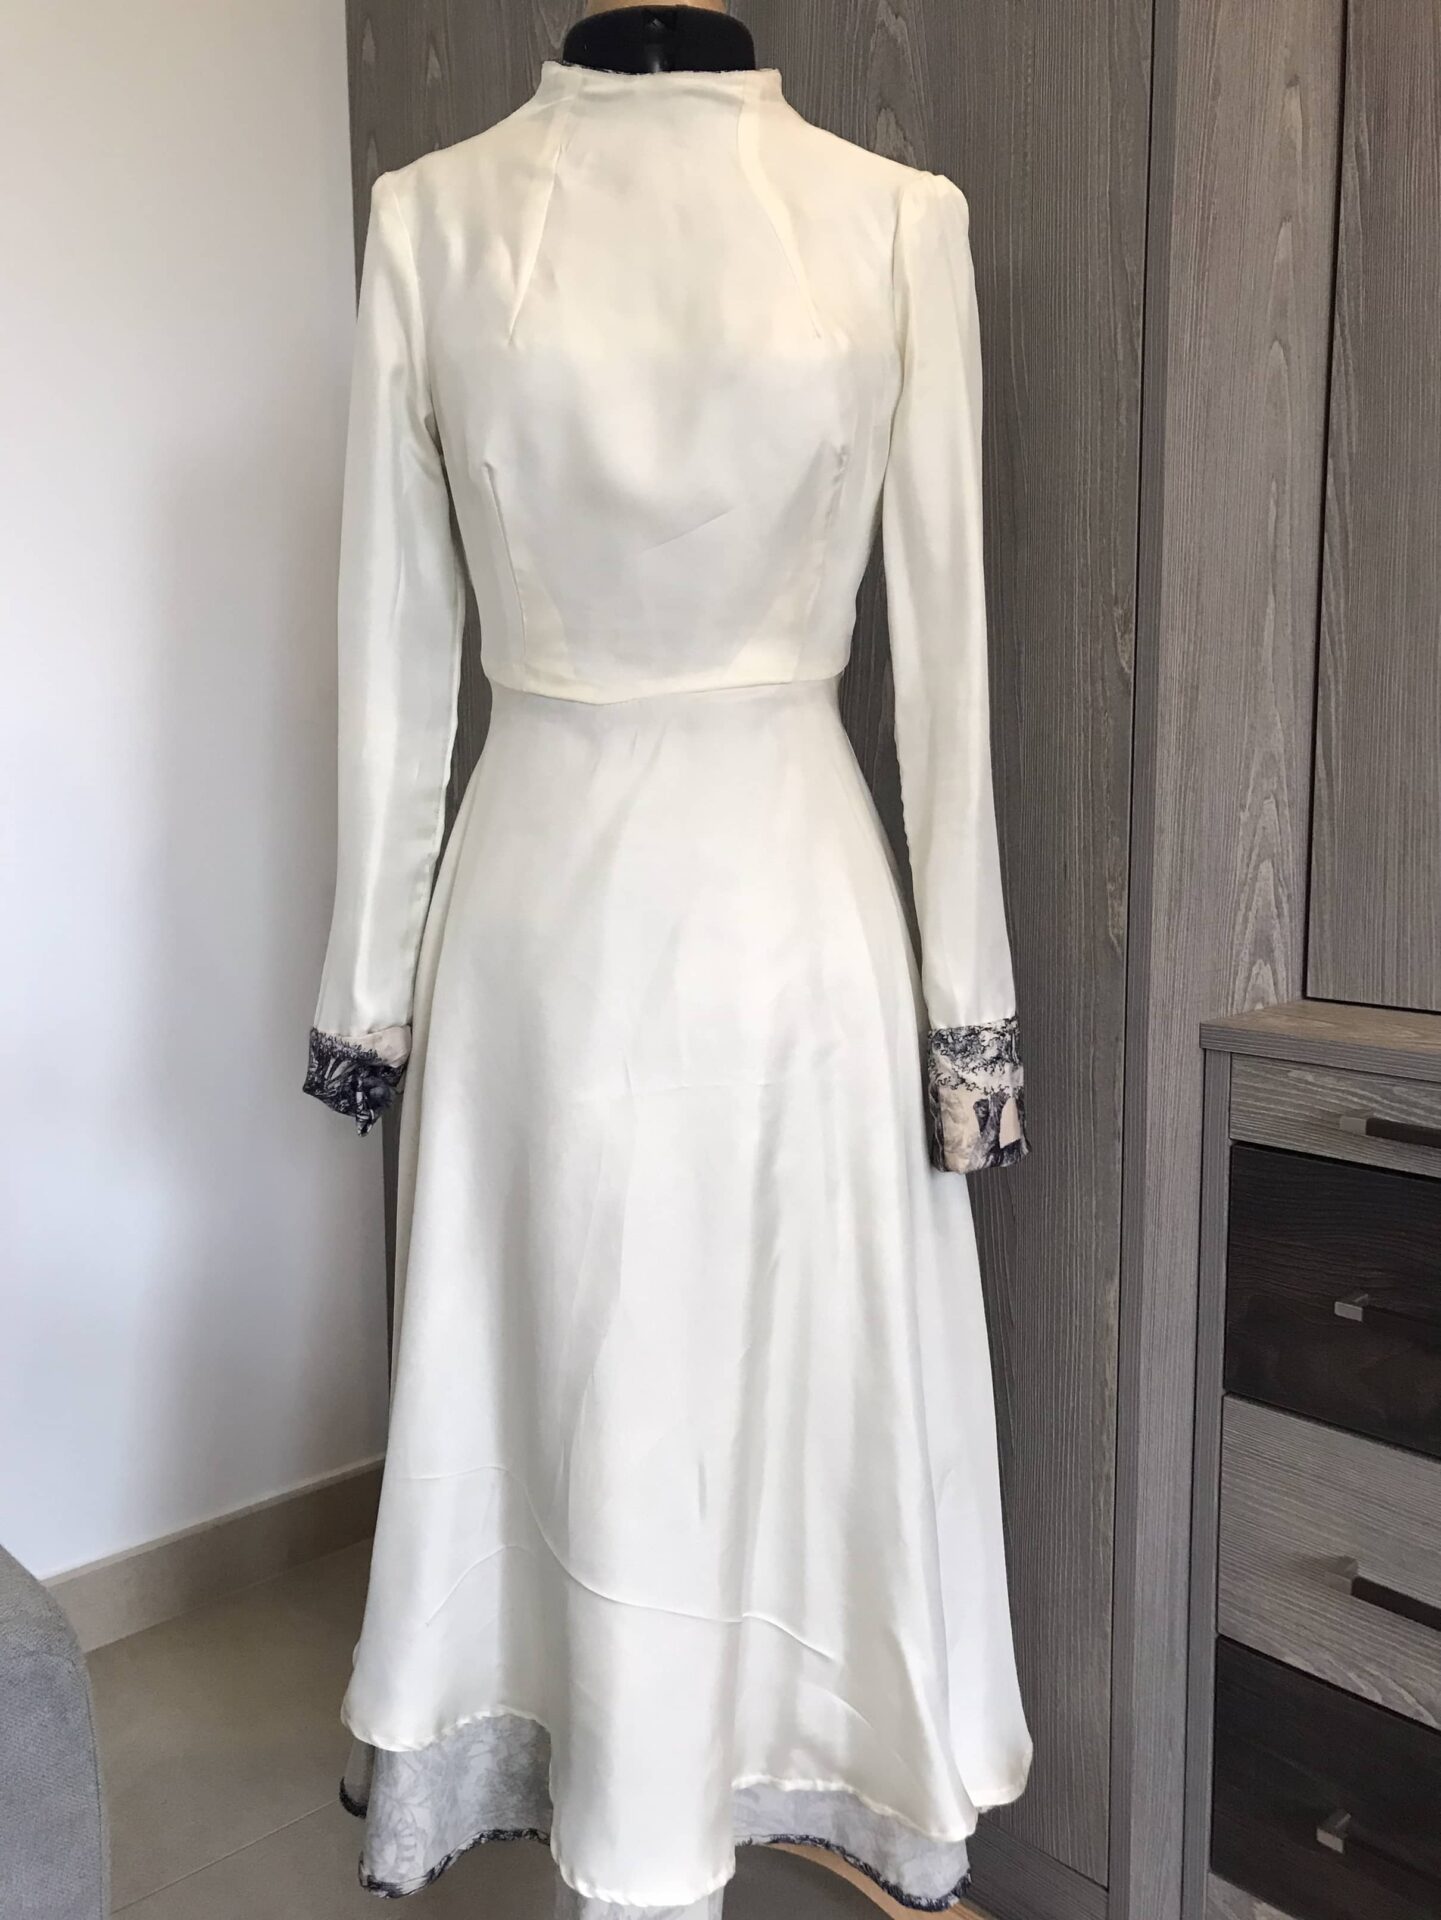
And thirdly, I let the dress sit for 48 hours before hemming. It is quite incredible how the fabric moved in so little time- by more than 8cm on the sides!!!I hadn’t done it for my first nearly-Dior dress and deeply regretted it – it took me a year of not wearing it to finally gather the energy to re-hem it all (dress + lining!).
Happy matchy-matchy girl!
This dress is beyond anything I could have hoped for and I am absolutely thrilled at this make. I haven’t yet dared wearing the dress/ bag combination in public but I am sure I’ll manage!
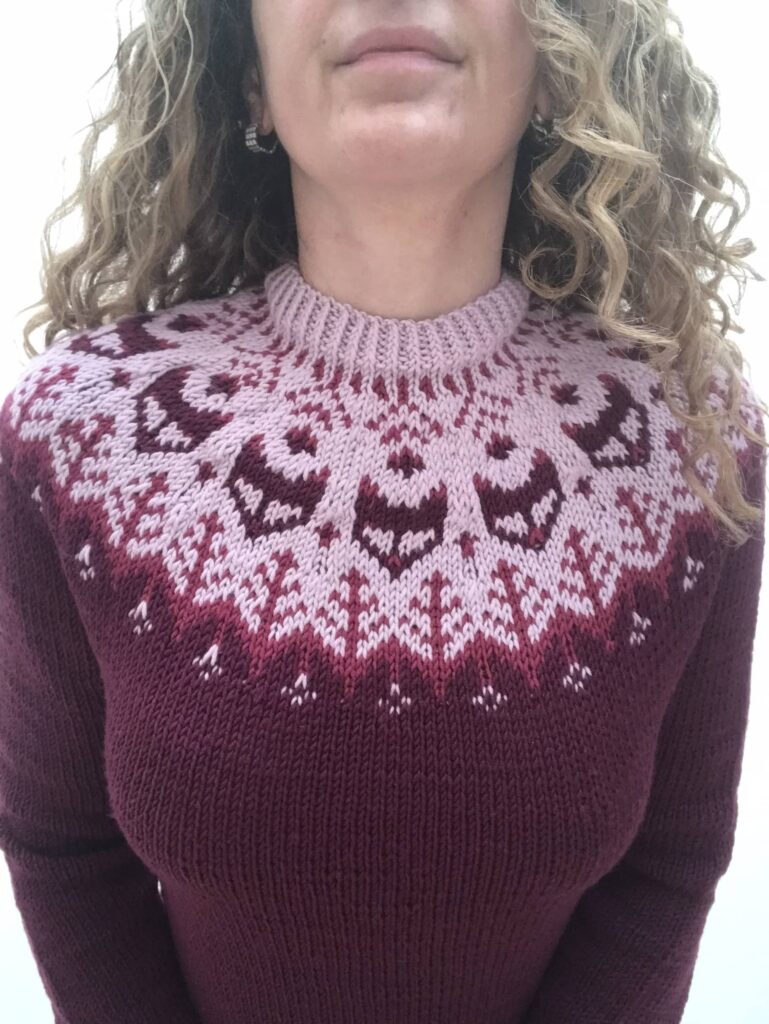
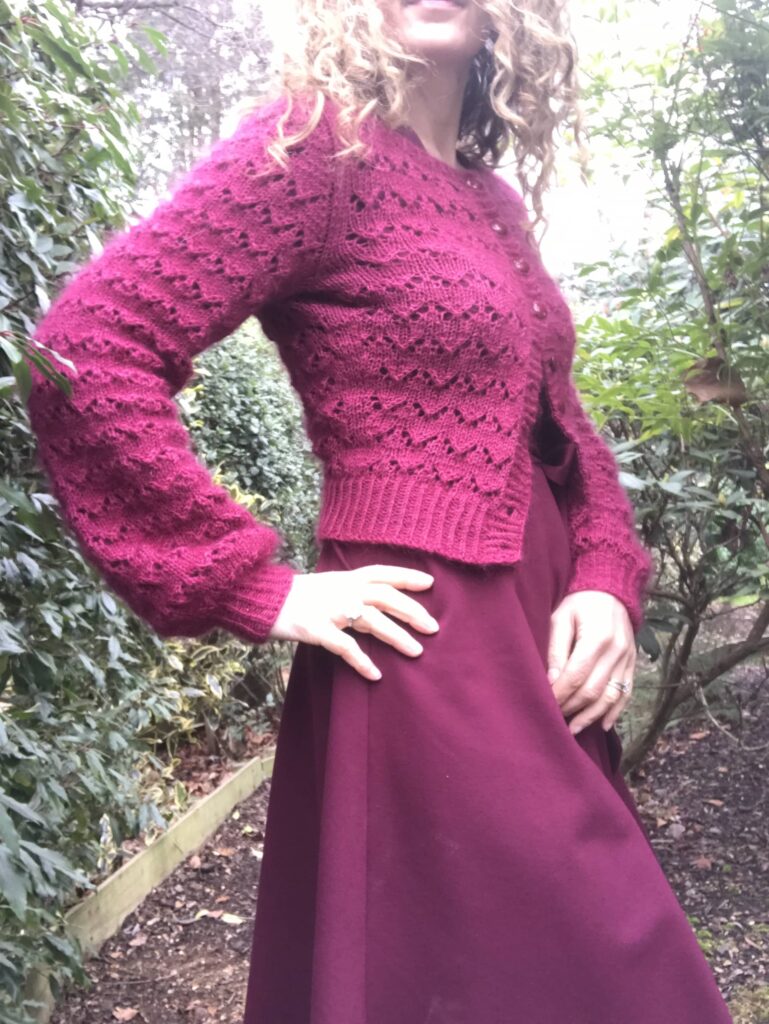
My second stranded colorwork knit: “Into the Wild”
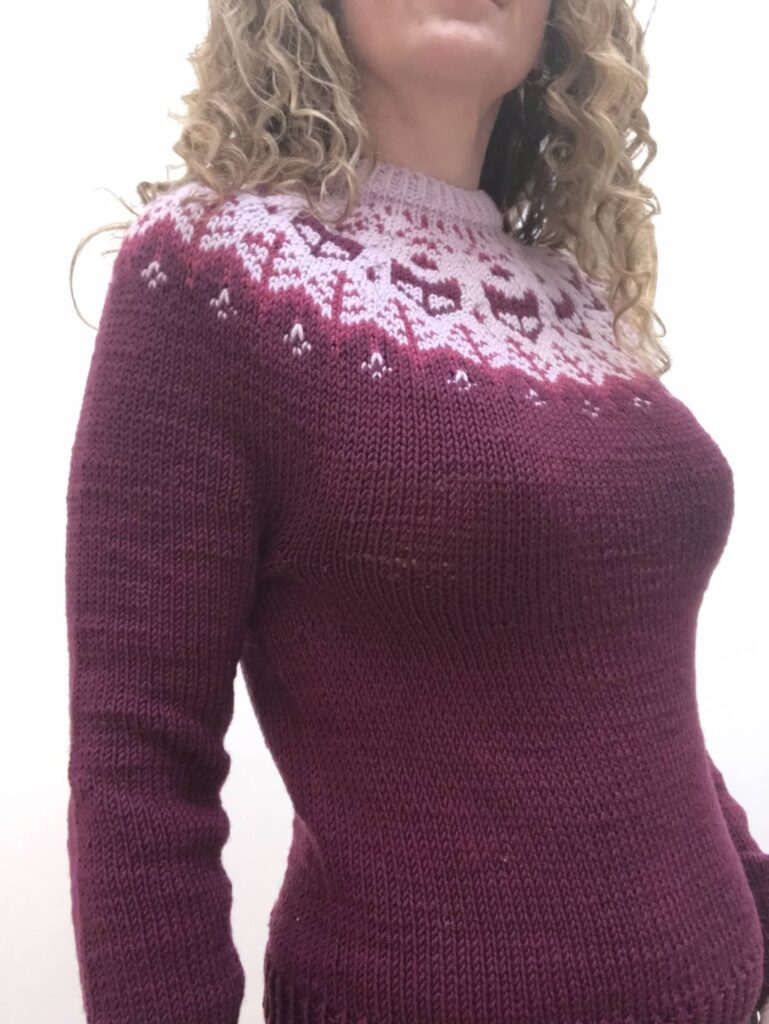
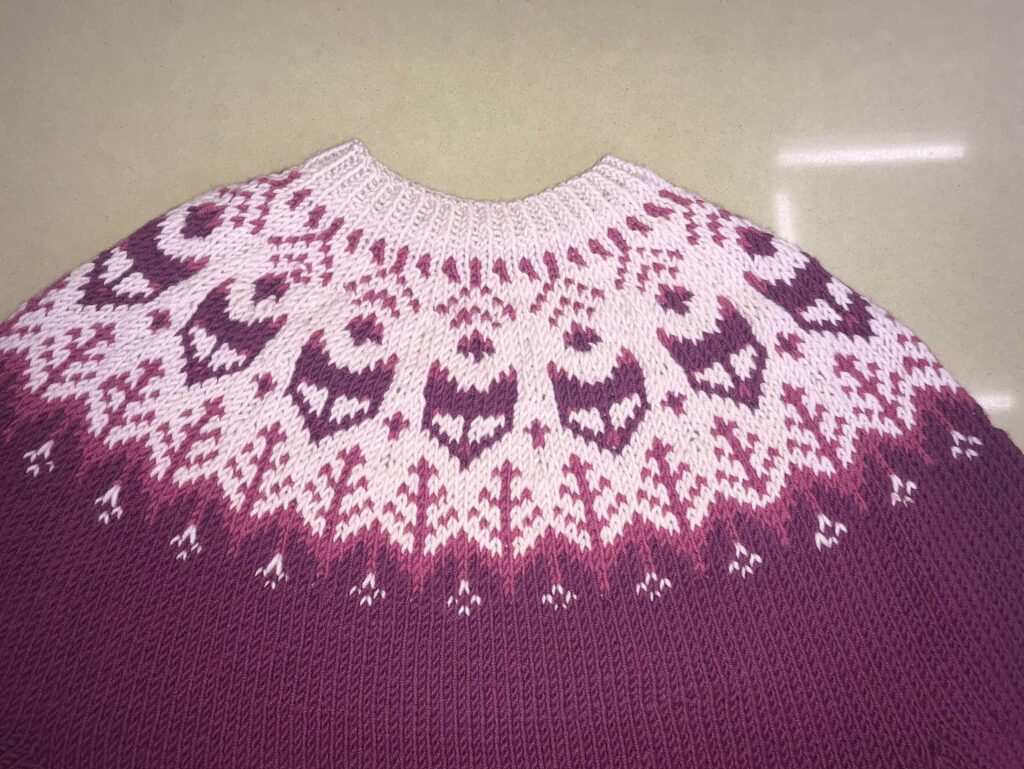
Knitting the Bowfell jumper really got me into knitting stranded colorwork. As soon as I was finished with the yoke, I was just obsessed with starting a new project! Here it is : “Into the Wild” by Tania Barley.
My tips to start knitting stranded colorwork
This is only my second stranded colorwork project so I am an absolute novice – therefore in the perfect position to know what problems other novices may face!
- Find a good reference book to help you – mine was « Tricoter le jacquard en rond » by Anna Dervout, sadly only available in French.
- Take plenty of time to chose your colours.
- Start with a pattern that only alternates two colours on the same row. “Into the Wild” alternates three, so I would not advise it for a first project. But Bowfell (only available in Anna’s book) and Marieke (available on her web site and on Ravelry) work.
- Control your tension constantly. This is by far the biggest challenge of stranded colorwork; and I am definitely not there yet…
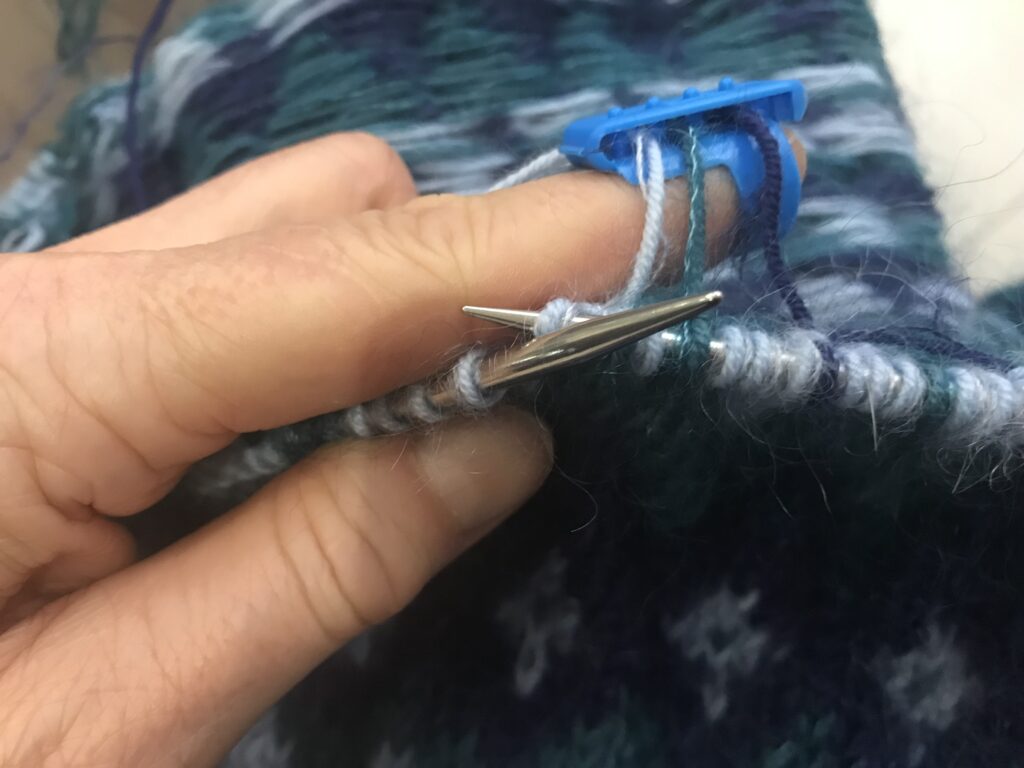
- Get yourself a yarn guide – I just cannot recommend this little piece of kit enough!
Knitting Into the Wild: pattern review
I had a lot of fun knitting this jumper: the pattern is very straightforward and well written; and the chart is not that complex to follow. The only challenge for me was to integrate a third yarn in the equation, but I managed it very well with my yarn guide.
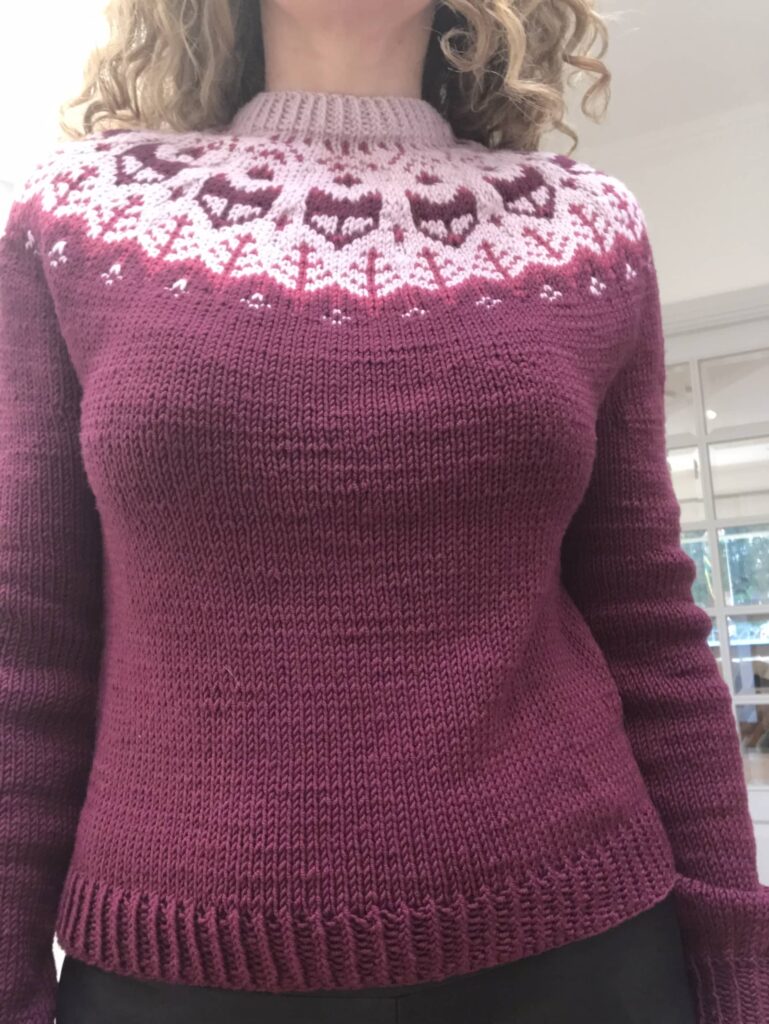
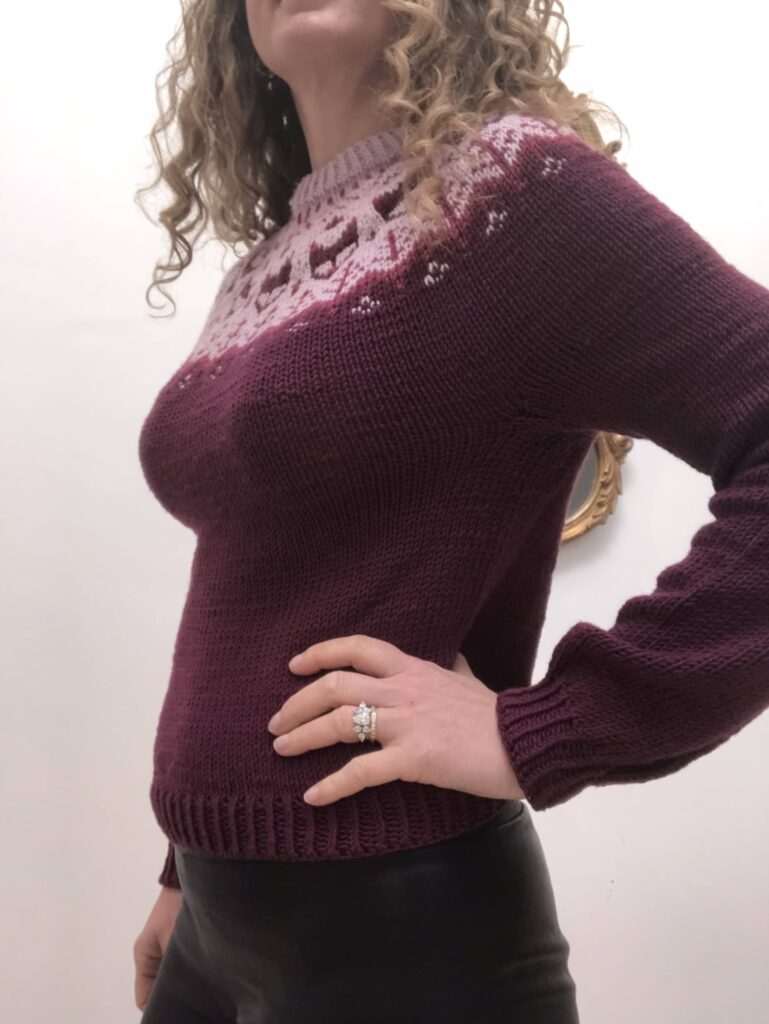
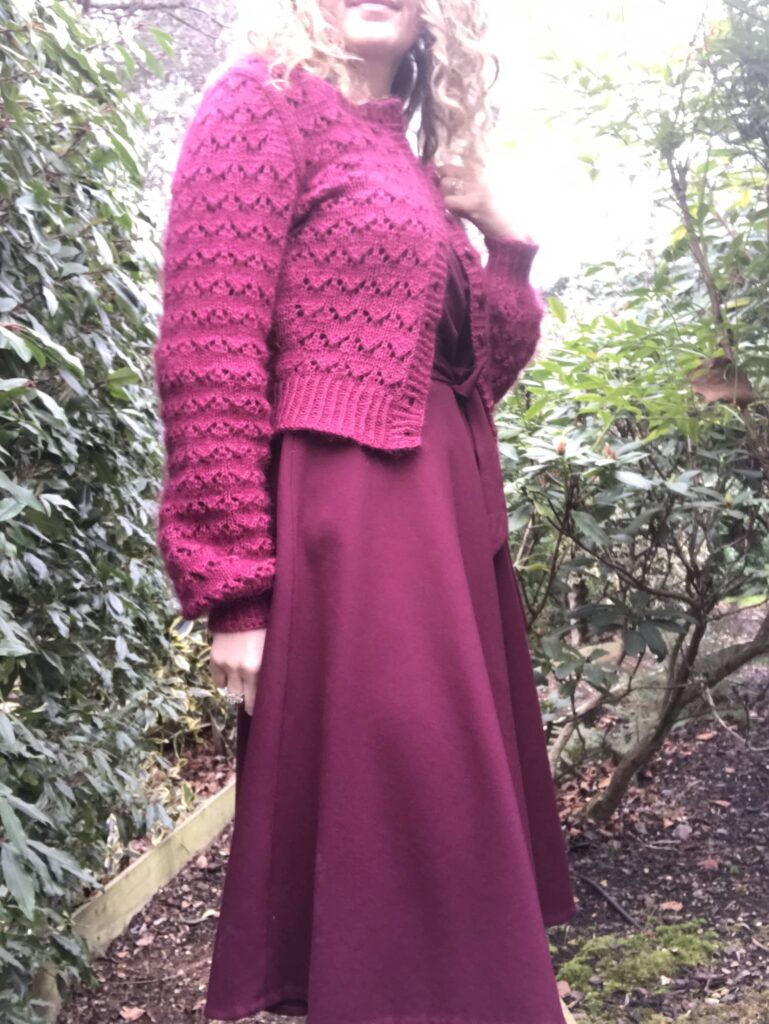
Size-wise, I went for the smallest available but it wasn’t my best idea. I wanted a tight fit and the body is exactly how I like it but the neckband is too small – of well… Next time I’ll use the same size but will make sure to cast-on more stitches for the neckband.
Yarn choice
After Bowfell, which has abstract patterns, I was quite keen to have a go with a fun motif; and the little foxes of the “Into the Wild”jumper clearly had my name on them. Here is the (gorgeous) pattern presentation picture.
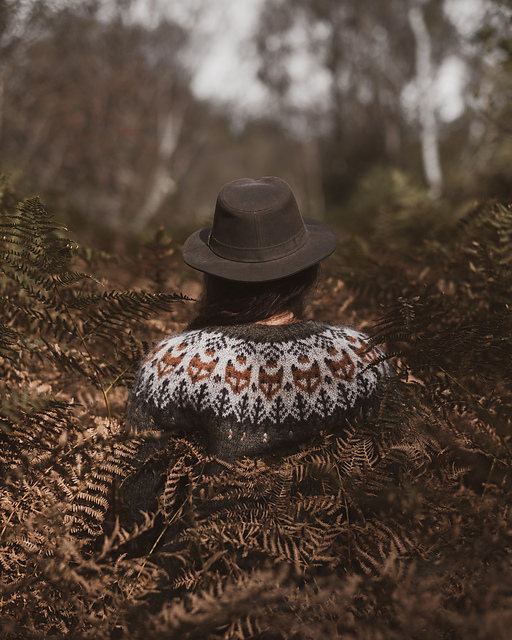
That said, I was not keen at all on the colours used – green and orange are my hate pets; and in general, earthy tones are persona non grata in my wardrobe, thank you very much!!
So I thought and thought and … well, I just went for my usual knit colour palette: pink, purple, burgundy, does it remind you of something?
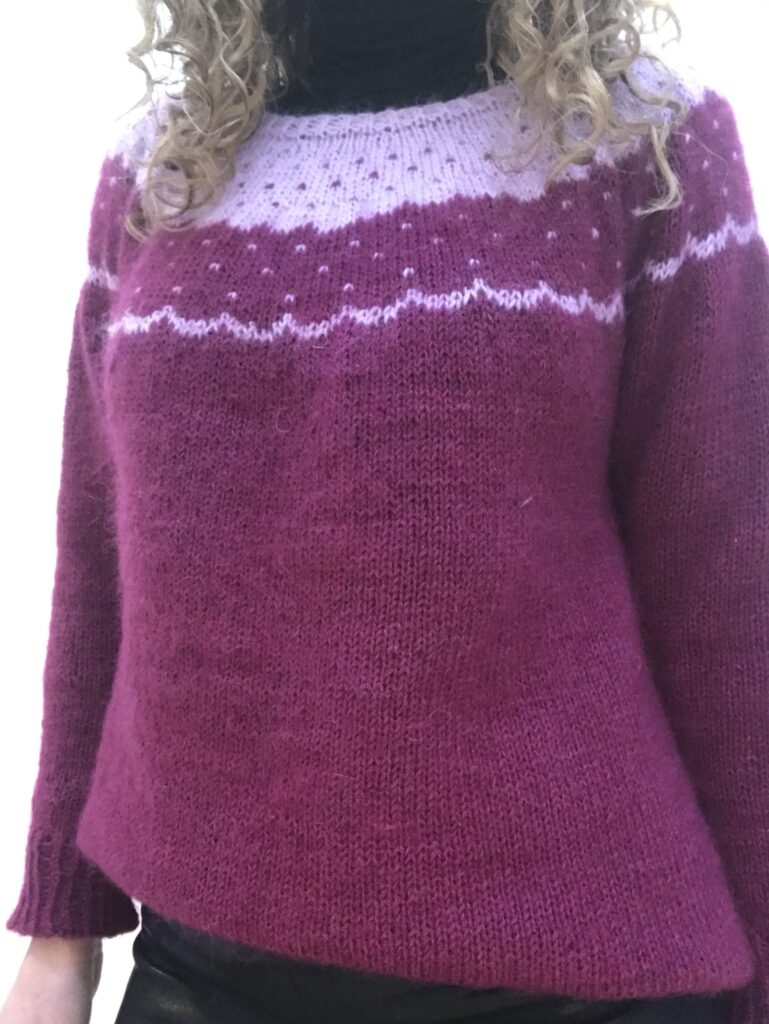
It means that my foxes look more like little devils but I’m happy with that – better than knitting a jumper I would never wear!
Yarn-wise, I used:
- 7 balls of Drops Merino Extra Fine / Dark Heather (35)
- 1 ball of Drops Merino Extra Fine / Heather (34)
- 2 ball of Drops Merino Extra Fine / Powder Pink (40)
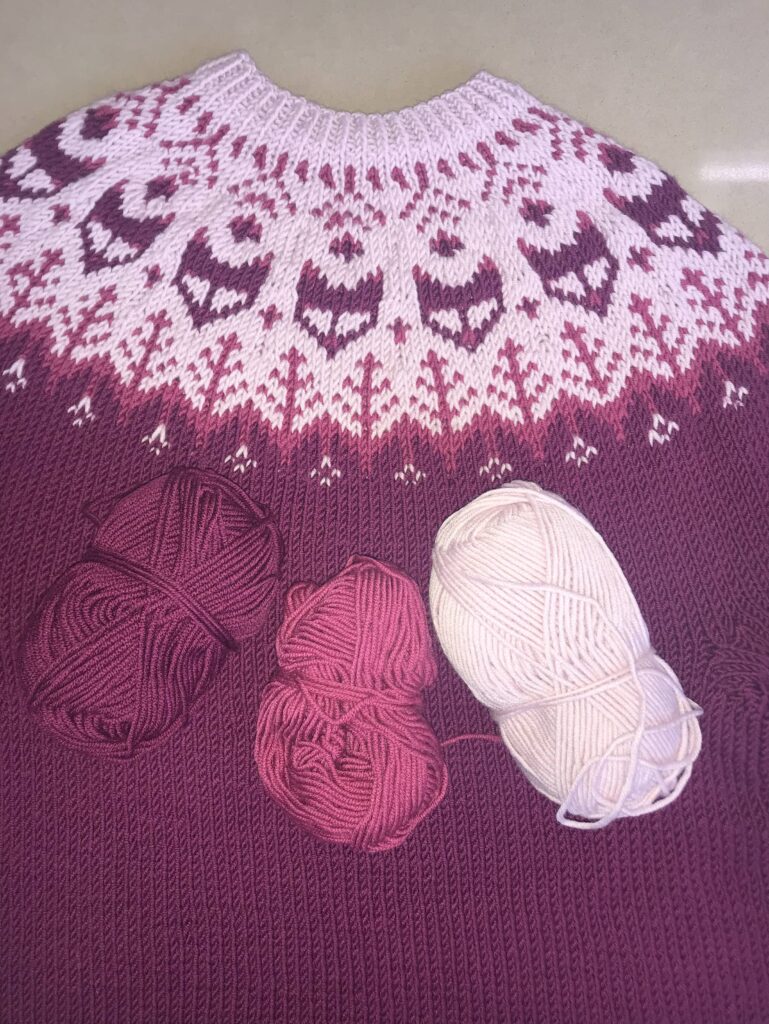
It was quite a change from my usual Drops Baby Merino/ Drops Kid Silk double-stranded combination… and much easier to handle for colorwork!! That said, the fluffy nature of Kid Silk makes it much more forgiving, so I feel all my mistakes are much more obvious without it.
Conclusion
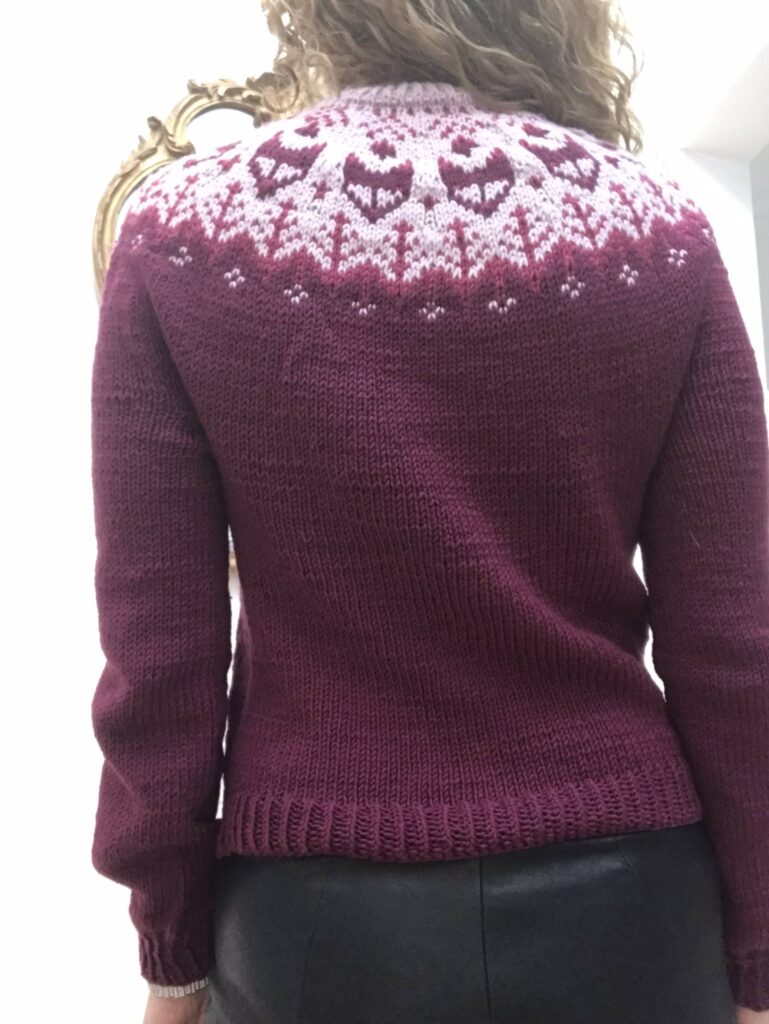
This jumper is in no way perfect but it is a great object of pride, as it is my first attempt at “drawing with my needles” as I see it. More will probably follow, although I currently have a third stranded colorwork project on my needles currently and I am running out of steam. So my next project is more likely to be lace..

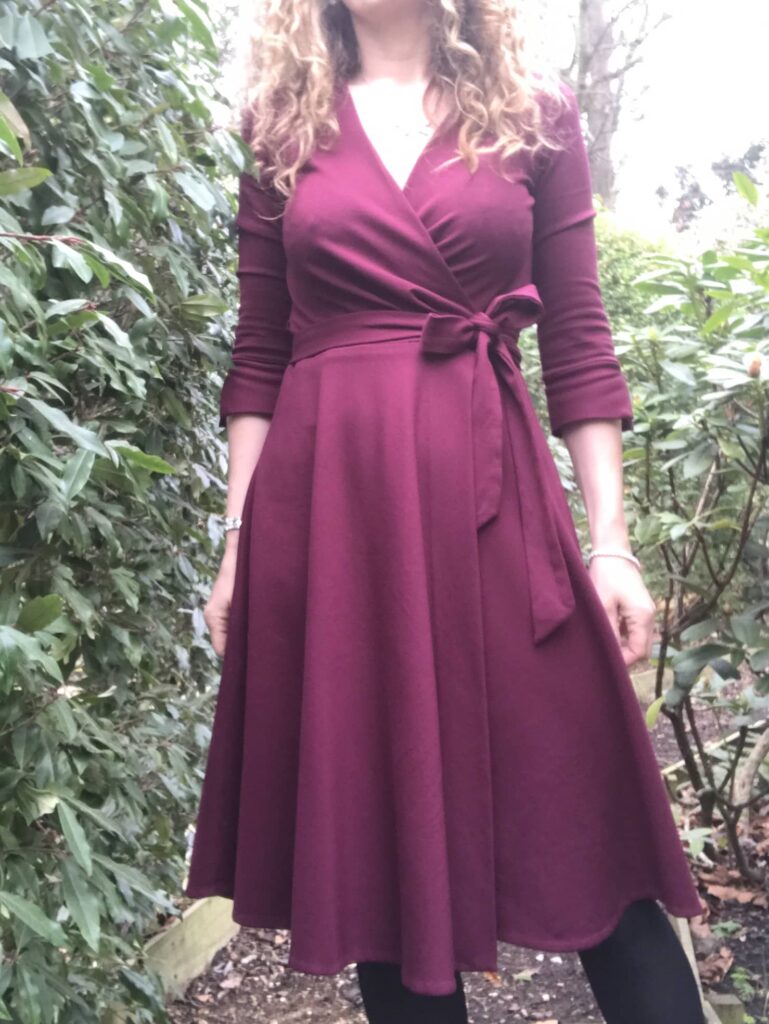
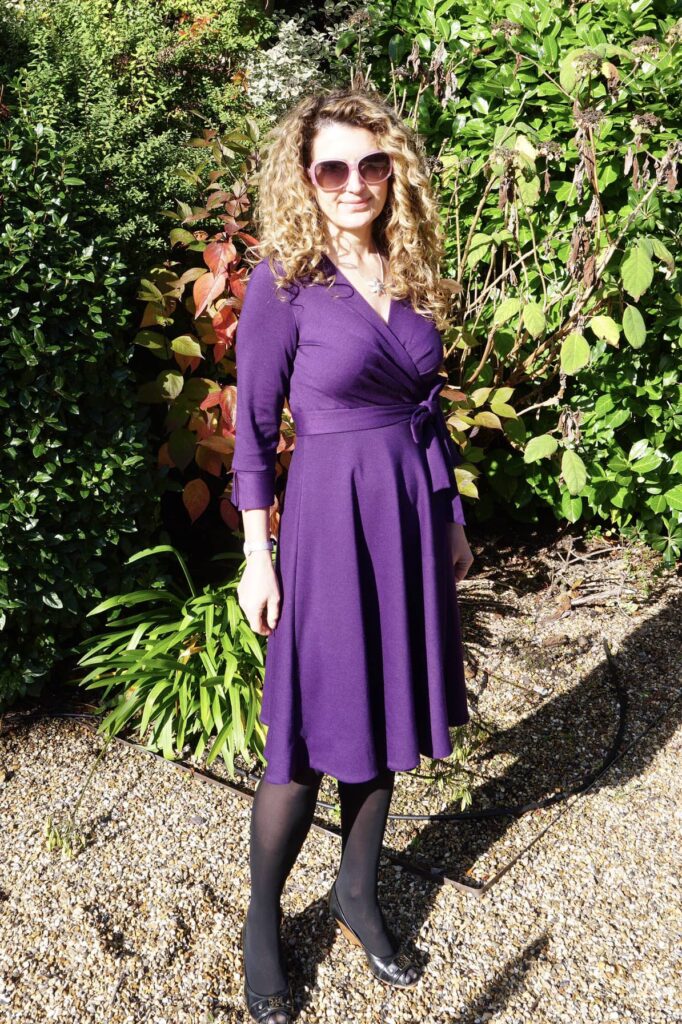
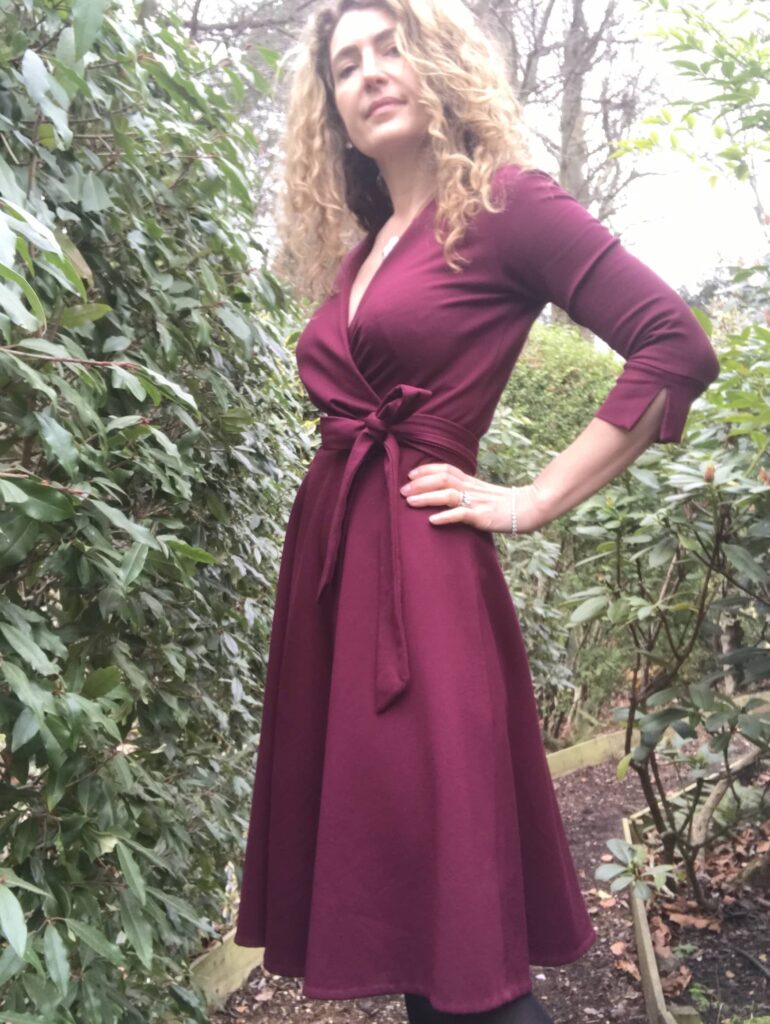
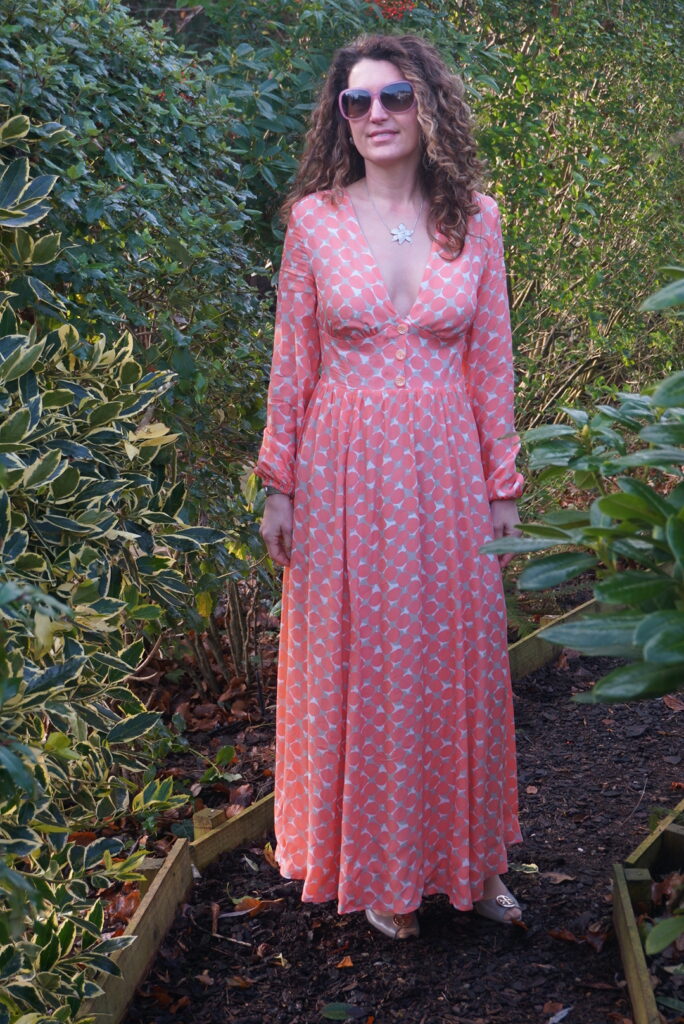
Sewing the V8379 dress…again!
When a dress pattern works, I tend to sew it again and again. So given the success of my first V8379 a few months ago, a second version was due to follow soon – here it is!
In no way dissimilar to its predecessor (except for the quality of the pictures maybe, oh well)…
V8379 pattern review – repeat!
I extensively reviewed this pattern in this article and nothing has changed, so just a quick summary of what I said before:
- This is a very quick and easy dress to make: it has a very limited number of pattern pieces; there is absolutely no technical difficulty (such as a zip or buttons); and the fit is very forgiving, as the pattern is designed for knits.
- What I love about this dress: its gorgeous pleated bodice, which works really well for my E cup without FBA; its beautiful fit-and-flare shape, with its knee-length semi-circle skirt; its perfect fit; and it lovely details (pleated bodice and sleeve bands).
- My only deviation from the original pattern was to put some iron-on interfacing around the side-opening for the belt, to strengthen it.

Fabric used: stretch but with weight
For both dresses I used Ponte Roma fabric , which has some stretch (as recommended by the pattern) but is also heavy enough to hold its shape. It is absolutely perfect for this pattern and I strongly recommend it. I would definitely not try making this dress is a very stretchy and light fabric.
A word of warning on Ponte Roma: always go for the viscose version, not the polyester one! The later piles when washed and your dress lovingly hand-sewn dress looks like a cheap rag in not time. I’ve been here before and had to throw away three dresses – heart-breaking!
Silly mistake!
Overconfidence is never a good thing when sewing, but it’s quite common when you reuse a pattern – for me anyway! So can you spot the silly mistake I made in my second dress?
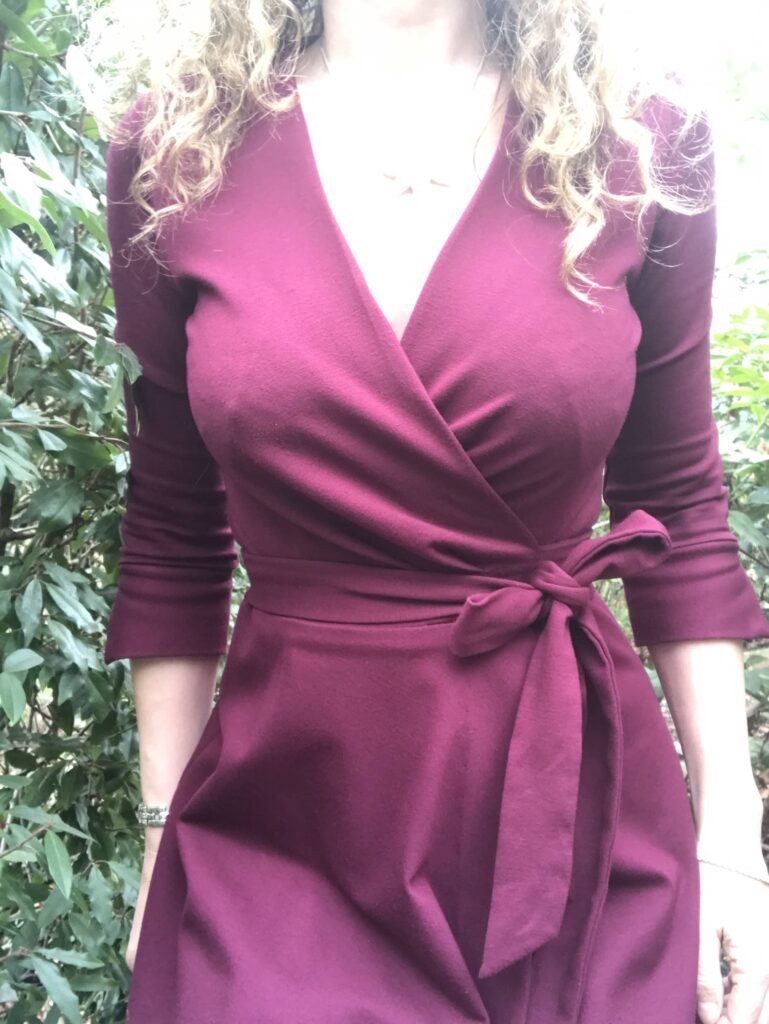
It’s (thankfully) not that obvious but I initially completely forgot to stitch the bodice pleats in place. This stitching is not visible but it holds everything in place and without it… well, it just does not work! So I had to sew everything by hand and I am praying every time I wear this dress that the hand-stitching will not unravel!
Conclusion
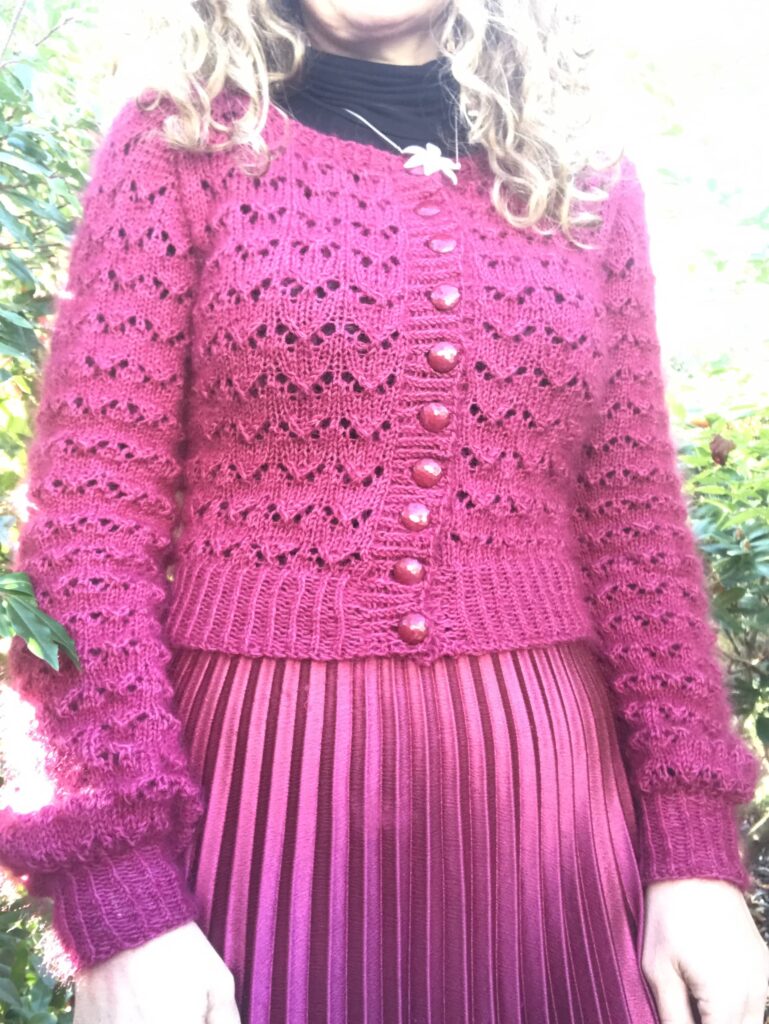
Despite the not-so-perfect pleats, I’m very happy with this new addition to my wardrobe. Even more so because it perfectly matches one of my latest hand-knitted Hetty cardigans. I have one question though: how do your wear a cardi with a wrap dress? – I still haven’t quite figured out…
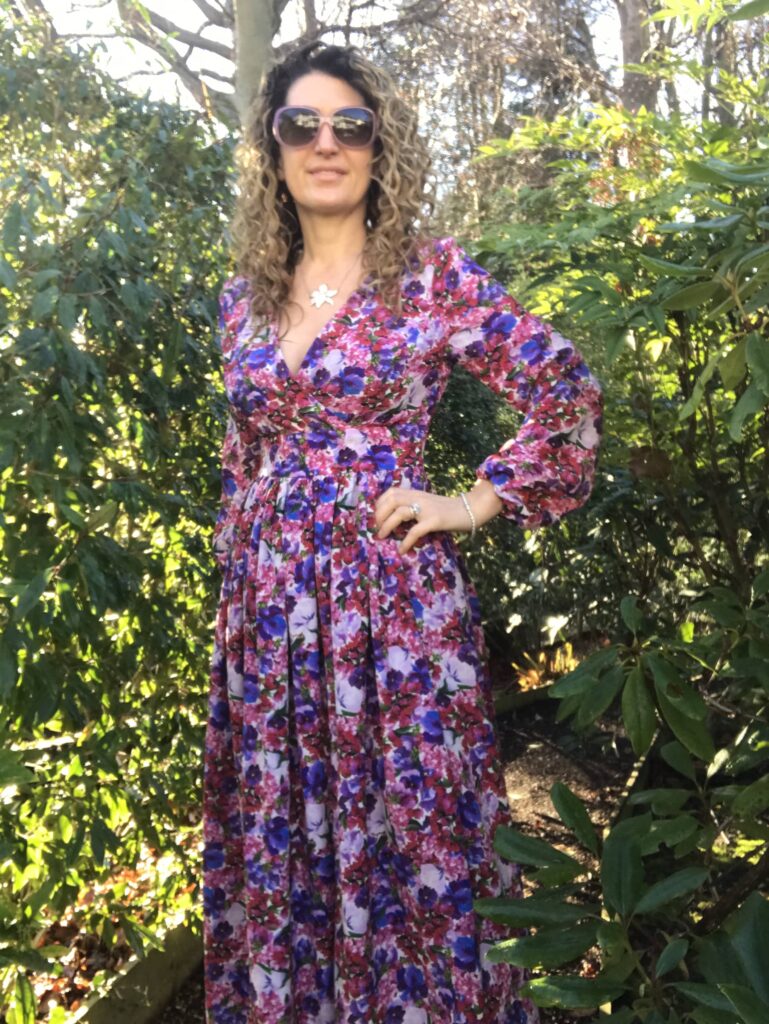
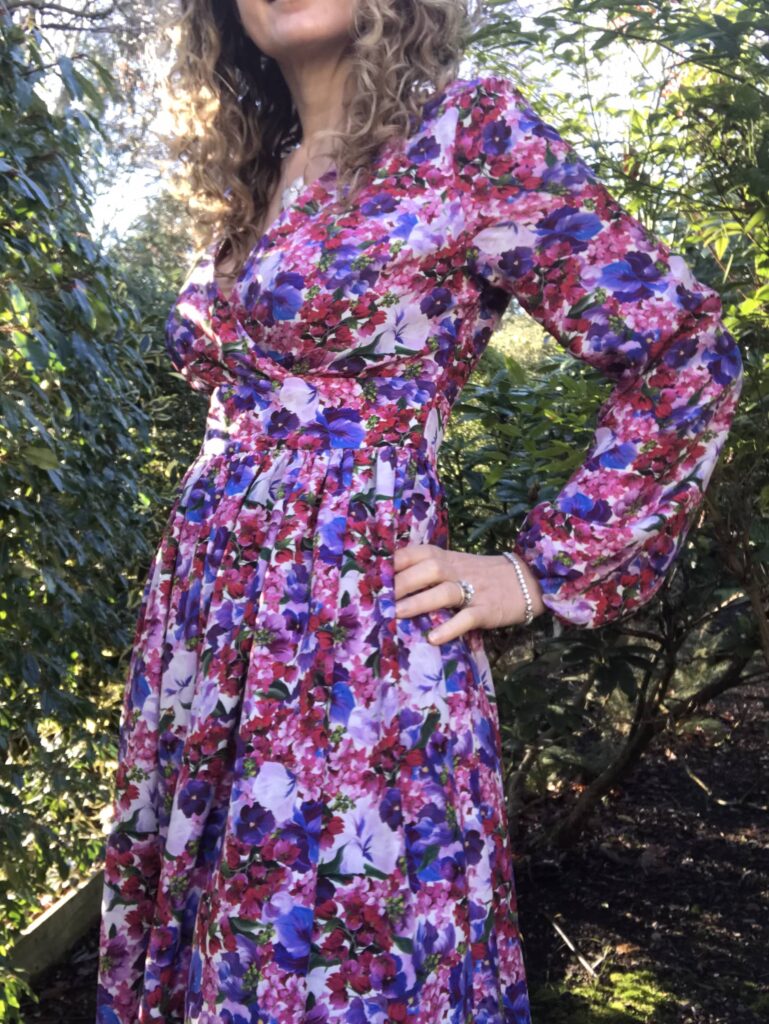
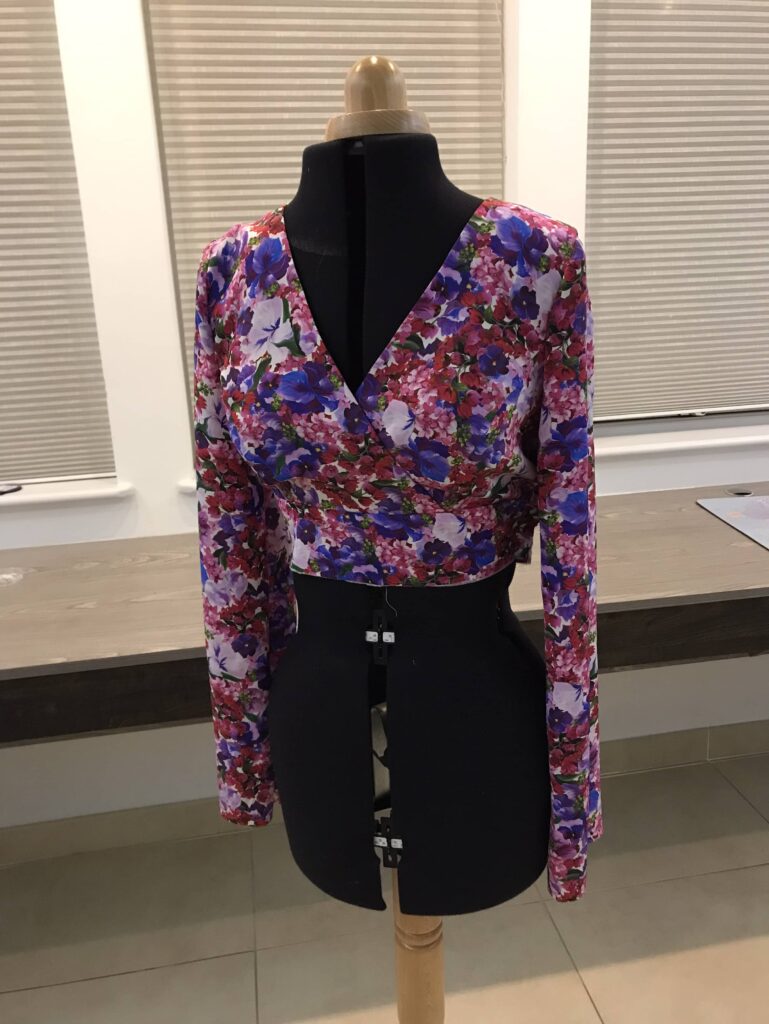
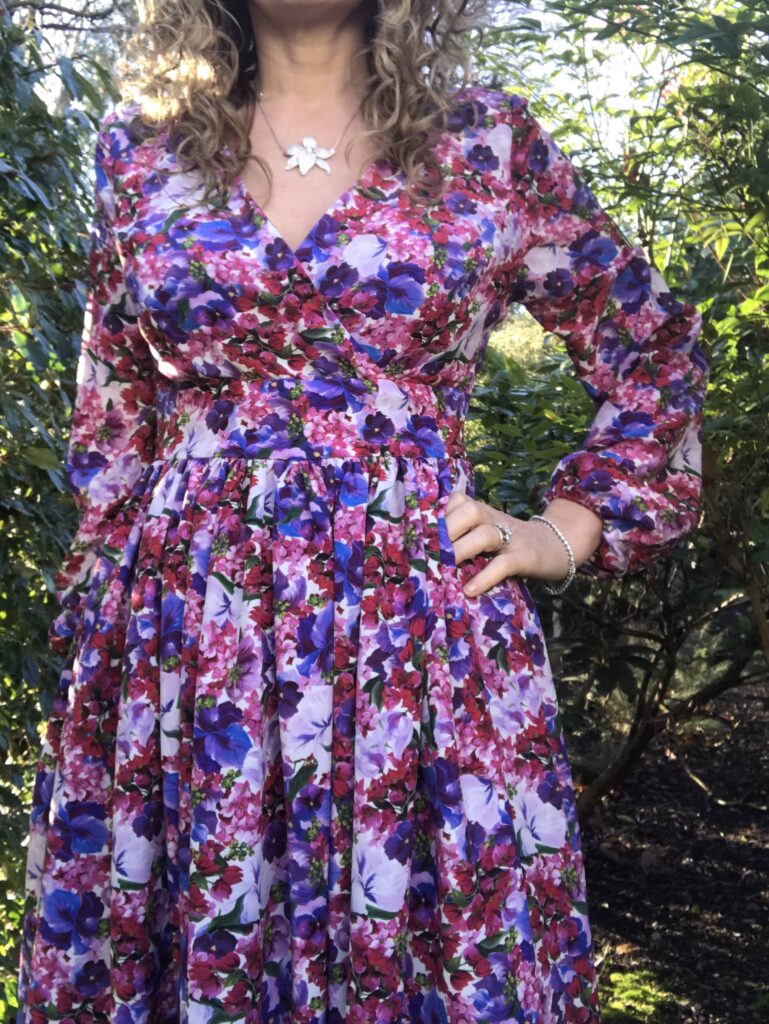
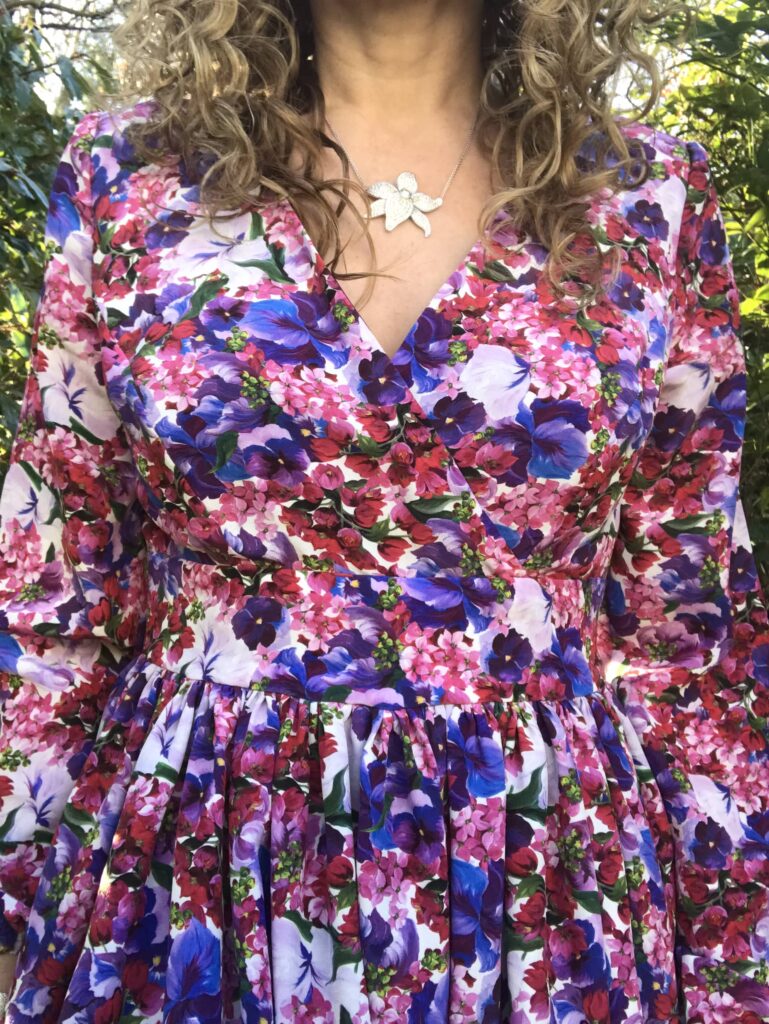
Sewing the Magnolia dress: more silk and more flowers in my wardrobe
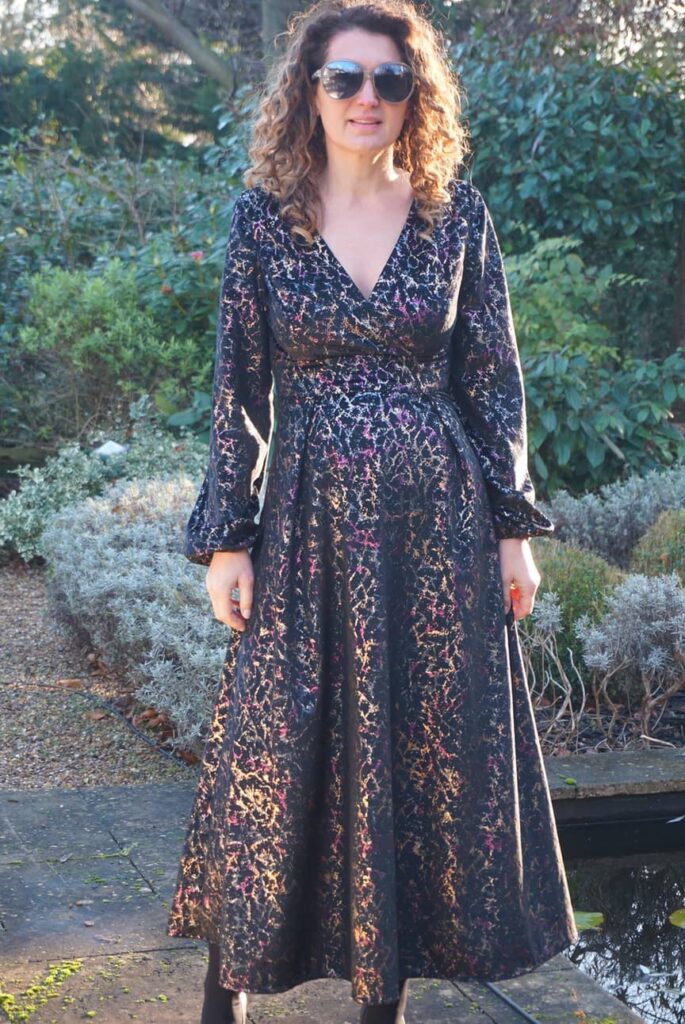
Although knitting has dominated the blog lately, I have in no way given up sewing. Here is my latest Magnolia dress by Deer&Doe, in a dreamy floral silk fabric from Selvedge and Bolts.
Magnolia pattern review: a long love story
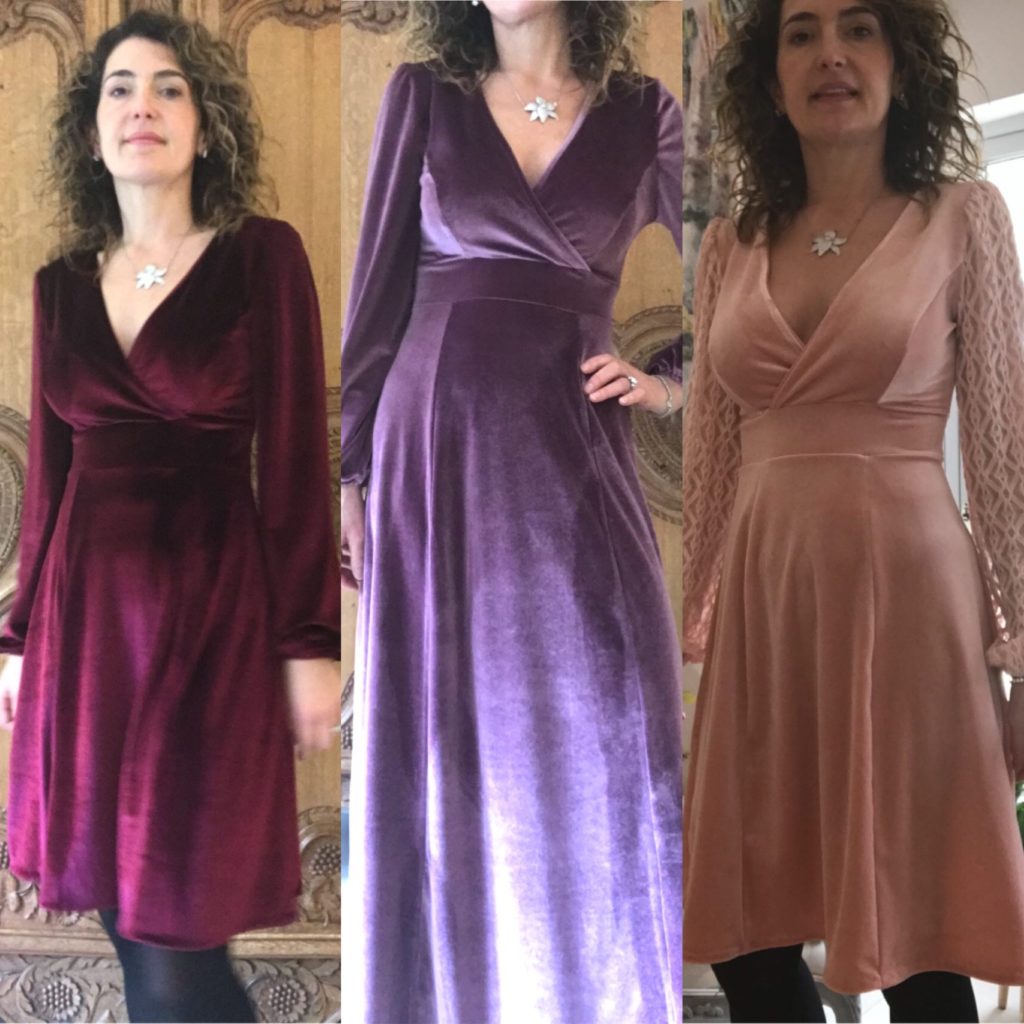
Magnolia is one of my favourite dress patterns; and this version is the latest of a long series. In the past, I have sewn Magnolia dresses in stretch velvet (three times!); in none-stretch velvet; in silk to use as a luxury nightdress or a day dress. So many options!
There are many things I like about Magnolia:
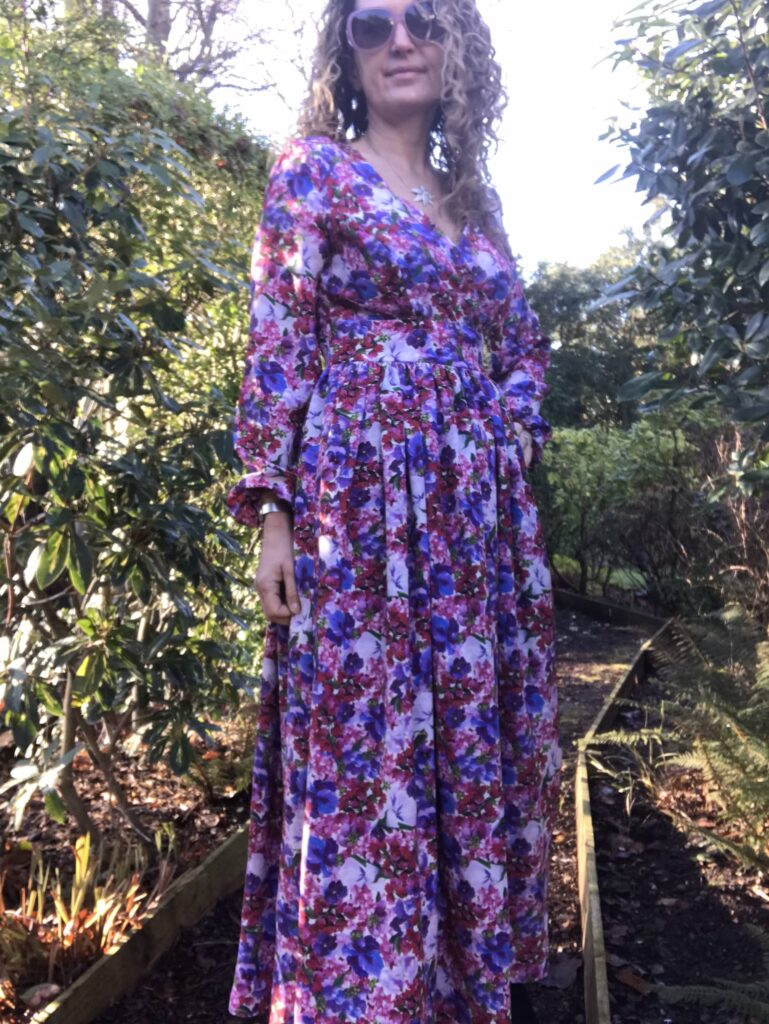
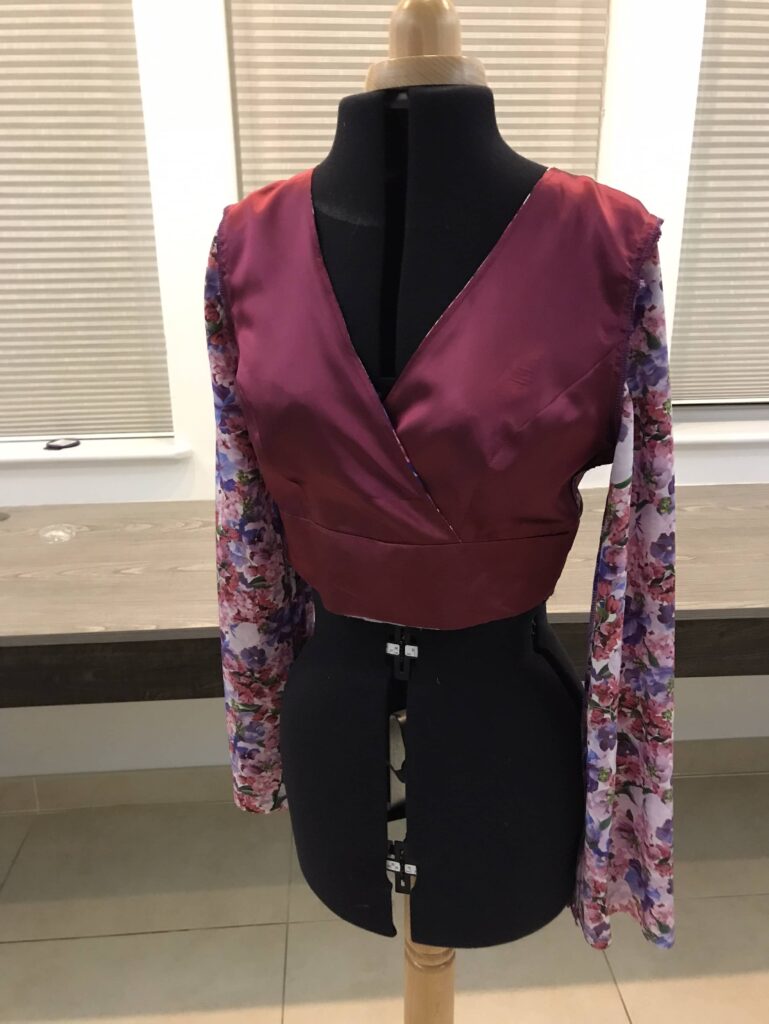
- The shape is ultra-flattering. I am not a huge fan of empire waists but here it is just sitting at the right level. The multi-panel skirt perfectly balances the generous sleeves. And who does not love a wrap bodice?
- The bust fit (well, the entire fit actually) is perfect. Deer & Doe tends to size generously at the bust level. This suits me perfectly as despite my E-cup I never had to make any FBA for Magnolia (and neither for my Luzerne trench coat actually).
- This is an easy and (reasonably) quick project. There is no major technical difficulty with this project except for the invisible zip. And the dress comes together incredibly easily for such a stunning result. This is very comparable to sewing V9253, another of my favourite dress patterns.
- The pattern instructions are super clear, as always with Deer & Doe.
Sewing Magnolia more efficiently: my advice
I have sewn Magnolia so many times that there are a few things I do differently to what the instructions recommend.
To get perfect princess bust seams, I reduce my seam allowance from 1.5 to 1cm at this level before sewing pattern pieces 1 and 3 together; and I use an ironing ham to get the seams in shapes. I also reduce seam allowances before setting-in the sleeves, as I have noticed working with less fabric makes the process much easier.
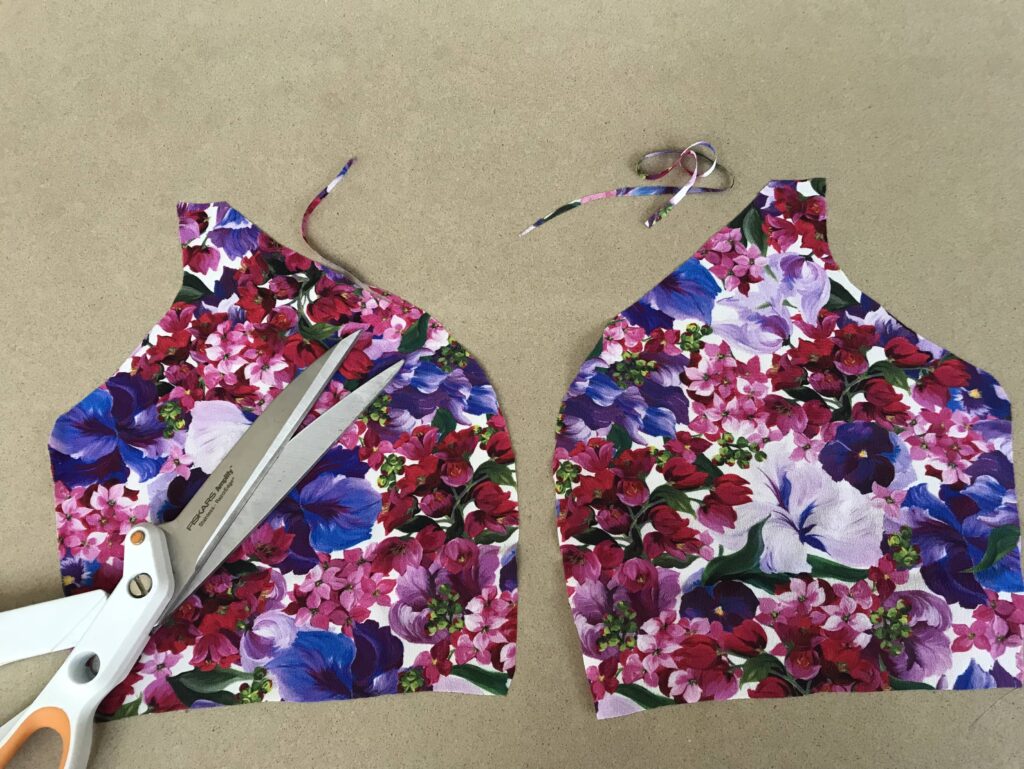
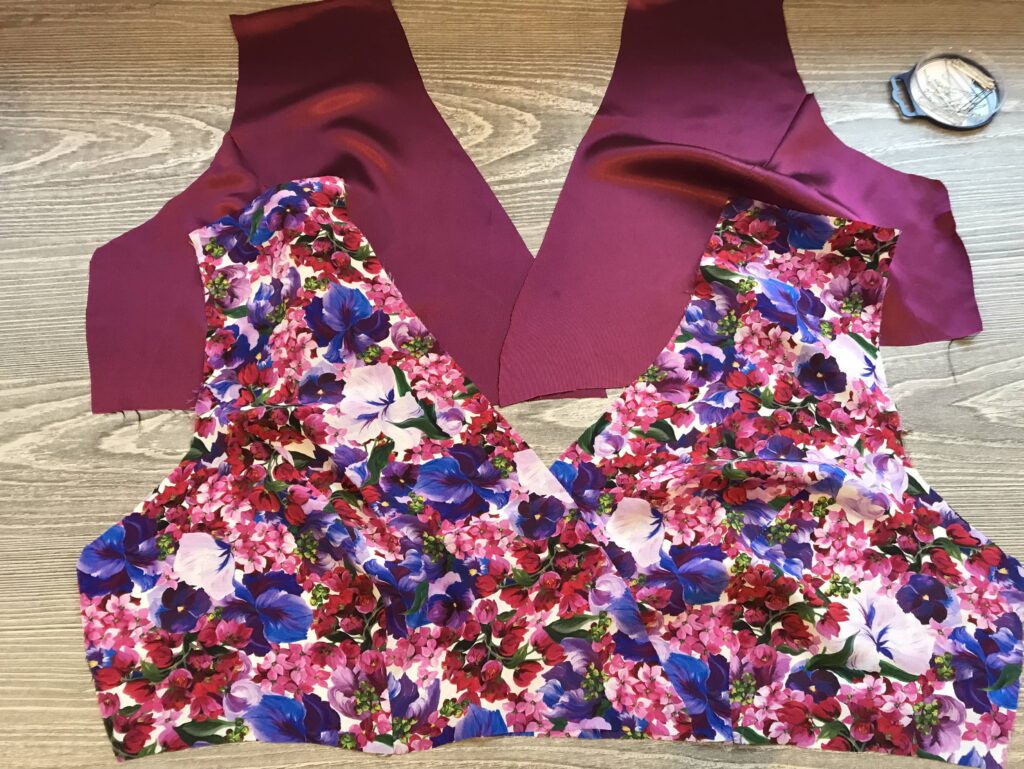
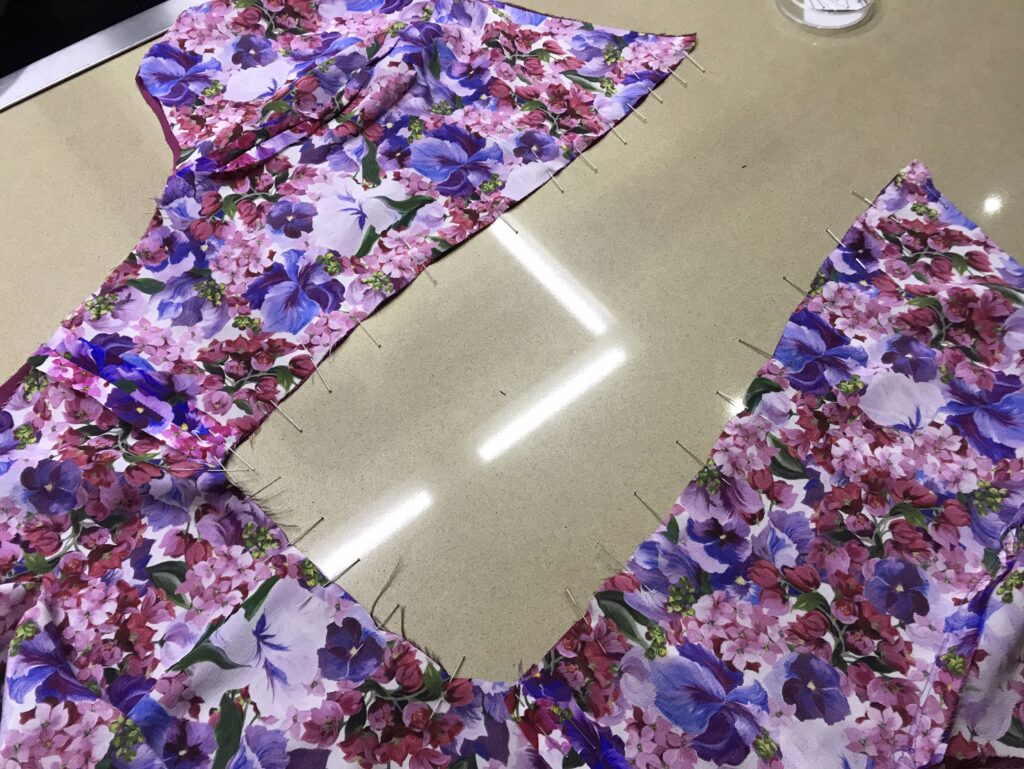
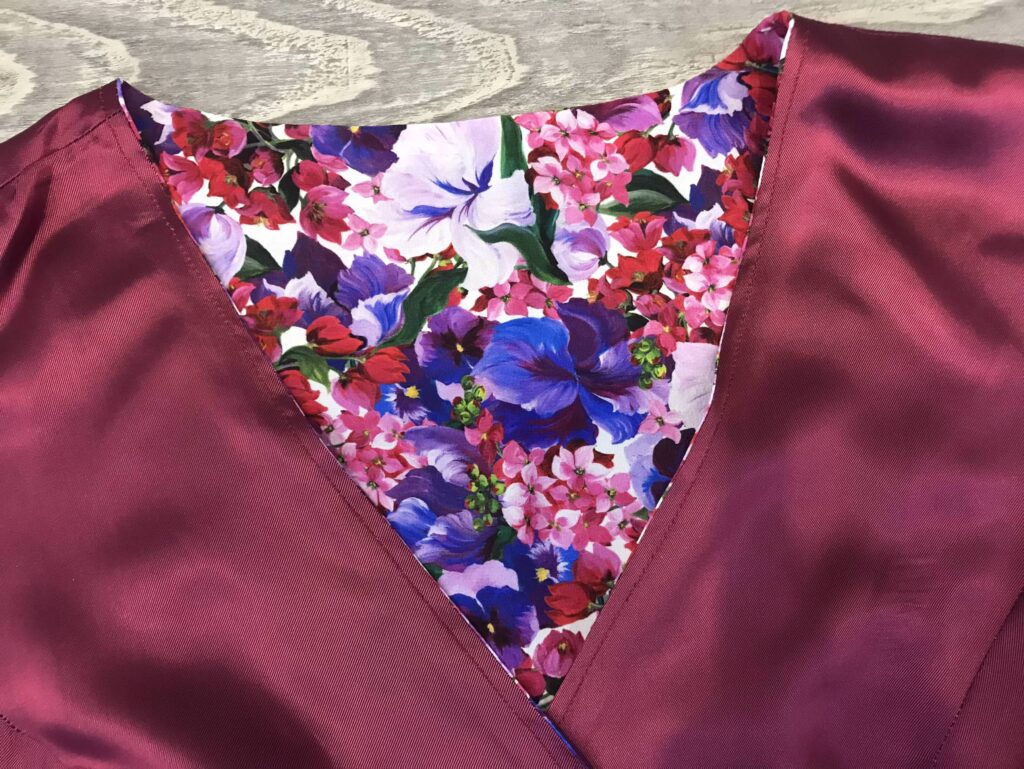
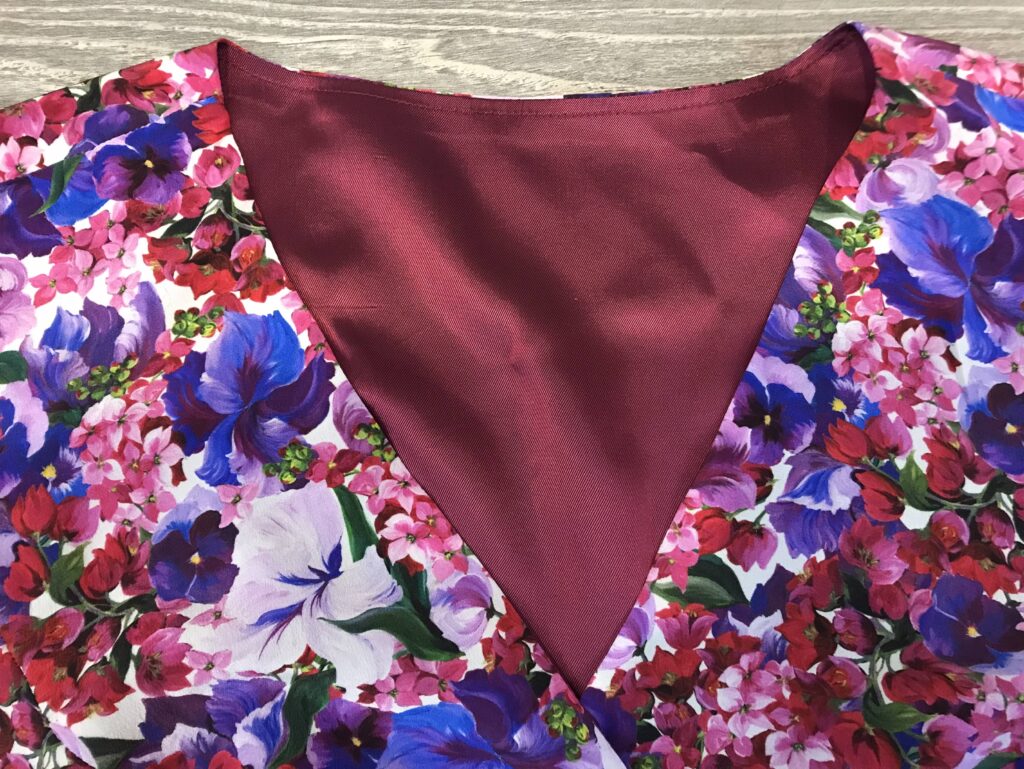
For a neater neckline, I entirely line the bodice instead of using bias binding. This prevents any visible stitching right at the middle front of the dress. To do this, I simply make two bodices (one main fabric, one lining); attach them together at the neckline; clip the curves; and understitch so that the lining remains invisible. (Then I attach the bodice to the skirt and the the sleeves as if main fabric and lining were one.)
For a neater waist, I also line the belt. I make two belts (main fabric + lining) instead of one and sandwich my bodice between the top of the two belt. I attach the skirt to my bottom of the MF belt, fold and iron the seam allowance of my L belt and finish by hand.
And for a skirt with less panels, which is useful when you work with fabric with large patterns of just when you want to make the process quicker, I either use the V9253 skirt or simply two rectangles of fabric gathered at the waist.
Sewing silk: my advice
I am a horrible fabric snob and I adore wearing silk (cotton, wool, cashmere – natural materials only please!). I used to be terrified at the idea of sewing such a delicate material but after a number of skirt and dresses, not any more!! Over the past 18 months I have actually sewn quite a number of silk garments:
This version of Magnolia is in a dreamy floral crepe silk from Selvedge and Bolts, one of my most reliable sources of exceptional luxurious fabric. Look at this beauty!
If you’re toying with the idea of sewing silk but are terrified to start, here are a few words of advice:
- Don’t overspend on the fabric. The more you spend on silk, the more terrified you will be to use it. My best source of reasonably-priced silk of good quality is Bennytex. Looking for deadstock is also a good option – I regularly browse through Amotreads‘ stock. Obviously as you become more competent do not hesitate to spend more, this is exactly what I did with this dress.
- Pre-wash and iron you fabric as you normally would, except if you are planning to have your dress professionally cleaned in the future. I personally only sew and knit clothes I can machine-wash… but I am the woman who puts all of her husband suits in her Miele washing machine! Wool program, no temperature, 600 spin, it works wonders for wool, silk, cashmere…
- Go for silk that is slightly thicker or that has texture. I find that silk crepe and silk dupioni are easier to work with, as they are less slippery that silk satin for instance. In any case look at the material weight, the heavier the easier.
- USE A MICROTEX NEEDLE, absolutely, even if you can’t find it on Amazon. Using a super-thin (60) general needle will not work a well, with some silks it may pull off strings and damage your fabric for good. And also use thin pins, not standard ones.
- Use a pattern you have already sewn, to reduce the risk of mistakes. Having to unpick stitches is particularly dangerous with silk.
- Line silk with silk if you can afford it, it would be such a pity to lose the softness and drape of silk because of a synthetic lining.
- Go SLOW – no need to rush, you are unlikely to want tens of silk dresses in your cupboard (except if you are me), so you have all the time in the world!
Conclusion
I cherished this fabric and hesitated for a long will on which pattern to use. I am very pleased I chose Magnolia, as it really shows the fabric under its best light!