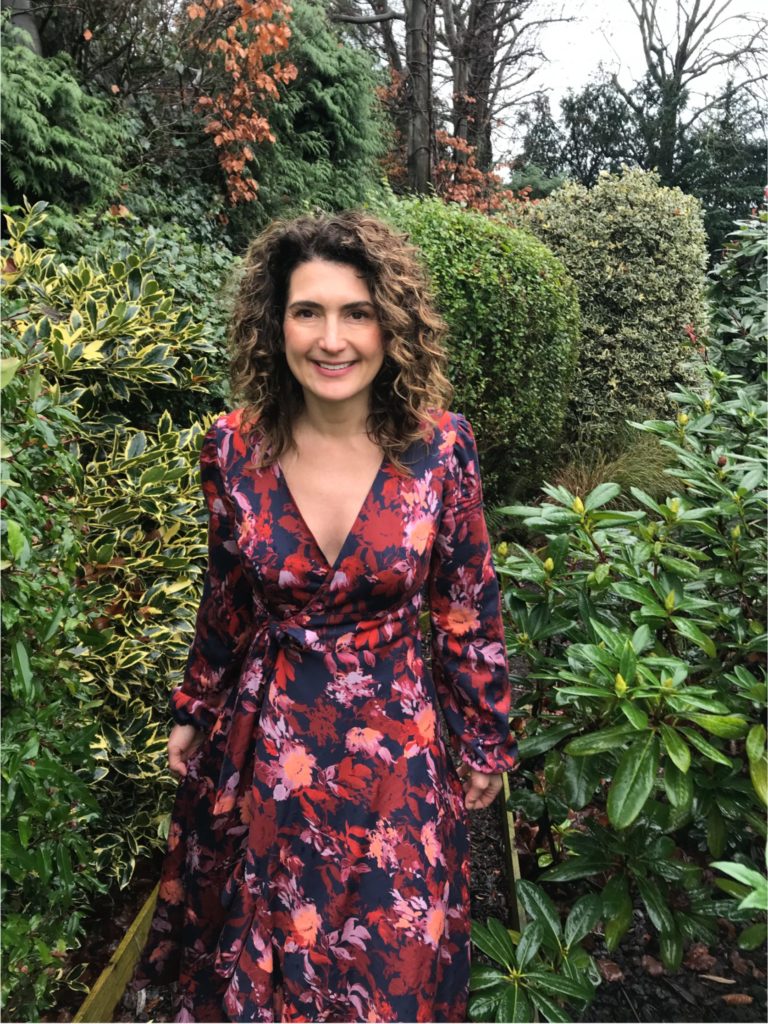
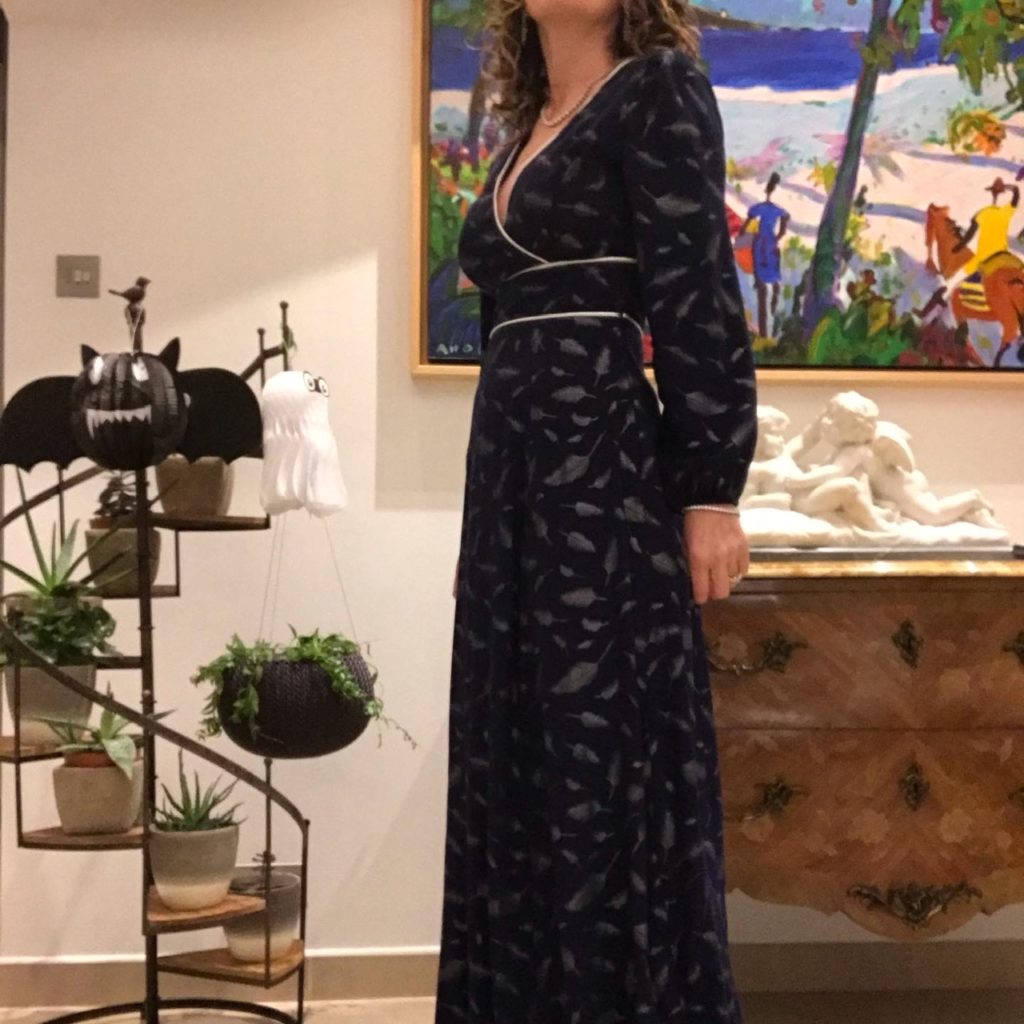
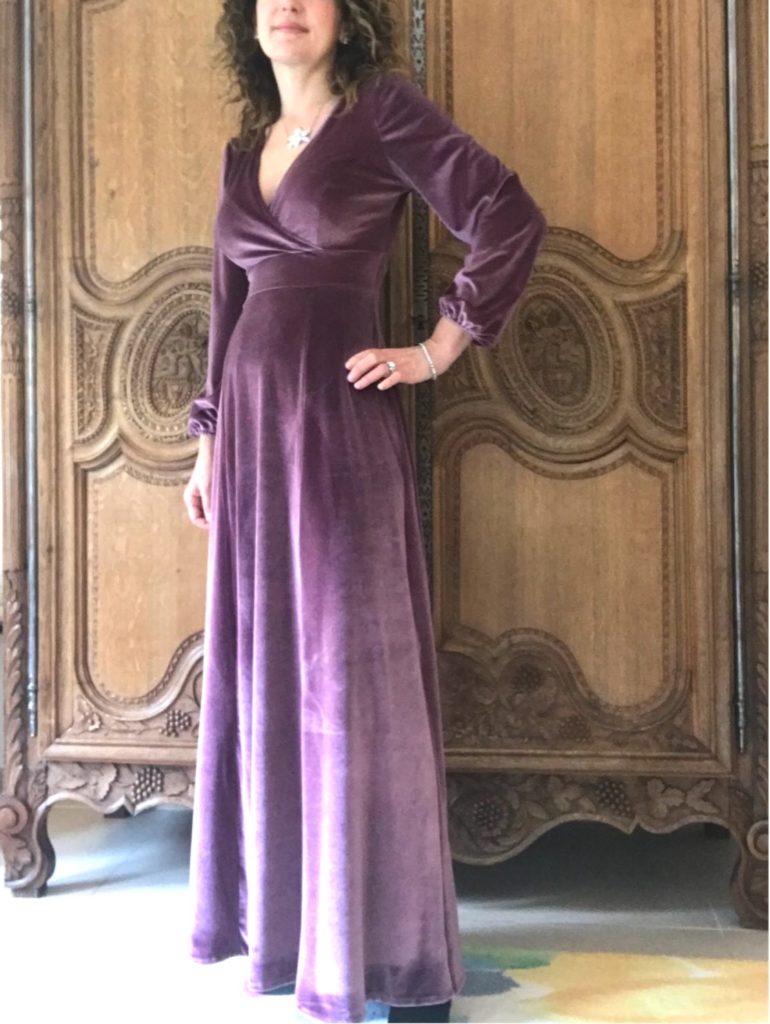
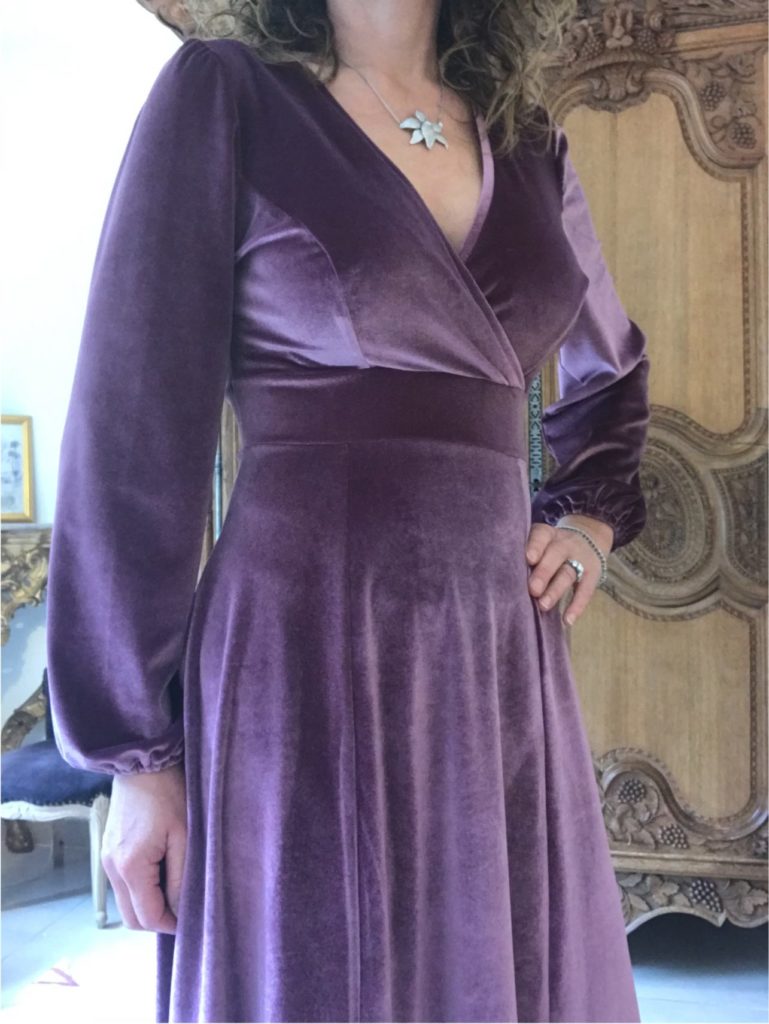
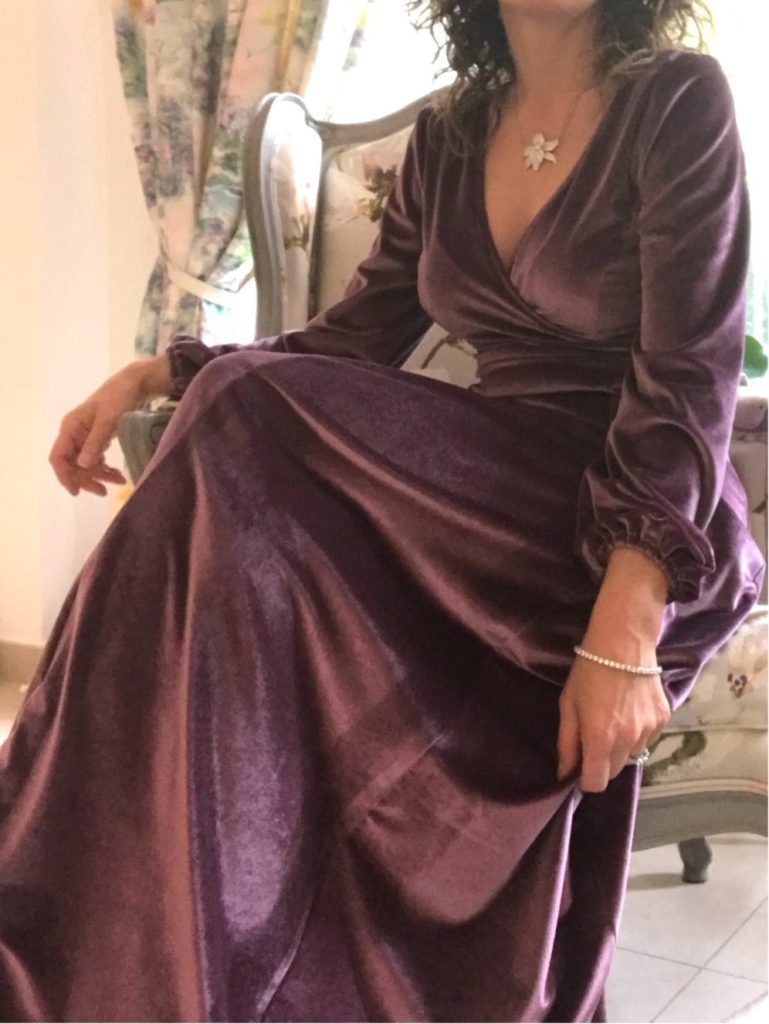
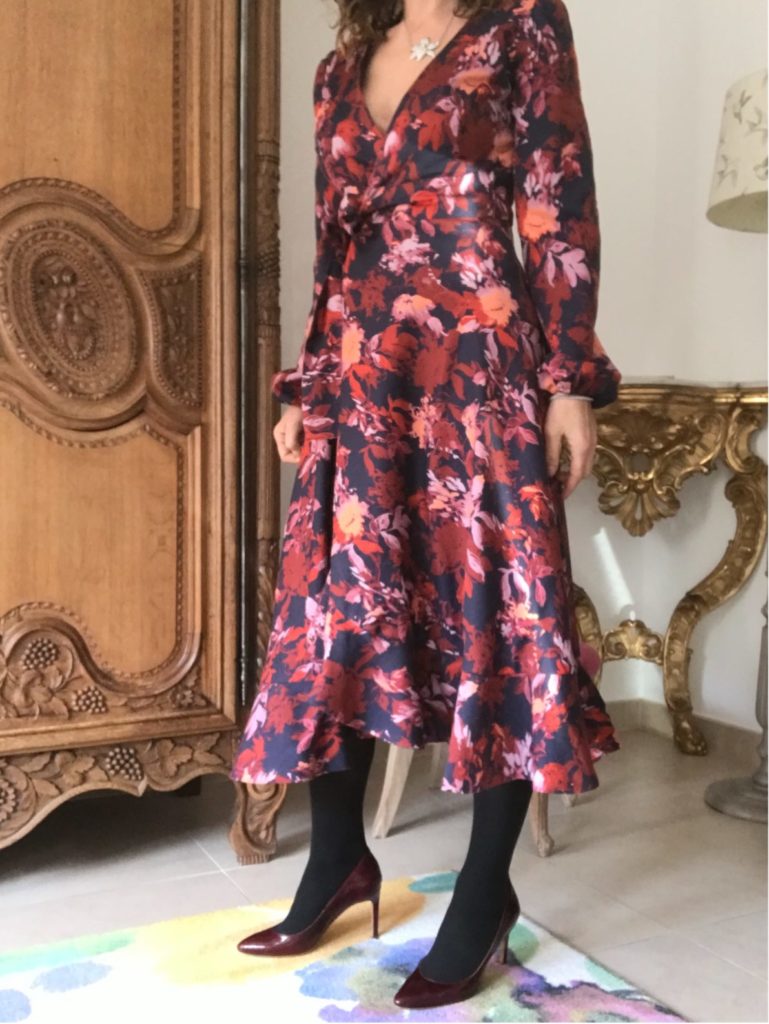
My Dream Autumn Dress – Or How to Combine Magnolia and La Boheme
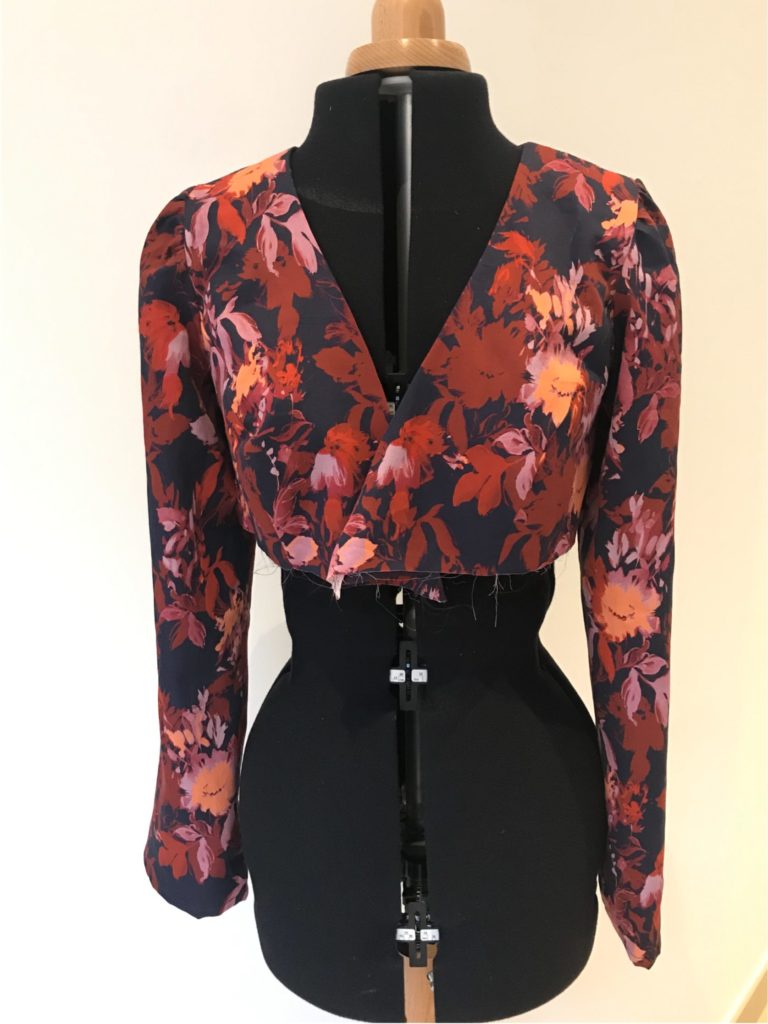
You will by now know my adoration for the Magnolia dress, after seeing my three velvet versions. My dream was to combine it with another of my beloved patterns, the La Boheme skirt, and make it a real wrap. After months of hesitation, I finally took the plunge and went ahead – let me introduce you to my pride and joy of this Autumn collection!
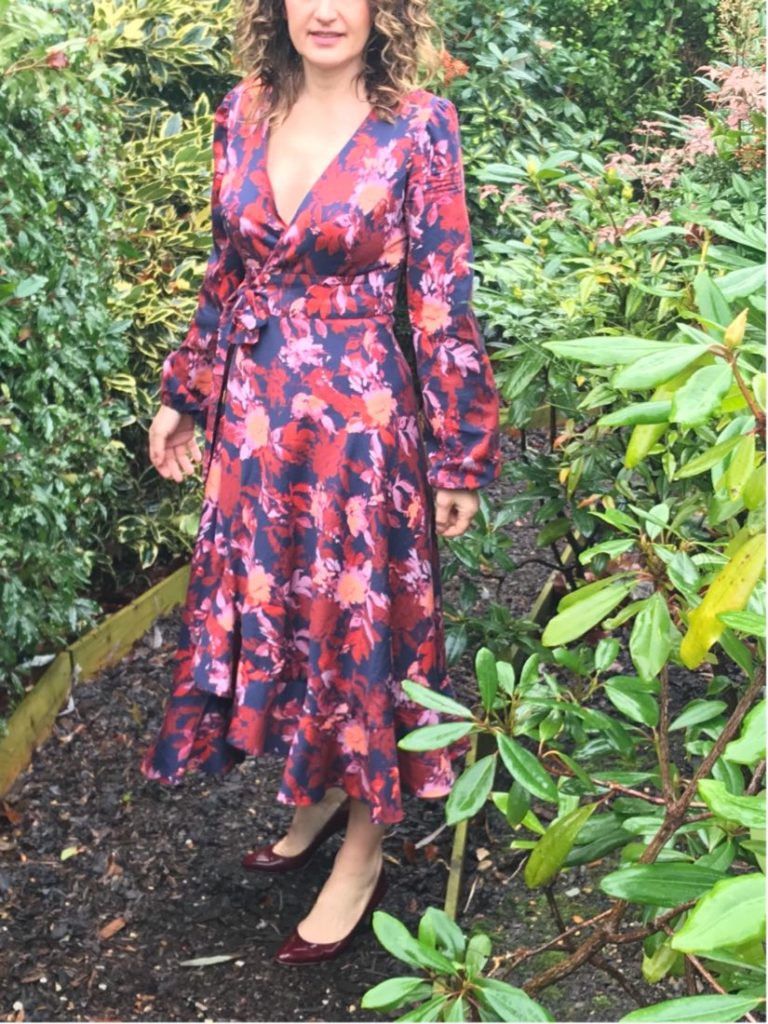
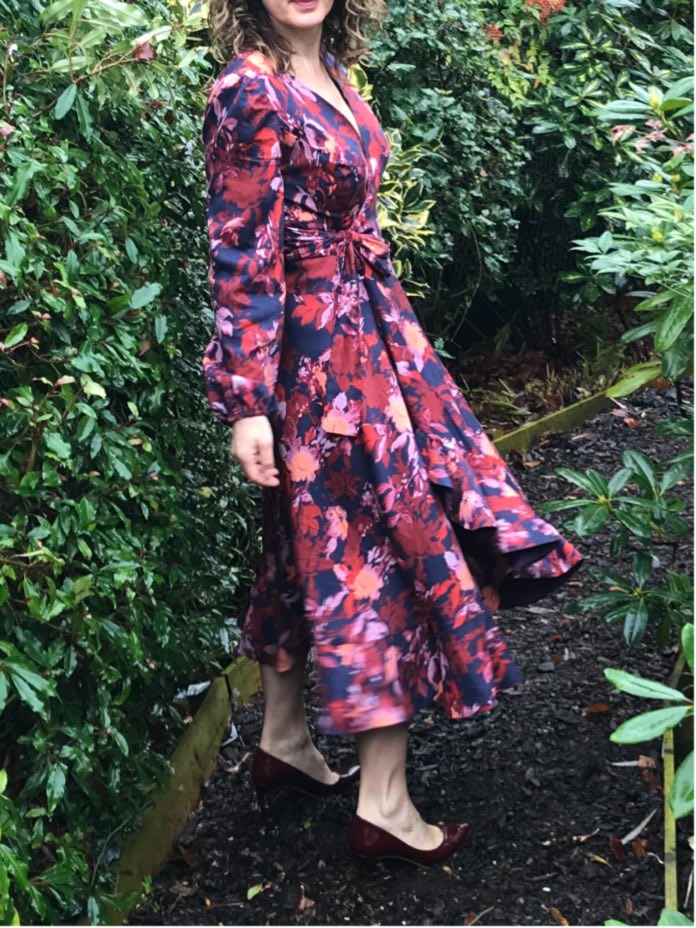

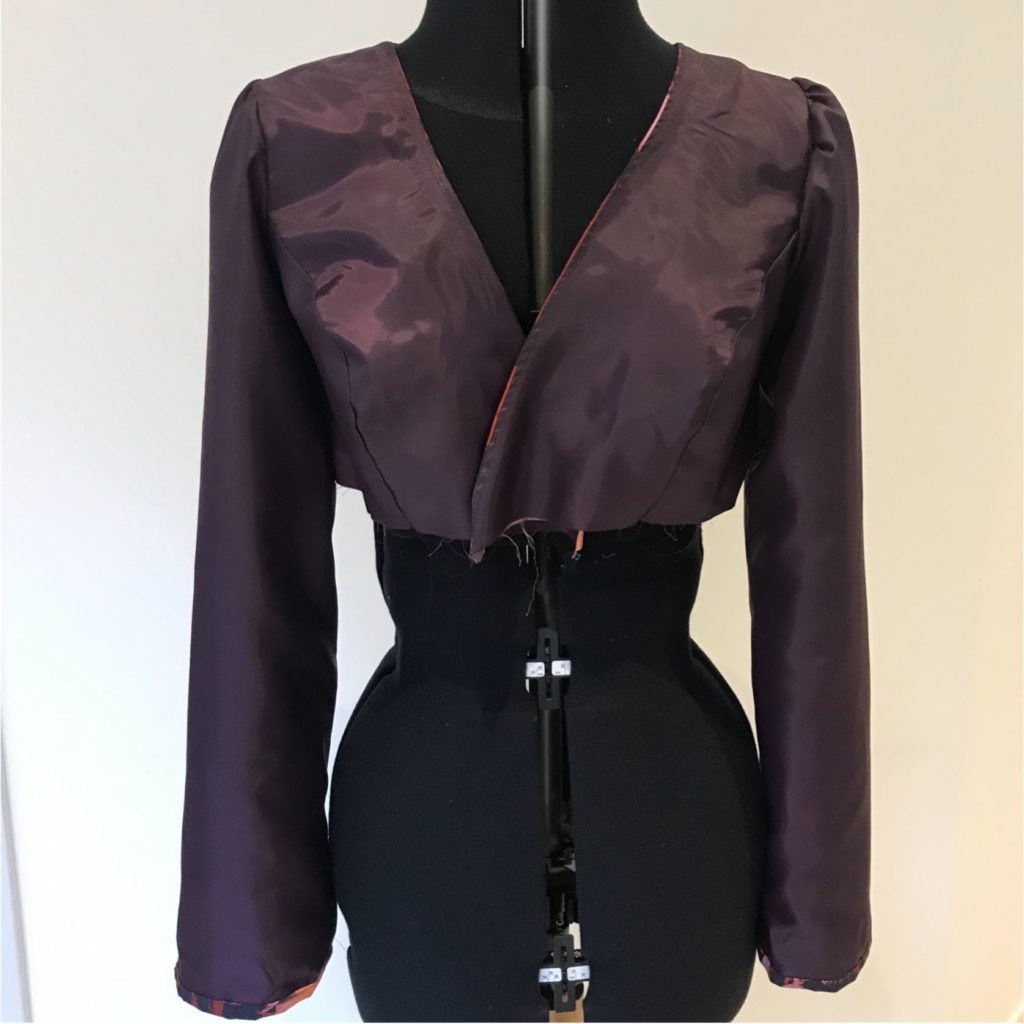
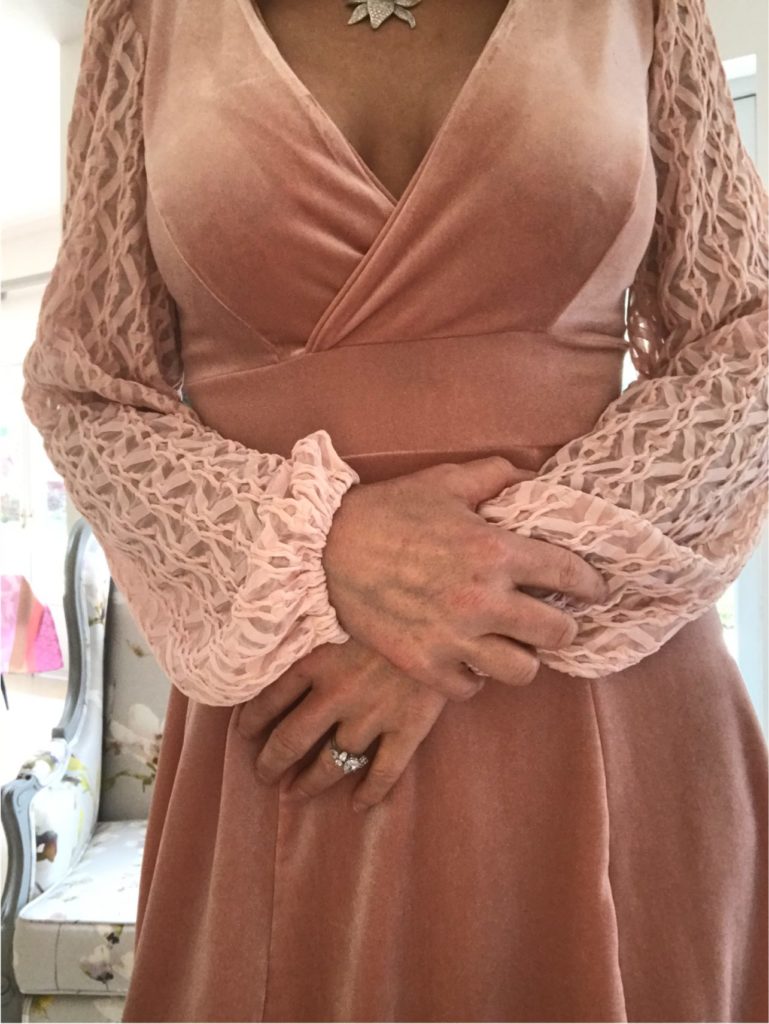
I also wanted this dress to be fully lined, because this inside of La Boheme skirt is partly visible – adding another level of complexity to the self-drafting process. It was all the more necessary that I chose a cotton fabric for this project, with beautiful colours but very much on the thin side for the season!
Here is how I managed the process – I pretty much went step by step, as I struggled initially with the overall process. So there you go!
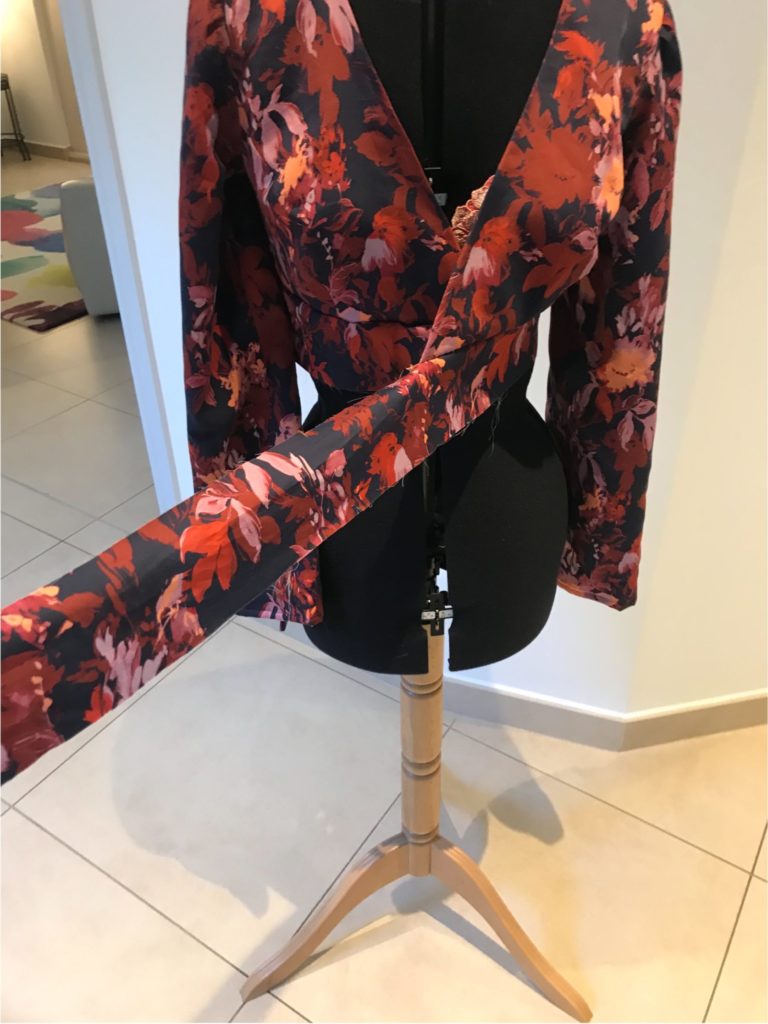
First, I made the lined bodice.
- I cut front, back and sleeve pieces both in the cotton and lining fabrics.
- I sew both bodices independently then attached them at the neckline.
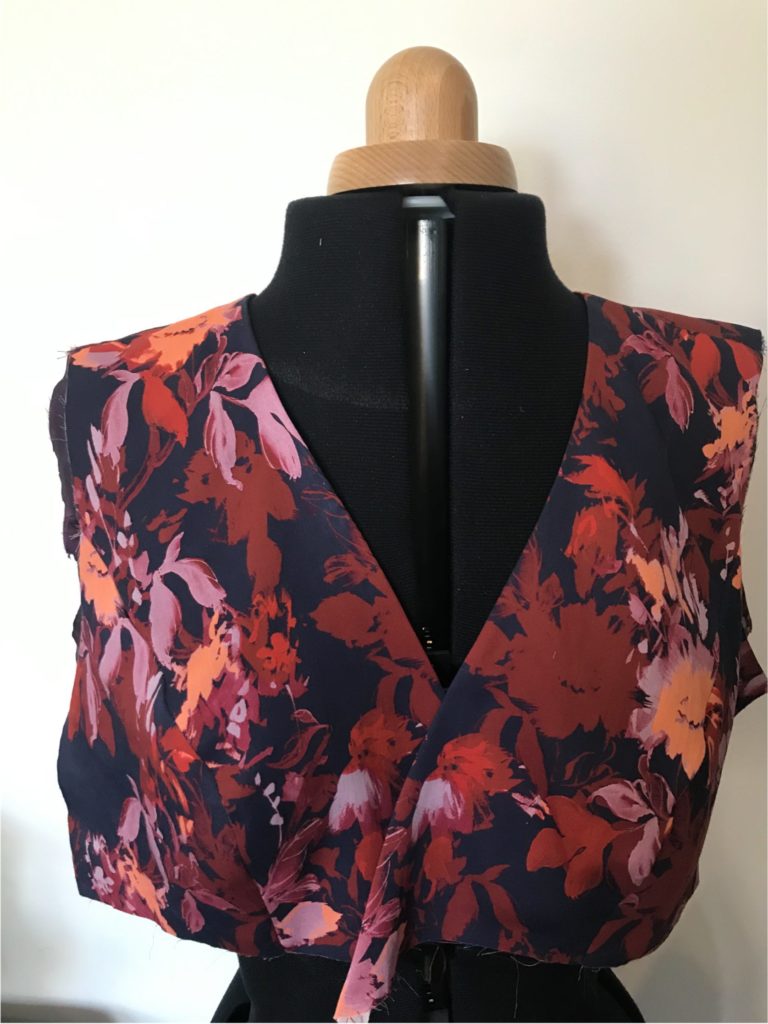
- I then added the sleeves separately to each bodice (fabric and lining) and attached them together at the wrist while making the elastic tunnel (my Magnolia sleeves are 5cm longer than the original pattern and the elastic a bit shorter (19cm), I find it prettier this way).
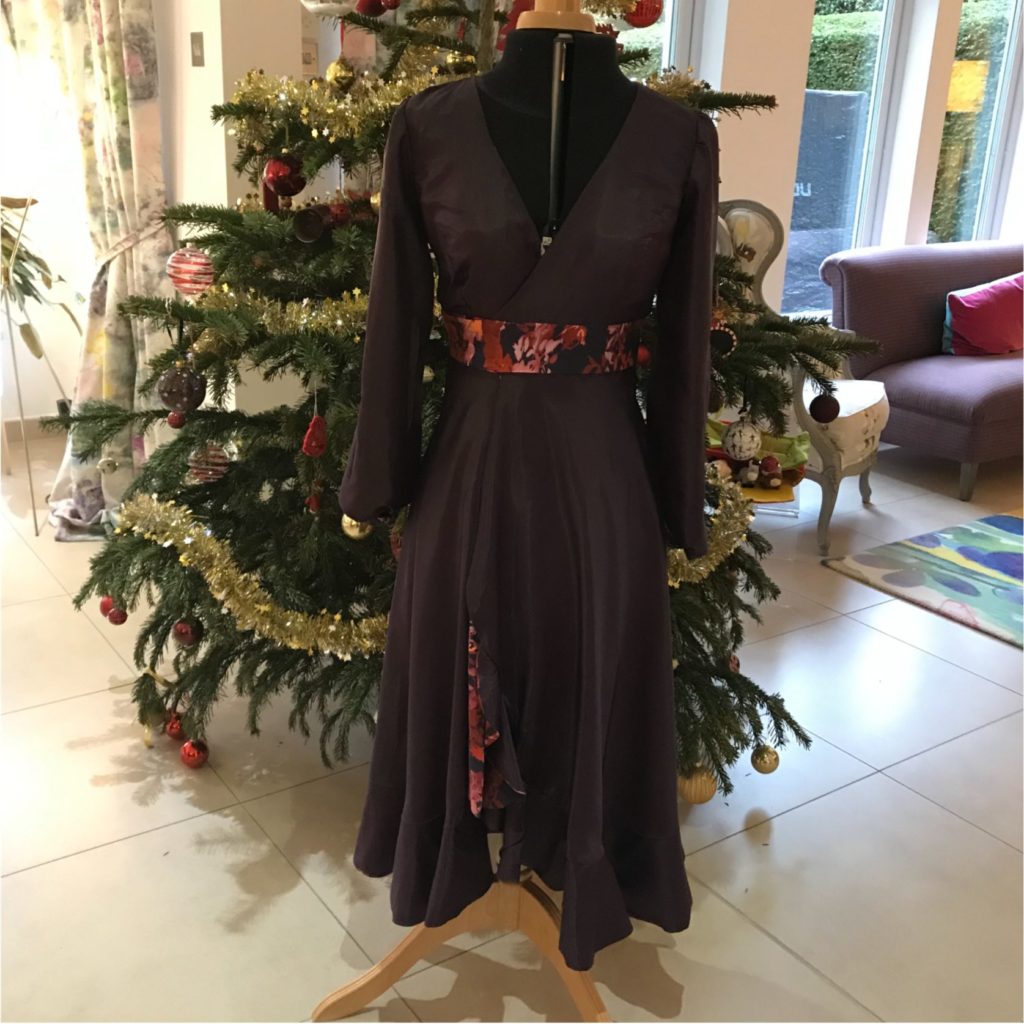
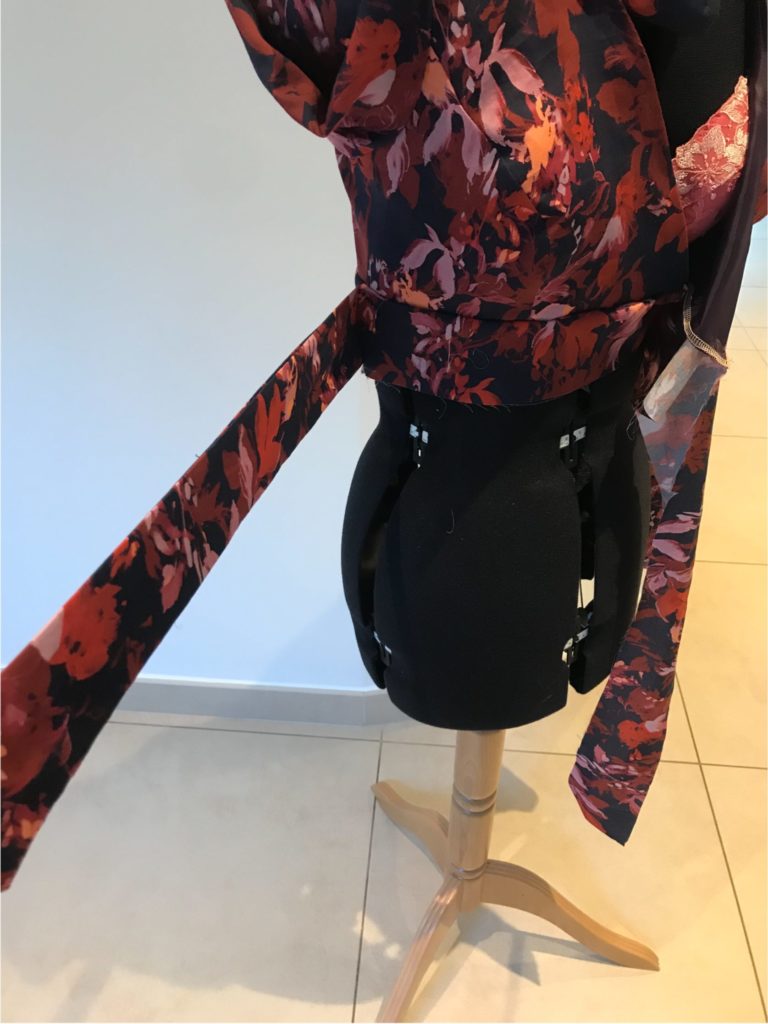
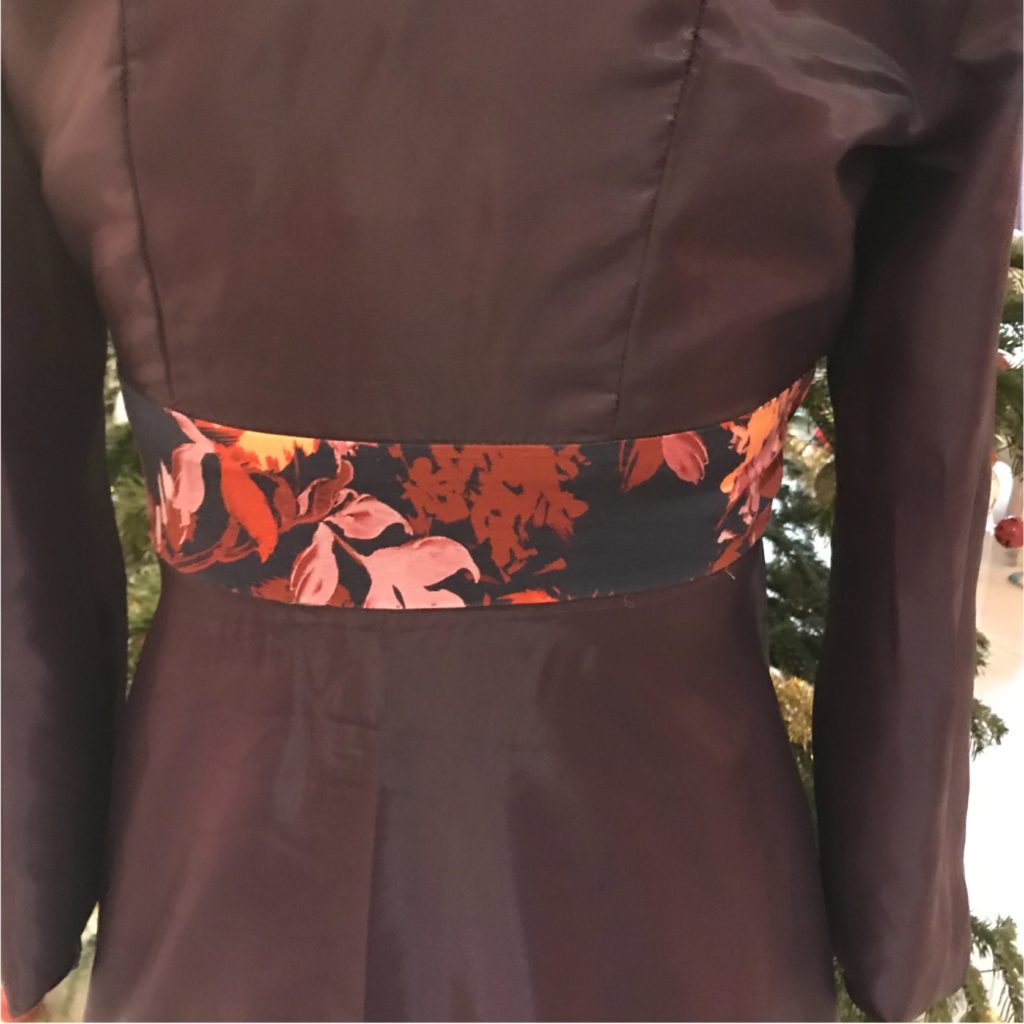
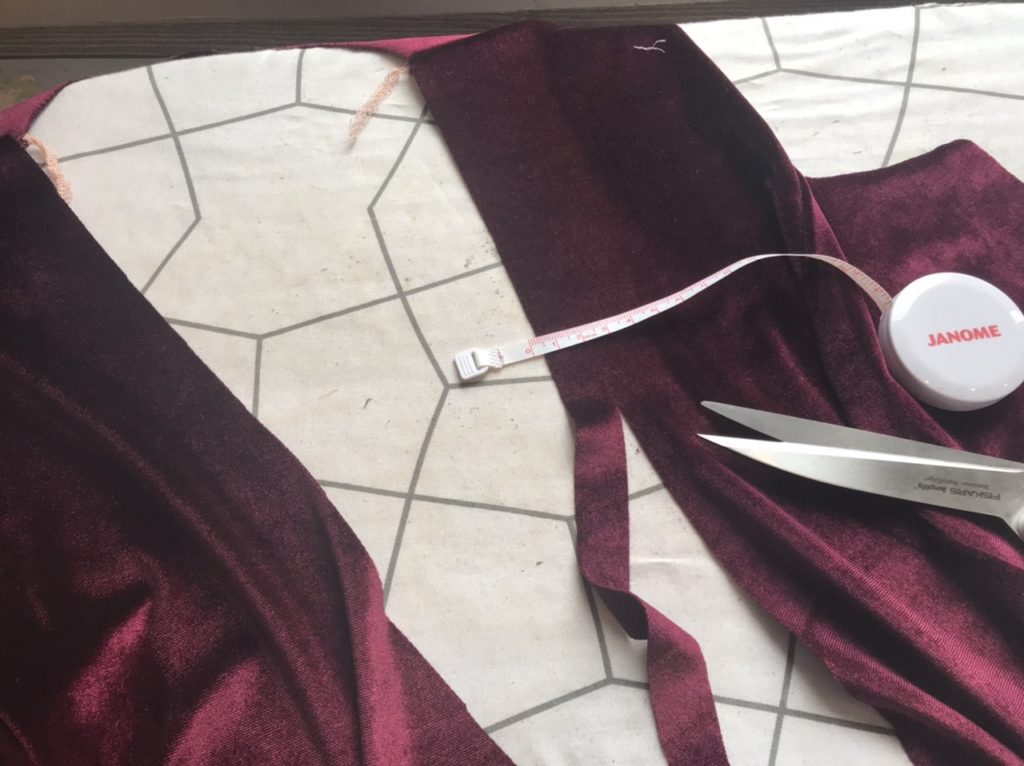
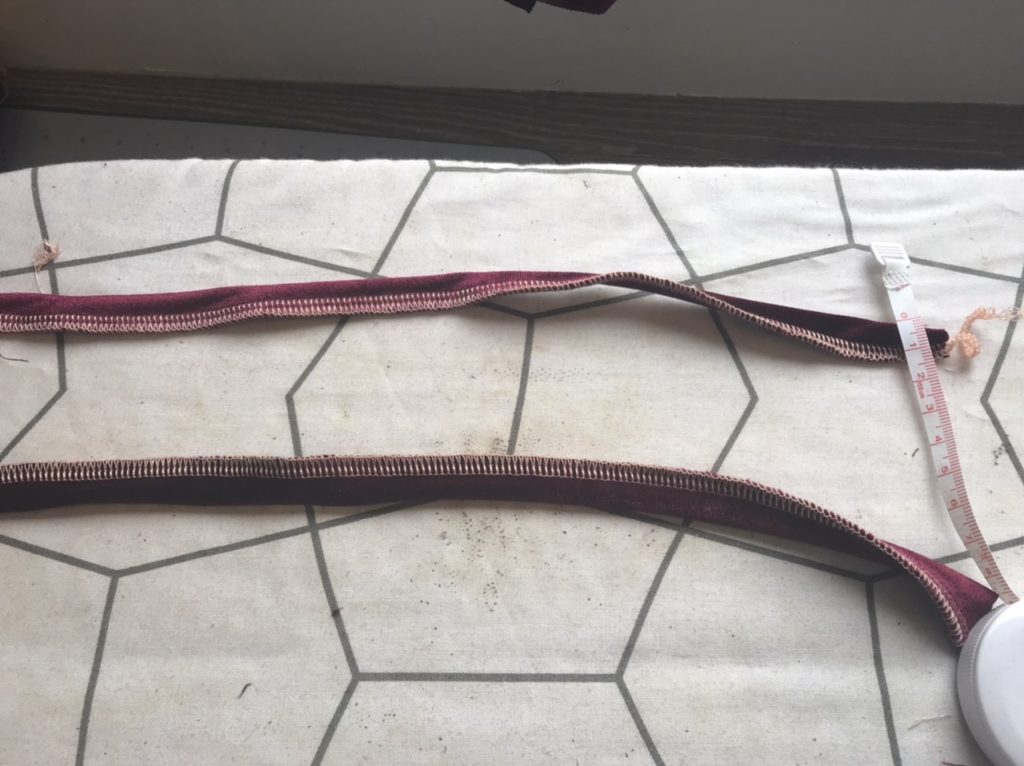
Second, I made the belt:
- My belt making was very convoluted, as I did not want to have hole on one side to pass the overlapping belt as recommended in the La Boheme Pattern. Instead, I sandwiched a piece of fabric where the hole should have been. It is neater but mind-boggling so I would advise you make the belt following the pattern instructions if you’re not that fussed about the hole.
- If you do that, you need to cut two back belt pieces of Magnolia ; and four front pieces extended by 80cm.
- Sew all three pieces of belt together twice (front + back + front); then sandwich the bottom of the bodice )fabric + lining) between the top of the belts and sew all along, leaving only bottom side of belt unsewn (this is where you will insert your skirt).
- Do not forget to make the side hole.
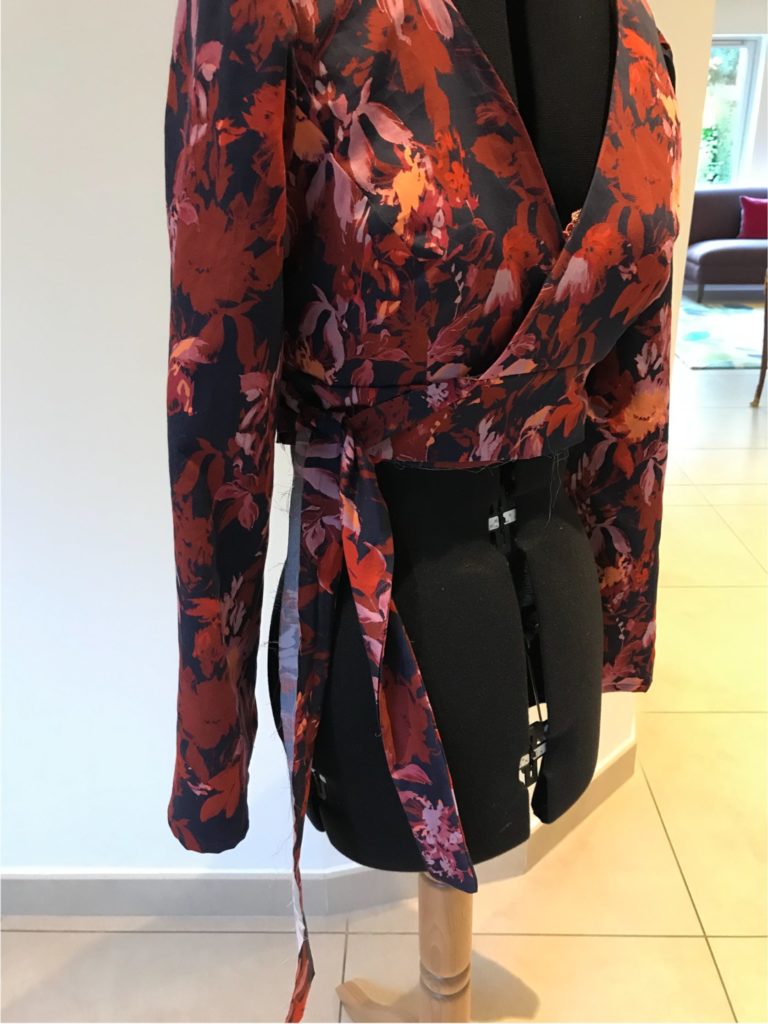
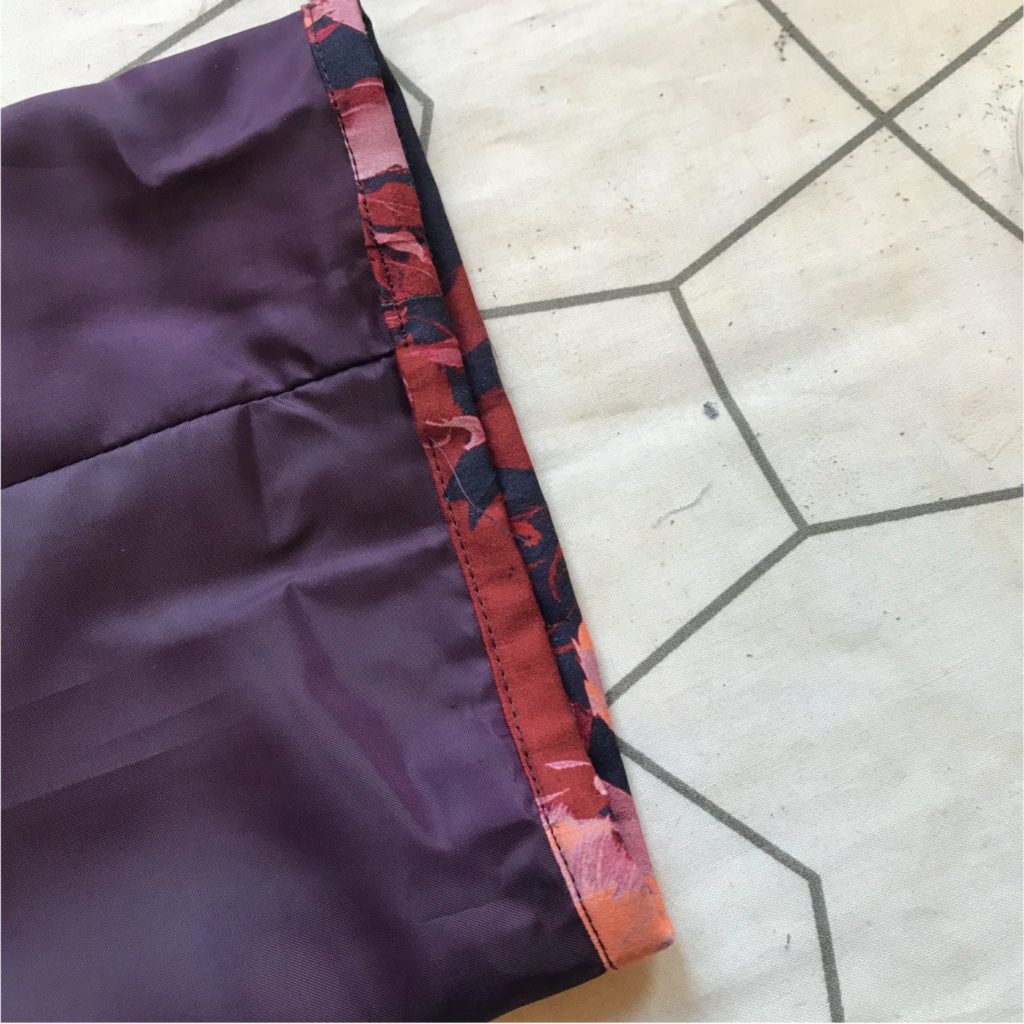
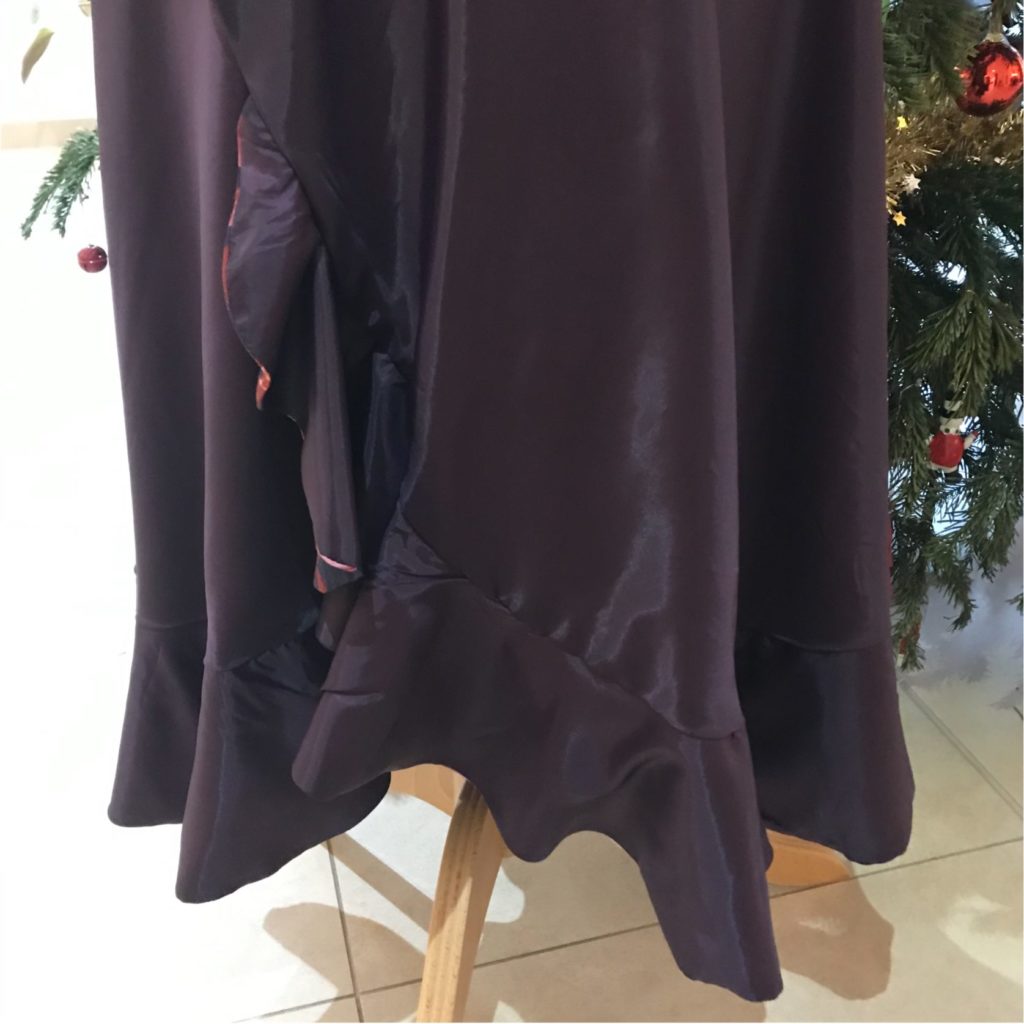
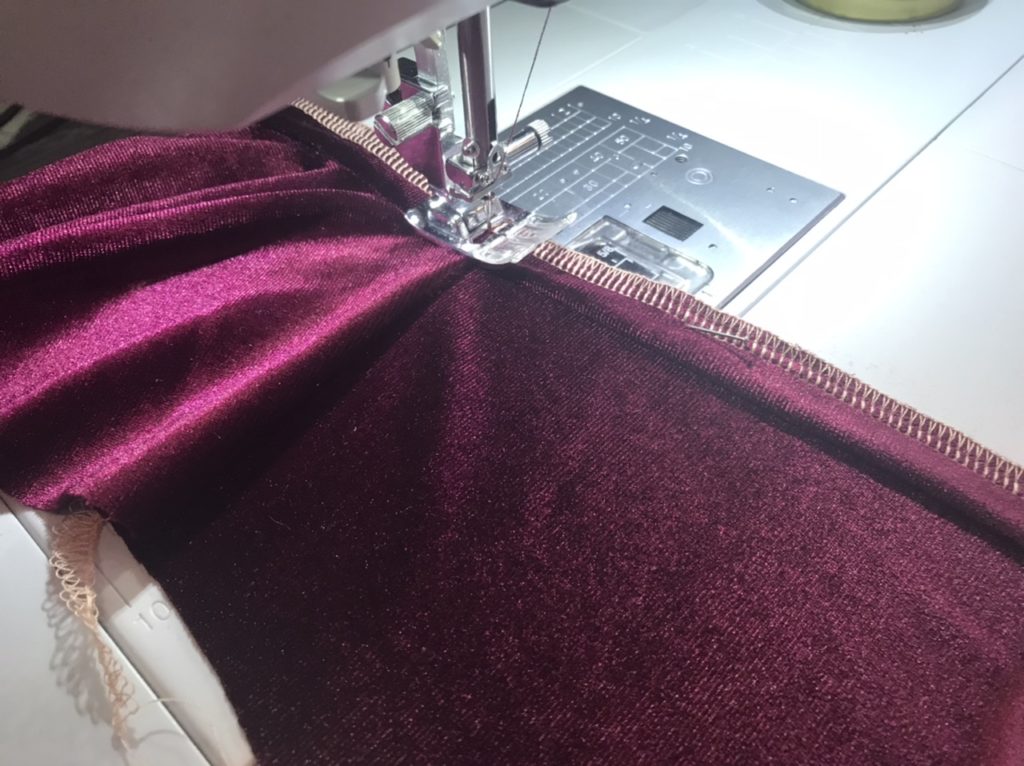
Third, I made the skirt:
- I modified my La Boheme skirt pattern to make it shorter (because I wanted a midi skirt rather than a long one); and by making the curved front side correspond to the width of the wrap bodice (the original skirt wraps further but that would not look very coherent to leave it like that). Be careful, once you’ve done that you need to shorten the ruffle – I took about 20cm off.
- I cut the skirt and ruffle pieces (but not belt) in both the cotton and lining fabrics. Then attached each ruffle to each skirt – no need the hem the ruffle here as this will be done automatically in next step.
- I attached lining to skirt through the outside hedge (this way the hemming is done).
- I attached the skirt to the outside belt (the one visible) with my sewing machine.
- On the inside, I hand-stitched to get an invisible finish.
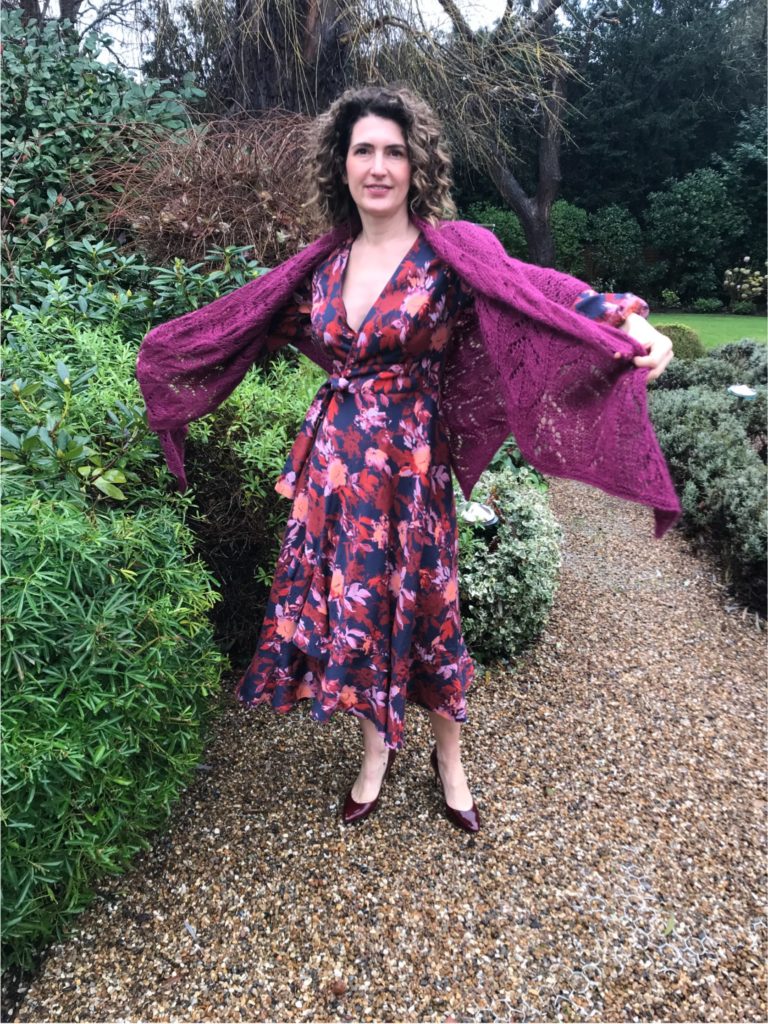
And that’s it!!! I hope the pictures help to understand the process. And here are a few more pictures of the finished dress, which I’m really pleased with! A sleeveless version is definitely on my to-do list, for when the weather agrees with it!!
YOU WILL PROBABLY LIKE THESE BLOG POSTS:

Autumn Sewing: Another Sirocco of Course
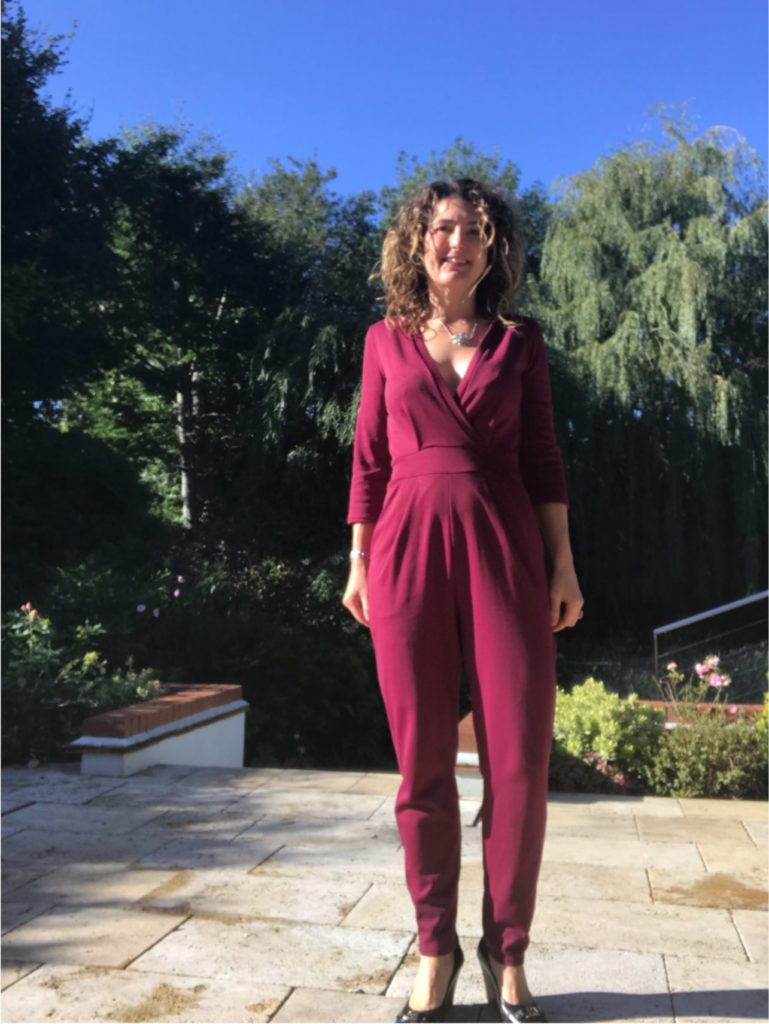
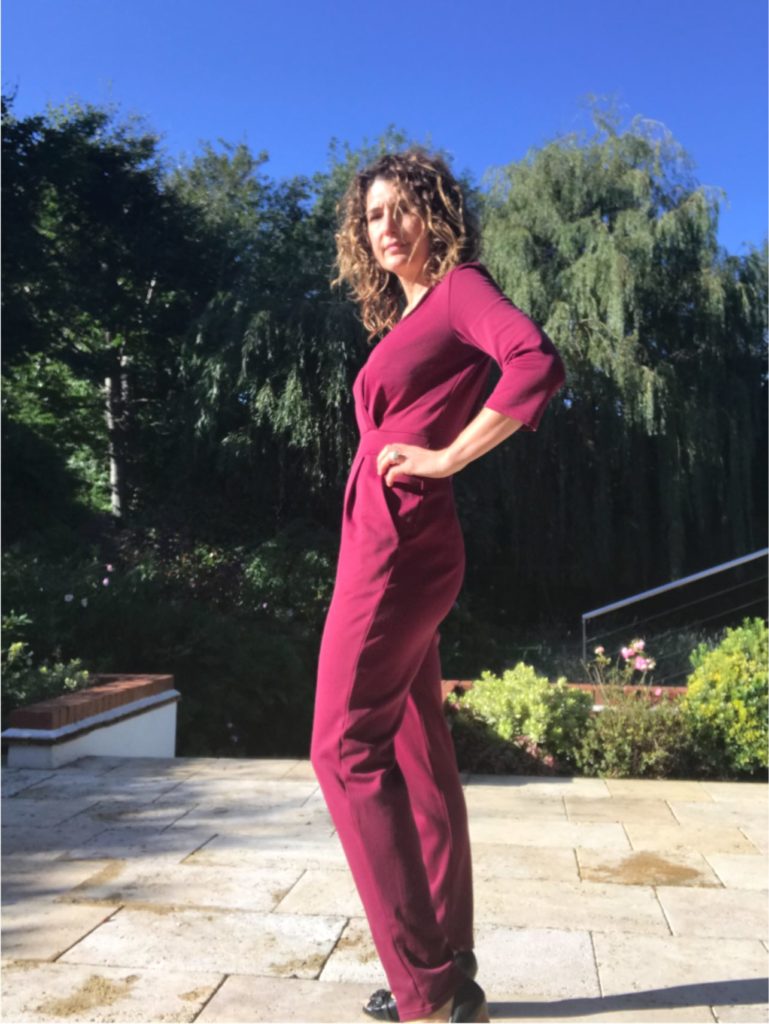
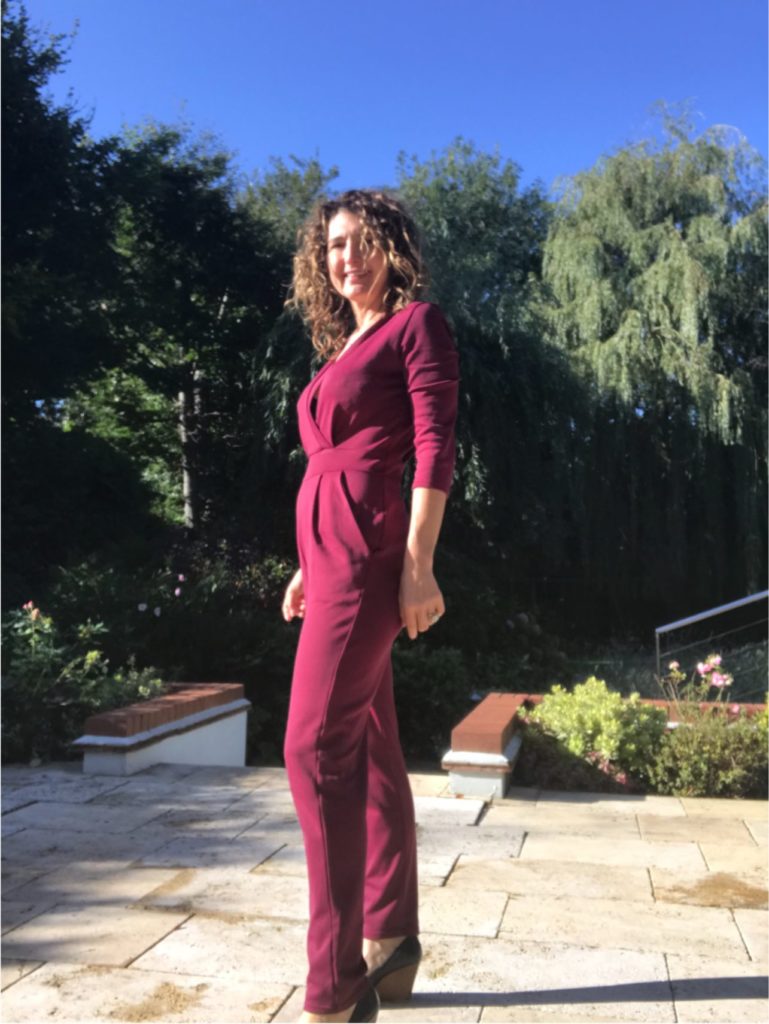
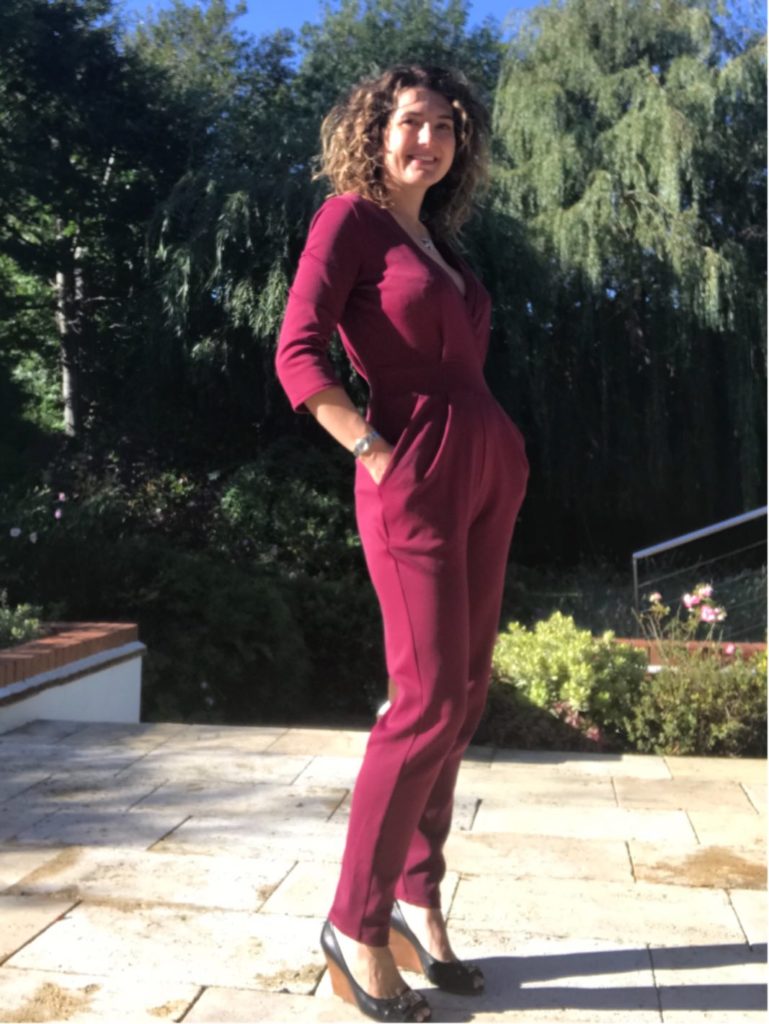
Winter officially starts on 21st December, so I have a week left to finish introducing my autumn sewing collection… Oh well… Today let me introduce a piece I could not miss: another Sirocco jumpsuit of course! And in my favourite Autumn colour, how predictable of me!
If you’ve been reading this blog for a while, you know I am an absolute Sirocco fan – see my black version here and my pink version here. This pattern is an absolute gem, I’ve seen loads of versions on Instagram and they all look stunning, whatever the shape of the person – truly incredible for a jumpsuit!
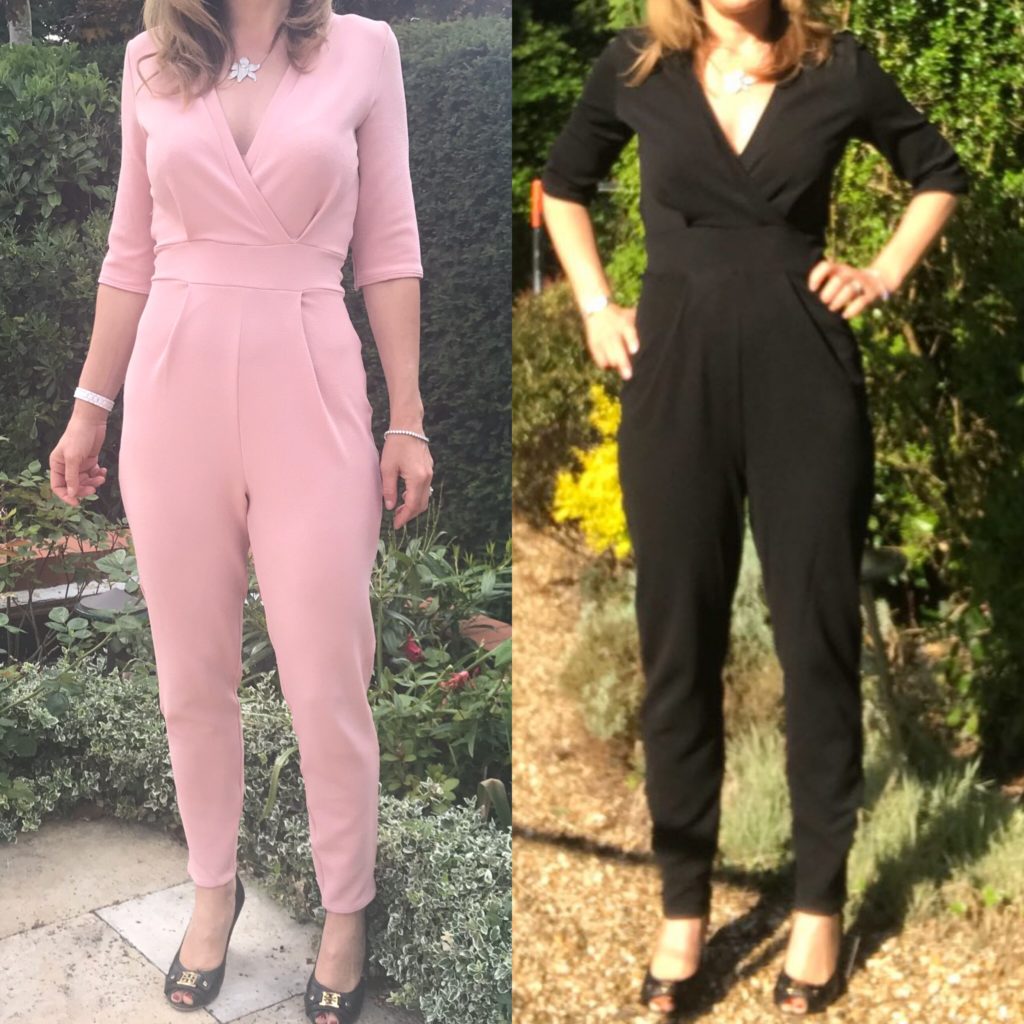
But despite its short sleeves on the enveloppe, for me Sirocco is more of a transitional piece, completely appropriate for Spring and Autumn – you just need to lengthen the sleeves, which I did for all my versions by simply drawing a straight line from the initial pattern sleeve lines.
I would have loved a full sleeves version here, instead of the 3/4, but … I didn’t have enough fabric for both long sleeves and pockets!!! So annoying… I did omit the pockets for the black and pink versions, out of sheer laziness (and also because I usually hate the unnecessary bulk around the waist) , but I definitely recommend you keep them, they make a huge difference to the overall look of the jumpsuit.
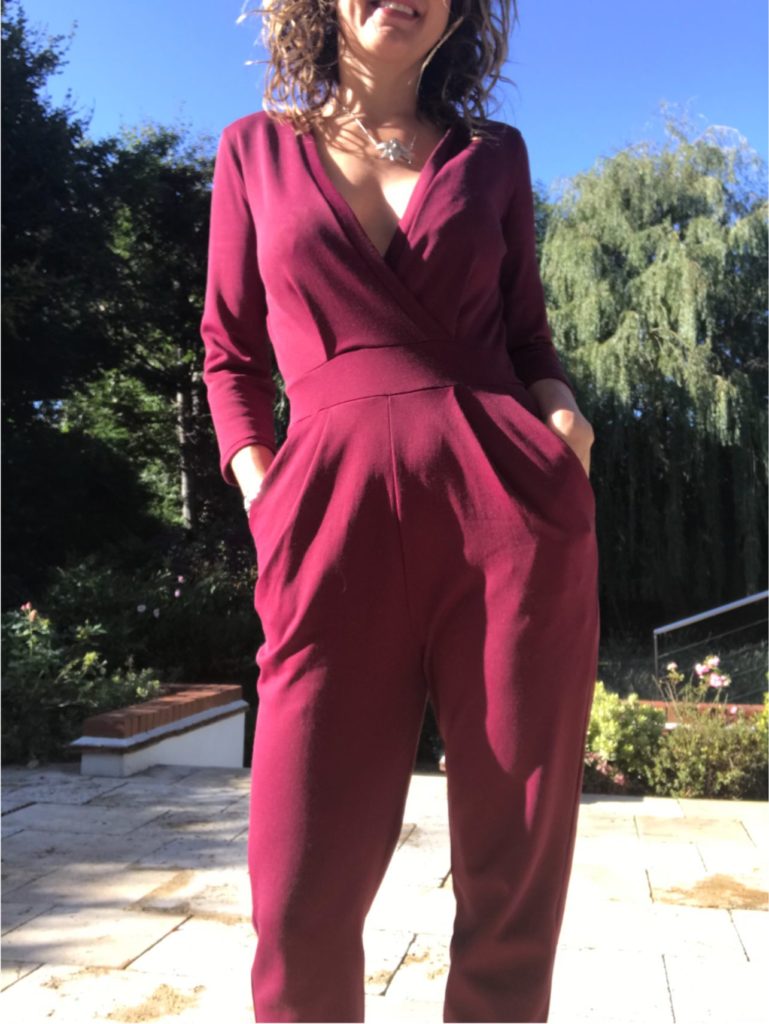
I am actually a bit disappointed by the outcome this time, which looks a bit too large and where the neckline in definitely very low. I think this is solely due to the fabric: my black and pink version where made from a stretch fabric with a lot of recovery, this burgundy version is definitely in a softer fabric – a mix between a scuba and a French terry, double-sided, very soft and beautiful actually! I am wondering if I should re-cut the pattern one size lower (and make all my previous adjustments) if I want to work on “saggier” fabric – such a hassle, I will need a lot of motivation for that!
In any case maybe I should just not bother, I got a lot of compliments each time I wore this jumpsuit, and I love this colour so much I am not too bothered about the fit, for once!
Just for reference, all the changes I made to the pattern (as well as pictures of the various colourful muslins) are detailed in this article.
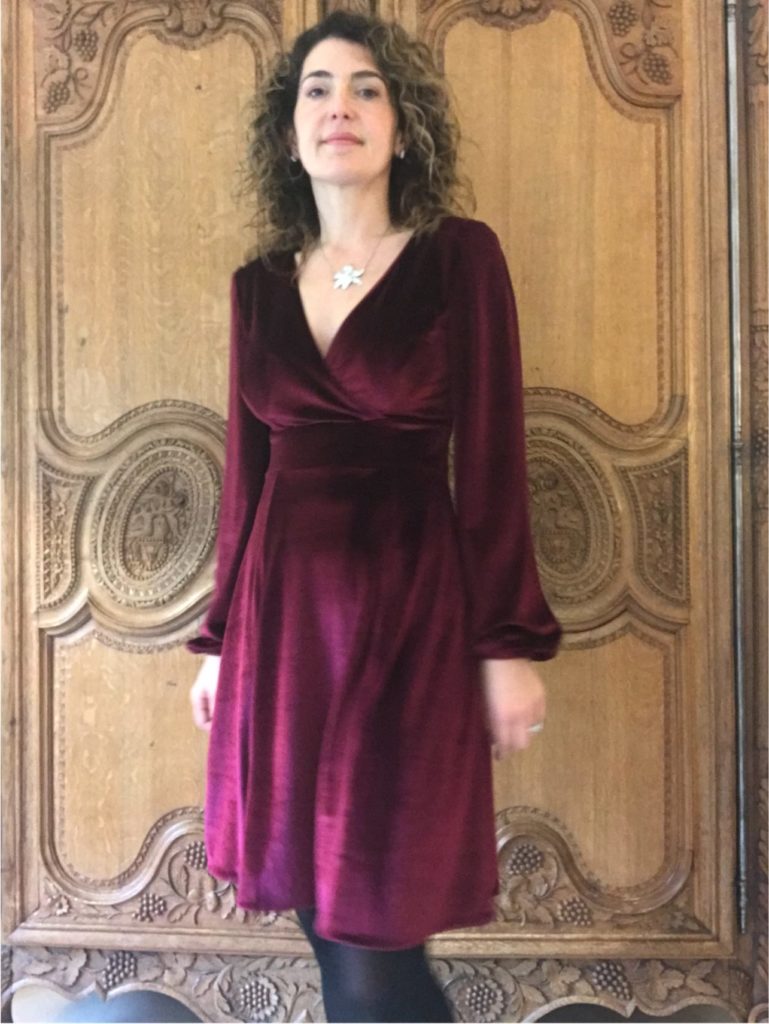
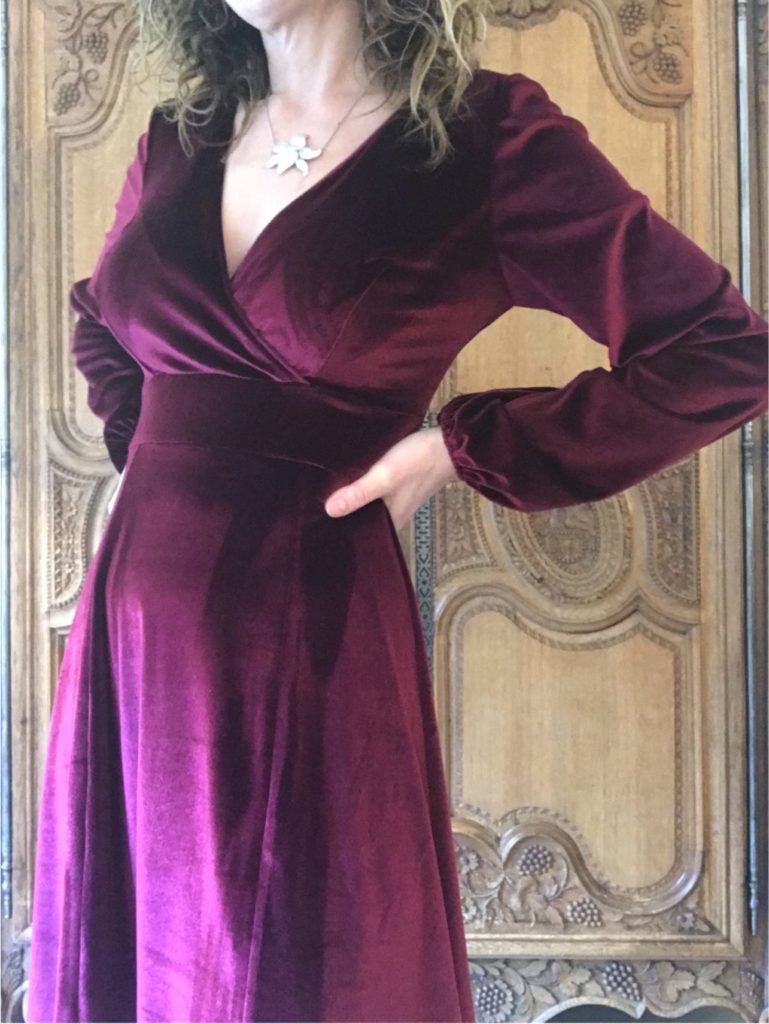
Sewing for Autumn: Soft as Velvet
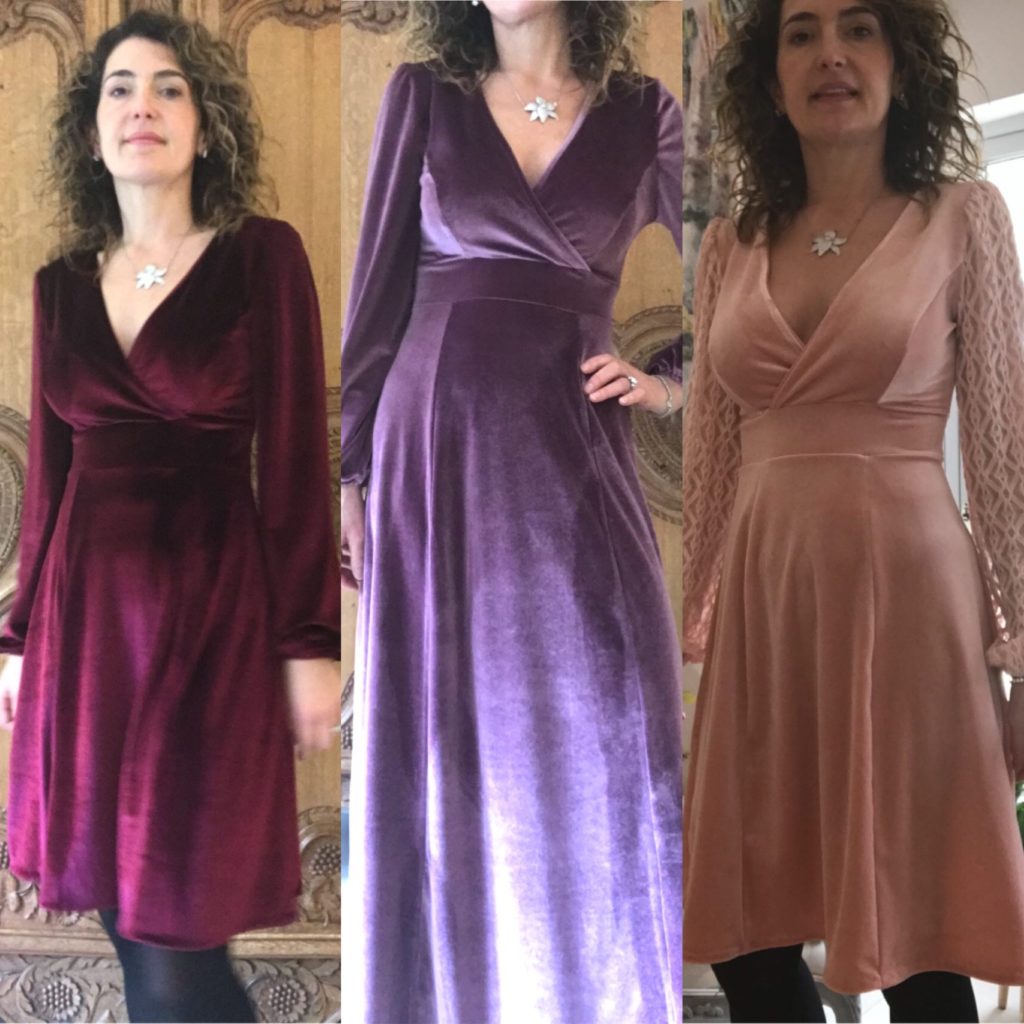
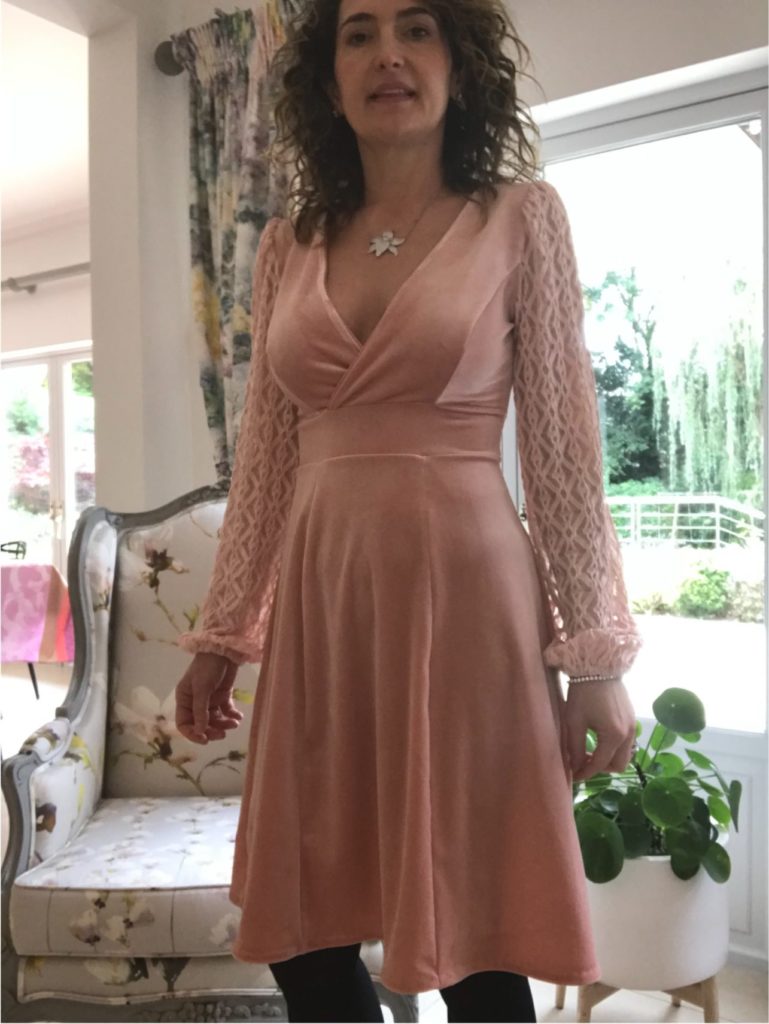
Let’s continue my Autumn series by introducing you to my favourite pattern in my favourite fabric for this season: the Deer&Doe Magnolia dress in stretch velvet. And you know me: in my enthusiasm, I haven’t stopped with one or two dresses… I have actually sewn three, all in my favourite seasonal hues discussed in my previous article.
Magnolia is a pattern I had been wanting to sew ever since it was released. But I have a large bust and after discovering the McCall and Vogue Custom Fit patterns with different bust cup options (winter dresses sewn here, here, here and here) I just stopped looking at anything that would potentially require a Full Bust Adjustment (FBA for those familiar with this long process).
How stupid of me!!! I finally decided to try and sew Magnolia without making any FBA and… it worked perfectly!!! D&D patterns already size more generously at the bust than other indie and regular pattern companies and I also think the princess seams offer a bit more room for the bust. I cut a size 38, in line with with my measurements (except bust) , and all of my E cup fit in there – I just had to reduce very slightly the waist.
But Magnolia is a pattern for non-stretch fabric so my first trial version is this one, in a light viscose, with shiny piping of course!

This dress is beautiful and I was over the moon with the outcome, but it is frankly not very appropriate for winter, as the fabric is very thin hence not very warm – for me anyway! I therefore decided to explore thicker fabric but still with drape; and stretch velvet came as an obvious candidate: it is very cosy, completely straightforward to sew and, importantly, all over the place in fabric shops. My favourite providers are Croft Mill and Fabrics Galore,
Here are the adjustments I made to convert the pattern for a stretch fabric:
- I should really have gone a size smaller but I did not – I put the dress together in size 38, then before hemming it I tried it one and shaved off whatever was not necessary (depending on the stretchiness of the velvet, this was between 1 and 1.5cm). I know this is not the right way to do it but it worked really well.
- I omitted the side zip, not needed with the stretch of the fabric.
- To finish the neckline, I cut 1cm off the neckline, then cut a velvet band 3cm wide and the lenght of my neckline. I folded this band in two, wrong side to wrong side, overlocked the raw hedge, then assembled it to my neckline with an overlocker – the way you finish off the neckline on a tee-shirt but without making the band smaller.
- I assembled everything with my overlocker, but hemmed by hand (for an obscure reason I really like thIs process, weird…)
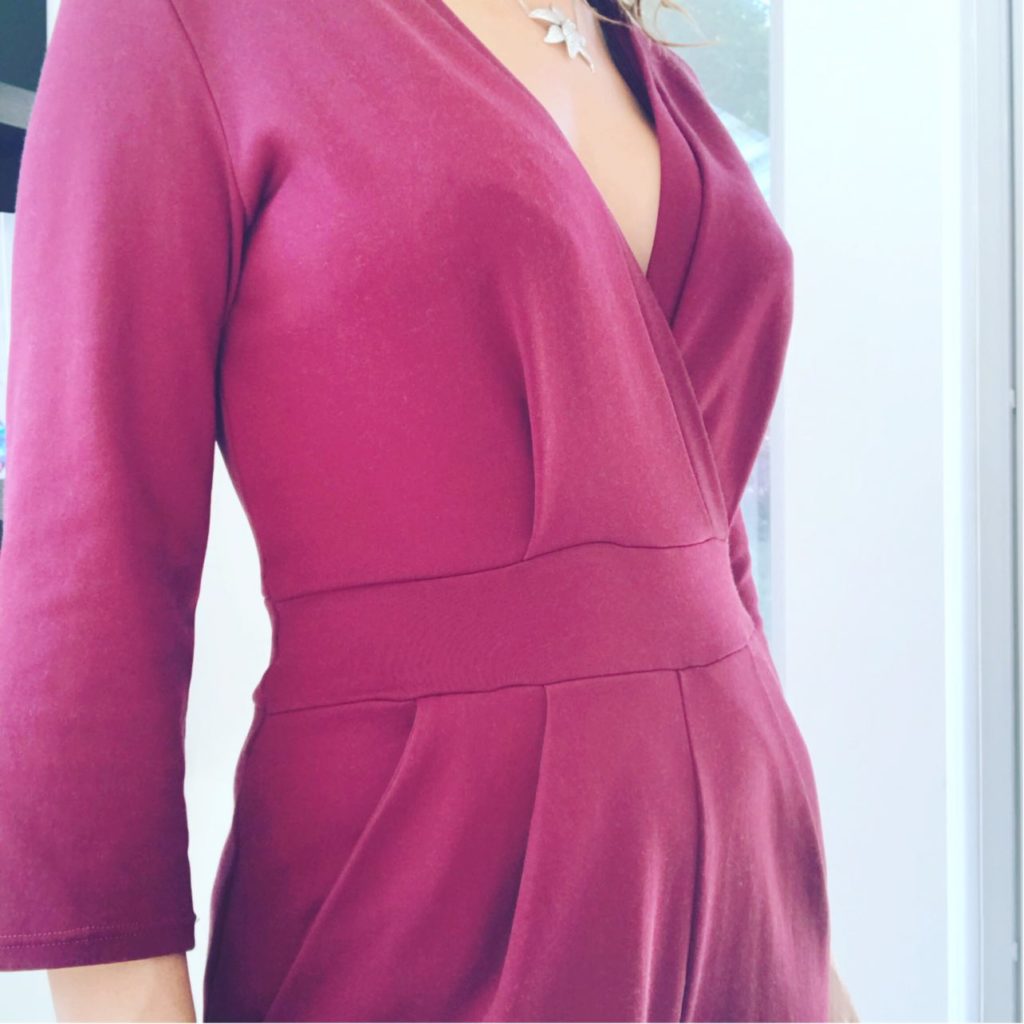
Here are the picture of the neckline finish, which is the main adjustment I made to the pattern:
And that’s it. Three dresses! First a long lilac one – I did not keep the side slit in the skirt but now I think I should really have. This dress looks very elegant but is a true secret pyjama, it is incredibly warm and cosy!
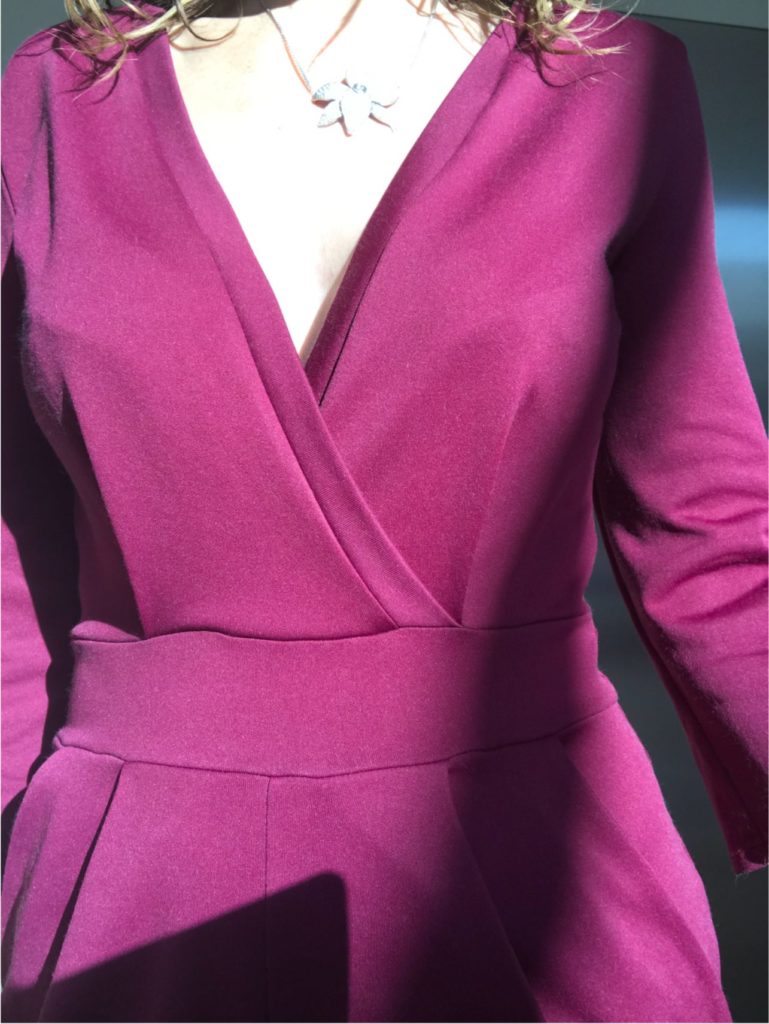
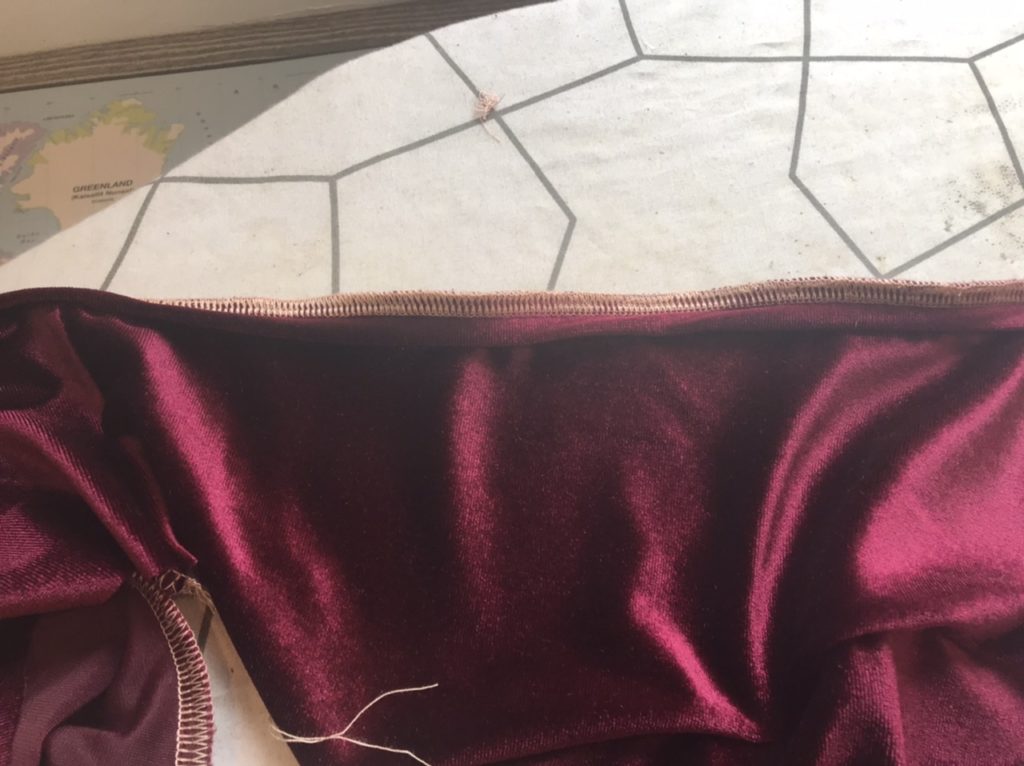
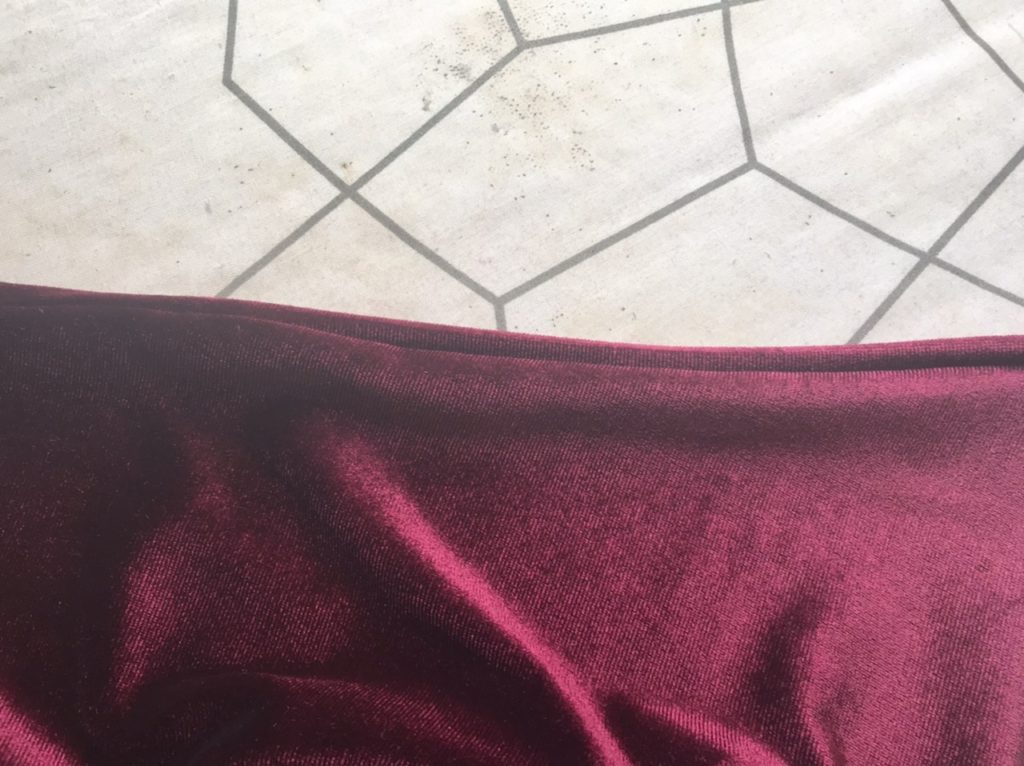
The second one is wine-coloured and my favourite – I am absolutely in love with the colour. I lengthened the sleeves by 5cm and made the wrist elastic slightly smaller than indicated (19cm), I find it more comfortable this way.

For my last version, in blush pink, I used a stretch lace fabric I had in stock for the sleeves – incredibly perfect match to my velvet! I slightly messed-up the neckline which is now very revealing… Oh well…
That’s it for these, but I promise there are more Magnolias to come soon…
Sewing for Autumn in Wine Hues
Although my writing has been rather light on the ground over the past few months, my sewing has far from stopped! In fact since September, I have been very productive sewing my Autumn wardrobe, as the weather turned cold extremely fast and I was attracted by new colours. Well, actually, should I say one specific colour?… Which is…. guess!
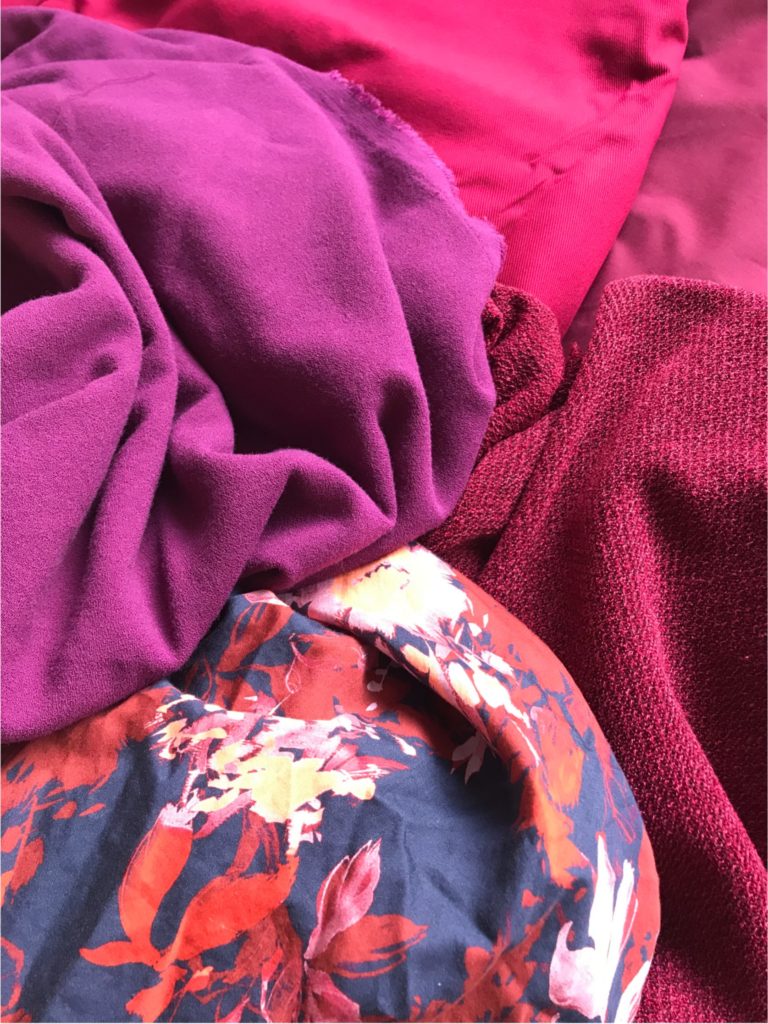
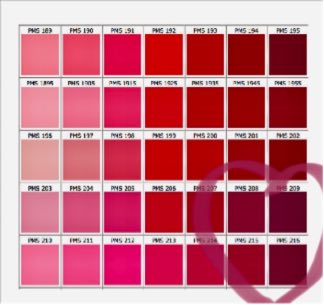
Not sure what this colour is called: wine, burgundy, damson, mulberry? I like it with quite a bit of red and purple, not too much pink (definitely not fuschia!!!) – on the Pantone charts I think it would sit in between 208, 209, 215 and 216.
Obviously a huge struggle to order from the internet because very often, the colours shown on the websites have nothing to do with the real-life colours – this is the case with other colour tones but not to such a huge extent in my view.
So to help you purchase fabric if you share the same colour obsession as me, here is a little selection of what I’ve bought and loved in this tone – and is still available to order at the time of writing this article. For all these fabric I actually ordered samples first, as the colours from the website pictures can be very inaccurate ( and I’m really fussy about my colours, in case you didn’t notice).

From left to right and top to bottom:
- Wine stretch velvet from Croftmill
- Winter-toned cotton sateen from SewMeSunshine
- Damson water resistant peachskin from Croftmill (the website photo is not acurate at all)
- Burgundy cotton twill from SewMeSunshine (the colour on the website is completely misleading, this fabric is a deep beautiful burgundy colour as shown here, not a bright fuschia)
- Damson crepe from Croftmill (here the website picture is spot on)
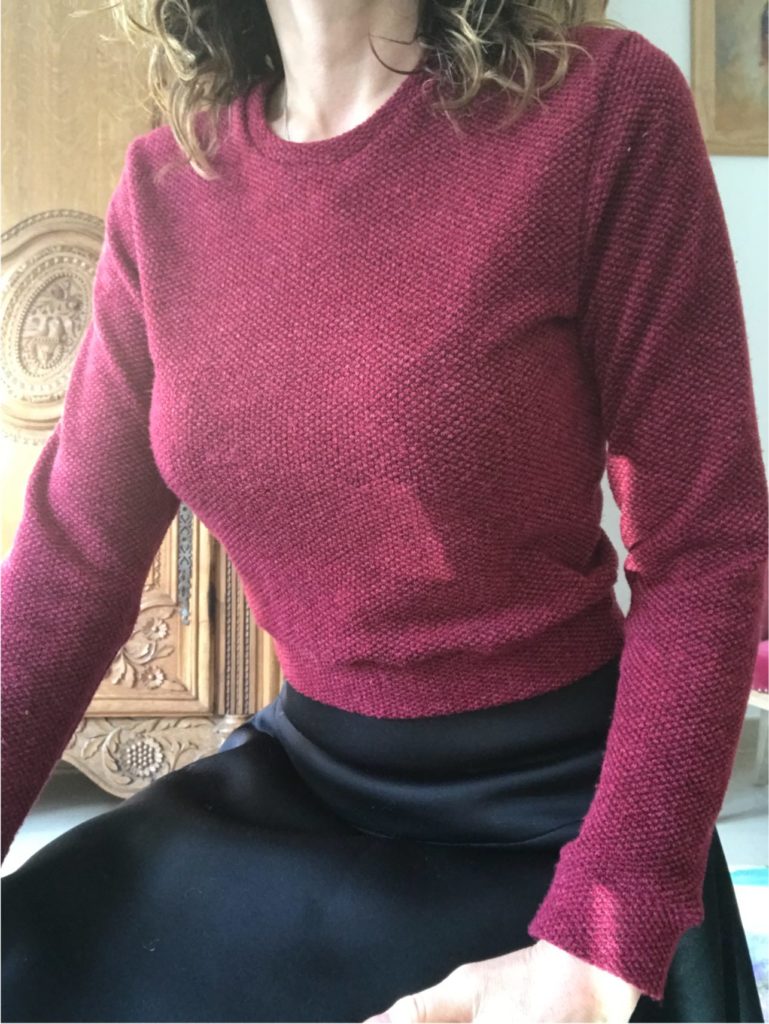
- And off course a bit of wool: jumper in a mix of Drops wools – Big Merino Maroon (here too the website picture is all wrong, this is a burgundy beauty not a brownish horror ) and Dark Rose Kid Silk.
And without further ado, here are my recent makes in this colour schemes.
Yet another Sirocco jumpsuit:
A series of stretch velvet Magnolia dresses:
A dress from a mix of the Magnolia dress and the La Boheme skirt:
A cute little Ondée top:
And a self-drafted knitted jumper, still in the making…
More details on most of these projects in forthcoming blog articles, soo, I promise!