You would think that the more you sew, the wiser you become at choosing your projects and the fewer fails you have – well, not for me! I have recently noticed that a series of good projects get followed by a series of disappointments: not just one, but two or three things that just don’t turn out as I wanted. This V8917 dress definitely is part of a “bad sewing luck” span…

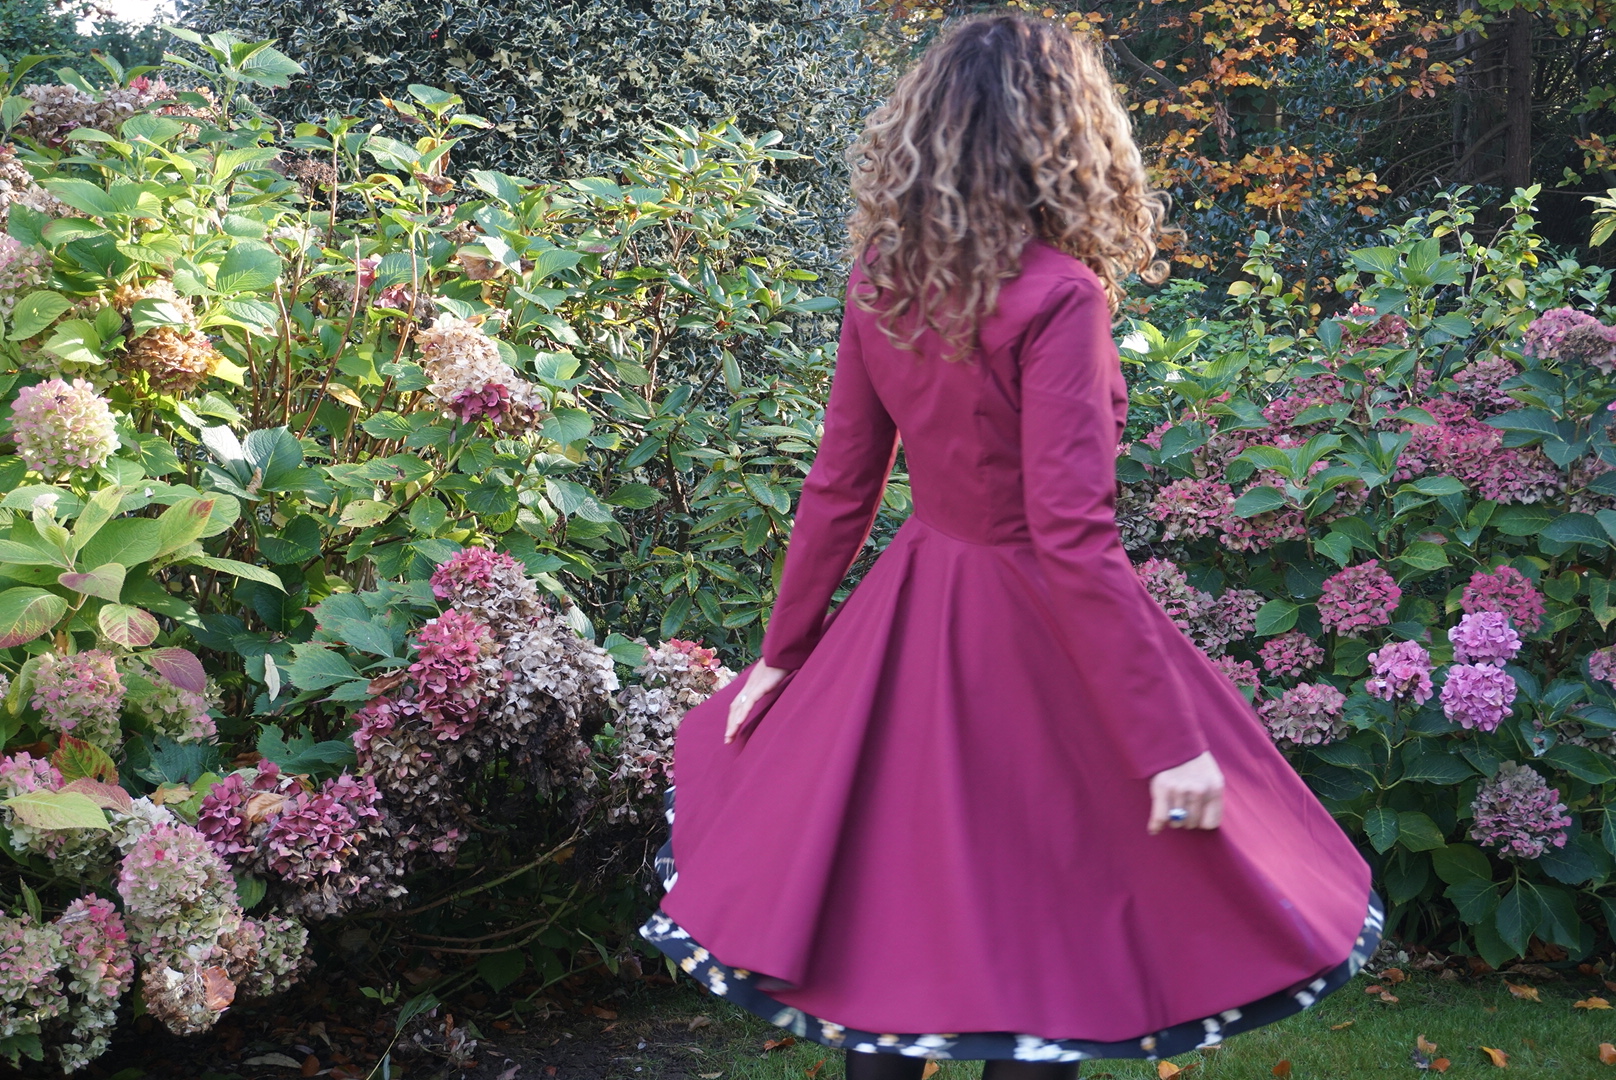
I recently discovered with amazement the perfect fit of the Vogue Custom Fit models – in my enthusiasm I made this first V8630 wide-collar, straight skirt fitted dress;

followed by this second one – exactly similar shape but very different fabric;

and by this V9327 high-neck, large cuff, big skirt dress. 
And I absolutely adore all three! The bust, which is usually a long struggle for me, fits perfectly with no adjustment whatsover; and THEY were actually quite easy to put together even when you’re mad enough to want to fully line all your winter dresses!
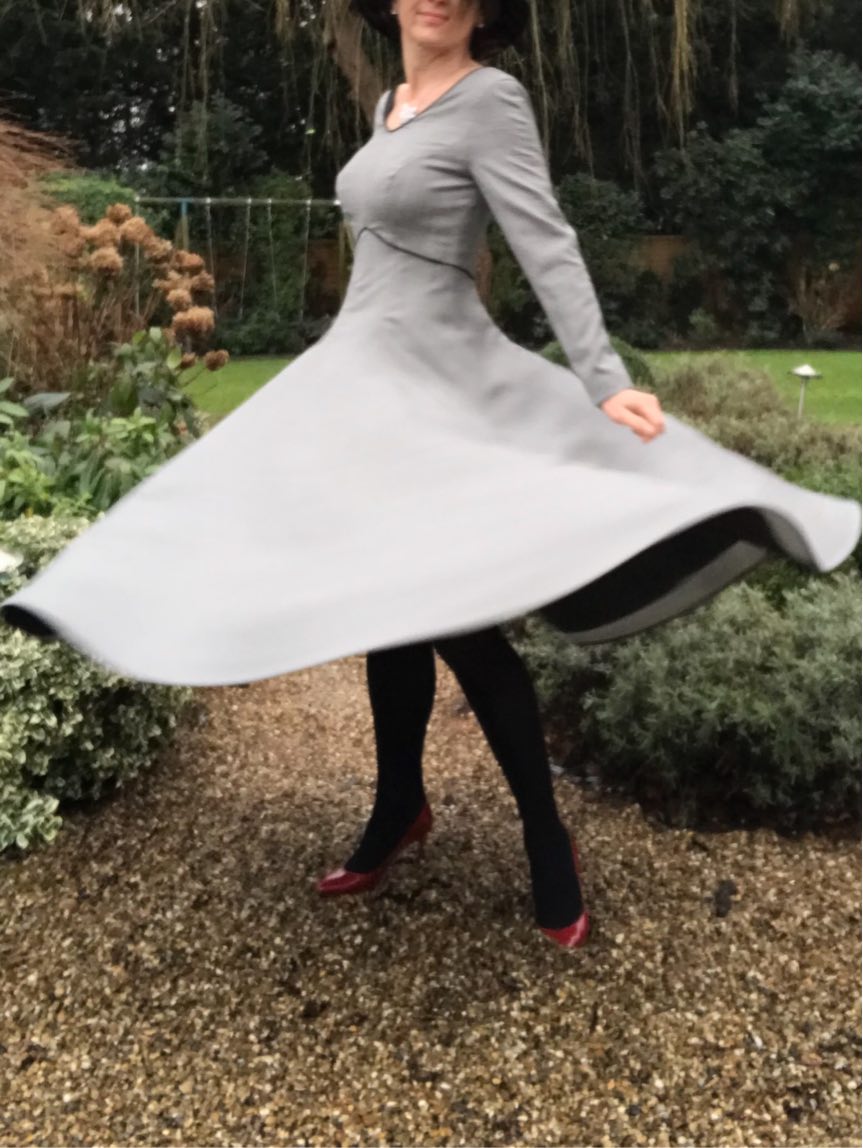
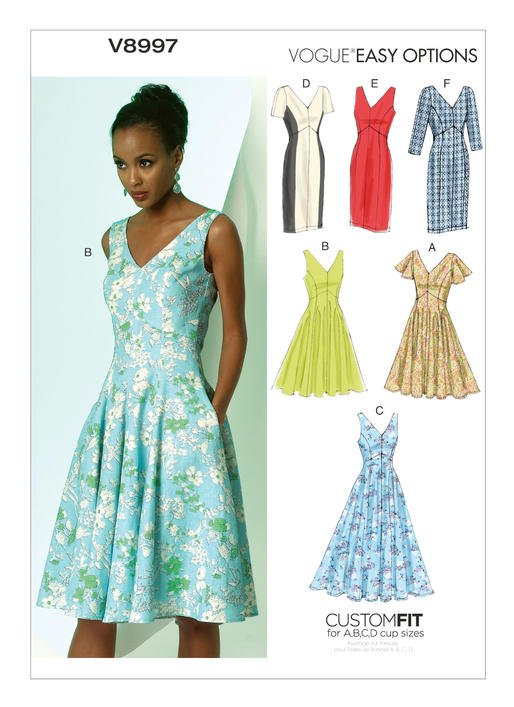
So when I decided to tackle a third dress pattern from the same collection, namely V8997, I was fully confident that it would turn out as a stunning project. I was attracted to this dress by its V lines at the neck, back and waist; its princess seams at the bust (which I’ve been wanting to tackle for ages but couldn’t face a self-made FBA); and its big floating skirt. My plan was to sew view C (big skirt at it longest) with long sleeves, to make it a perfect winter skirt.
I made a series of mistakes that could have been avoided but transformed this project into an unpleasant sewing marathon:
- My first mistake was not to look at the line art in sufficient detail – had I done so, I would have noticed that the dress itself has 18 pattern pieces, or 36 if you decide to fully line it! Not a good start! Note to myself for the future: always, ALWAYS count the number of pattern pieces before purchasing a pattern.
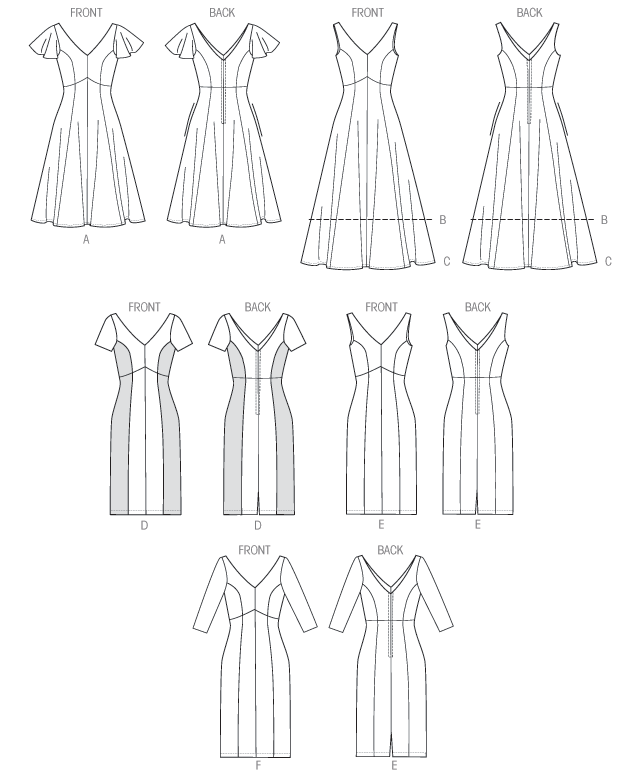
- The other problem I had is that the (8!!!) skirt pieces all look quite similar, so if you don’t keep track of which is which, it is quite easy to put them together wrong – I did very well with the dress itself; but for the lining I did attach the wrong pieces together at least twice! Arrggghhhh! Adding to that my very poor quality lining, which meant a few holes and having to completely resew my lining bodice (which I had assembled the wrong way around too)… Nightmare!
- When the dress was finished and ready to hem, I realised the long skirt was definitely too long – in my grey fabric I looked like a nun, not that I have anything against nuns but that was definitely not the look I was planning to achieve! So I had to take 10cm off a very wide skirt circle skirt… And then hand-hem the skirt… It just took FOREVER!!!

- Oh and off course I decided to add black piping at the waist after putting the dress entirely together (but thankfully before assembling the lining). So that meant unsewing the entire waist to insert my piping; and cutting corners at the back, not to have to unsew my invisible zipper. ARRRGGGHHHH! Second note to myself: make up your mind on the piping at the beginning of the project!


The other adjustments I made were the following (after making a muslin of the bodice):
- There were two front body pieces, I merged them into one as I couldn’t see the point of having a seam right in the middle of the dress;
- the neckline and back were too low for the winter, so I added 3cm at the shoulder, going to 1.5cm at the center front and back;
- there was a mistake in the pattern for the sleeves – at some point the size lines disconnect, you have to go along with the largest for your size; I got that initally wrong so the sleeves were to tight and I had to redraw them;
- I turned the three-quarter sleeves into long ones by adding 13cm.
- I increased the underarm opening by 1.5cm, which is a common adjustment for me; I did not have to make adjustments to the sleeves to do this, just to the bodic, as the ease was sufficient to accommodate my adjustment.
- As mentionned previously, I added black piping at the waist and around the neckline.
Other than that the bust fit was absolutely perfect; the V shape at the waist is very flattering; and the skirt moves very nicely when you walk (justifying all the fabric used!!). The shoulders are a bit too wide so if I ever make this dress again I will have to take 1cm off there. And I think this dress needs a bit more pressing of the seams before wearing, I need to buy the proper tools for that! (these pictures were taken the day before our holiday, in the middle of my packing-for-six-for-two-weeks frenzy!, so not much time to press)


Hi Elissenne. Thank you so much for sharing your experiences of this project with the Vogue Easy Options V8997. I will be making it up and will take on your advice. Your finished effort is delightful! I love the fall of the fabric and especially the piping!!! It really makes it. Piping won’t suit this overweight elderly person, but looks brilliant for you. Cheers, Jennifer
Hi Jennifer, you are as harsh on yourself as I am on myself… but the joy of sewing is that you choose the details that suit you! All the best for this project!
I’m only 5’2” so these lines will hopefully still look elegant on my small frame!!!
Hi, I made this dress about 10 years ago as a summer dress with the full skirt and then in the straight skirt – I absolutely love it, I must have used this pattern about 8 times in total, including a long sleeved winter dress in a heavyweight Jersey. Sometimes I make the front without the seam, to avoid clashing patterns at the centre.
Very pleased that this pattern is working so well for you! I am very keen to give it another go but terrified by all the skirt pieces…
Thank you for the thorough review. I’m a beginner and working through this one myself. Commenting here to see if anyone else has come across a seam length mismatch on the princess seams. Fortunately I uncovered this problem in the muslin phase. The prompted me to walk the princess seams on the tissue to find that the front bodice seam is 3/8 longer than the front side seam.
If this were across the whole length of the seam, then I would’ve assumed that I should just ease the extra in, but there’s 3/8s difference in length just between the top notch and the armhole.
Thanks so much for this details fedback. You are very brave to be tackling such a complex pattern as a beginner!! This dress is a bit of a basket case in my view but very pretty so worth this efort!