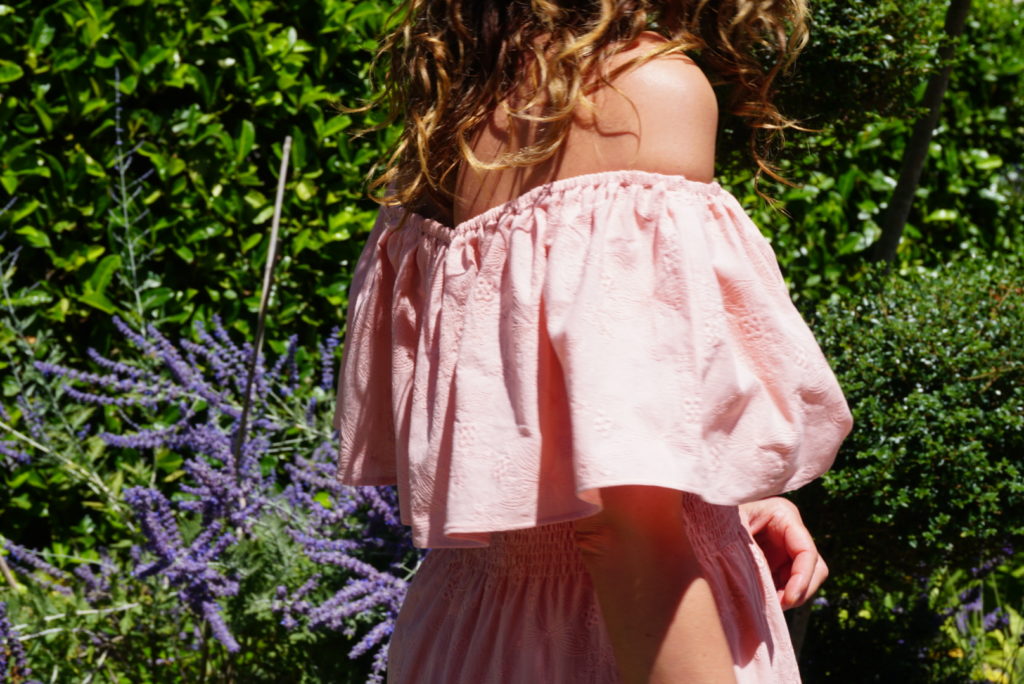
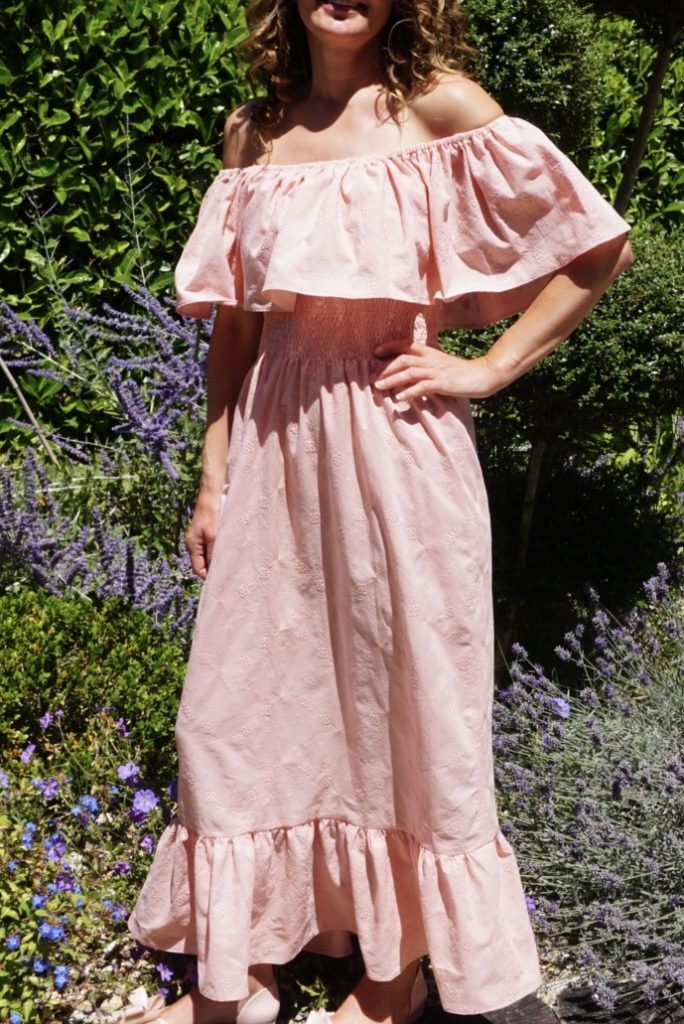
Tutorial: off-the-shoulder ruffle dress
If you make a smocked dress with one of my tutorials, do not hesitate to use the hashtag #smocksmignons so that I can admire and re-gram it!!
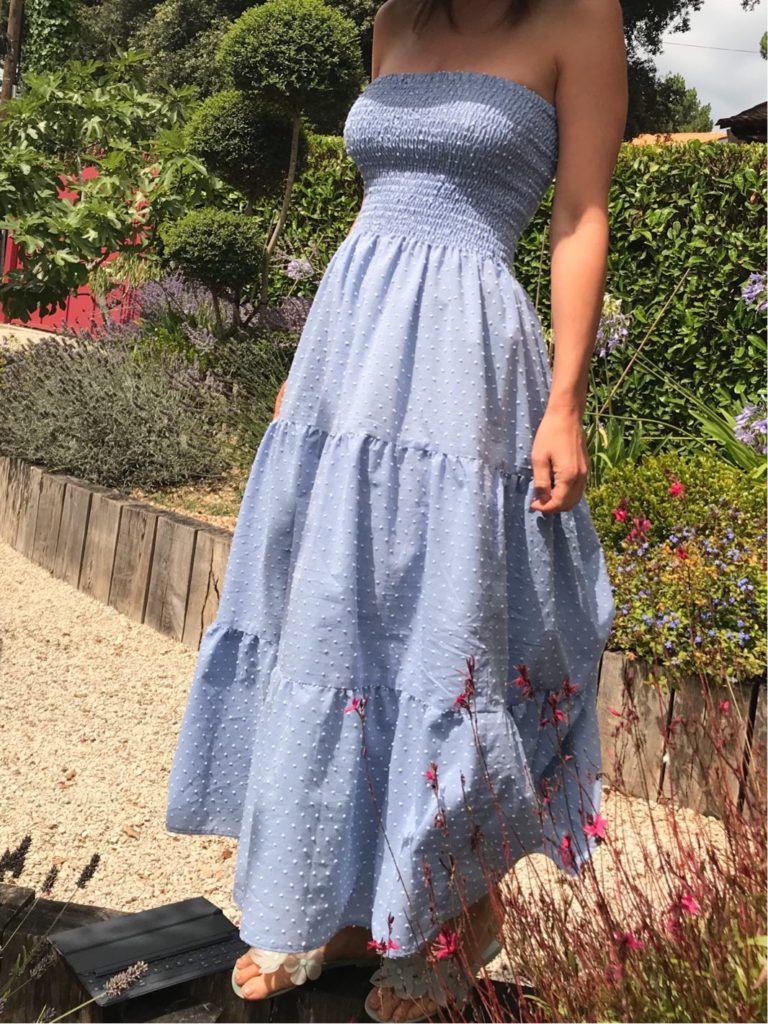
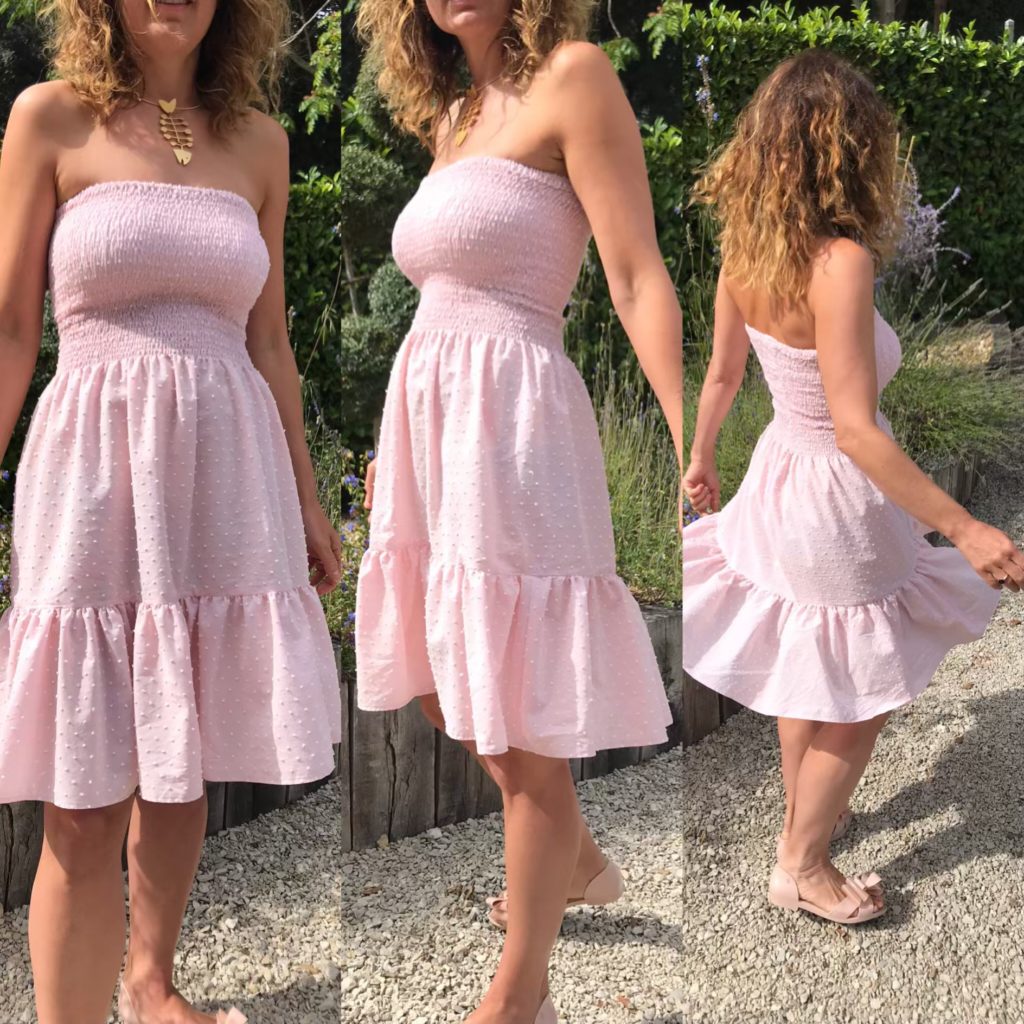
I have an adoration for shirred dresses in the summer: they are fresh, sun-tan compatible and most importantly extremely easy to make without a pattern. Here is a small selection of my handmade shirred dress collection (I obviously have more than eight…):
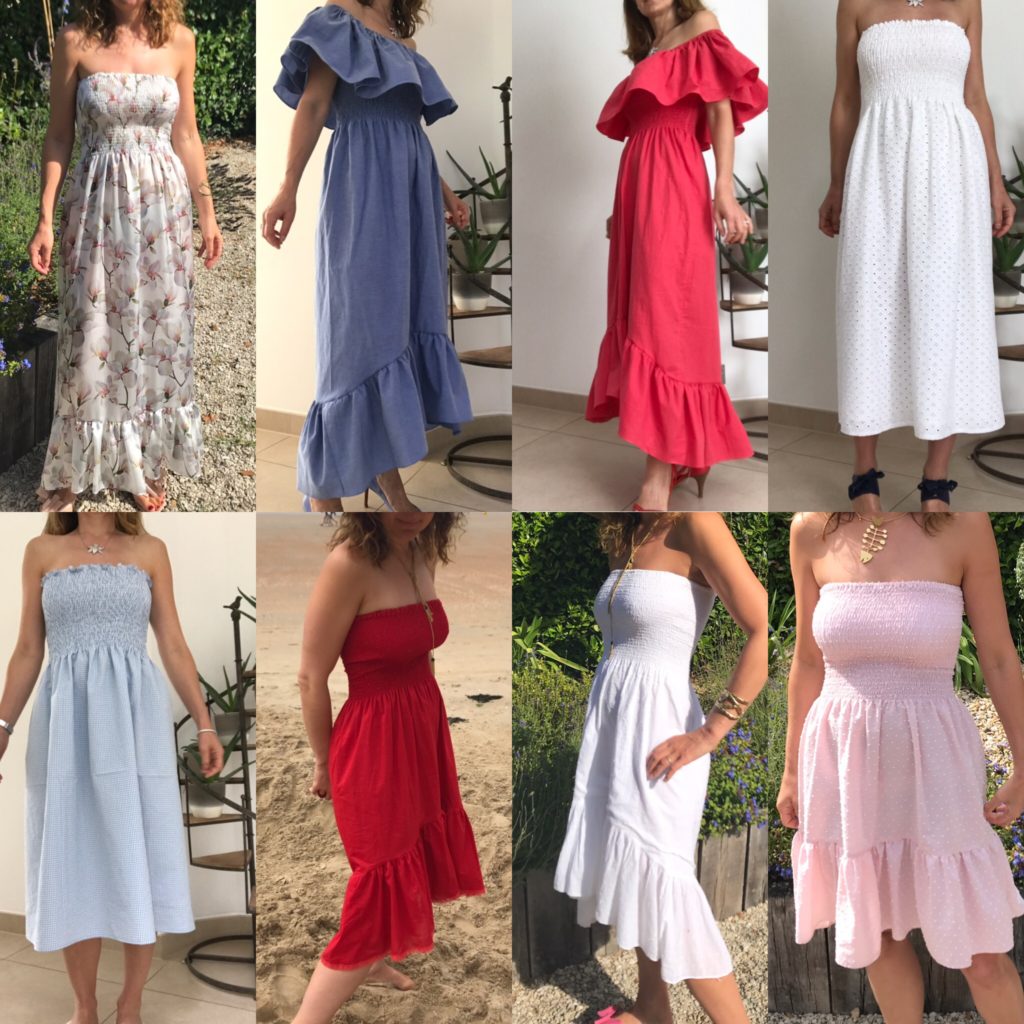
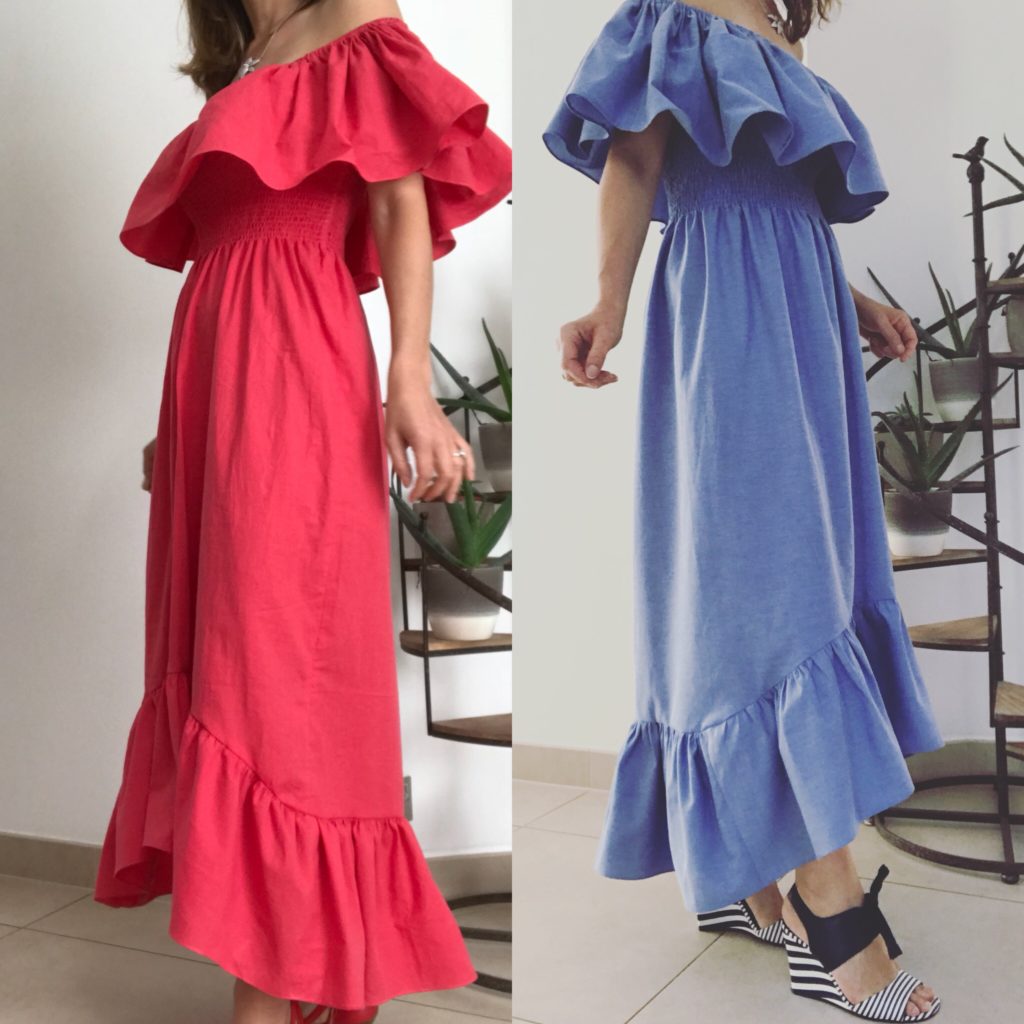
I have already written tutorials on the two dresses below (just click on the pictures to get to the blog articles)…
… but I get asked many times about these two – specifically how to add an off-the-shoulder ruffle to a shirred dress.
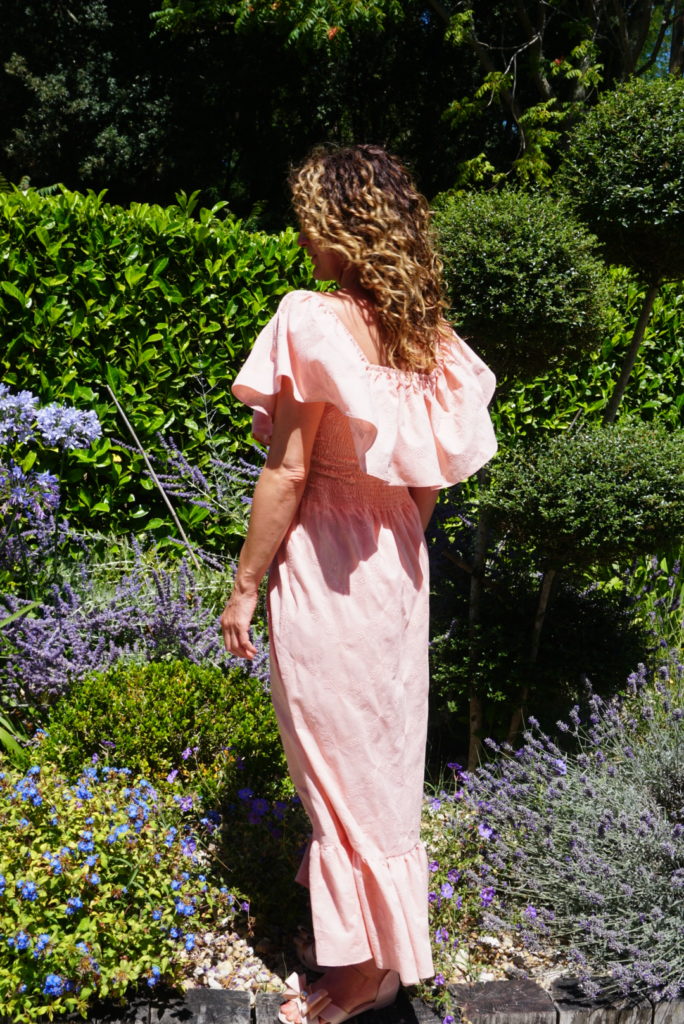
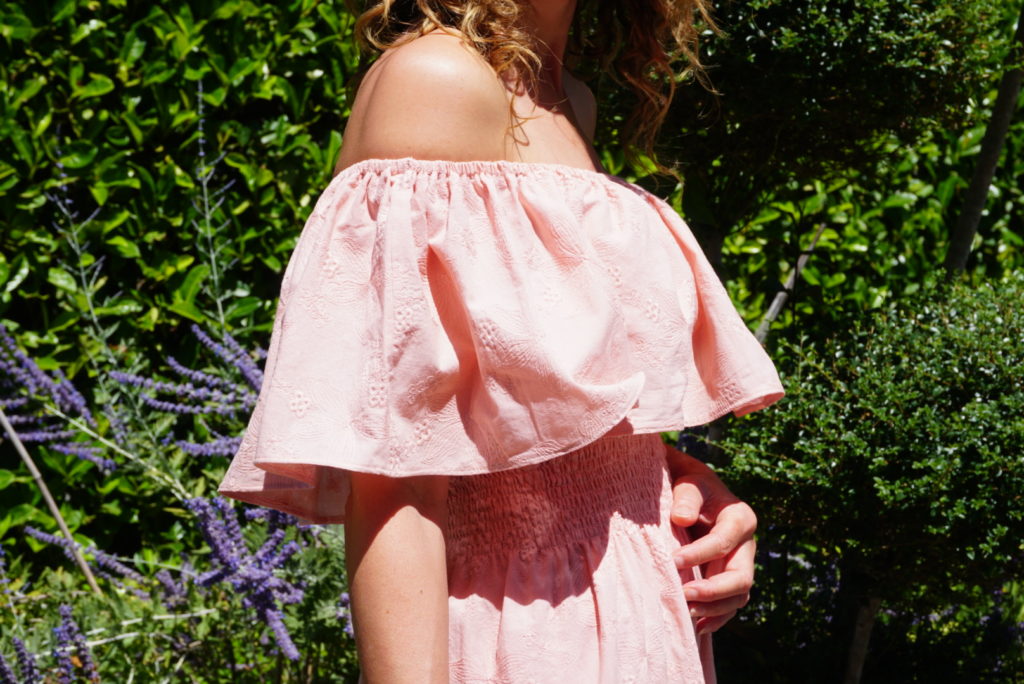
So here we are, I’ve finally managed to get my sewing machine in shirring mode again (this does not always work!!) and I made an off-the-shoulder shirred dress specifically for the purpose of this tutorial – any excuses to sew more dresses is good to me!! Note that this dress is longer and more complicated to make than the blue or pink ones – I would rate it of intermediate difficulty.

SUPPLIES
- 2m of fabric (150cm wide is best, 130 will do at a stretch but not less ); ideally lightweight: cotton voile, Swiss dots, silk or polyester satin. Do not forget to wash and iron before starting any work.
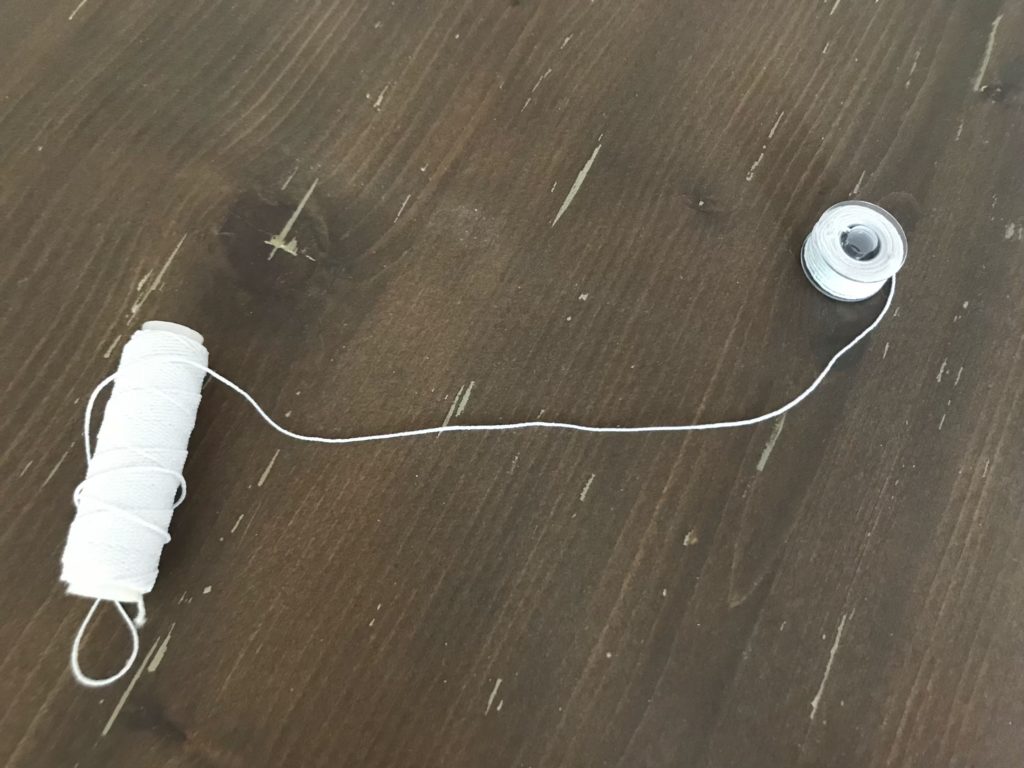
- Elastic sewing thread of 0.5mm wide, like this one (2x20m just in case).
- 1m of flat 5mm to 7mm wide elastic , like this one.
- Classic sewing thread matching your fabric and and all your usual sewing equipment.
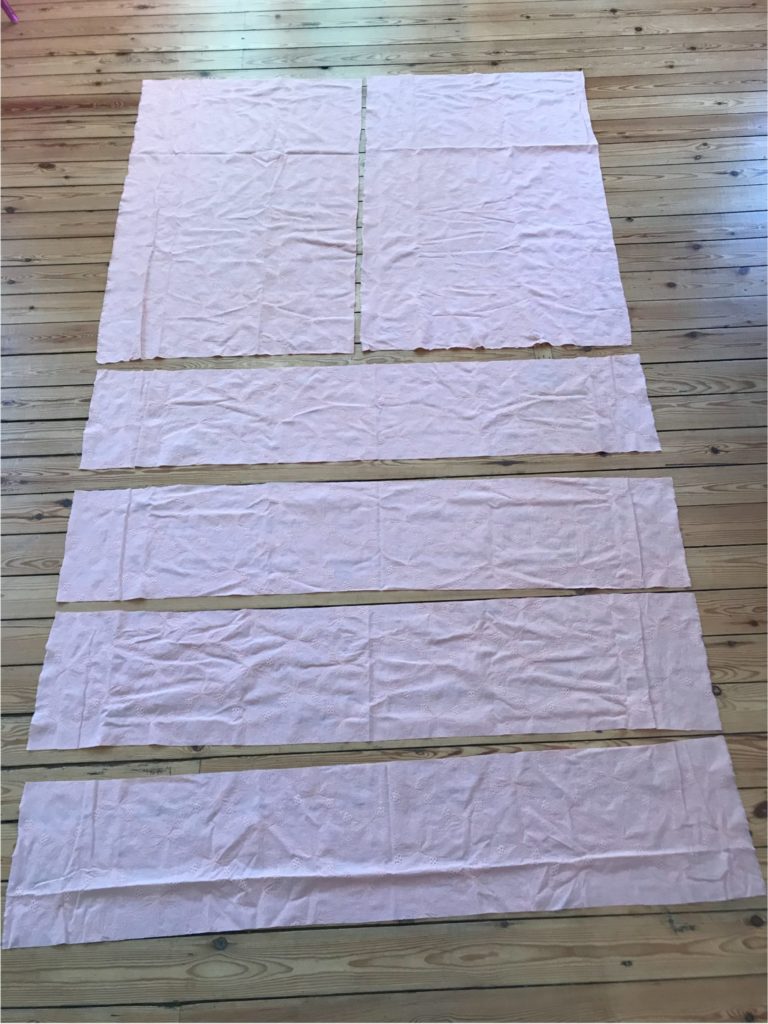
1/ PREPARING YOUR PIECES
Cut:
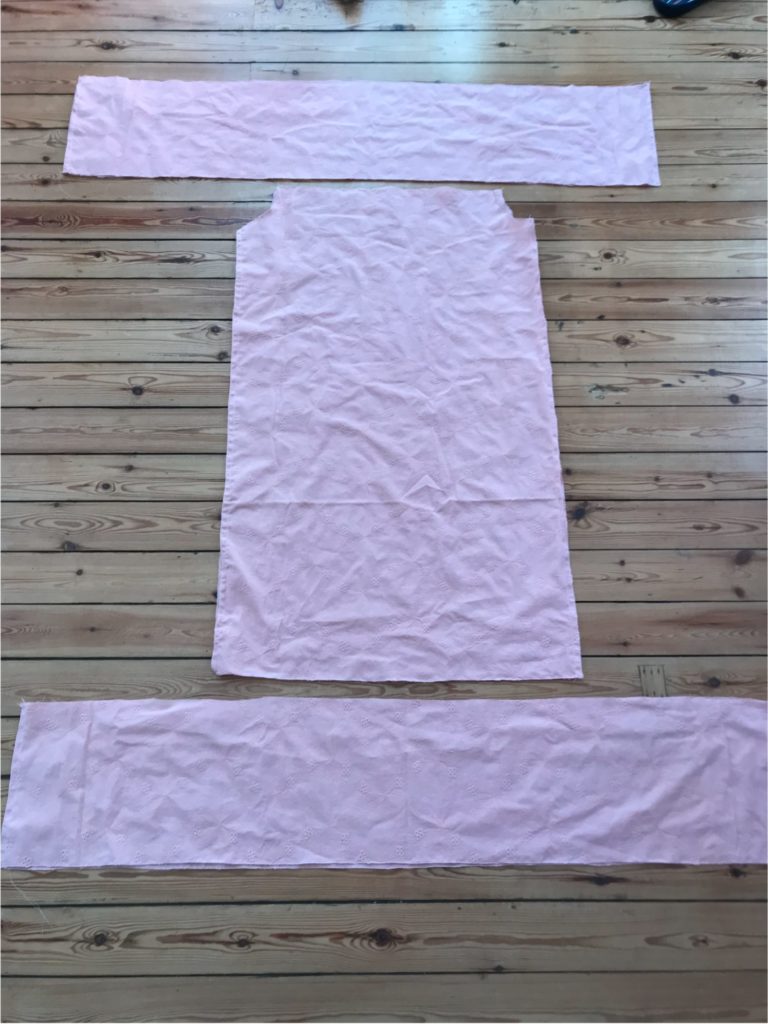
- 2 rectangles 75 cm wide x 100 cm high
- 4 rectangles 150 cm wide x 25 cm high
(For those wishing to adjust this dress to their measurements, I am 1m68 tall and the length of my dress is to the ankle, not to the floor).
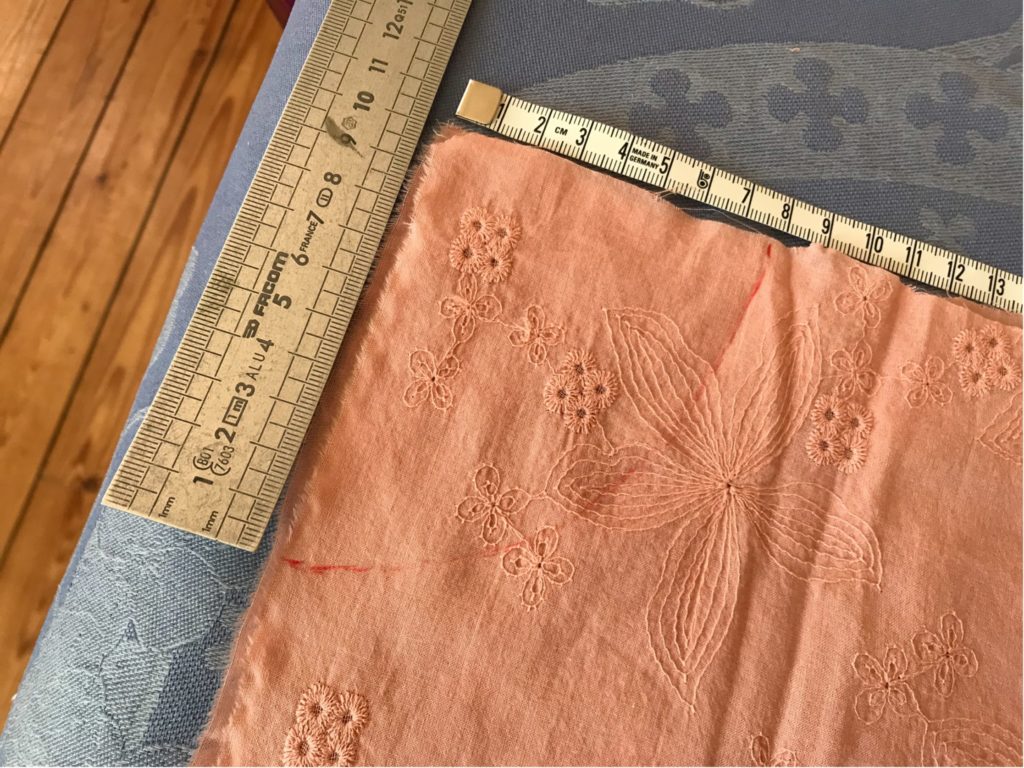
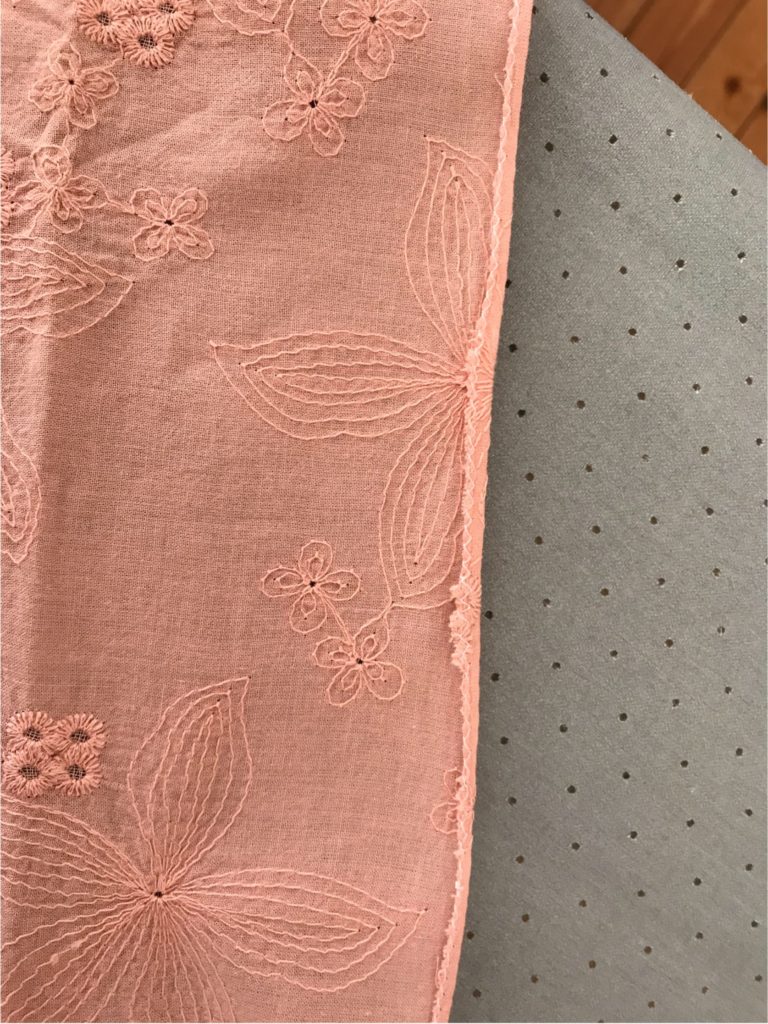
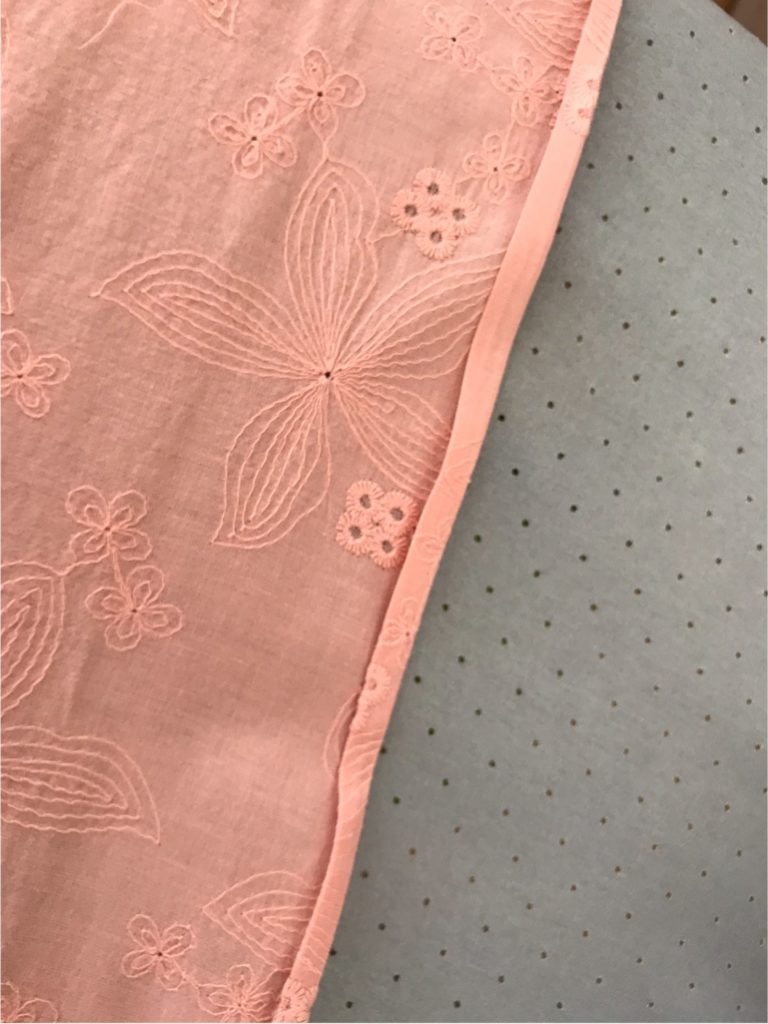
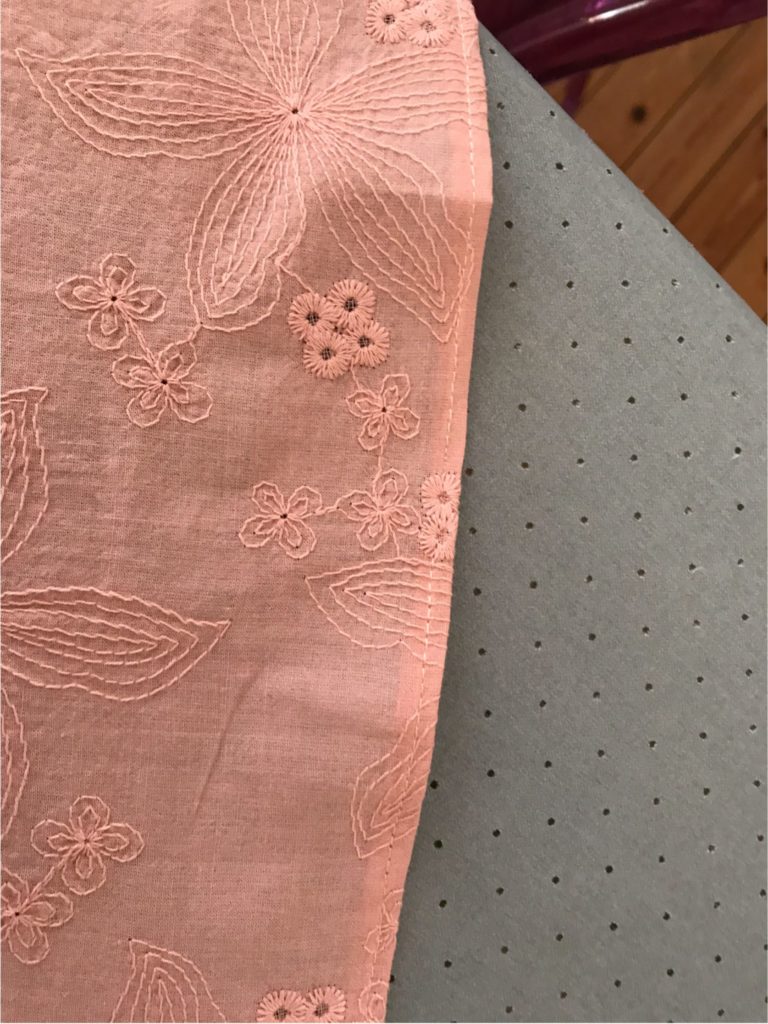
Make two under-arm openings at the top of the largest two rectangles, using 10x 8cm measurements and drawing an approximate quarter circle – this step makes the shirring more complicated, so you could avoid it, but I advise against this shortcut as it makes the dress definitely more comfortable!
Overlock all the faces of the rectangles with a zigzag stitch on the sewing machine or with an overlocker.
Make three tubes with the rectangles as follows:
- For the 75×100 rectangles, lay them on top of each other, right side against right side of fabric, stitch the 100 cm sides together, 1 cm from the edge (2 seams).
- For the 150×25 rectangles, lay them on top of each other two by two, right side against right side of fabric, stitch the 25 cm sides together, 1cm from the edge (2 seams each time and you end-up with two tubes).
- Open all seams with an iron.
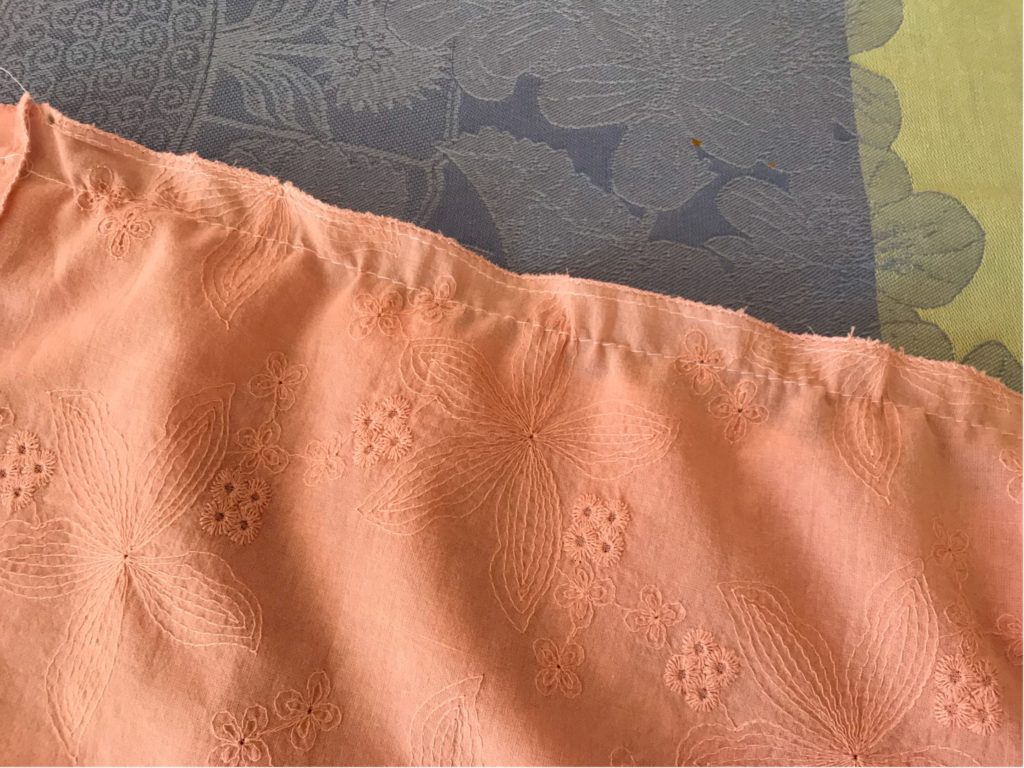
You should end-up with this:
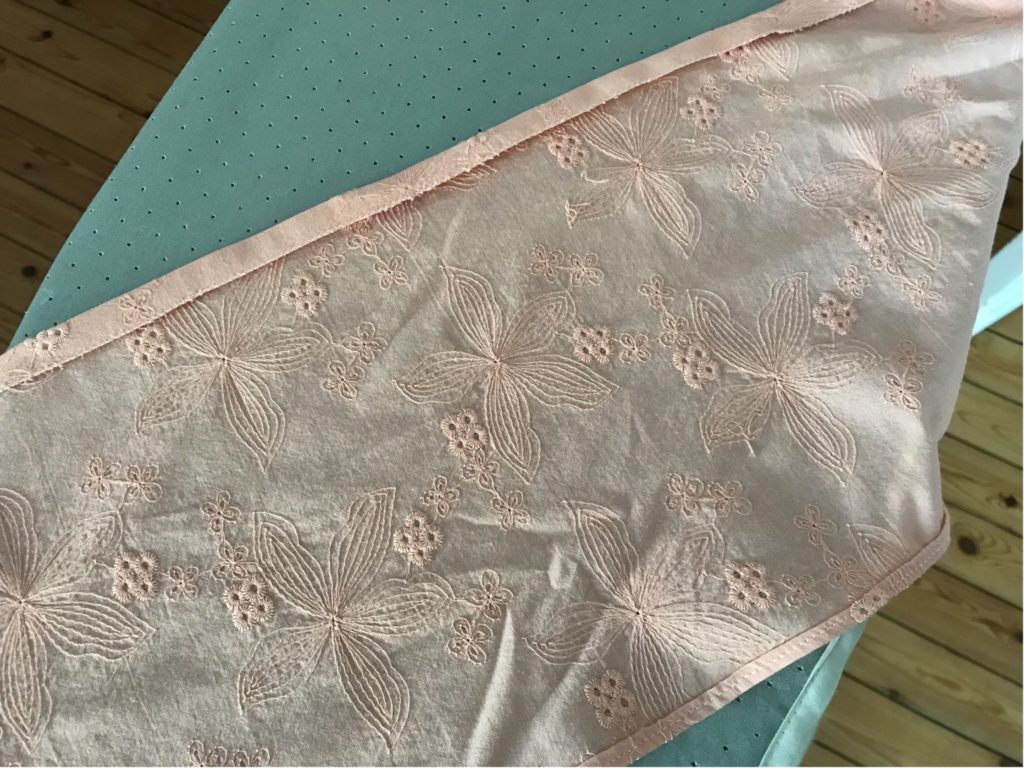
Make a mini-hem on one side of each of the two large tubes; and at the two under-arm openings – I use my iron to fold the fabric twice, then straight-sew 0.5cm from the edge of the fabric, as shown here.
2/ START SHIRRING
I already made a shirring tutorial for this dress, so the one here is extremely similar.
First, get your sewing machine ready:
- Mount a spool of elastic thread by hand (creating a bit of tension) and position it in your machine.
- The top yarn remains a classic yarn, with a color matching your fabric.
- Set your stitch width to the maximum (4/5), without touching the machine tension (I use a standard 5/6).
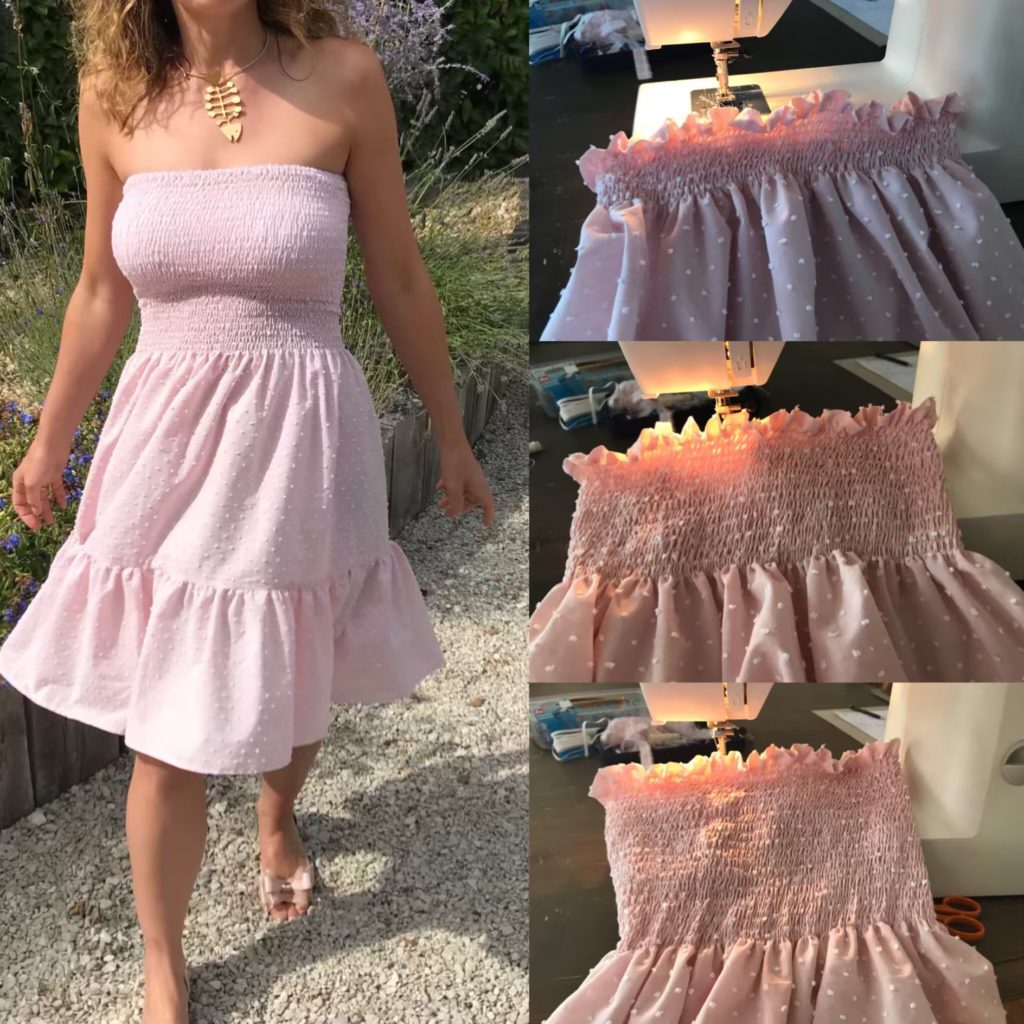
You can now start shirring:
- Starting with one side, place the fabric under the needle, right face of fabric facing you, top of the dress at the top. Place your needle 3cm below the top edge.
- Make a back-stitch at the beginning, then sew in a straight line, finally make a back-stitch at the end – the elastic thread must be well blocked!
- Raise the needle and and place it about 1cm below, and proceed again in the same way.- you will go back and forth.

- Continue until you each the under-arm where the tube starts, then start again for the other side’s top, going back and forth until you reach the under-arm.

- Then start working in circles.
If you have decided not the cut under-arm openings, your life will be easier because you can work from the top and go in circles all along.
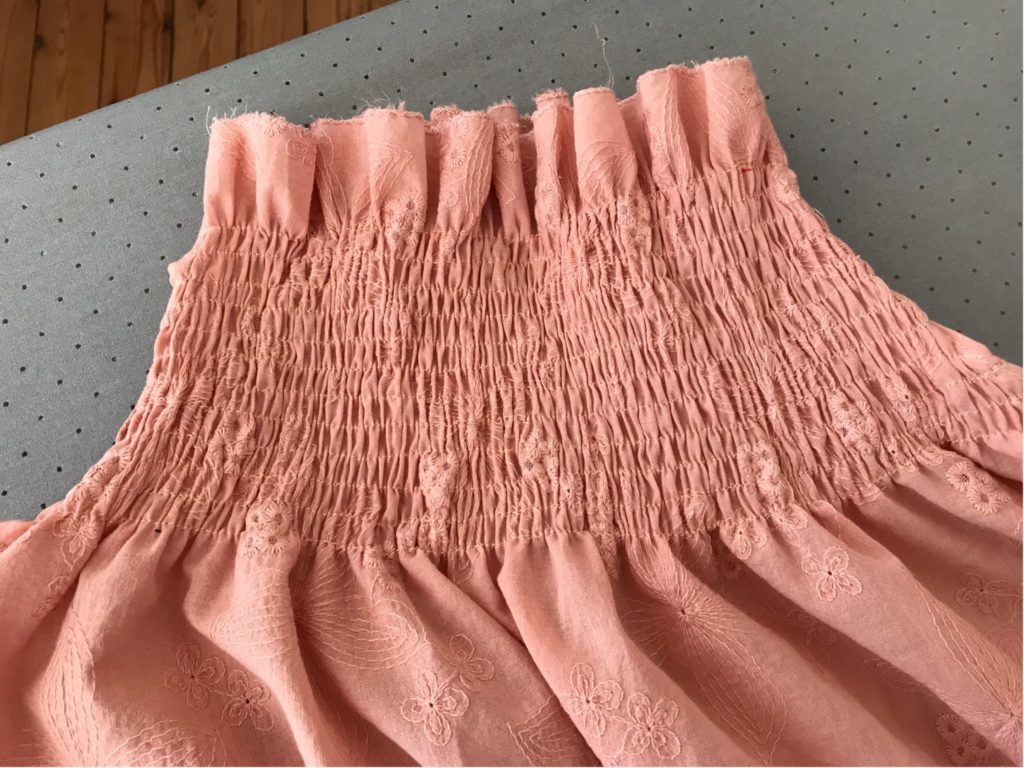
Try the dress on as you go to see where to stop shirring. I sew 28 rows (22cm), which allows the gathers to be well placed under the bust – but this will depend on your own measurements! Ideally you want the last line of shirring to reach the narrowest part of your torso, about 10 cm above your belly button – this is a lot of shirring but totally worth the effort!
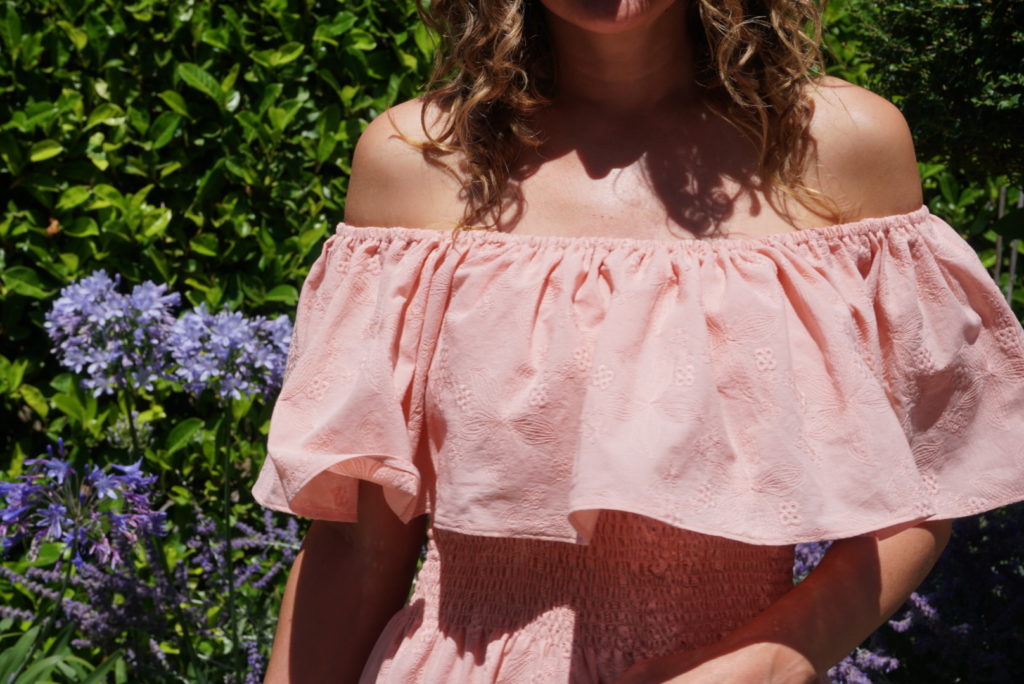
3/ ADD THE SHOULDER RUFFLE
Change your bobbin thread: remove the elastic thread and put on a standard sewing thread.
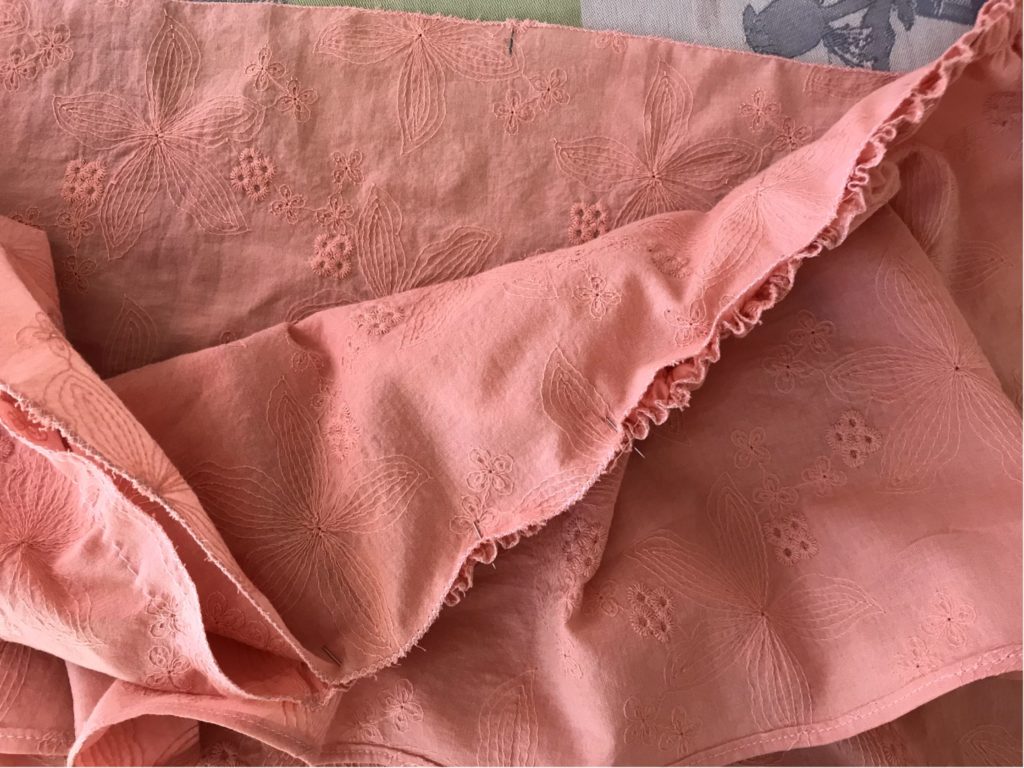
Join the ruffle to the dress:
- With an iron, fold the non-hemmed side of one of two large tubes by 1.5cm.
- Mark the middles of the top front and back of the large tube (where the fold is) and the top front and back of the shirred tube (the sides are where the rectangles have been sewn together).
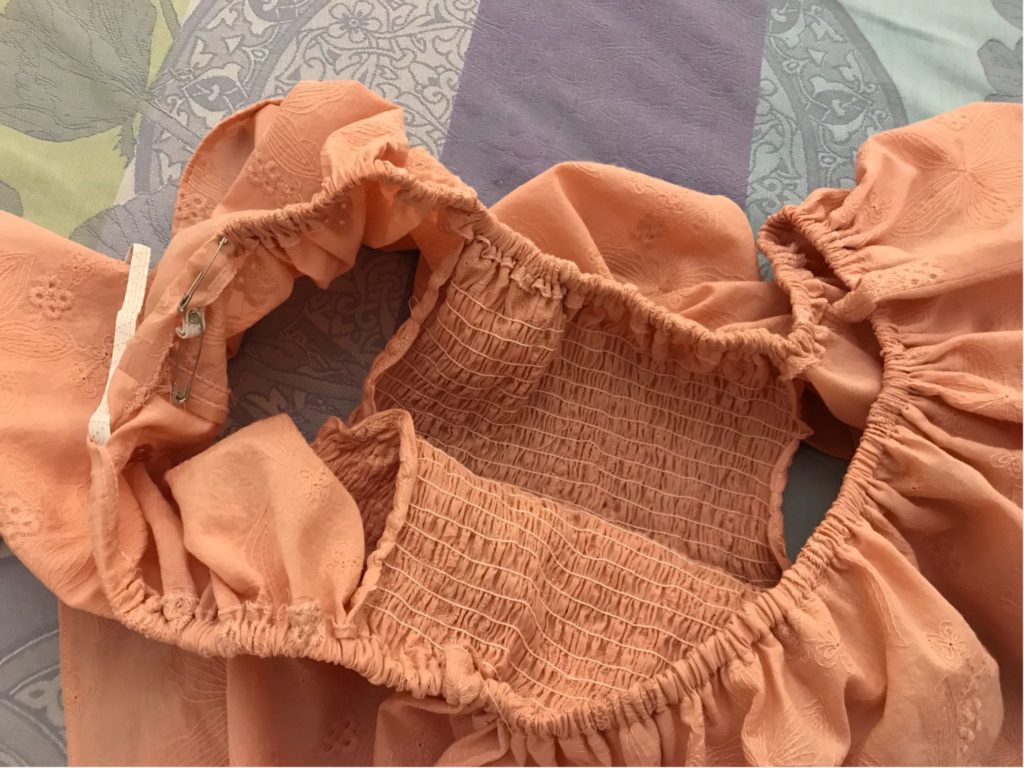
- Aligning the middles, sandwich the top front and back of the shirred tube withing the fold of the large tube – the fabric will be face (of shirred tube) to back (of large tube), with the large tube sitting on top of the shirred tube.
- Sew an elastic tunnel 1 cm from the edge, leaving a 5 cm opening on the side.
Within the tunnel, insert the flat elastic:
- You can use a safety pin, a skewer or any other tool that suits you.
- Be patient as this a very narrow (1cm) but very long (3m) tunnel, aaarrgghh!!
- Once the elastic as gone trough, put the dress on to determine the width you need, cut the excess of elastic and sew both ends of elastic on top of each other with a zigzag stitch – but make sure that the elastic does not turn in the tunnel before sewing.
- Close the open section of the tunnel with a normal stitch, without catching the elastic.
4/ ADD THE BOTTOM RUFFLE
Now time to join the bottom ruffle to the dress! (last step, yesssss)
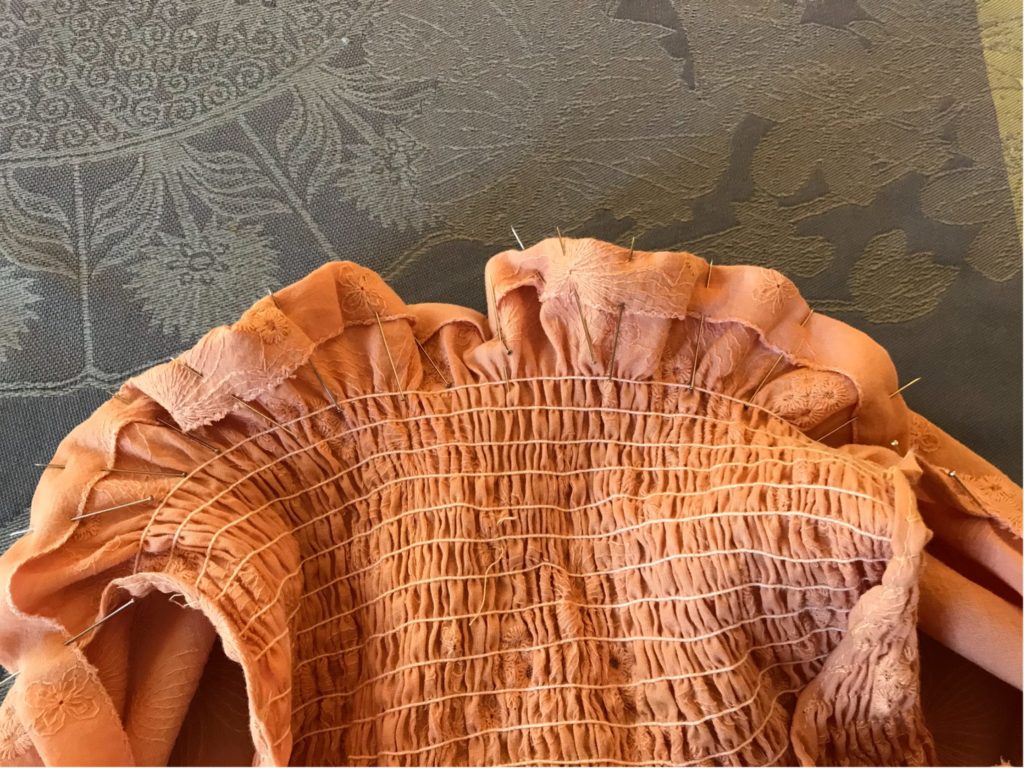
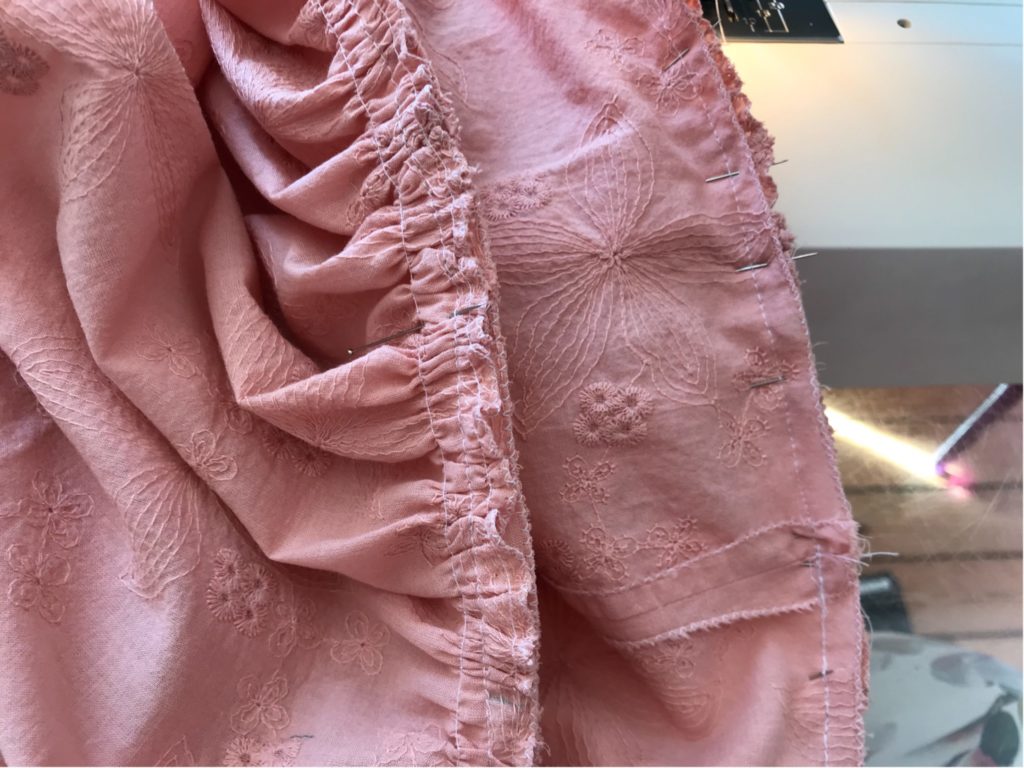
- Split the ruffle in 4 equal parts with pins; do the same for the bottom of the dress.
- Insert gathering lines: set your machine on a large straight stitch (4/5) ans sew two parallel lines, one 0.5cm and the other 1.5cm away from the fabric hedge. Do not forget to leave enough thread at both beginning and end. To make the gathering easier and more regular, I divide my fabric in two (so four sewing lines in total, parallel 2 by 2).
- Assemble the ruffle and the dress together, matching the pins you’ve just laid. Pull on the threads to create gathers, until the width of the ruffle fabric matches that of the dress. Pin as you go along, being careful to keep your gathers regular. Work quarter by quarter and only pull on to two thread facing you (not the onces on the other side of the fabric).

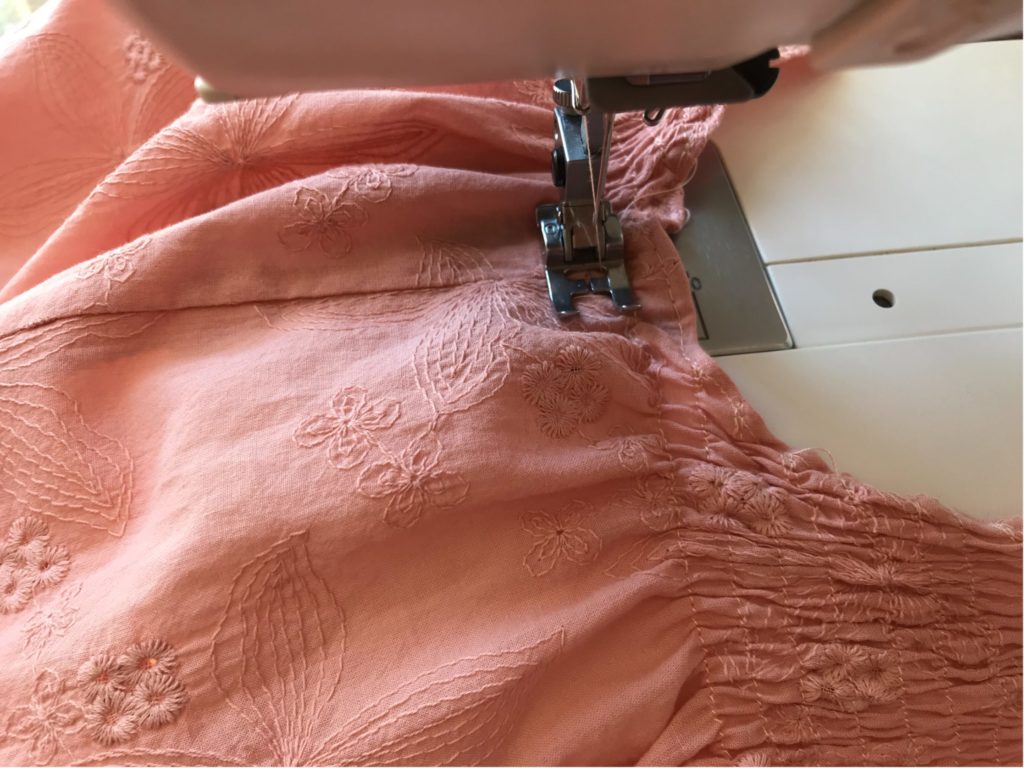
- Put your sewing machine back to a normal-length stitch (around 2.5), put your fabric under the needle face up, and straight stitch 1cm from the fabric hedge.
- Check that you have caught all of the gathers and only then (calmly) get rid of your (meters of) gathering threads.
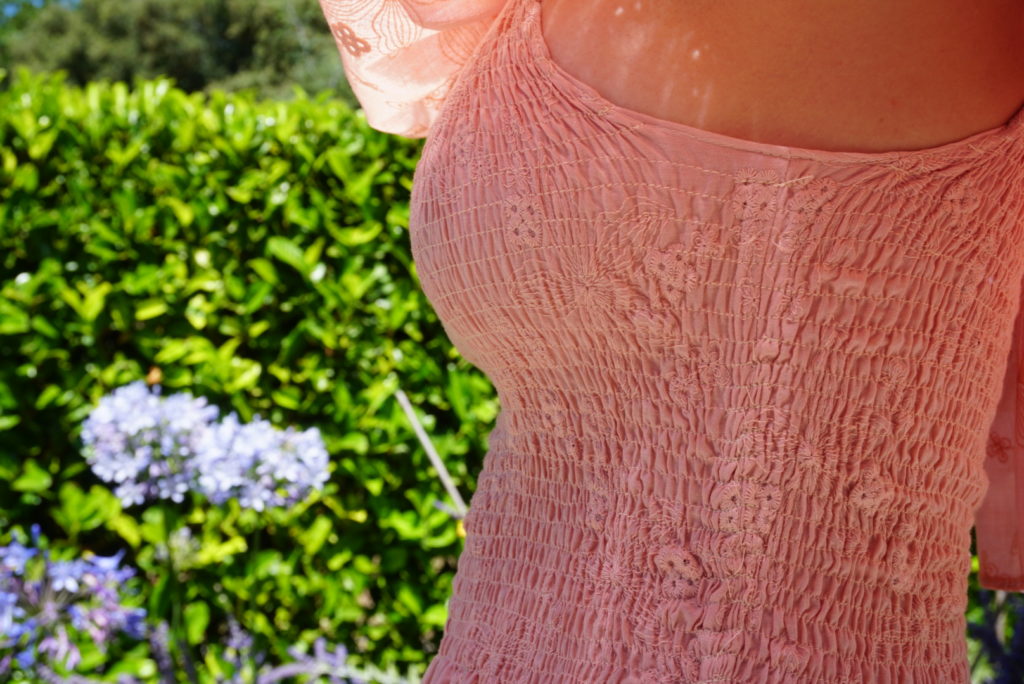
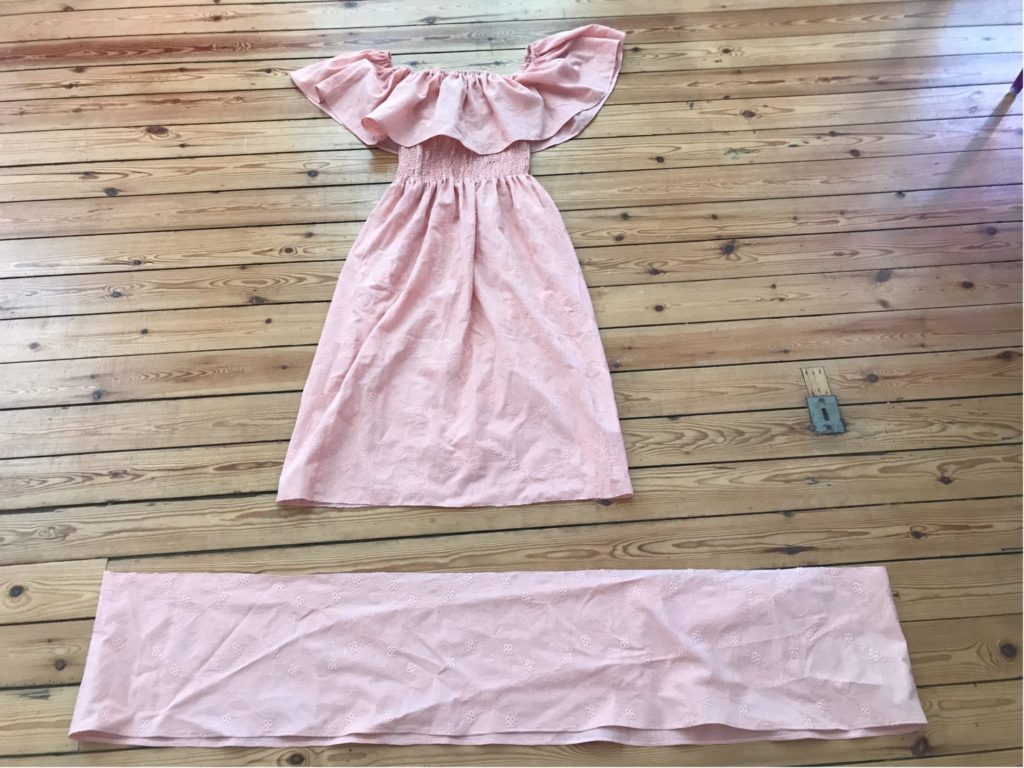
ET VOILA! Your dress is finished!
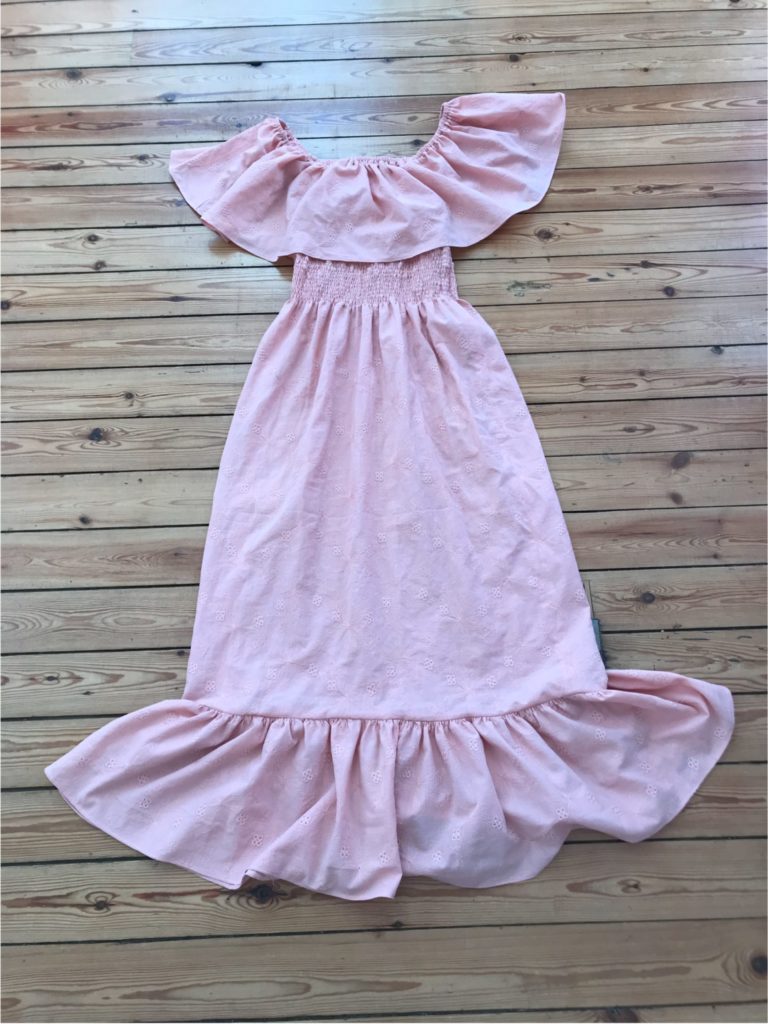
Always better worn immediately!
YOU MAY ALSO BE INTERESTED IN THESE TWO FREE TUTORIALS:
If you make a smocked dress with one of my tutorials, do not hesitate to use the hashtag #smocksmignons so that I can admire and re-gram it!!
No such thing as too much lace: my Belladonna cardi
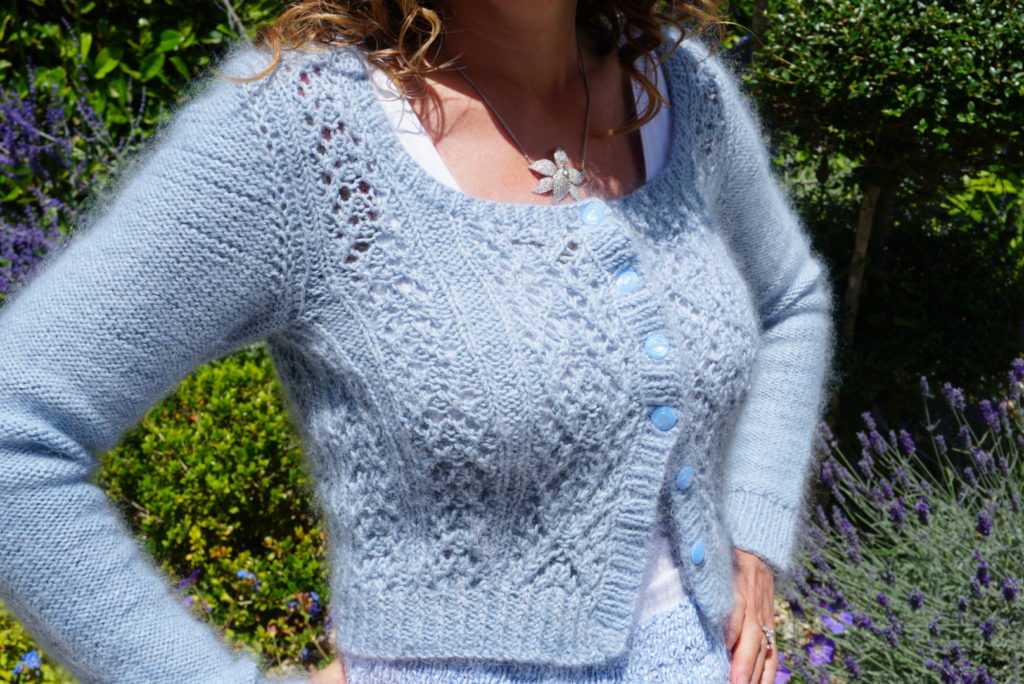
Now that I have discovered that I can follow a knitting pattern (it only took me three years to gain the confidence), I have been knitting compulsively, with a passion for both cardigans and lace. So I could only fall for Untangling Knots’ latest cardigan pattern Belladonna.
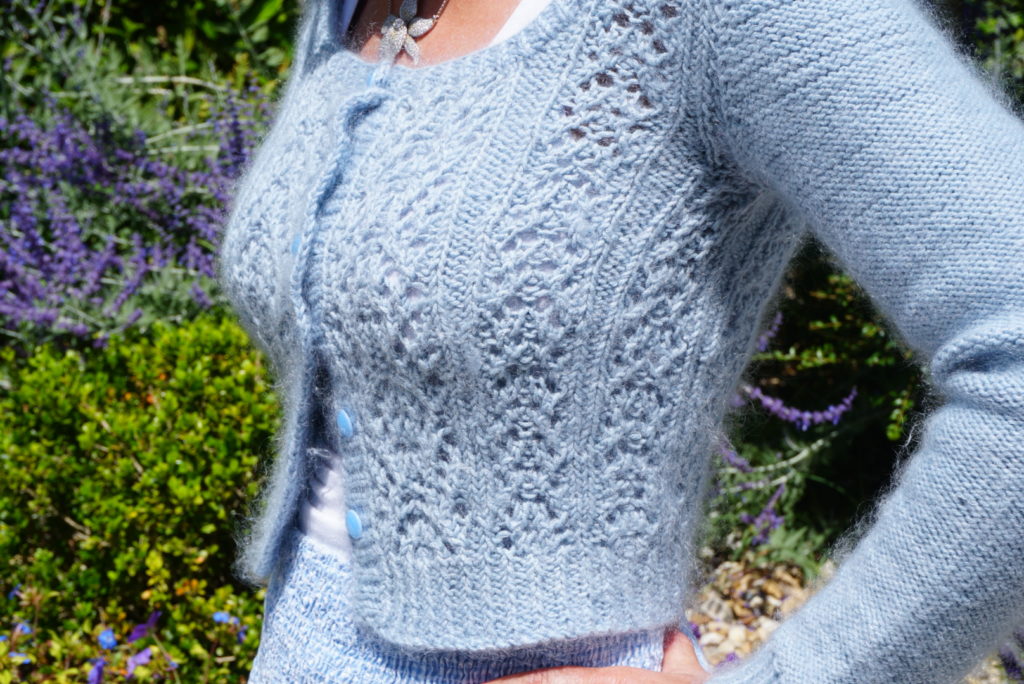
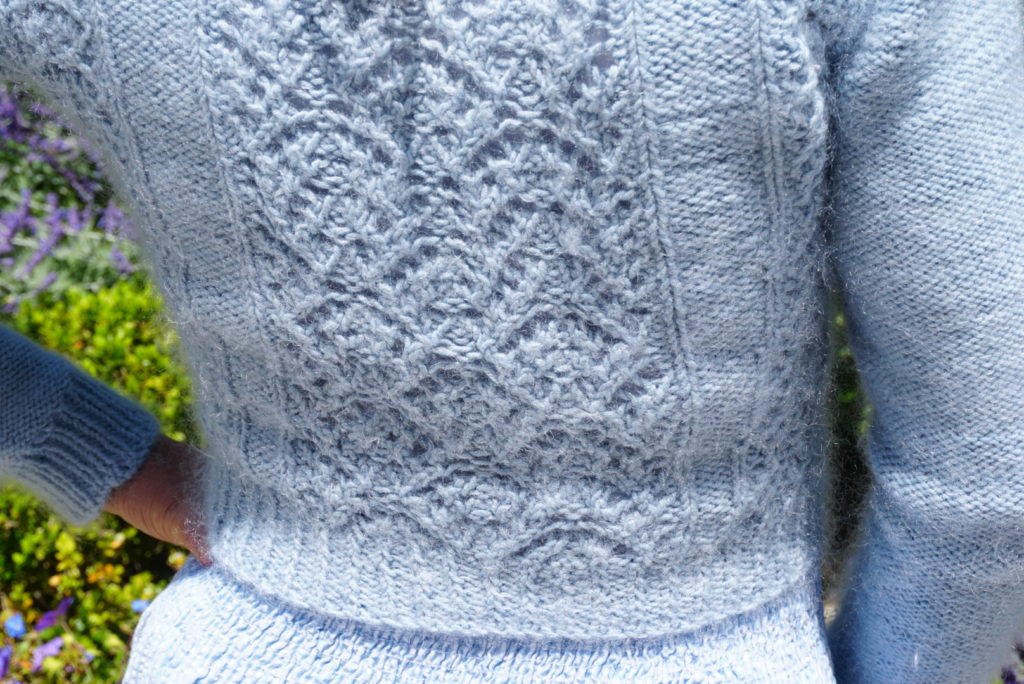
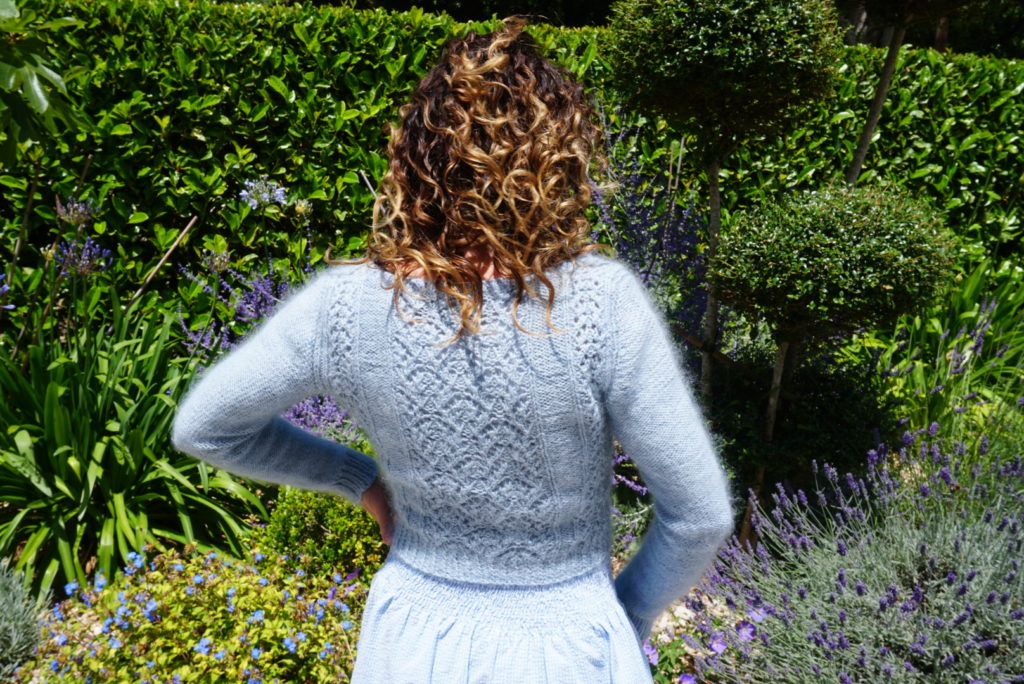
For sure there is lace absolutely everywhere in this cardigan (except for the sleeves, which as we agreed with my lovely auntie would look tacky). There are three motifs at the back, two on each side of the front and another one under each arm when you join the round while working top-down – oh God! So although the lace charts are quite straightforward, you need to stay focused all the time! But so much worth it!

This is my third Untangling Knots project (after my Chuck jumper and my Salal cardigan) and I am an absolute fan of Andi Satturlund’s knitting patterns. Initially I was attracted to their shape: always cropped and snug-fitting, they match perfectly my retro-ish dress sense.

But when I started knitting them I discovered how amazingly well explained the patterns are. They also always follow the same construction logic so once you understand how they work your life is much easier. And they are perfect – I never ever make any change because I know every single stitch is calculated to be here! Anyway, I have already knitted a fourth one and many more will follow for sure!
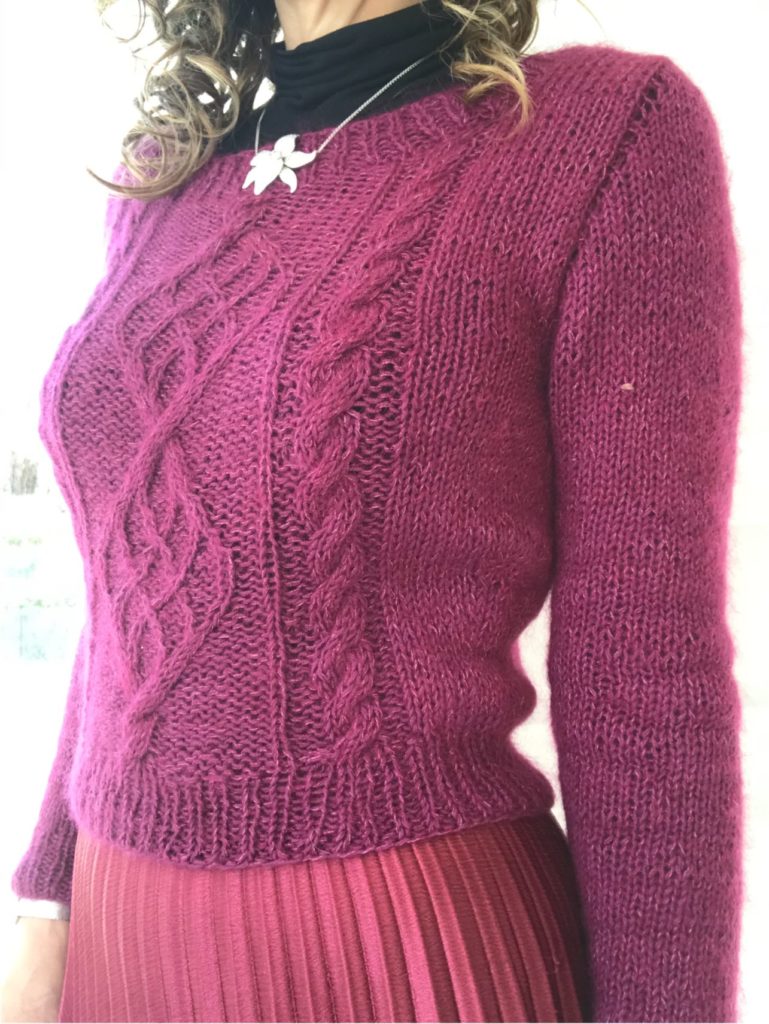
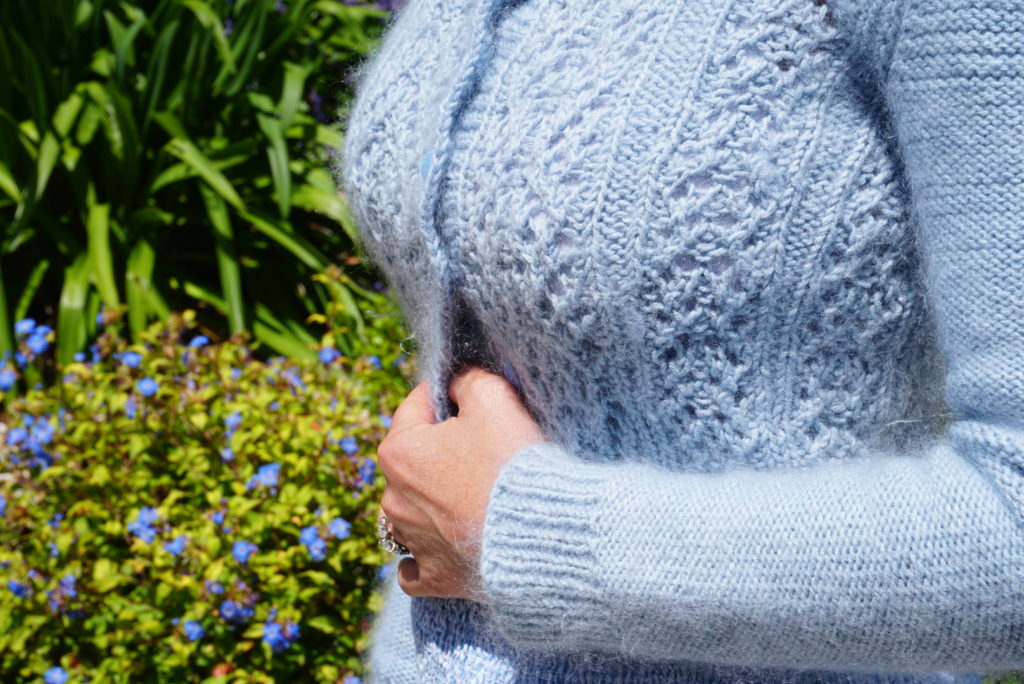
Back to Belladonna, you will be surprised to read that I was actually grumpy most of the time while knitting it because I made a mistake in my wool order. I wanted to order the exact same Drops Baby Merino/ Drops Kid lace as the one I use for this blue jumper.
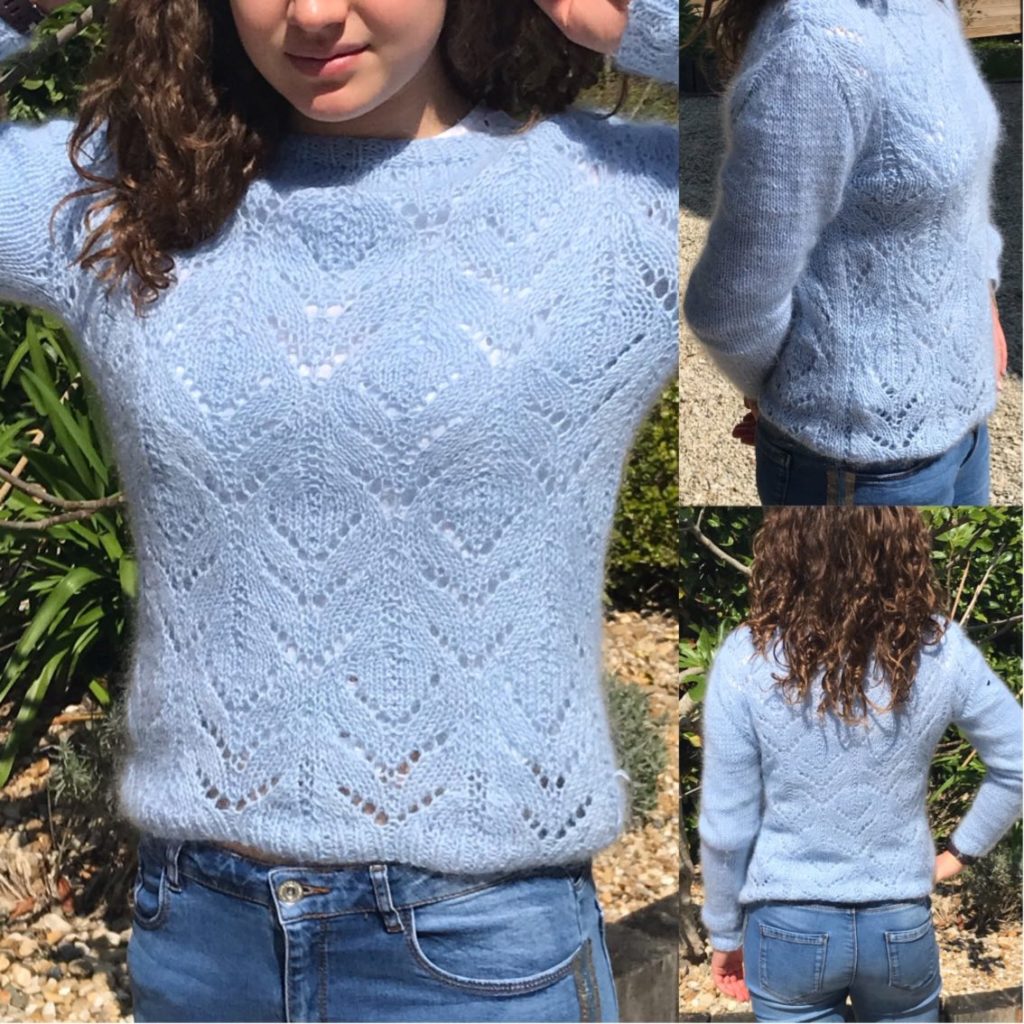
But I made a mistake and ordered what I thought was only a different colour of wool – but ended-up being also a different quality… which I only realised when I was missing wool to finish my second sleeve, horror! So in the end here is what I used: 4 skeins of Drops kid silk light steel blue 07; and 7 skeins of Drops cotton merino ice blue 09. The cotton-merino is much thicker than the baby merino so all the way though my knitting I wondered what was happening… No comment!
In the end this cardi looks completely fine and the cotton merino makes it even fluffier than the baby merino would (the picture below gives you a good idea). But it is definitely not as soft and will be only worn in the winter with long-sleeved dresses!

Appart from the wool drama, I am very pleased with this cardi and I am so tempted to make another one in royal blue – but I need two weeks of peace and quiet for that, and with the kids’ summer holiday looming this is unlikely to happen any time soon… So maybe one for autumn, we’ll see!

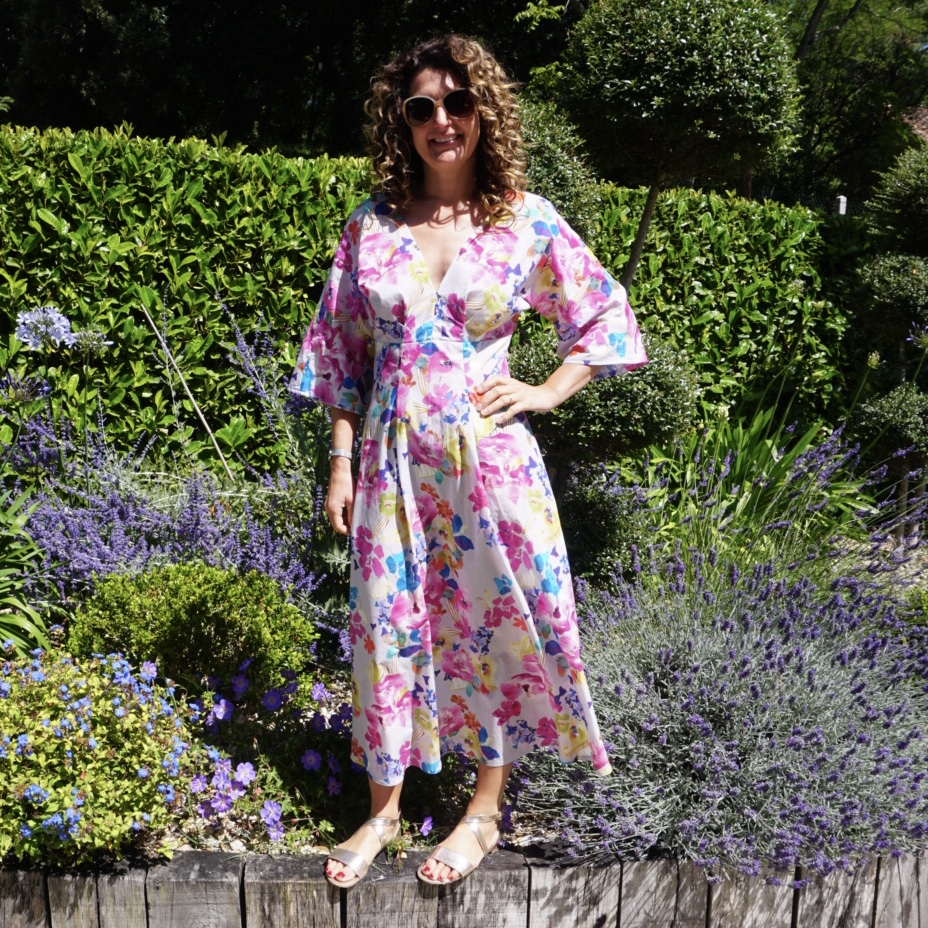
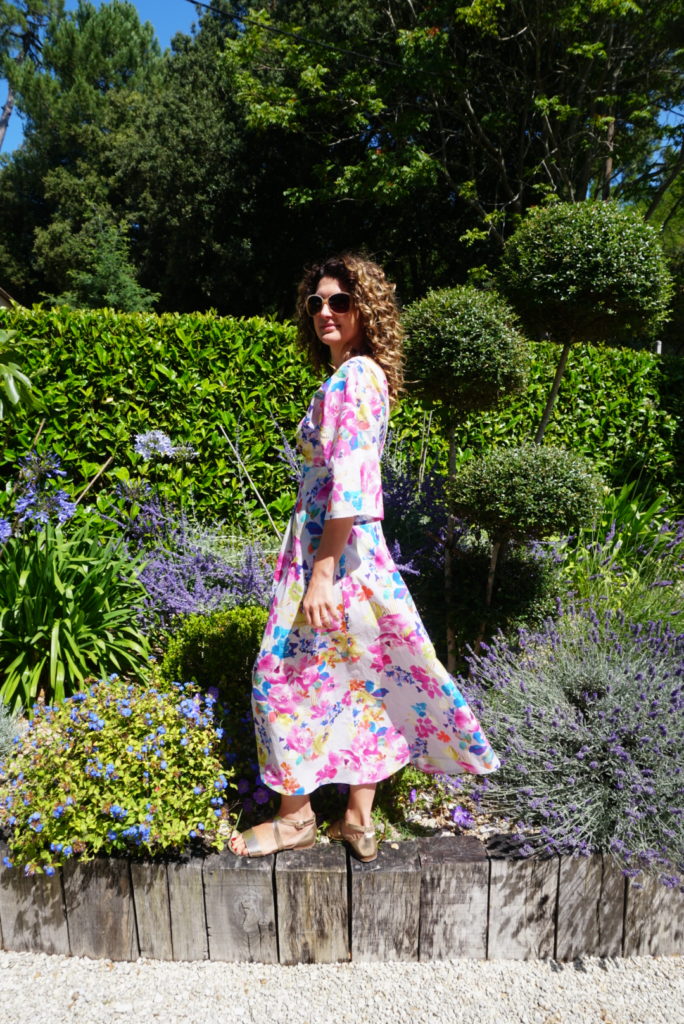
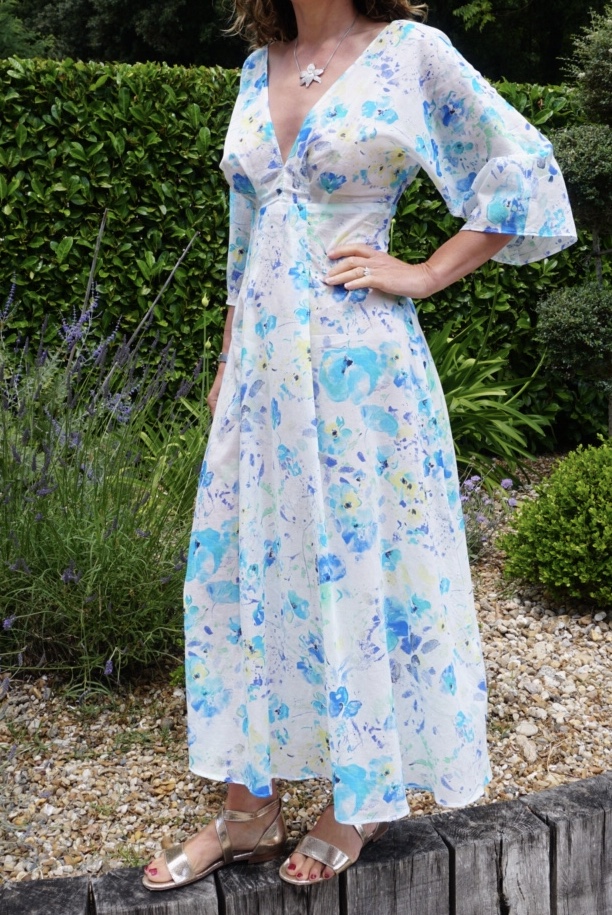
Why stop with one? My second V9253 dress
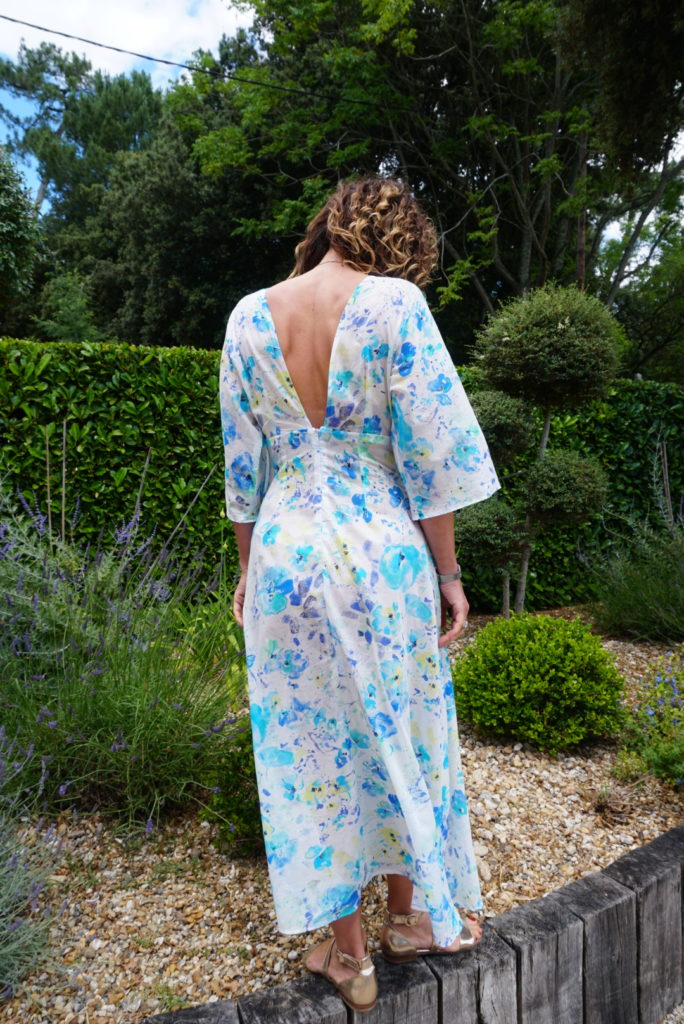
Yes I know, it was only two days ago I posted about my first V9253 dress – but I warned you then that there would be many more to come! So here is my second version of V9253, in a similarly light and beautiful cotton from Selvedge and Bolts.

I made no changes to my previous version – FBA, lowered back, raised neckline, I won’t bore you with all these as they are fully explained in my previous article.
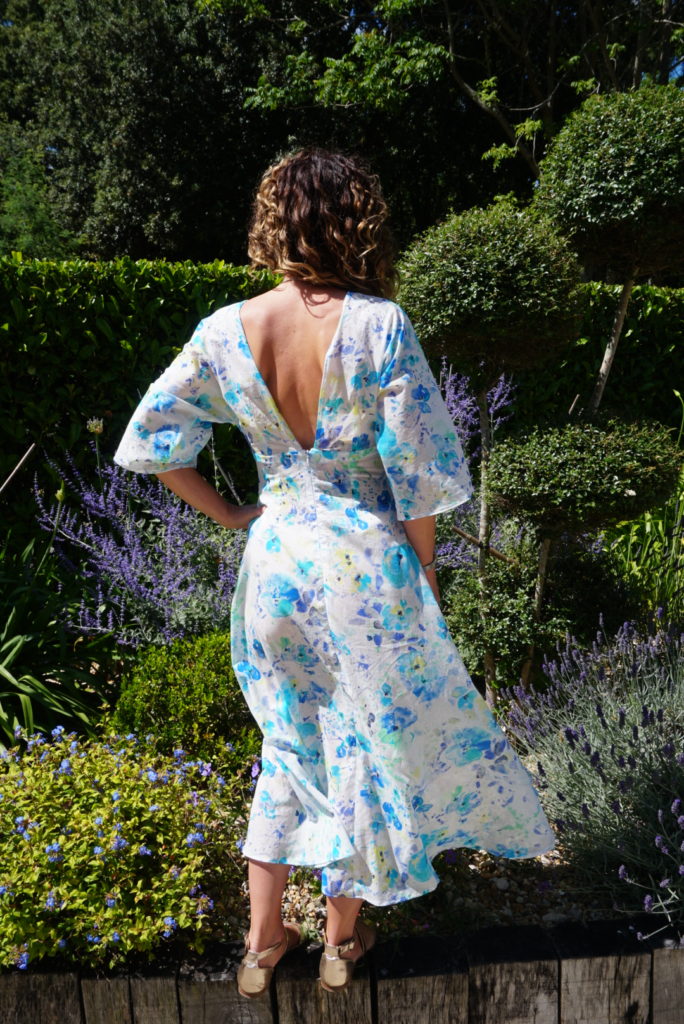
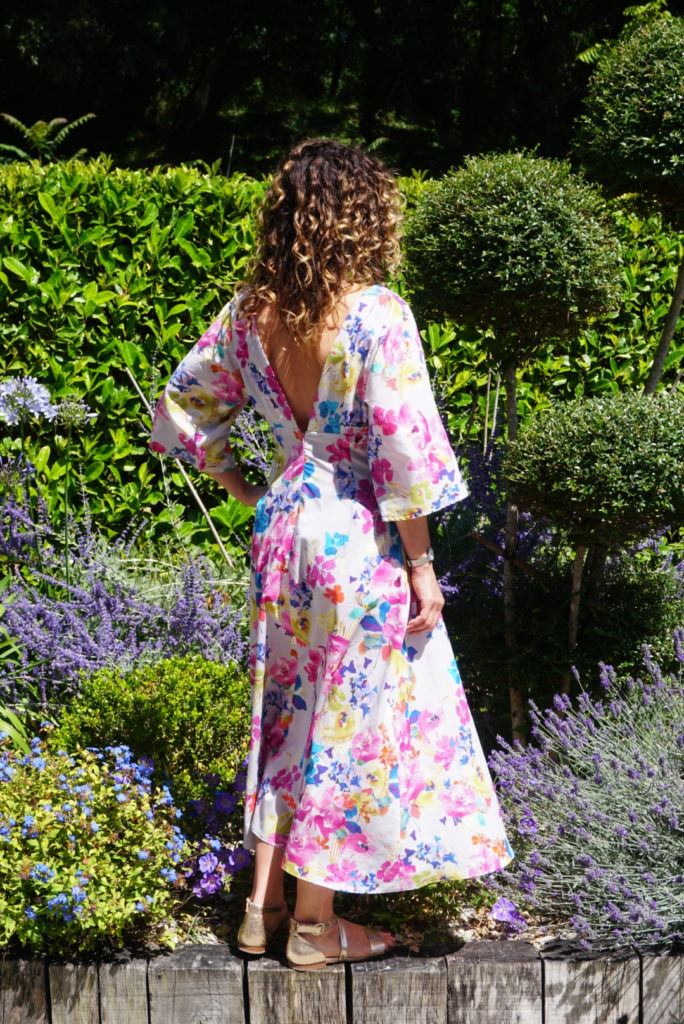
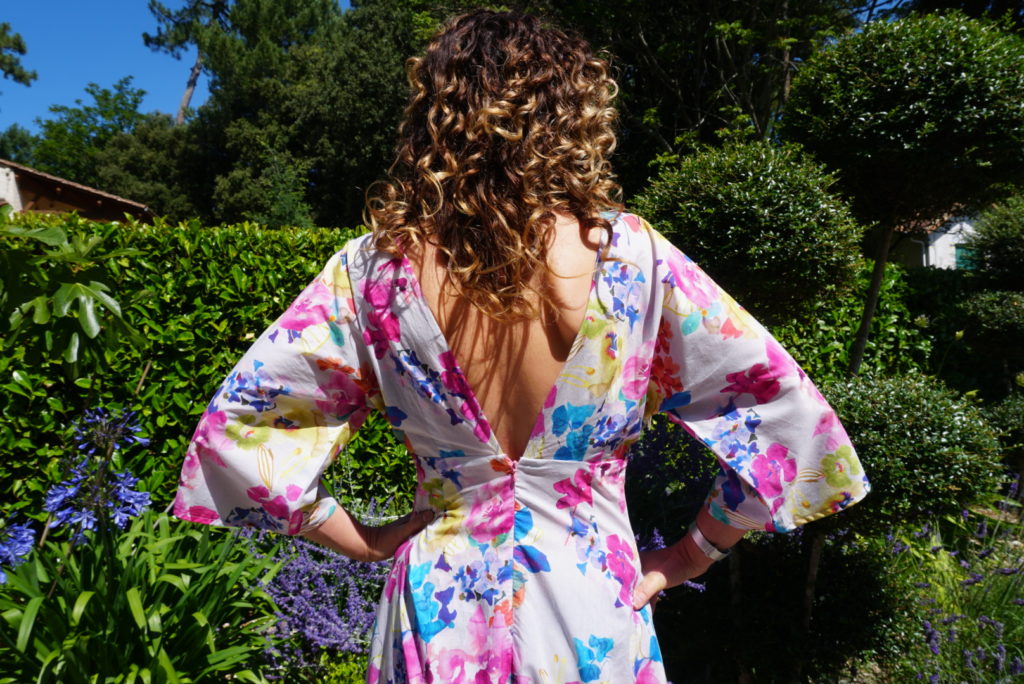
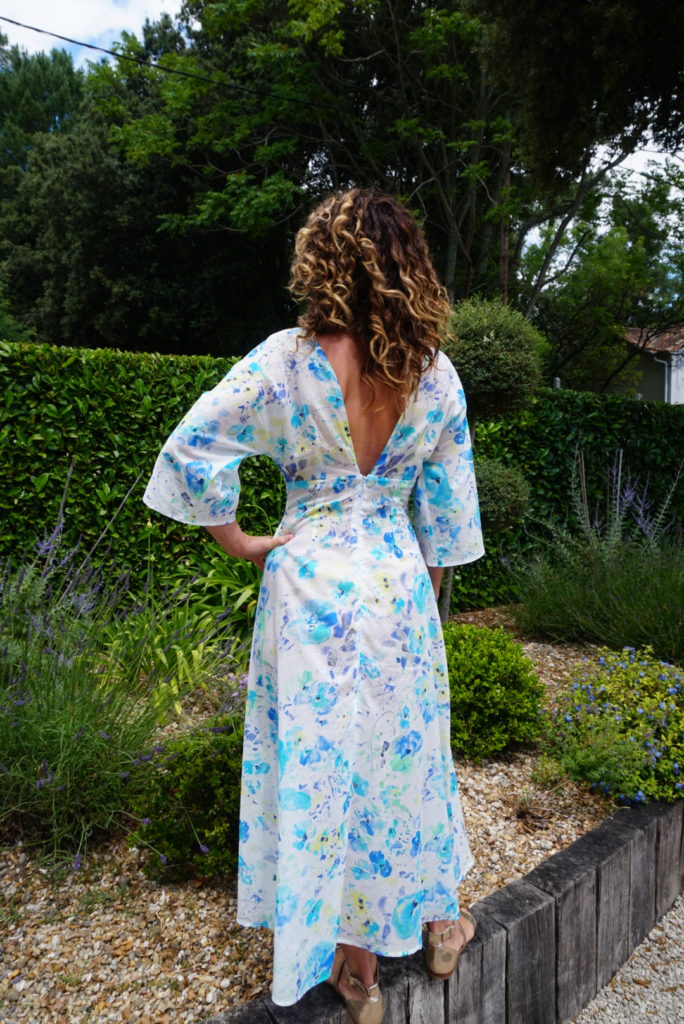
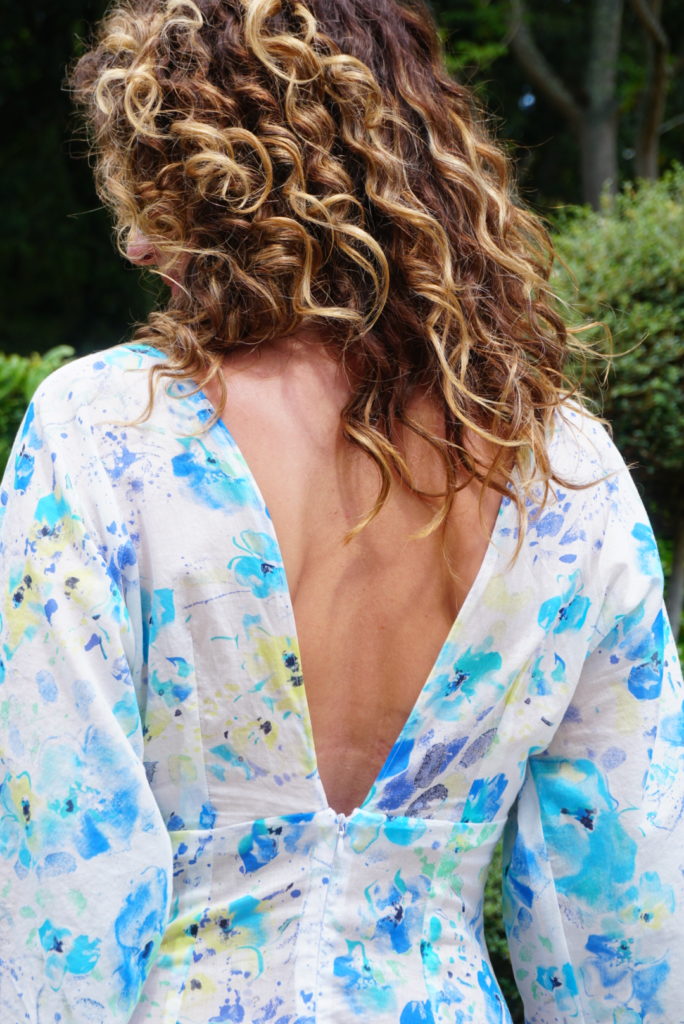
My absolute favourite part of this dress is the V back, this is a modification I made to the pattern and I adore it.

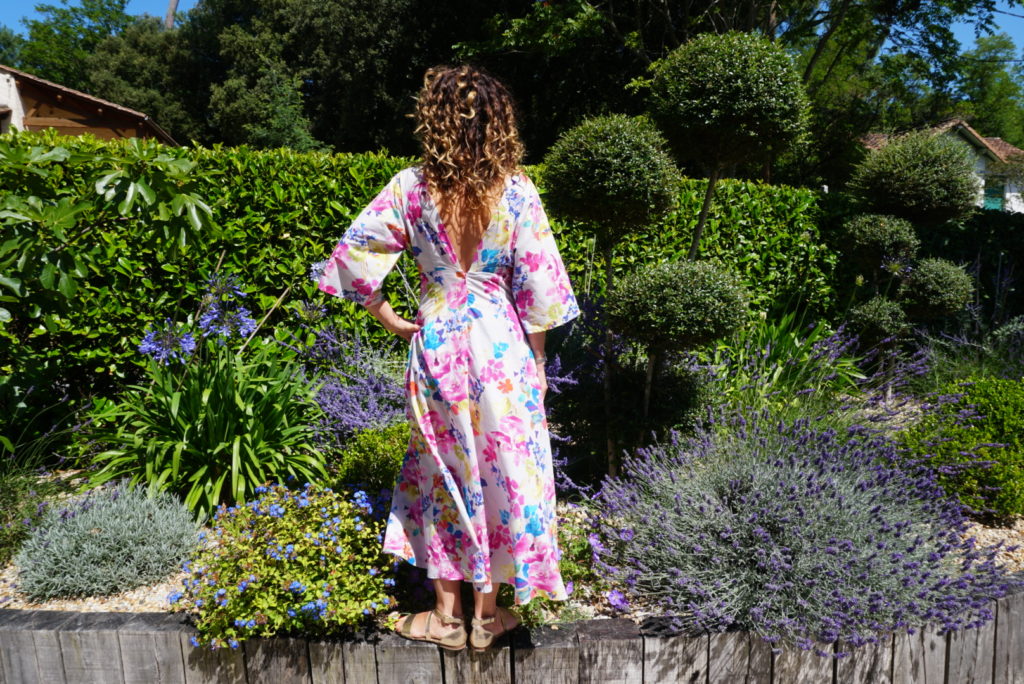
And obviously this fabric is absolutely stunning. It is very lightweight but far less see-through than my previous version – not that I mind that very much to be honest. I was so excited when I saw it on Selevedge and Bolts’ Instagram that I immediately went online to buy… well, the wrong fabric! But thankfully the lovely shop owner quickly reached out to let me know – and she even told me when the fabric got put online the day after. Long story but totally worth the effort!
Not much more to say except that I am delighted. I am now thinking about either a silk or a broderie anglaise version, and I’ve got all the fabric in stock, so you may see a third dress very soon!
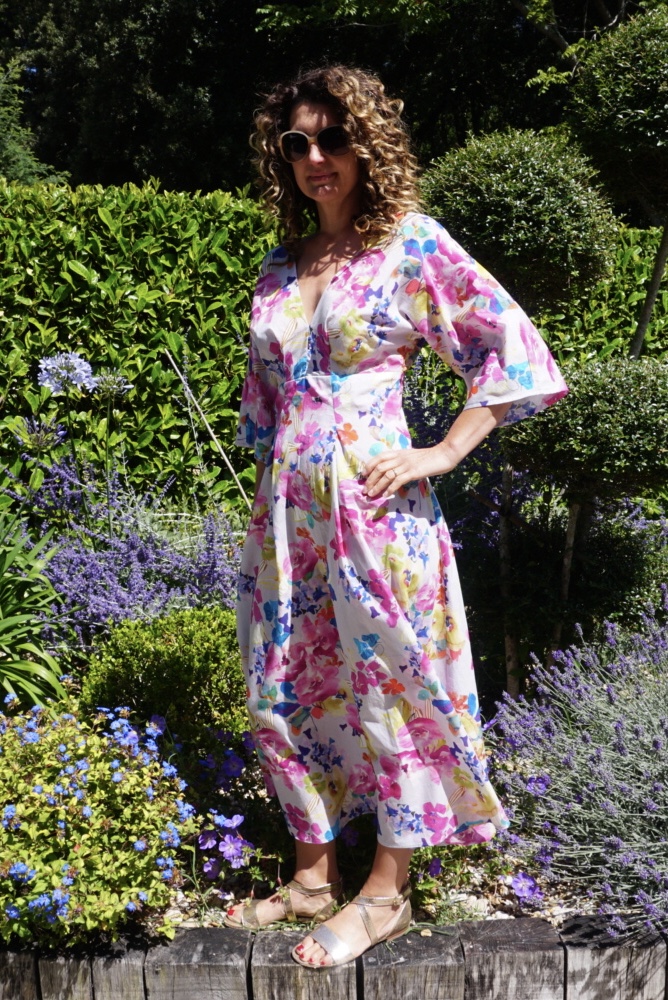
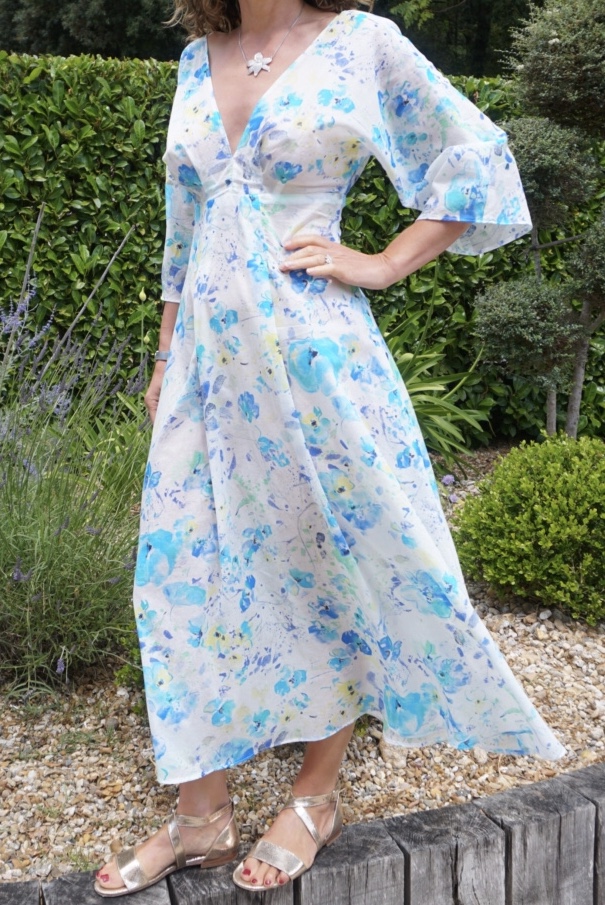
A new favourite pattern: the V9253 dress
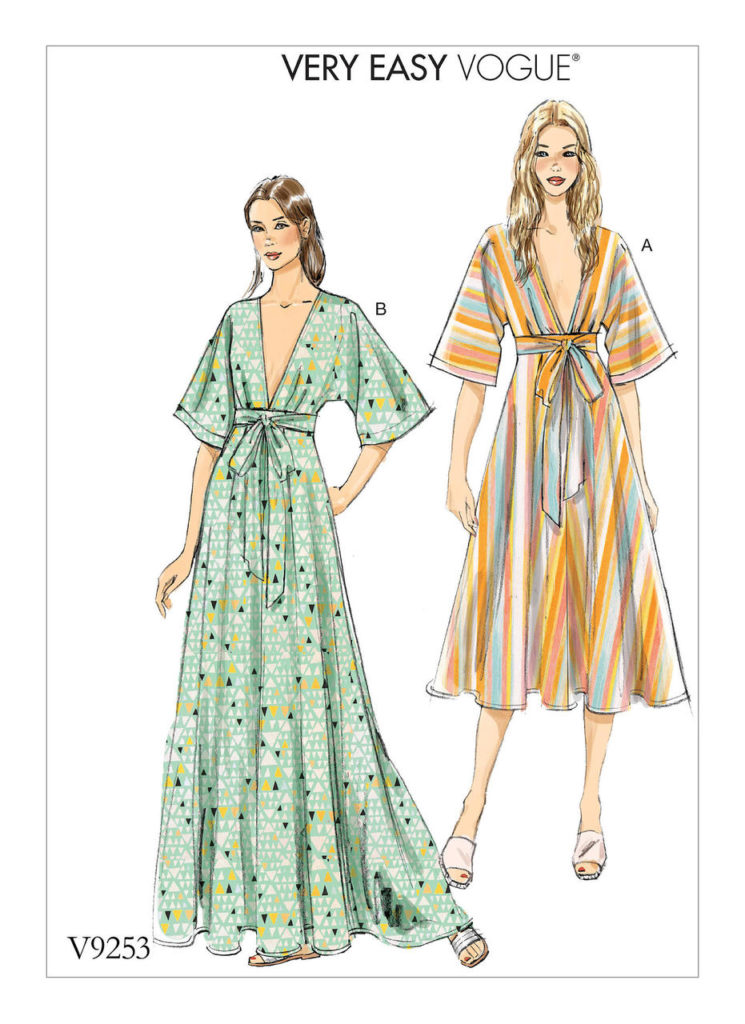
I think I’ve discovered a new favourite dress pattern, which I will use again and again, winter and summer – for me the equivalent of Magnolia by Deer and Doe. Let me introduce you to my version of the the beautiful Vogue V9253.
This pattern was issued in 2018 and was definitely the dress to make then– they are so many gorgeous versions all over Instagram and on the net. Like many of my favourites, I discovered it through mom.maker.model’s Instagam account. I was hugely tempted to make it but was really put of by…guess… the potential of a difficult full bust adjustment of course! Sadly this pattern does not come with bust cup option, huge shame!!!
But after seeing Emily Hallman’s recent version and reading her “redemption” article, I knew I had to have this dress for the summer, especially after finding the perfect fabric for it. So I ordered both pattern and fabrics from the UK (which, being in France, did not make a lot of financial sense) and I finally got going.
This pattern is qualified as “very easy” and it definitely is – there is a very limited number of pattern pieces (7 if, like me, you omit the belt) and putting them together is extremely straightforward. The only technical difficulty in the invisible zip at the back but you could avoid it by using a stretchy fabric (in that case go one size below your usual though!).
My personal challenge was the full bust adjustment: I am an E cup and I knew that omitting this step would result in the front of the skirt being pulled up – neither a nice look nor comfortable to wear. I searched and searched for FBAs over the internet but couldn’t find anything for this pattern. So here are a few pictures to illustrate my FBA for V9253.
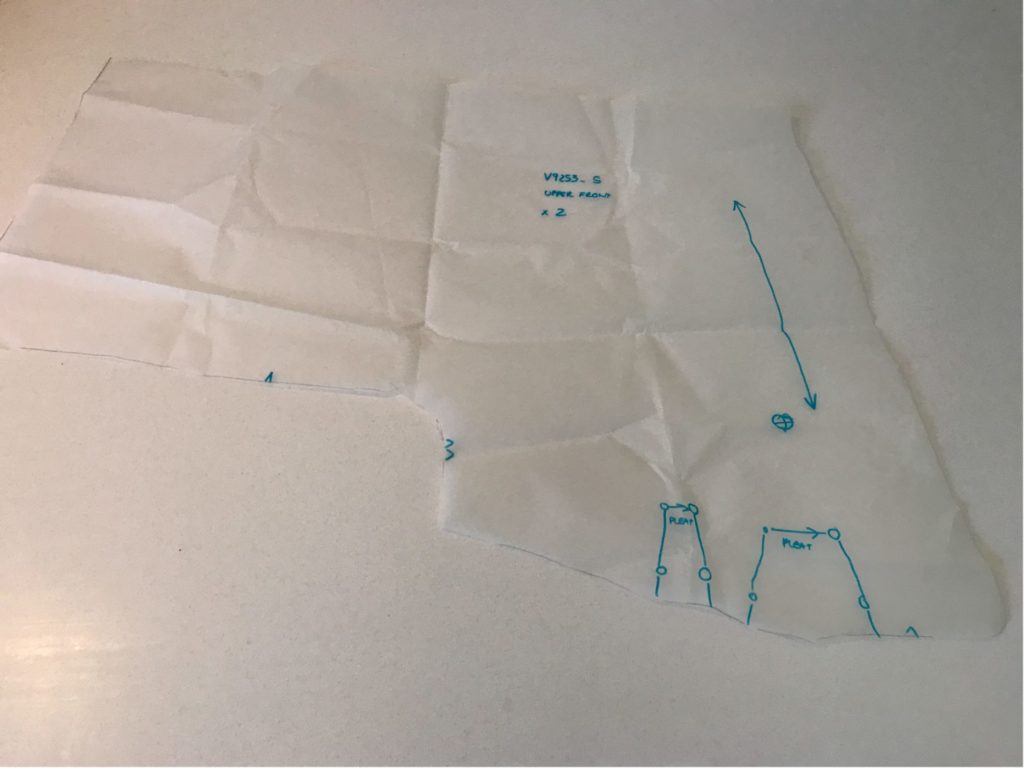
First I cut the initial front bodice pattern (in size S for my usual 10 Vogue) – you can see that the bust ease is given by the two waist pleats. And that the pattern designer was kind enough to give you the bust apex (the circled cross), thanks!!
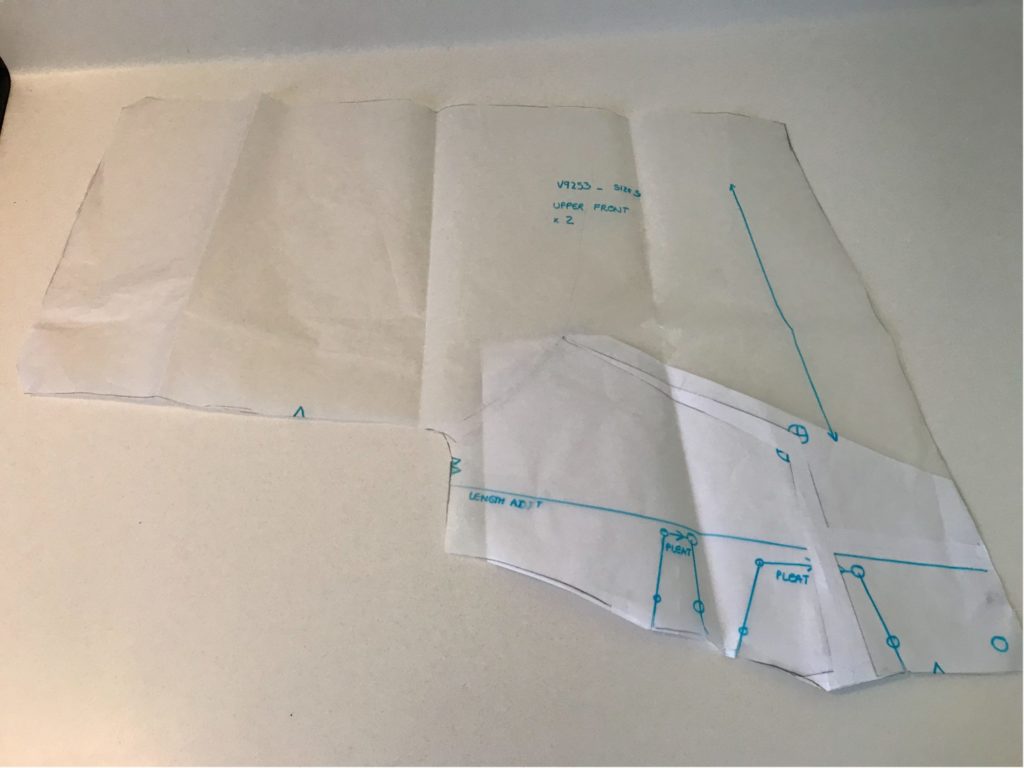
With an E cup, I usually need around 2cm extra bust ease. So here are the steps of my FBA:
- I drew a (very approximate) armhole.
- Then I joined it with a first line to the bust apex, and from the bust apex I drew a second (vertical line) to the waist.
- I also drew a third line – horizontal and called “length adjustment” (it is indicated already on the pattern).
- I cut through all these lines (as well as the bottom of my armhole) and gently pulled to get to a 2cm horizontal gap – this also means you need to create a vertical adjustment anf that the armhole moves slightly up.
- I glued/ taped everything back together on a piece of white paper.
- I obviously made a muslin to check all was good – and all was good indeed, thank God!!!

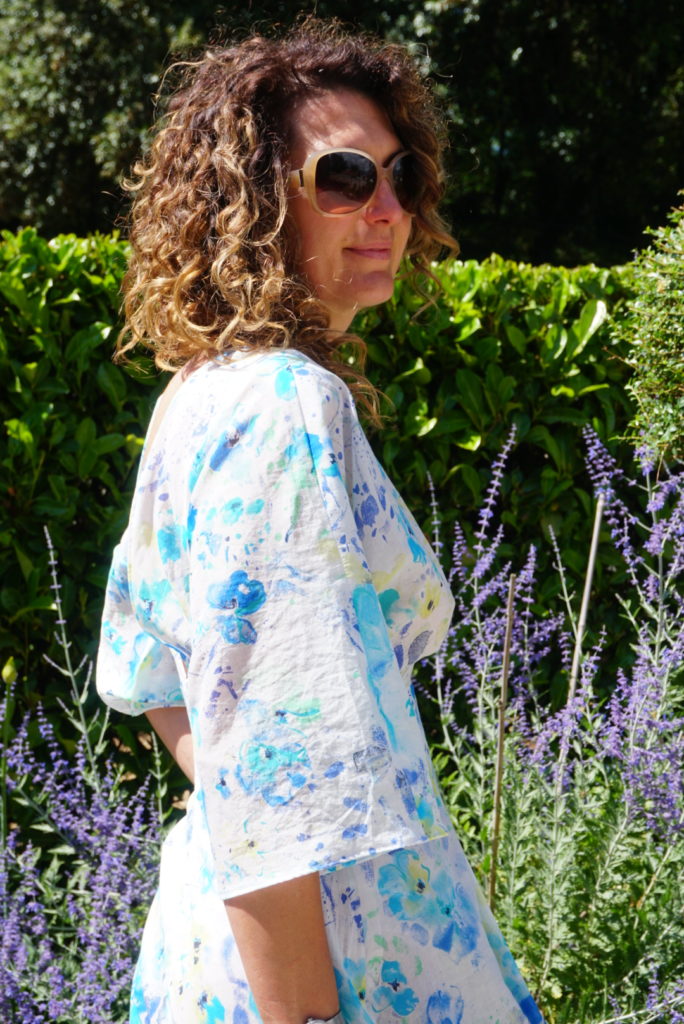
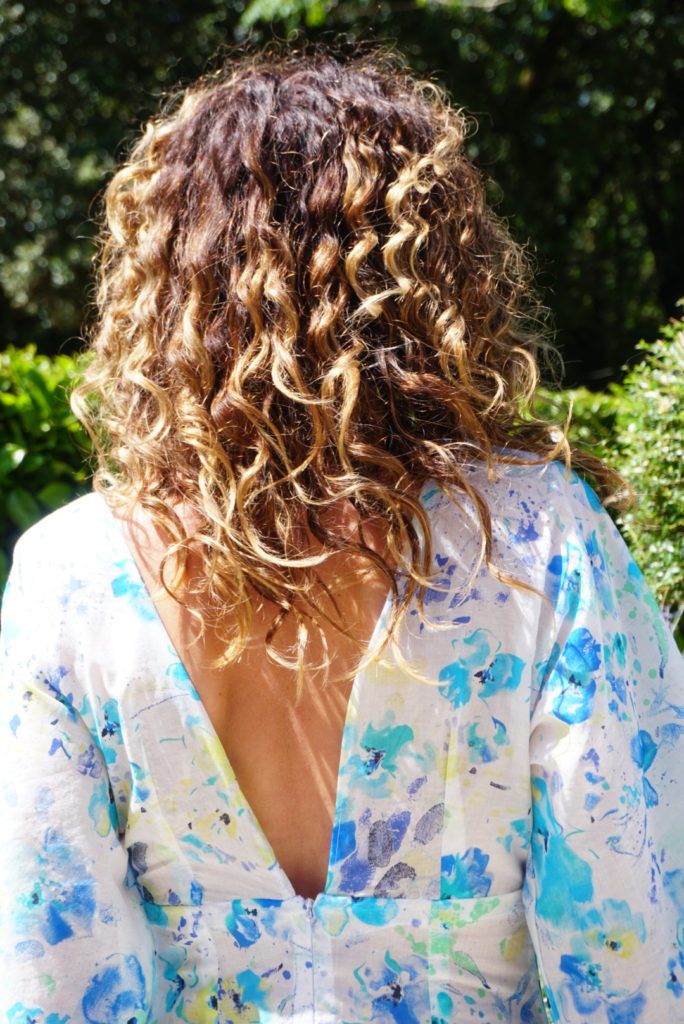
My other major adjustment to the pattern was to make it opened at the back. I initially wanted to replicate the full open-back of opandsquash – but she kindly warned me of the potential “unexpected boob on display” effect. So I went for an gentler V back, replicating the front. It does stay put… if you don’t move your arms too much though! I do love it, I think it goes much better with the very low front than a fully closed back. Word of warning though: you cannot wear a bra once you’ve lowered the back like that, whatever you choose to do with the front. The following picture, with my beautiful bra mark, is a perfect illustration of where the opening sits.
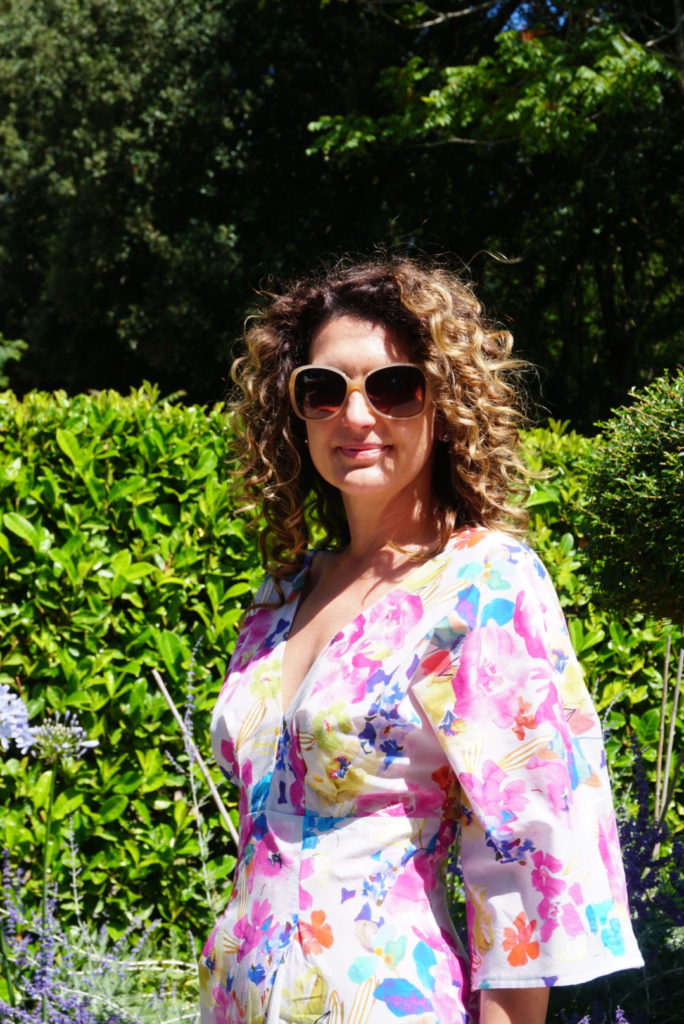
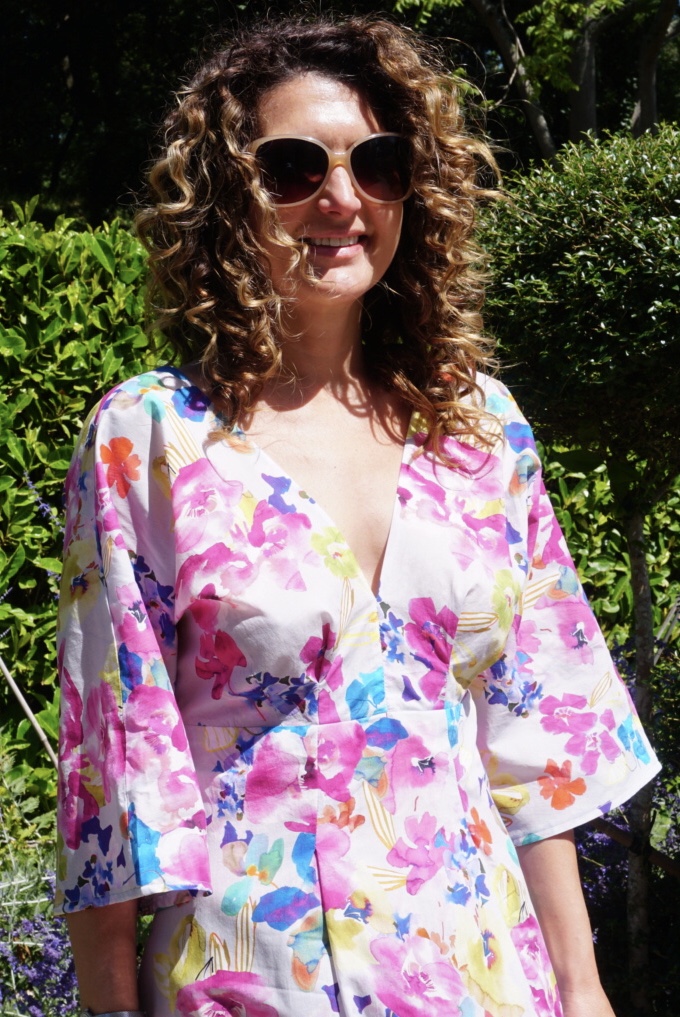
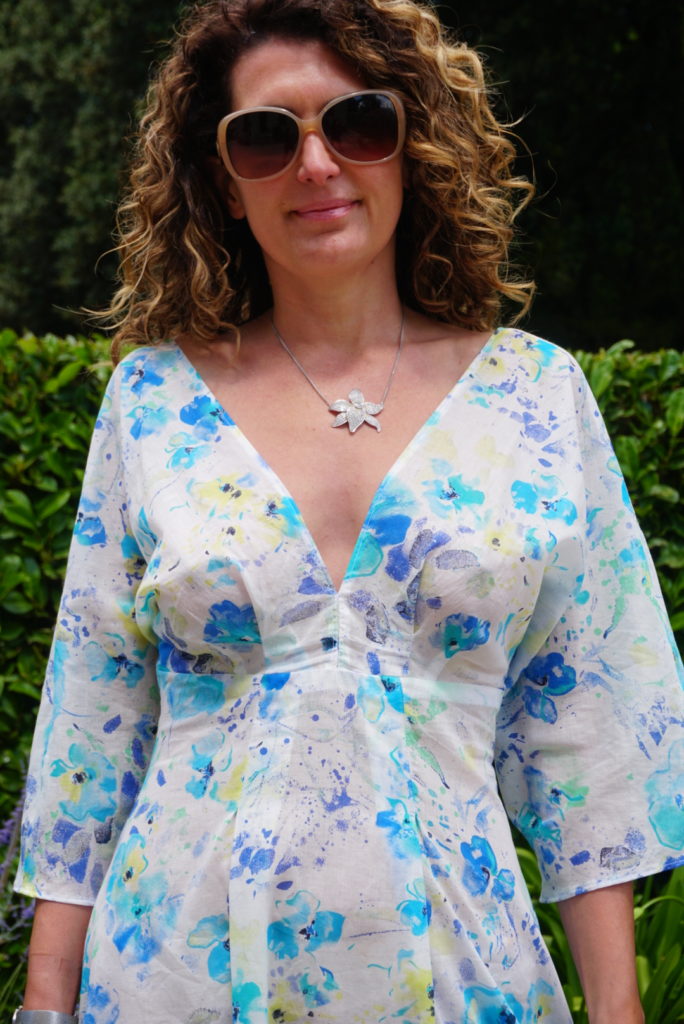
The third (tiny) change I made to the pattern was to close the very very low neckline at the front by about 7cm with invisible stitches. I think I may close it even further with my next (already cut and overlocked) version as I don’t find this deep V very flattering.
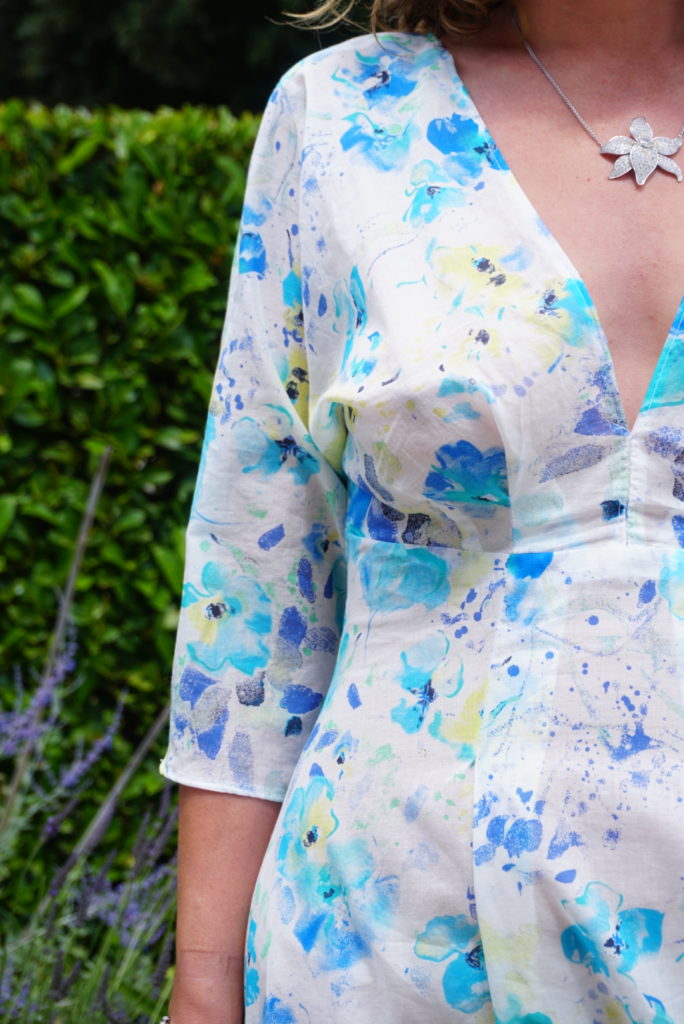
With these tweaks, I’ve definitely created a dress I absolutely adore. I made no changes whatsoever to the skirt, it is perfectly fitted thanks to pleats at the front and a the curved darts at the back, I will use it again with other bodices (actually, I already have, naughty meu).
The fabric is a gorgeous very lightweight cotton from Selvedge and Bolts – I fell in love with the impressionist print and the beautiful colours, it is slightly see-through but this is OK as this dress will stay be the sea-side for exclusive hot-days use! This fabric is out of stock but there is so much more to choose from – I recently ordered this beauty for another V9253.