Sewing the V8379 dress: the perfect pick-me-up project
You wouldn’t believe this if you saw the tremendous progress I’ve made on my Autumn 2021 sewing plans to date (one coat, three dresses, one top, one skirt, three bodysuits, three cardigans!). But I actually struggled going back to sewing in September: not the right weather, not knowing where I wanted to start. So to get things in motion, I needed a quick-to-make and highly rewarding project. And the V8379 dress turned out to be exactly that!
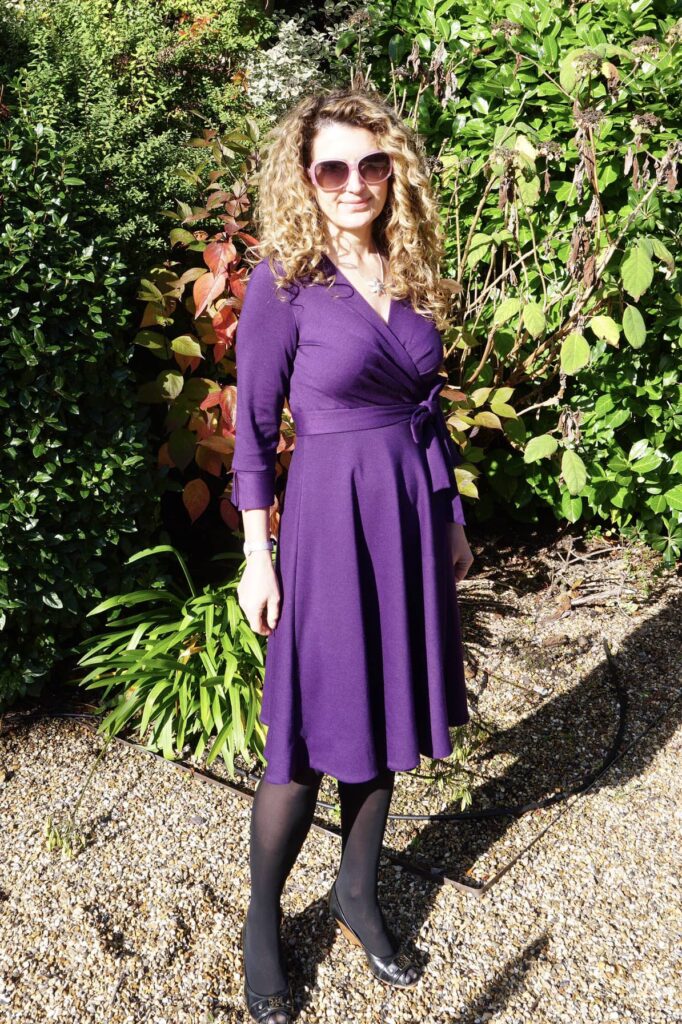
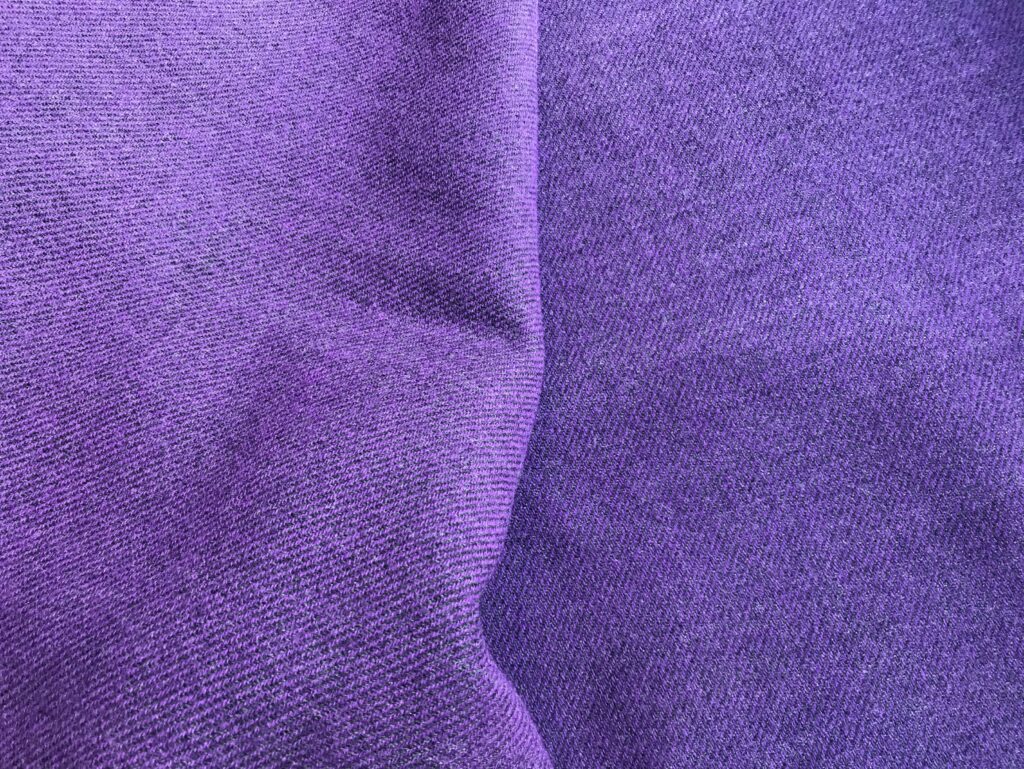
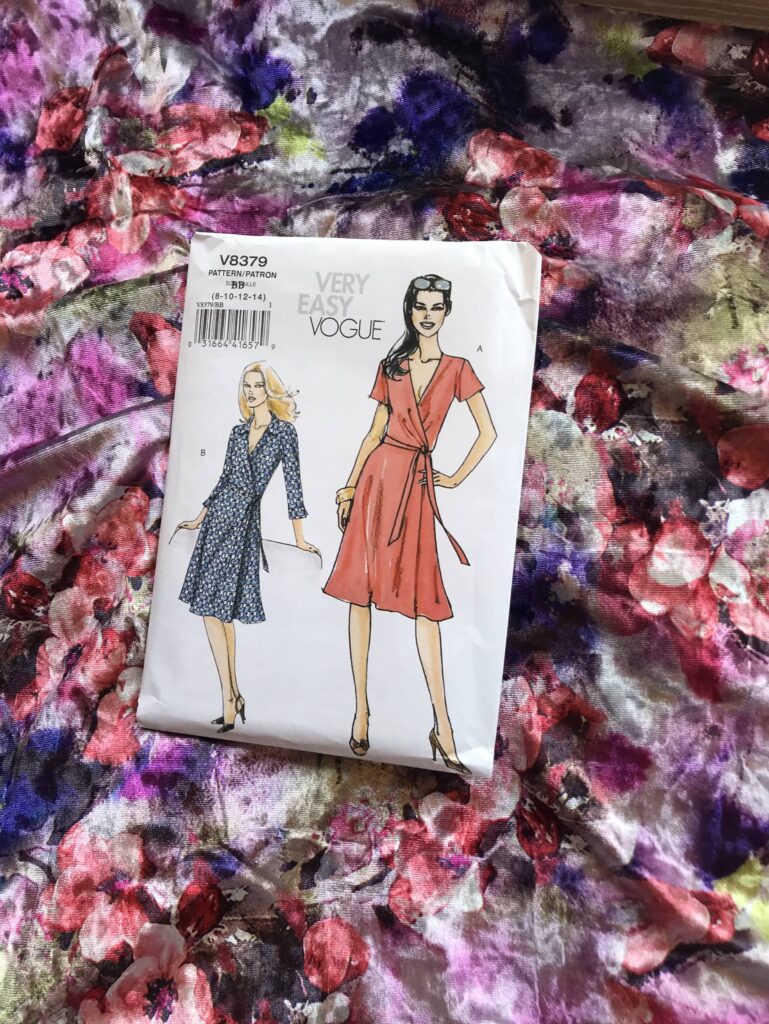
Let me introduce you to my first dress of the season: V8379, sewn in a gorgeous deep purple ponte roma fabric.
Inspiration: Emily Hallman, my sewing idol
I absolutely adore sewing blogger Emily Hallman: her style, her pattern and fabric choices, her sewing precision and knowledge, she is truly my sewing idol! I actually discovered her blog about a year ago while she had been writing it for quite a while already. So I binge-read all her articles, which generated a to-sew list so large that it will need a lifetime to complete it… Never mind!
V8379 is one of Emily’s favourite dress patterns (see her latest one here) and it perfectly fits my style too: a fitted bodice and a flared half-circle skirt, with the bonus of being a wrap! That said, the envelope illustration is far from flattering, so had I not seen Emily’s version, I would definitely not have bought this pattern ever!
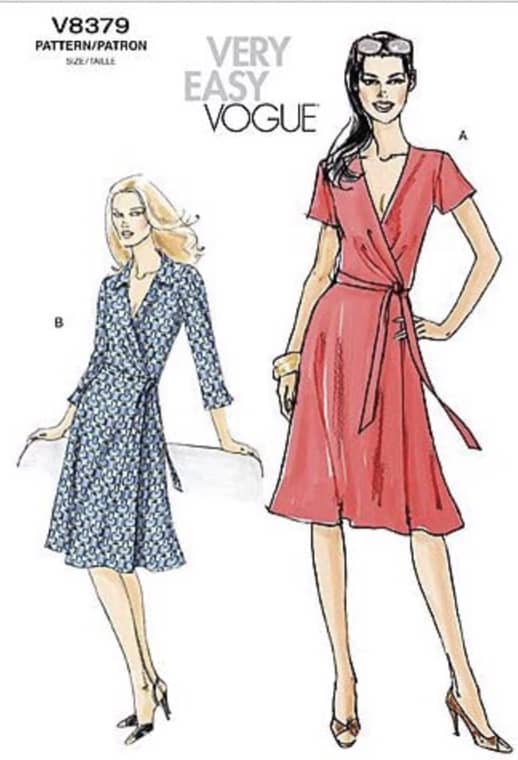
I went for a collarless version B – although I know these collars on wrap dresses are very DVF-esque, I just don’t find them nice at all! I kept the knee-length, which works really well for me.
A super quick and easy make
This dress has a few attributes which make it the perfect candidate for a relaxed Sunday afternoon sewing session (which is actually exactly how I saw it):
- It has a very limited number of pattern pieces (4 + 2 facings if you omit collar and sleeve bands).
- There is absolutely no technical difficulty, such as a zip or buttons, as the dress simply closes with its belt.
- The fit is very forgiving, as the pattern is designed for knits, much more accommodating to curves than woven fabrics. And also because the bust is shaped with pleats – my newly found best alternative to bust cup options. These pleats are actually gorgeous, they are my favourite part of thedress I think.
Pattern positives, negatives and alterations
This pattern has only positive to me, no negatives at all – incredible from this French girl who always likes to pick those tiny little negative details!
So here are the positives:
- After quite a few complex projects, I particularly enjoyed how easy to sew this dress is.
- The fit-and-flare shape is by far my favourite for dresses. Here the skirt is semi-circle so less flared than my usual but it is actually perfect for a wrap dress.
- The fit is spot-on: as usual with Vogue (McCall’s, Butterick), I cut a size 10 (for my FR36/ UK8/ US2 and E bust cup), made absolutely no adjustment anywhere, and it fits like a glove.
- Despite it simplicity, this dress has absolutely lovely details: the bust pleats mentioned above and also the pretty sleeve bands.
My only deviation from the original pattern was to put some iron-on interfacing around the side-opening for the belt, to strengthen it – 100% Emily’s idea and not mine I’m afraid!
Conclusion
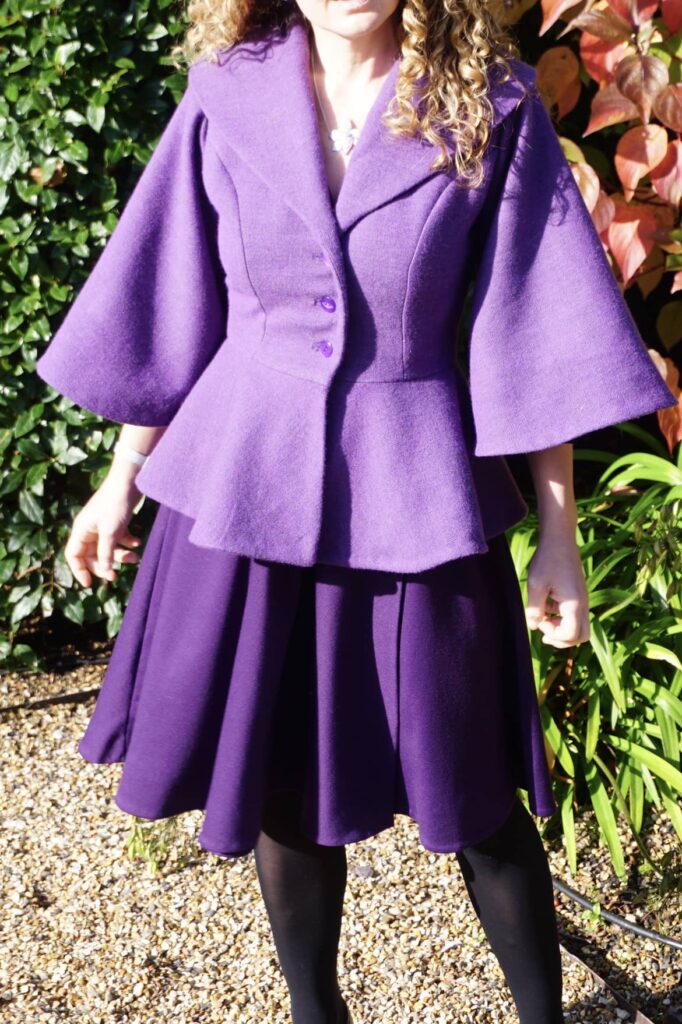
This dress is a great addition to my Autumn wardrobe. The ponte roma fabric is a nice weight for Autumn; and when the weather turns chilly I layer it with one of my multiple hand-made cardigans (I actually never showed it but I own a gorgeous deep purple Belladona!); or even with my new Princess Coat – how great is this match?
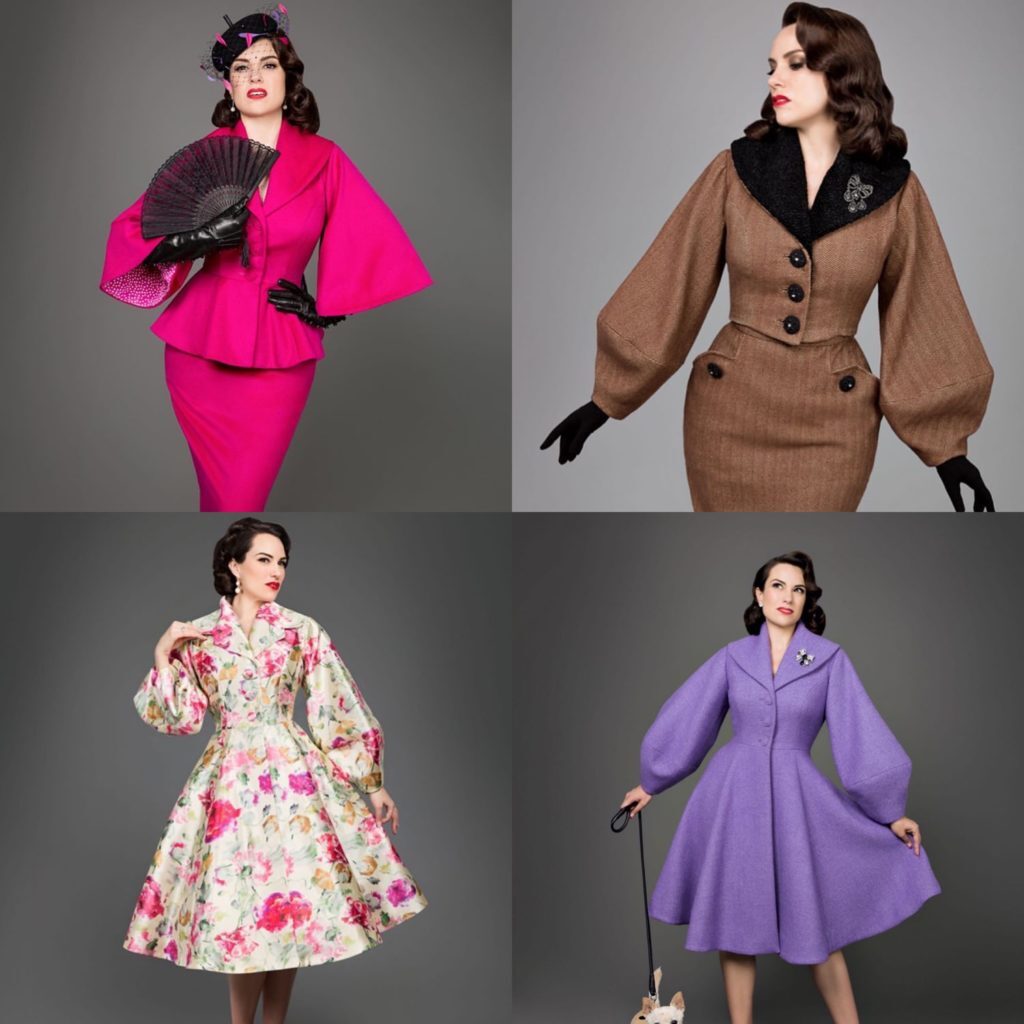
Sewing the Princess Coat by Charm Patterns
Although I have not been very active on the blog lately, my Autumn sewing has gone full steam. To my own surprise, I have very diligently followed my Autumn sewing plans and added quite a few new pieces to my wardrobe. Blogging about them is long overdue so let’s start with my most technical piece: my Princess Coat by Charms Patterns:
Inspiration for my Princess Coat
If you’ve been reading this blog for a while, you are probably well aware my style is all about fit-a-flare. This is very much in line with the 1950’s New Look epitomised by Christian Dior.
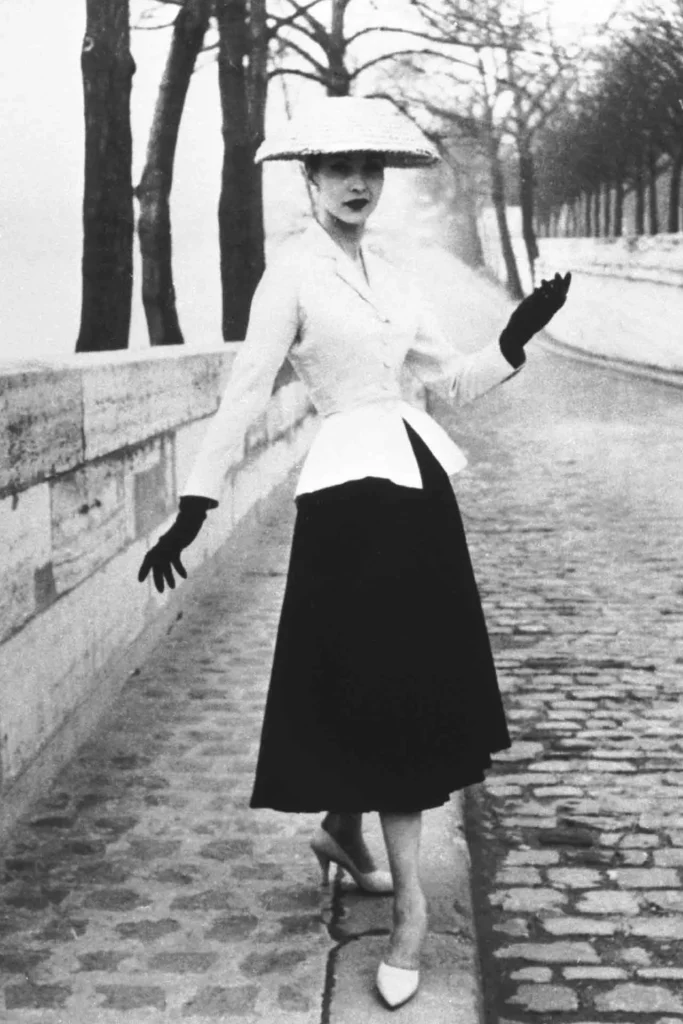
This beauty is the Bar jacket, created in 1947 but which I only discovered at the V&A “Christian Dior: Designer of Dreams” exhibition in 2019. This exhibition was an immense source of sewing inspiration but this jacket really stood out as something that would be extremely useful in my wardrobe.
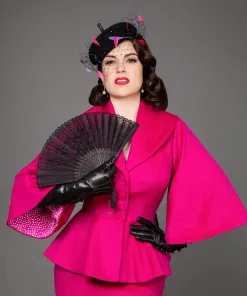
Then Gertie published her Princess Coat pattern, with its amazing bright pink peplum version:
And then Serena made this gorgeous jacket for the semi-final of the 2021 Great Sewing Bee a few months ago:

The stars were aligned, I had to make this jacket!!
Preparation for sewing the Princess Coat
This is quite a technical piece to sew so if you want to enjoy the process, I would strongly advise you take plenty of time for preparation – it took me months to get going!
STEP 1: Getting hold of the pattern
The Princess Coat patterns is readily available to buy on the Charm Pattern website; so pondering about how to buy it may seem a bit silly.
However, I now absolutely refuse to print PDF patterns at home when they go over 12 pages – this one is close to 200 pages, plus a 76-page instruction booklet, beware!! On the other hand importing the pattern from the US seemed absurdly expensive.
In the end (and after literally months of pondering), I bought the PDF pattern, got the A0 pattern sheets (8 of them) printed by NetPrinter and printed the instruction booklet at home. That said, the paper version of the pattern is now available from minerva.com in the UK, so it is definitely the option I would have chosen if available then.
STEP 2: Reading the instruction booklet thoroughly
The instruction booklet for the Princess Coat is a gold mine and I would strongly recommend you read it in full as early in the process as possible.
STEP 3: Choose the version you want to make
The Princess Coat is offered:
- in three lengths: cropped, peplum, below the know
- with three sleeve options: lantern, bell or tailored
- with two collar options: with or without a notch
so it is essential that you make up your mind on which combination you fancy.
My Princess Coat is peplum length with bell sleeves, exactly like the pink version worn by Gertie. My goal was to get a medium-weight jacket that I can wear with my fit-and-flare dresses in Autumn – with sufficient ease to put a wool cardigan underneath.
STEP 4: Shopping for notions and fabric
You will need quite a few coat-specific notions, such as Weft interfacing, muslin, silk organza and horsehair braid. You can easily source them on E-Bay or Etsy but I would recommend you gather all of them before starting your coat. Nothing is more frustrating than having to stop the sewing process just because you’re missing a tiny bit of organza.
As for fabric, I am a usually a huge fan of online shopping; but it did not work at all here. I wanted a purple pure wool fabric, of medium weight and with good drape; and I ordered many samples to get this Holy Grail. The samples gave me a good idea of colour and weight but they were too small to assess drape. In the end, I spend a morning on Goldhawk Road (oh my God, oh my God, why did not I go there before!!!) and found this amazing wool tweed at Misan Fabrics, along with the perfect lining. The picture on the left is quite true to the colour.
While on the subject of fabric buying, beware that the recommended yardage is given for size ranges rather than for each size, so if you are at the bottom of the scale you will end-up with far too much. Given wool is not cheap and this coat consumes A LOT of fabric, I wish I had laid out my pattern pieces before buying – I will definitely do that next time.
STEP 5: Do make a muslin!
The instruction booklet is adamant that a muslin is a must – and so am I! This is a very fitted piece of garment made with quite expensive material. Making a very basic muslin will take you no more than 30 minutes, a completely worthwhile investment of your time to avoid an unwearable garment.
I actually made two muslins, as the first one was so tight under the arms that I could barely move (this is a problem I very often have, nothing wrong with the pattern here). I also managed to remove a bit of ease at the waist, making the line more fitted without compromising on comfort.
Princess Coat pattern review: positives, negatives and changes I made
I absolutely adored sewing this coat. I was terrified to start cutting into my precious wool and get lost in a very complex process but… it actually all went really smoothly!
They are many things I like about this pattern:
- The fit is terrific. Based on my measurements (I am a FR36/ UK8/ US2 and an E cup) , I chose a size 4 and a B/C cup. I reduced the waist at 1cm on each side and got the snug-but-not-uncomfortable look I like. The pattern has bust cup options, which I always see as a major positive.
- The silhouette is beautiful. I had been looking for this style of coat for a while and I am happy I waited. This is the first one with such a well defined fit-and-flare silhouette. Beautiful from the front and even more so from the back.
- The instructions are so clear that if you follow them step by step, the sewing process is truly enjoyable.
- This coat is the perfect opportunity to discover many tailoring techniques, which I was personally not familiar with.
As for negatives, they are really minor points:
- As I mentioned earlier, I wish the required fabric yardage was given for each size rather than for two size ranges (2-10 and 12-20), as it implies quite a lot of fabric wasted if you are the bottom of the size range (I bought 3.40m and ended-up using only 2.5).
- Attaching the lining to the peplum coat involves quite a lot of hand-sewing, completely unnecessary and far less neat than machine sewing in my view. Many moons ago, I saw the Ernest coat by Republique du Chiffon and followed this amazing tutorial for attaching the lining (scroll down to the lining section). The instructions are in French but the pictures are quite self-explanatory. I have never encountered any better technique since.
- The bound buttonholes are done at the beginning for the front fabric; but at a later stage for the facing, when facing and coat are attached together, which makes the process quite fiddly. Next time I will do both at the beginning.
I made very few changes to the initial pattern:
- I reduced the waist by 1 cm on each side, to make the coat more fitted.
- I increased the underarm opening by (a whopping) 2cm, because no pattern ever seems to come with enough room for me in this area.
- I cut my centre back fabric piece on the fold, as I really don’t see the point of having two pieces of fabric instead of one here.
- For the peplum, I used the facing pattern piece for both facing and outside, as the facing is just one pattern piece while the outside fabric is 6 I think – why??
- I did not fully follow the instructions for attaching the lining to the coat.
Conclusion: definitely ready for another one!
As you have probably guessed, I am absolutely delighted with this coat. I really enjoyed the challenge of tackling slightly more technical sewing techniques; and I am over the moon with the result. Now I’d love a long version with lantern sleeves, but wait a few months for me to choose the fabric…
Sewing Plans for Autumn 2021
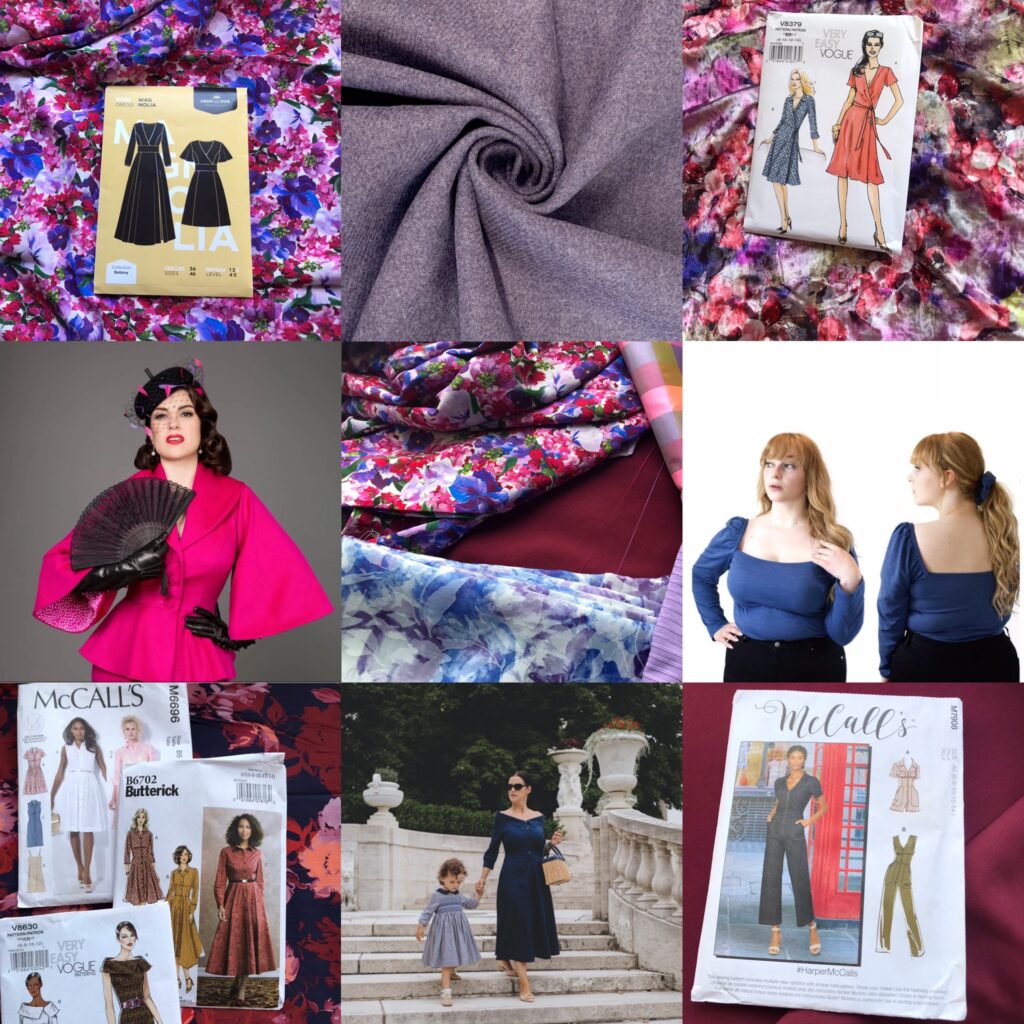
After quite a disorganised and patchy summer, I have decided to go back to planning my sewing for Autumn 2021. Although I have more fabric that I will ever sew, some project would need more purchases; and I haven’t fully decided on which patterns to use. In any case, here is a quick overview of my plans:
Why I like planning my sewing projects
This is not my first attempt at seasonal planning of my sewing projects. If you’ve read this blog for a while, you’ll remember I already did it for Autumn 2020 and Spring 2021.
Below you can see my Spring 2021 planning on the left versus my Spring 2021 makes:
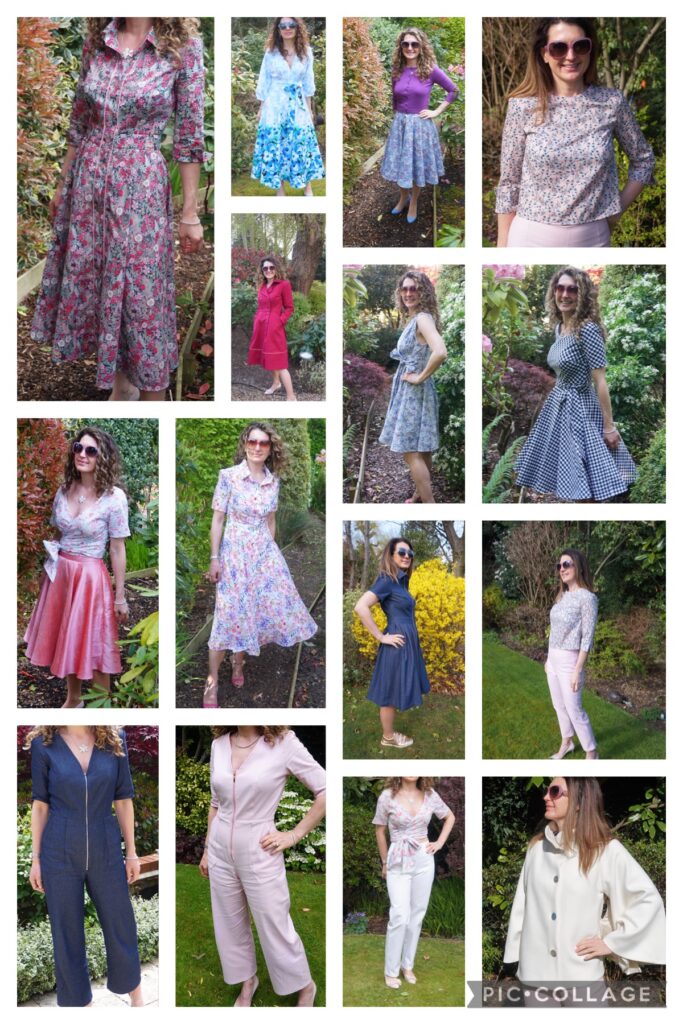
I was particularly pleased with how this season went. It really epithomised the reasons why I like planning my sewing projects:
- Planning makes me think about which holes need to be filled within my wardrobe, instead of going back to my favourite sewing project ever – dresses of course!
- It helps me manage my fabric stash better, by prioritising fabric that I already own instead of feeling compelled to buy more. I have not reach the stage where I do not buy new fabric for a season though, be reassured!
- I do not feel the urge to jump on the bandwagon of newly popular patterns; neither do I feel guilty not to follow current sewing trends.
- And planning challenges me to try types new projects which I would probably avoid if I hadn’t commit to them on paper !
The one thing I don’t like about planning my sewing projects is that it is excruciating! It takes weeks of thinking, of back-and-forth between patterns and fabric, of doodling on paper, of buying the extra supplies. And months of discipline of not diverging too much from the initial plan. But for me it is totally worth it.
That said, this article is in no way meant to make you feel guilty if you don’t plan your projects. Or to make you praise me for planning mine. We all work differently and what is good for me is not necessarily good for you. I wish I could unleash my creativity and follow my instincts, but for me having unlimited possibilities just generate too much stress. Of well…
Autumn colour palette: lilac is back!
My Autumn colour palette always tends to revolve around burgundy hues and this year is no exception; but lilac has been progressively creeping in my wardrobe and this is definitely reflected in my fabric choices.
Purple – all shades of it! – is by far my favourite colour and featured heavily on our wedding day… a few years ago!

It was also the colour of our first car and our first sofa, long gone since…
But purple had progressively disappeared from my wardrobe, probably because it was not that easy to get hold of. However it has definitely reappeared in the shops recently and I’m definitely making the most of it! Here is a lilac skirt I made a few months ago – my first ever purple sewing project I think!
Priority project: tops!!!
As I have been making more skirts over the past year, mainly to diversify my wardrobe away from dresses, I have come to realise I desperately miss tops! I have never been a fan of buying them, even less of sewing them, so this is no surprise.
Tops need to abide by three strict conditions for me to like them: they need to fitted, easy to put on (bye-bye buttoned shirts and other fancy closures) and work with my high-waisted skirts.
On this basis, I have selected three patterns:
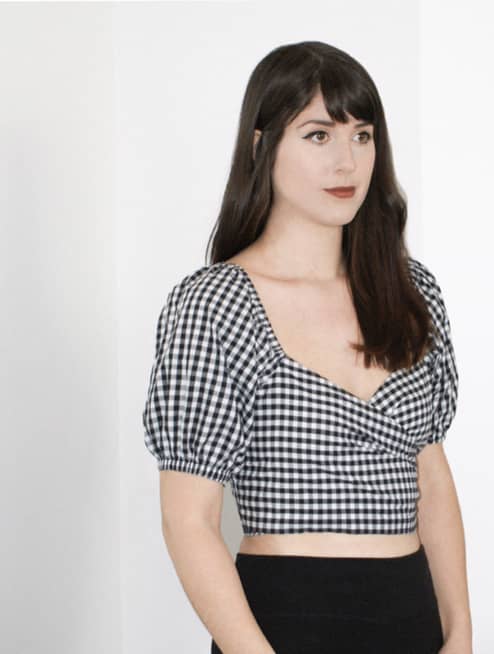

- A wrap version of the Tudor Blouse by Stitch Witch Patterns (there is also a front buttoned version). This top has been a massive success and I know why. After eying it for ages, I made a summer version (not photographed yet) – and I can confirm this pattern is a gem, super easy to make and amazingly designed! I now need to work out how to lengthen and slightly “un-puff” the sleeves so that they fit under a warm cardigan.
- The original version of the Boleyn Top, by Stitch Witch Patterns (there is also a wrap hack). This is a stretch jersey top, so I will need to muster all my energy to experiment with my new cover-stitch machine – my latest birthday present, specifically requested so that my jersey garments get a professional finish. Wait and see…
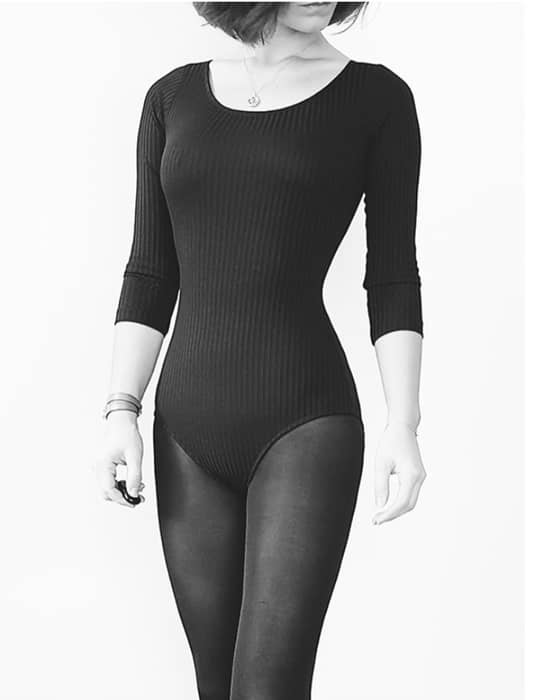
- A long-sleeved, standard back version of the Libra Bodysuit by French Poetry (there is an open-back version and three sleeve length options). Cover-stitch here we go!
As for fabric choice, work in progress I’m afraid! I have realised my (extensive) fabric collection blatantly lacks both solid colours and jersey fabric – no even mentioning jersey fabric in solid colours! So I am frantically ordering fabric to make stretch tests, as the Boleyn top requires 40% minimum and the Libra bodysuit 70%. I find that buying jersey fabric online is particularly unreliable but I have had no time to visit fabric shops lately, so samples should help.
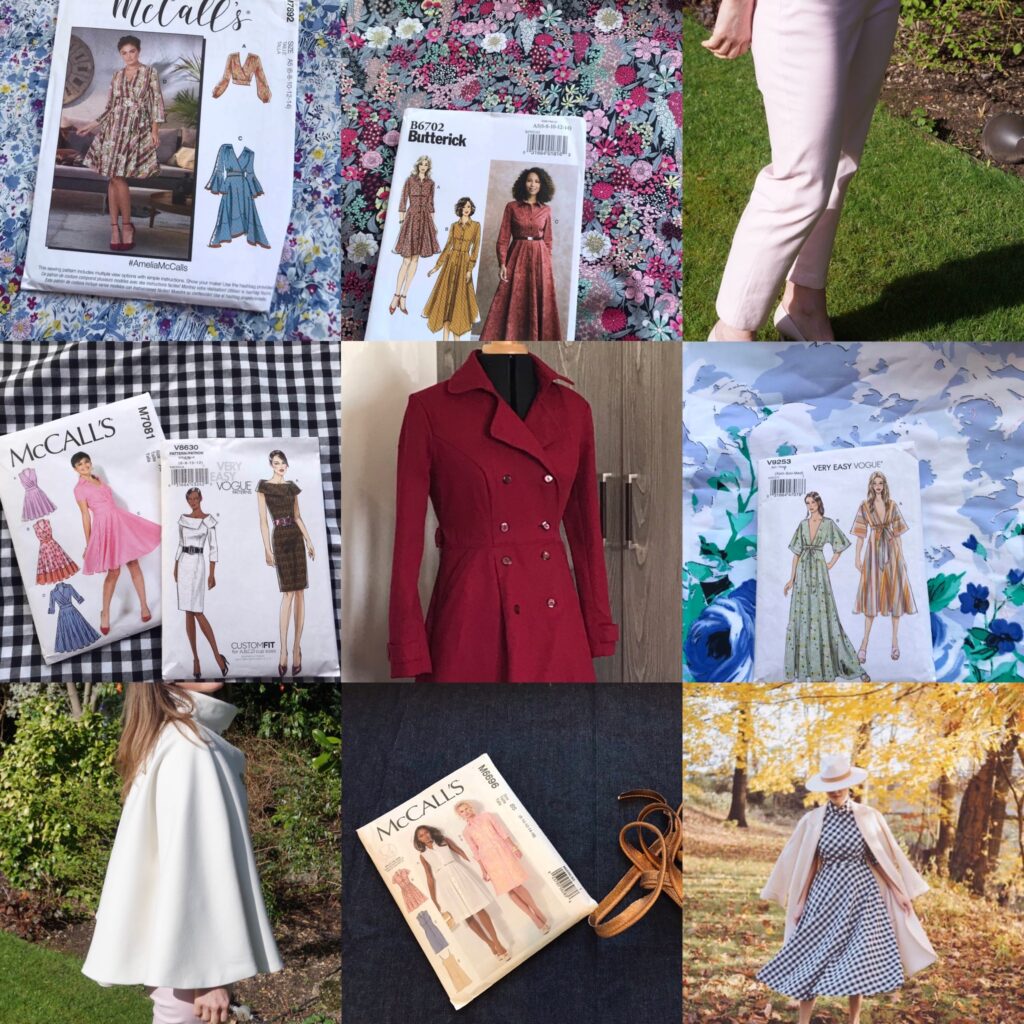
Two skirts to show off bold patterns
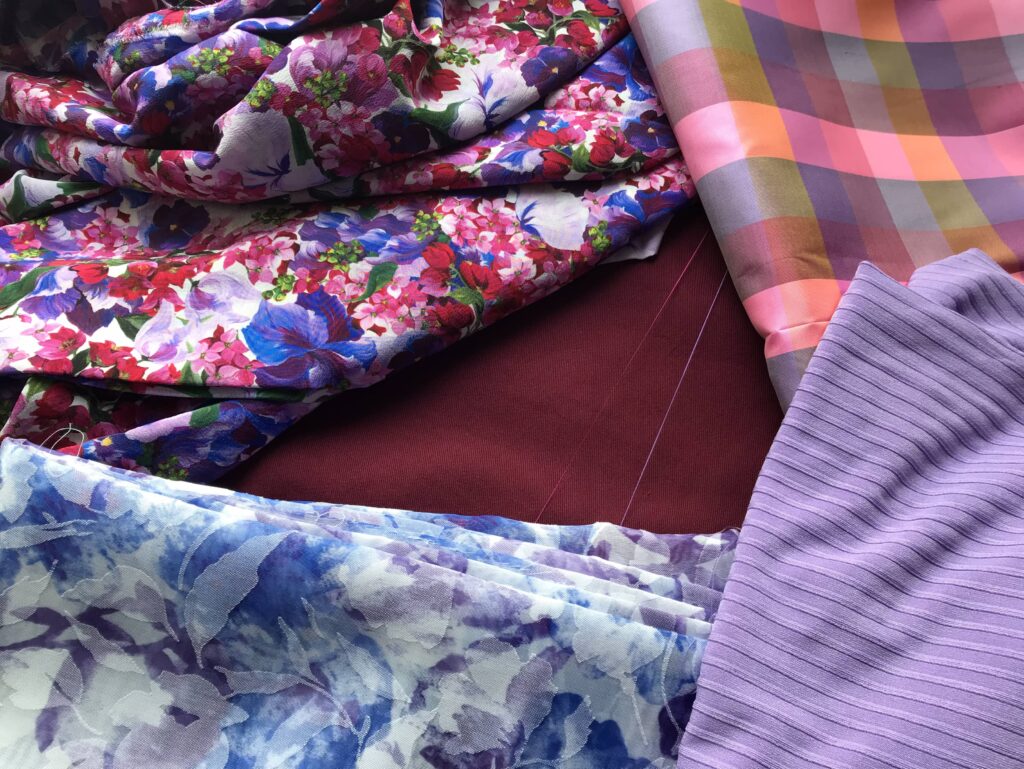
Within my Autumn 2021 fabric collection, you maybe have noticed two with quite bold patterns. Here is a closer view:
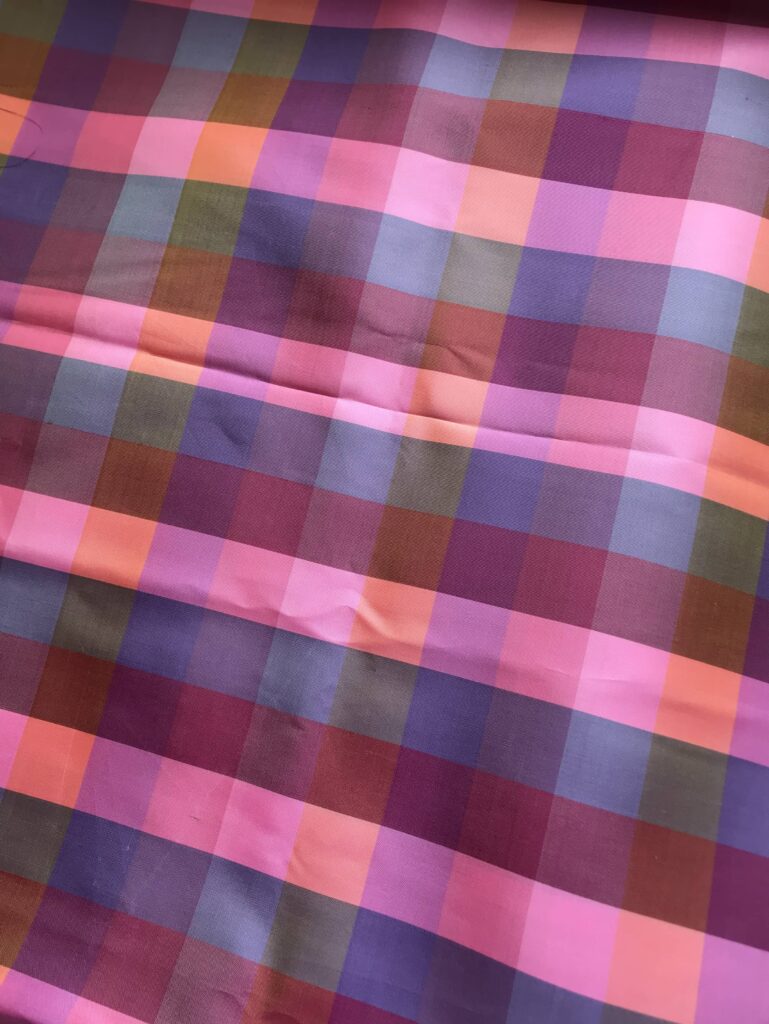
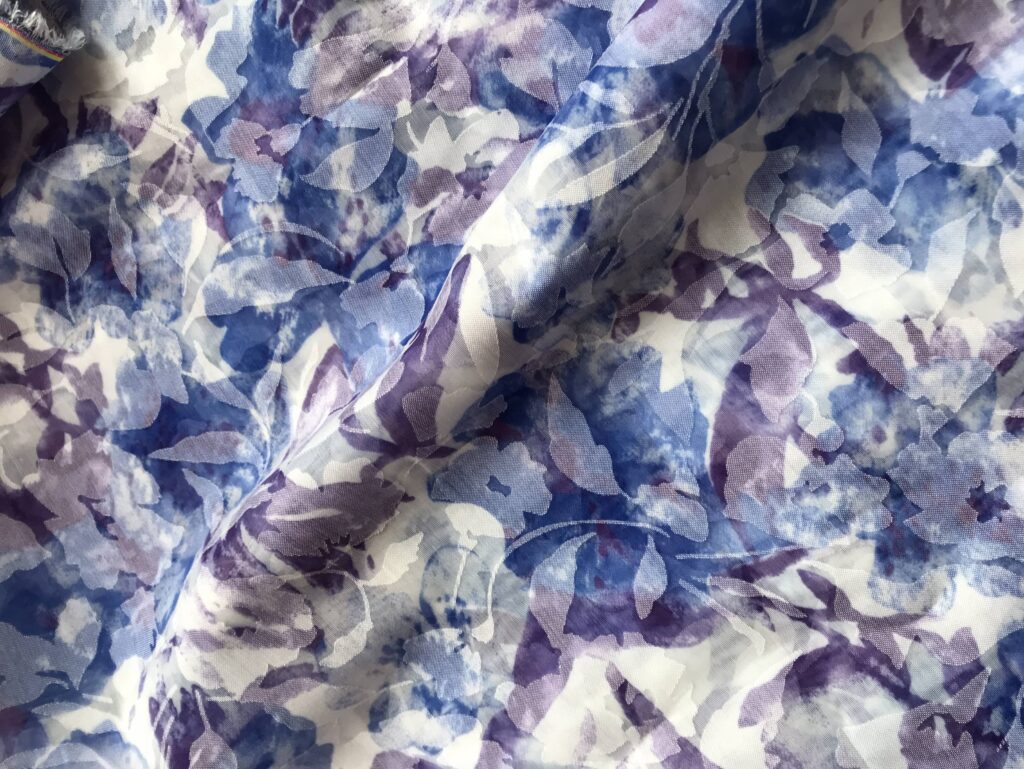
The one of the left is a checked silk, which I bought in Thailand a few years ago, with striking vivid colour . The second is an undetermined man-made fibre, see-through, in lilac-blue shades. I am very keen to use both this season but they are too bold/ too synthetic for dresses, so the next best options is skirts.
I have been pondering for ages about skirt shapes and I am still undecided about the sheer fabric – it will probably end-up as a circle skirt, as soon as I find the appropriate lilac lining (I was waiting for the right shade of silk to turn up but this is not happening). As for the checked silk fabric, a circle will not work with the checks so I may try a bubble skirt, using this tutorial and targeting an adult version of this skirt:
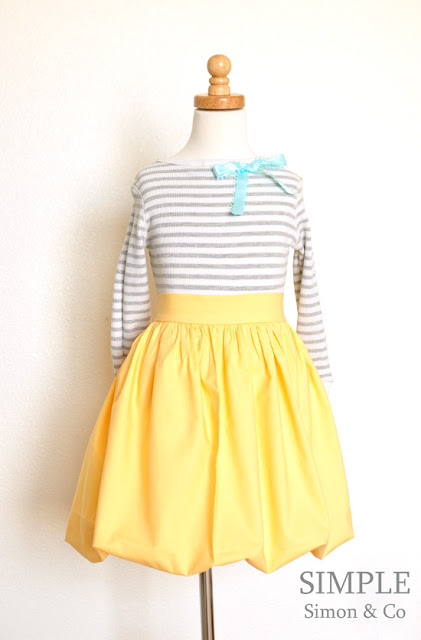
It may look completely over the top but I have been wanting a bubble skirt forever so never mind!
Another jumpsuit
In Spring 2021. I discovered the M7981 jumpsuit pattern and liked it so much that I made two versions of it (well, three actually, if you include the not-wearable-at-all muslin):
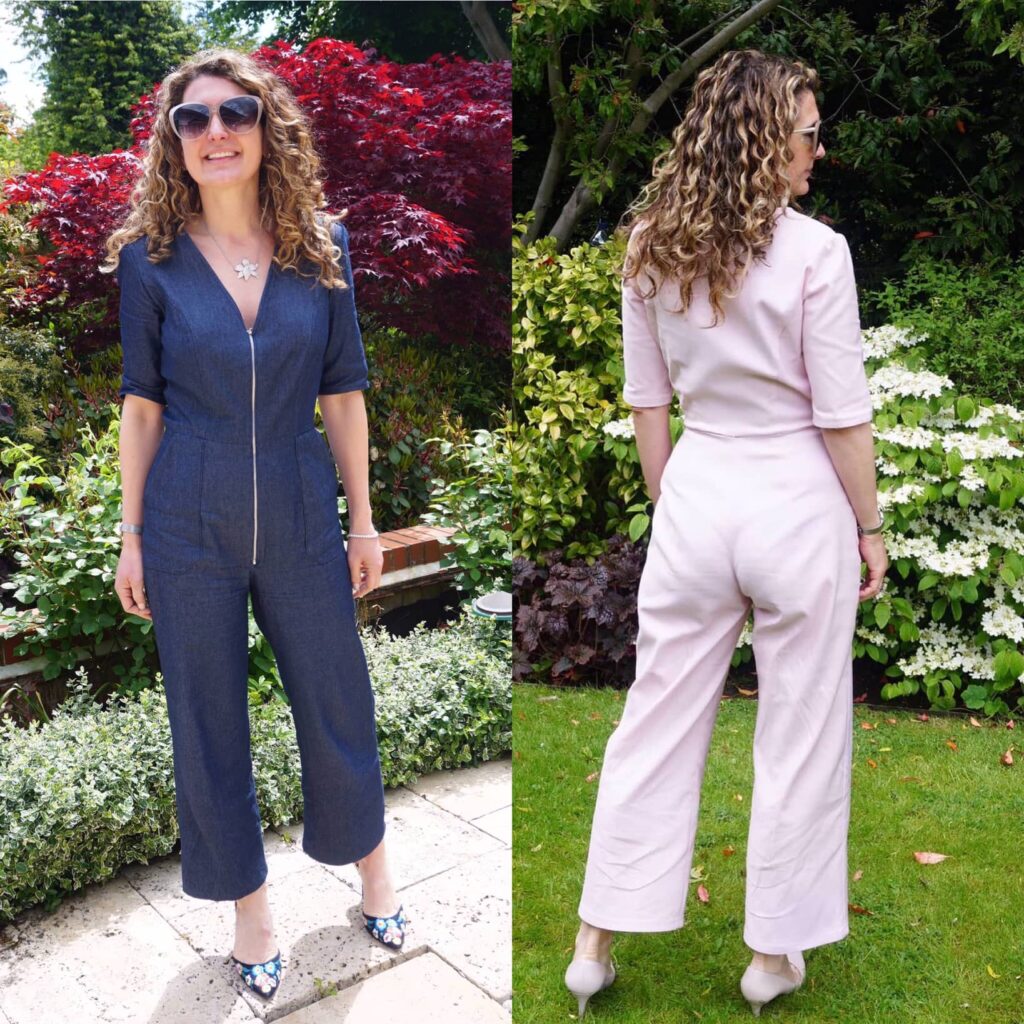
I really like this jumpsuit and I have been wearing both versions extensively. Unfortunately there short sleeves do not work cooler weather. So a third, three-quarter or long sleeved versions is definitely needed. All the more so that I already own the perfect fabric: a burgundy chino, with just enough stretch to make it comfortable.

Another jumpsuit pattern I would like to try is Pilat by Clematisse Pattern. However the original version is backless, so I am just waiting for a winter hack to be published.
Technical challenge: a Dior-inspired fitted jacket
For the first year ever, I watched the Great British Sewing Bee – and got so enamoured with it I am actually watching all past series (7 of them) but very virtuously: on my cross-trainer!
One of the designs I completely fell for was Serena’s Dior-inspired jacket, which could be reproduced using the Princess Coat by Charm Patterns – which I luckily ordered and got A0 printed months ago!
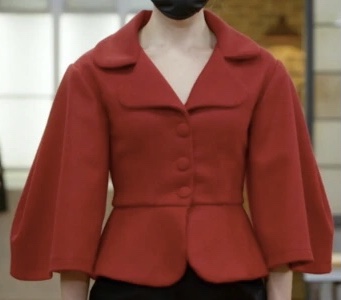
As for fabric, I am still in the process of ordering samples and this lavender Merino Lambswool seems promising:
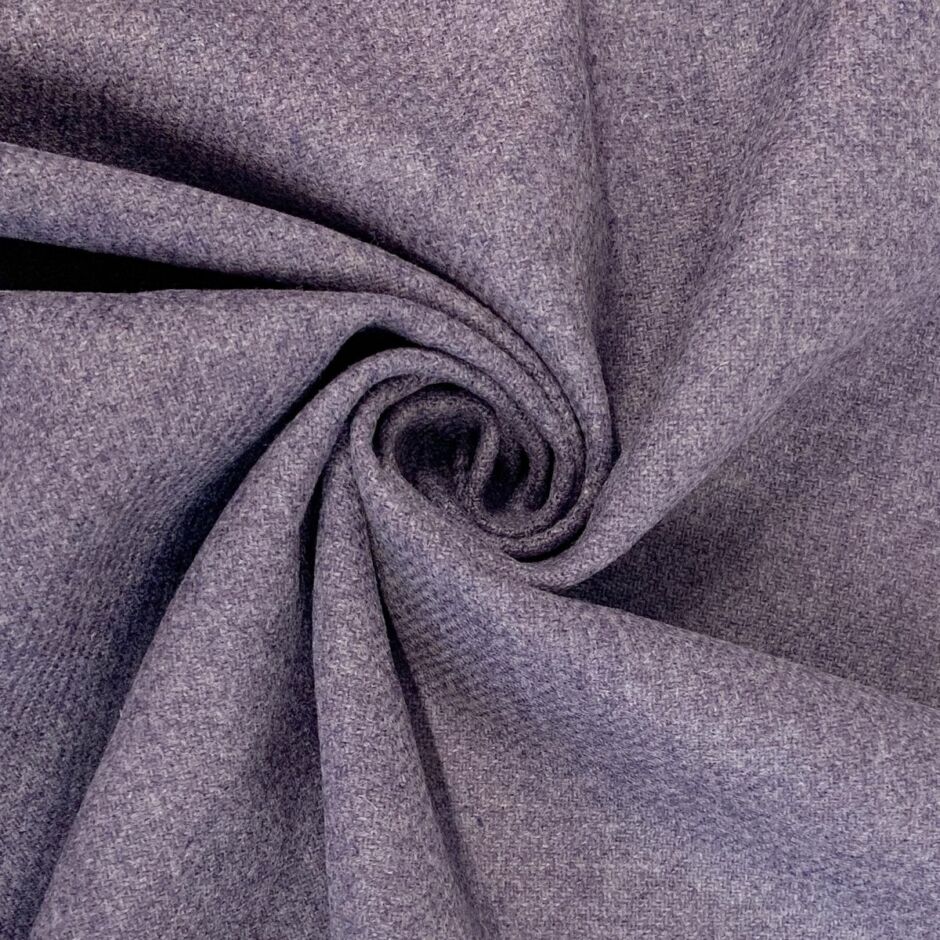
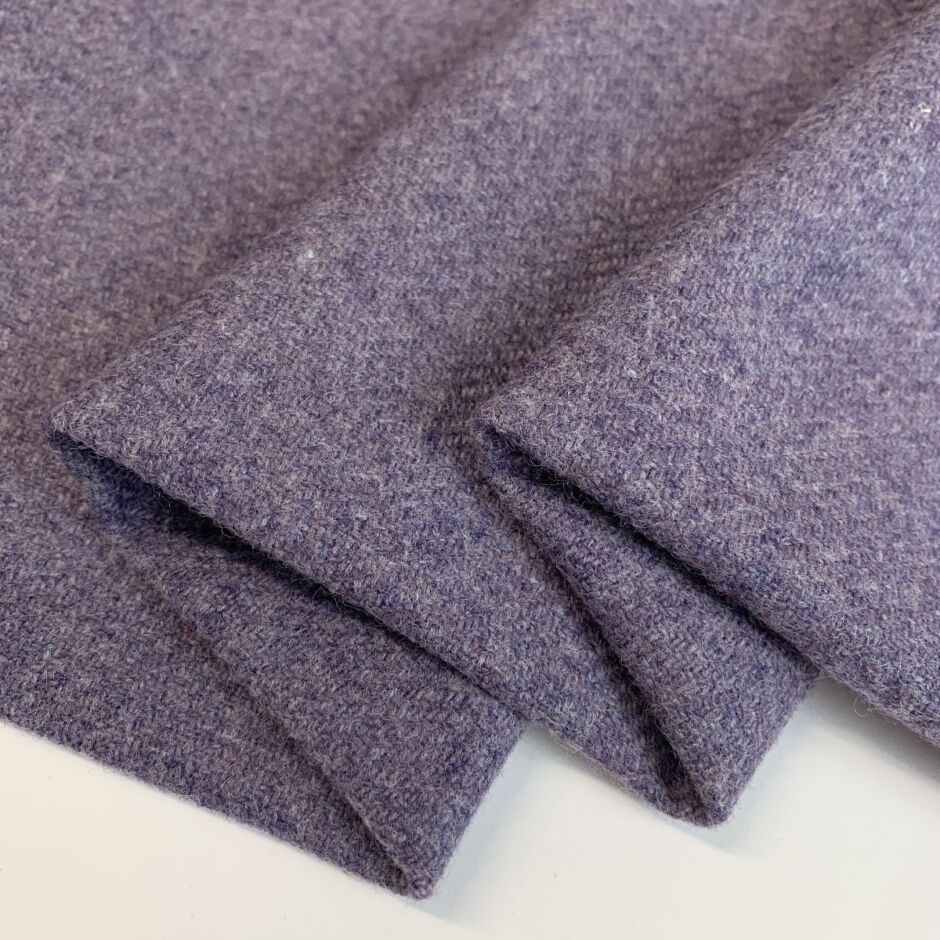
This is obviously the most technical project of my Autumn wish list, which will require several muslins for perfect fit.
And of course… more dresses!
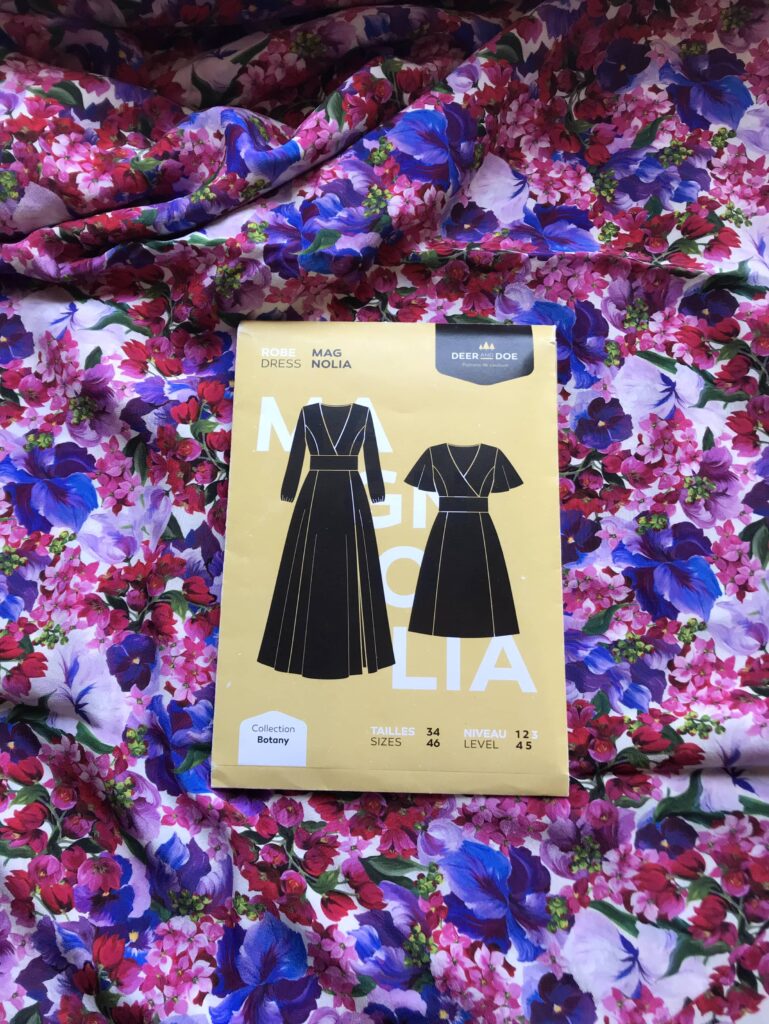
Strangely enough, I only have definite plans for a single dress – transforming this gorgeous silk into a Magnolia dress, ASAP. But the fabric is so beautiful that I am actually terrified to cut into it!
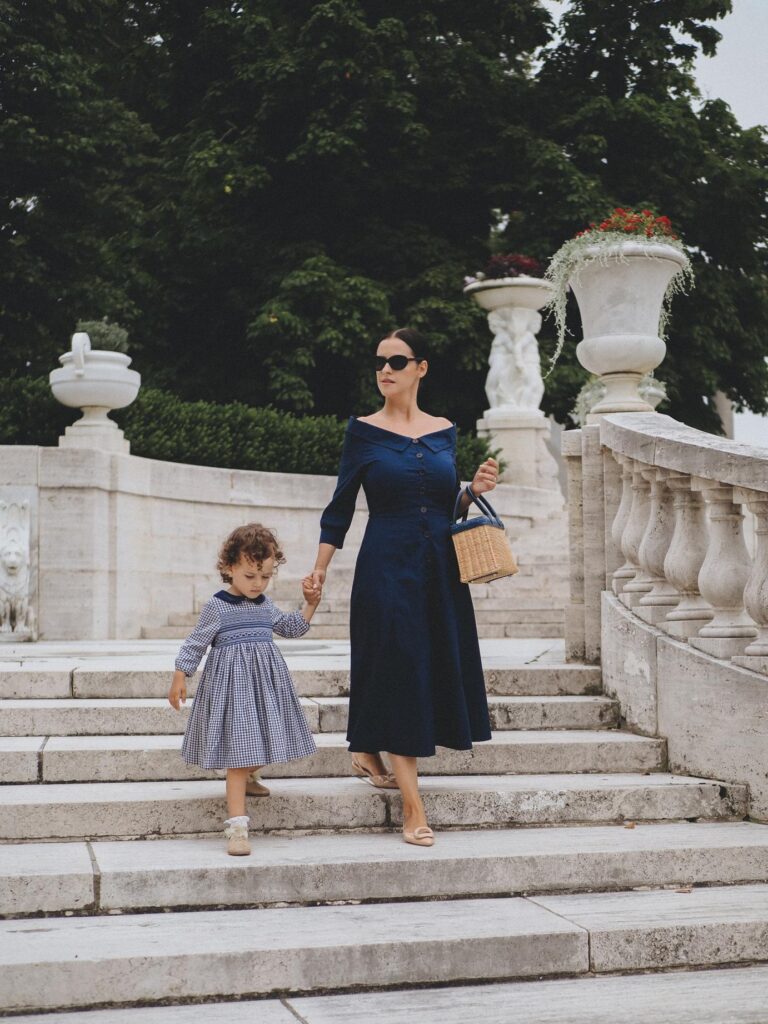
Another project I have in mind would be to replicate this gorgeous shirt dress worn by Bittersweet Colours, using a combination of my favourite patterns: B8630 for the collar (which would need to be re-centred), M6696 for the bodice and B6702 for the skirt. I have a patterned fabric in my stash which is completely Autumn appropriate, but I would a plainer version in block colour – the search continue…

Lastly, I would like to make a dress out of this beautiful stretchy jersey, but I am not completely sure about the pattern to use. I have been wanting to use V8379 for ages, after seeing so many beautiful versions on Emily Hallman’s website, but the pattern calls for moderately stretchy fabric and the stretch of my velvet is all but moderate… I will probably need to look for another fabric-pattern combination.
Conclusion: all but definite plans
Contrary to Spring 2021 and Autumn 2020, my sewing plans for Autumn 2021 are all be definite. I feel I have a general direction but not all the details so we’ll see how things go!
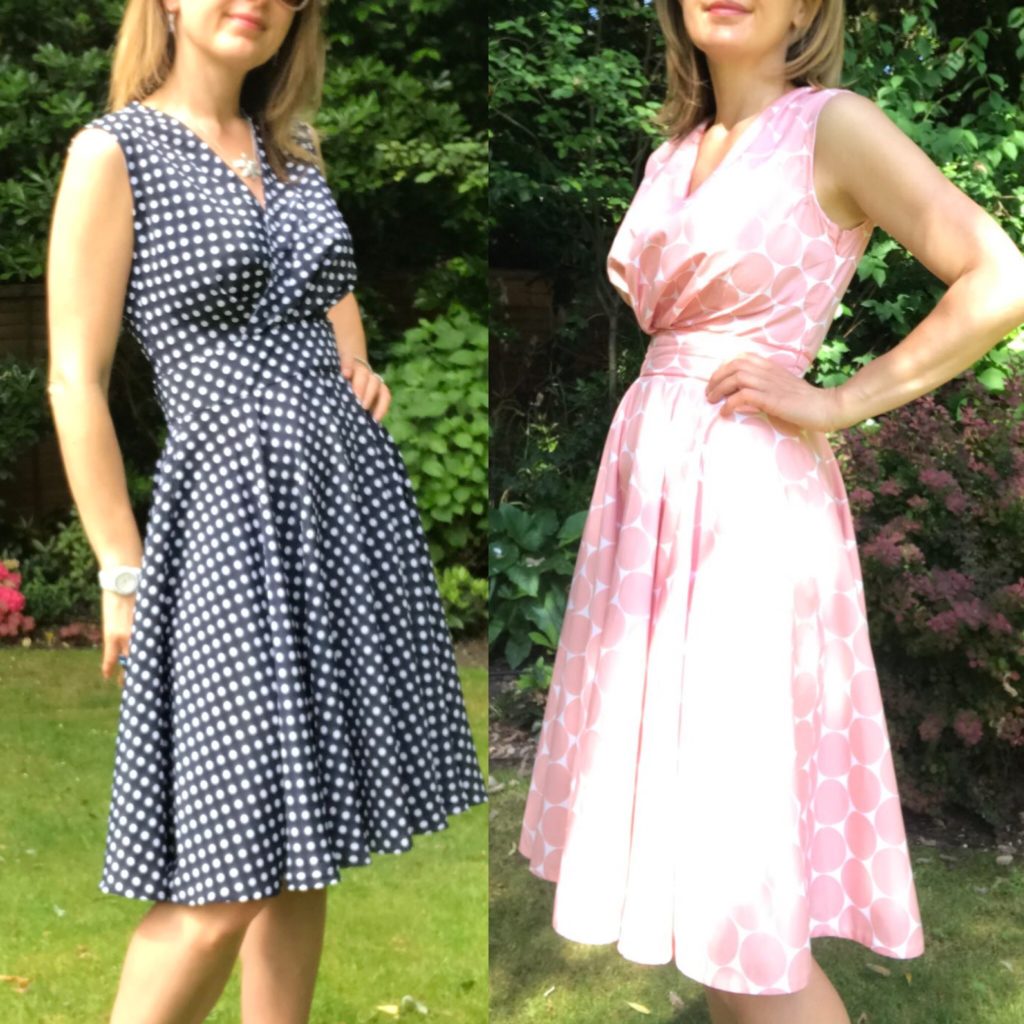
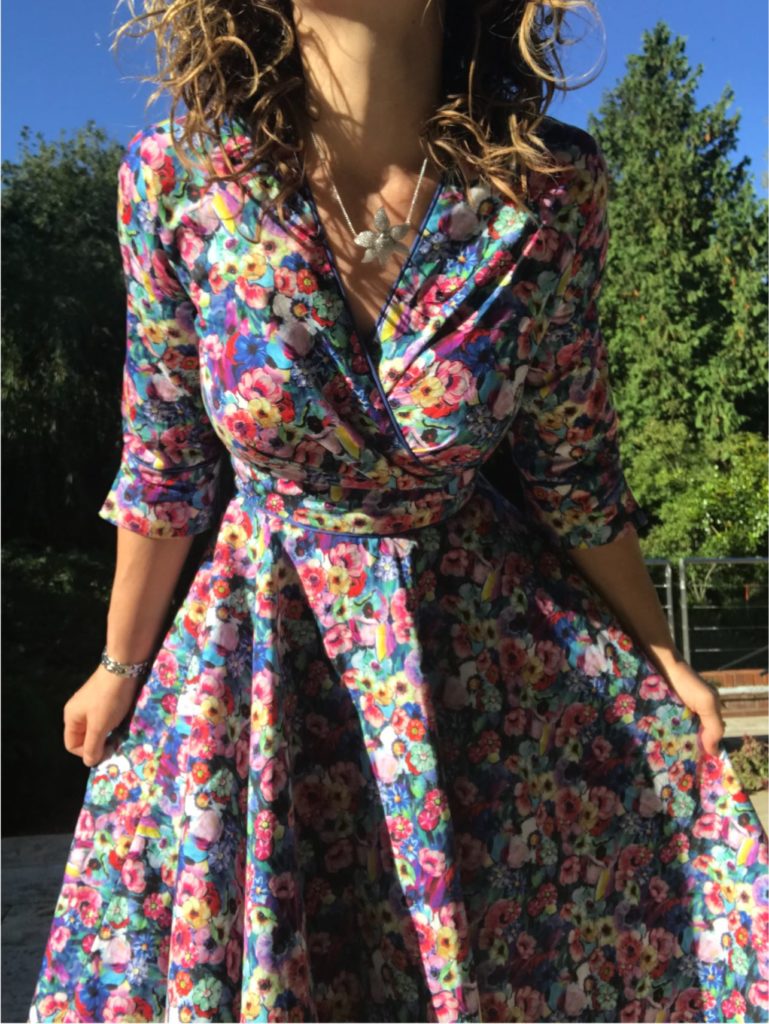
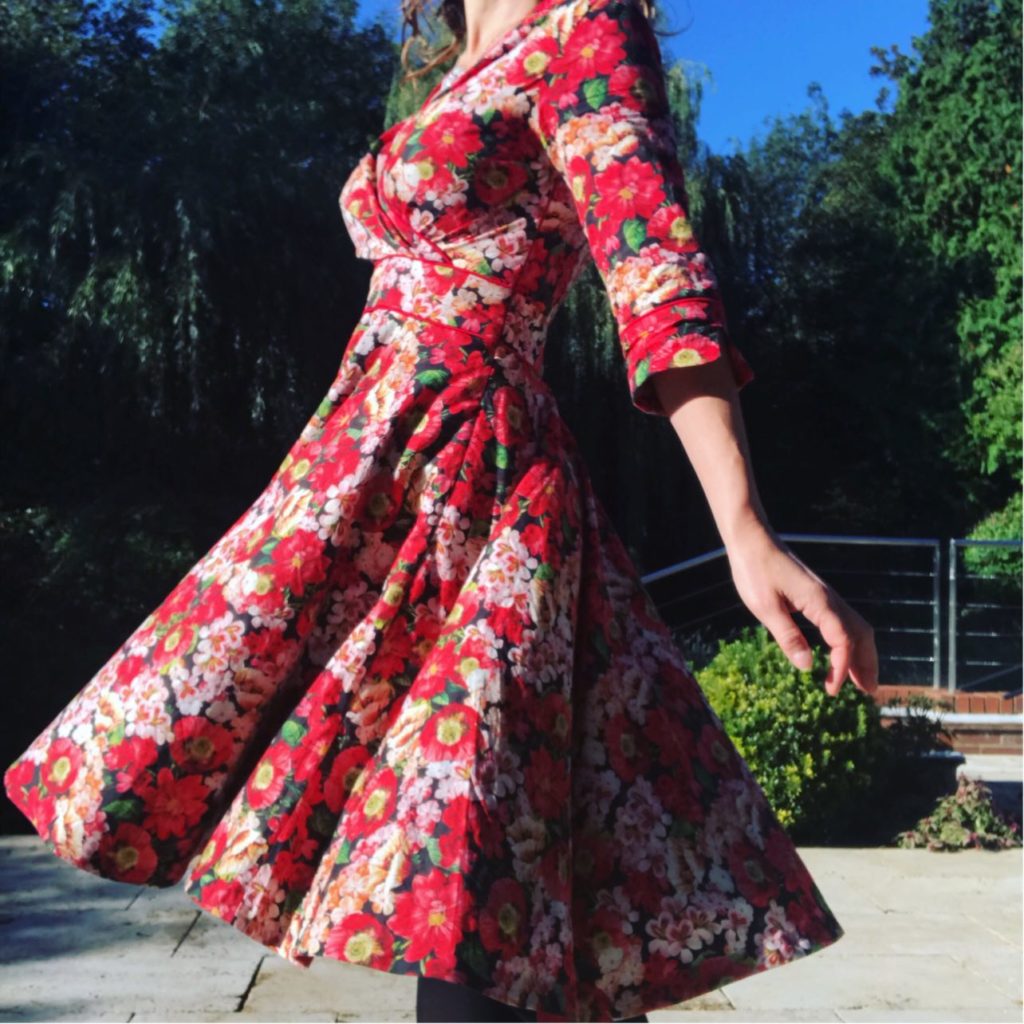
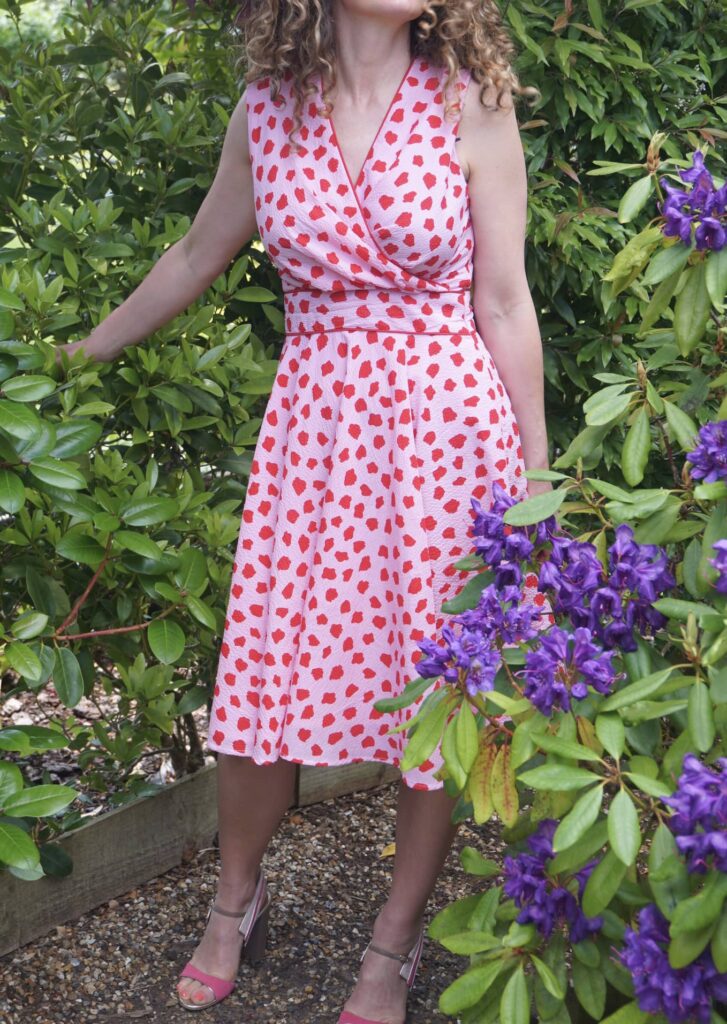
Late summer dress: a pink and red M7081
After a long break from the blog and before summer leaves us for good, let me show you the last of my summer makes: another version of my favorite pattern ever, M7081, in a vibrant red and pink fabric.
M7081: my absolute favourite pattern ever
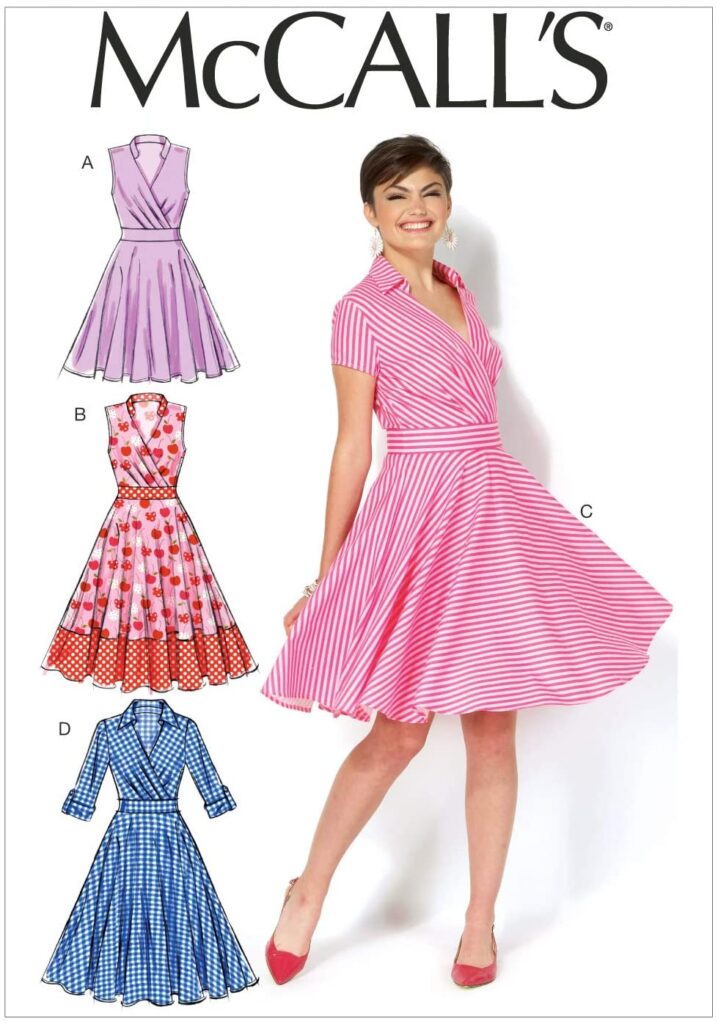
I think M7081 is now officially my most ever sewn pattern, as I have actually lost count of how many times I’ve sewn it in the past. In case you forgot, here is a quick view of the enveloppe.
I now own sleeveless summer versions…
and winter versions – even one in Dupion silk!

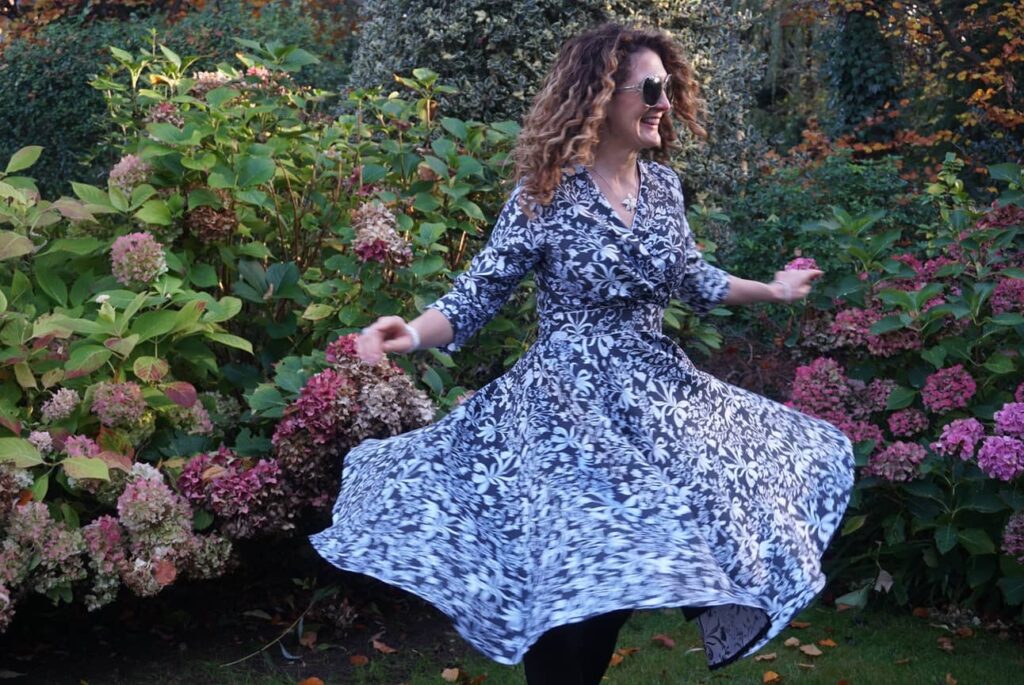

I just adore the shape of this dress, which I find utterly flattering for my figure. I love its mock-wrap pleated bodice, fitted waist belt and circle skirt. The collar shown on the envelope is the only element I dislike. But it is so easy to omit that it does not bother me at all!
My usual modifications to the pattern
I have already written articles about this pattern here, here and here and nothing has changed really… So just as a quick summary:
- The fit is perfect: I cut my usual McCalls’/ Vogue size 10 and added 1cm of extra ease at the waist, as I was cutting my fabric against the grain to get the full circle skirt. Beware that for these pattern you need to follow the finished garment measurements table to determine your size though, otherwise the end garment will be one or two sizes too big!
- The instructions are extremely clear, which is usually the case for McCall’s patterns.
- Overall the dress is quite easy to put together, there is no major technical hurdle except for the invisible zip.
I made my usual changes to the initial pattern. They consist in:
- Omitted the collar;
- Added red piping to the neckline and the belt;
- and lining the entire dress – which sorts out the issue of finishing neatly the neckline and the arm opening. I am now using the burrito method for lining sleeveless bodices and it has been the my great sewing discovery of the year! I strongly advice you have a look at the numerous YouTube videos out there, so helpful that I feel making a tutorial is pure duplication…
Vibrant colours and stunning fabric
I made this dress in pure cotton seersucker fabric from SewMeSunshine (out of stock now sadly), in a vibrant pink and red color palette. I do really like this color combination but I had never found a pattern that suited me before – this one is perfect.
If like me you are into seersucker for the summer, do make sure it is 100% cotton though! Very often seersucker is offered in a poly-cotton mix and you obviously lose all the benefit of a breathing fabric. Obviously I completely forgot about that when I lined my entire dress with polyester lining fabric… Oh well… Thankfully the British weather is mild enough to sort out this problem!
A quiet summer but plenty of projects for Autumn
My summer has been very quiet sewing-wise, with only two dresses sewn after this one – which I did not even photograph and left on my French cupboards, shame on me!
But I am now very keen to go back to my sewing machine and I have plenty of ideas for Autumn; and plenty of fabric to make them happen, of course! More on this very soon.