Although I have not been very active on the blog lately, my Autumn sewing has gone full steam. To my own surprise, I have very diligently followed my Autumn sewing plans and added quite a few new pieces to my wardrobe. Blogging about them is long overdue so let’s start with my most technical piece: my Princess Coat by Charms Patterns:
Inspiration for my Princess Coat
If you’ve been reading this blog for a while, you are probably well aware my style is all about fit-a-flare. This is very much in line with the 1950’s New Look epitomised by Christian Dior.
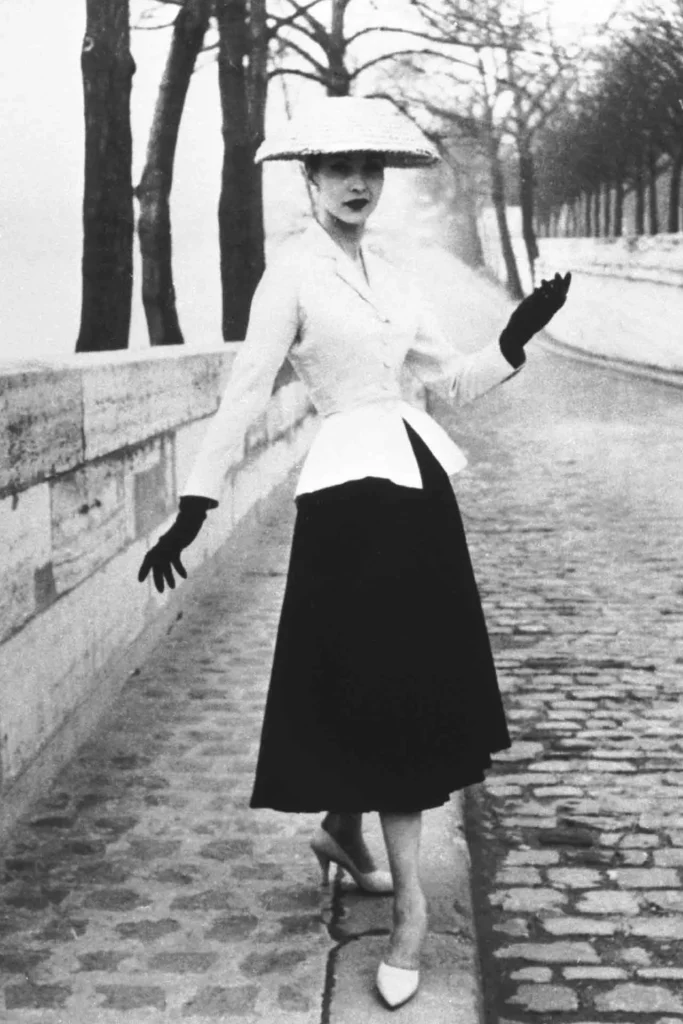
This beauty is the Bar jacket, created in 1947 but which I only discovered at the V&A “Christian Dior: Designer of Dreams” exhibition in 2019. This exhibition was an immense source of sewing inspiration but this jacket really stood out as something that would be extremely useful in my wardrobe.
Then Gertie published her Princess Coat pattern, with its amazing bright pink peplum version:
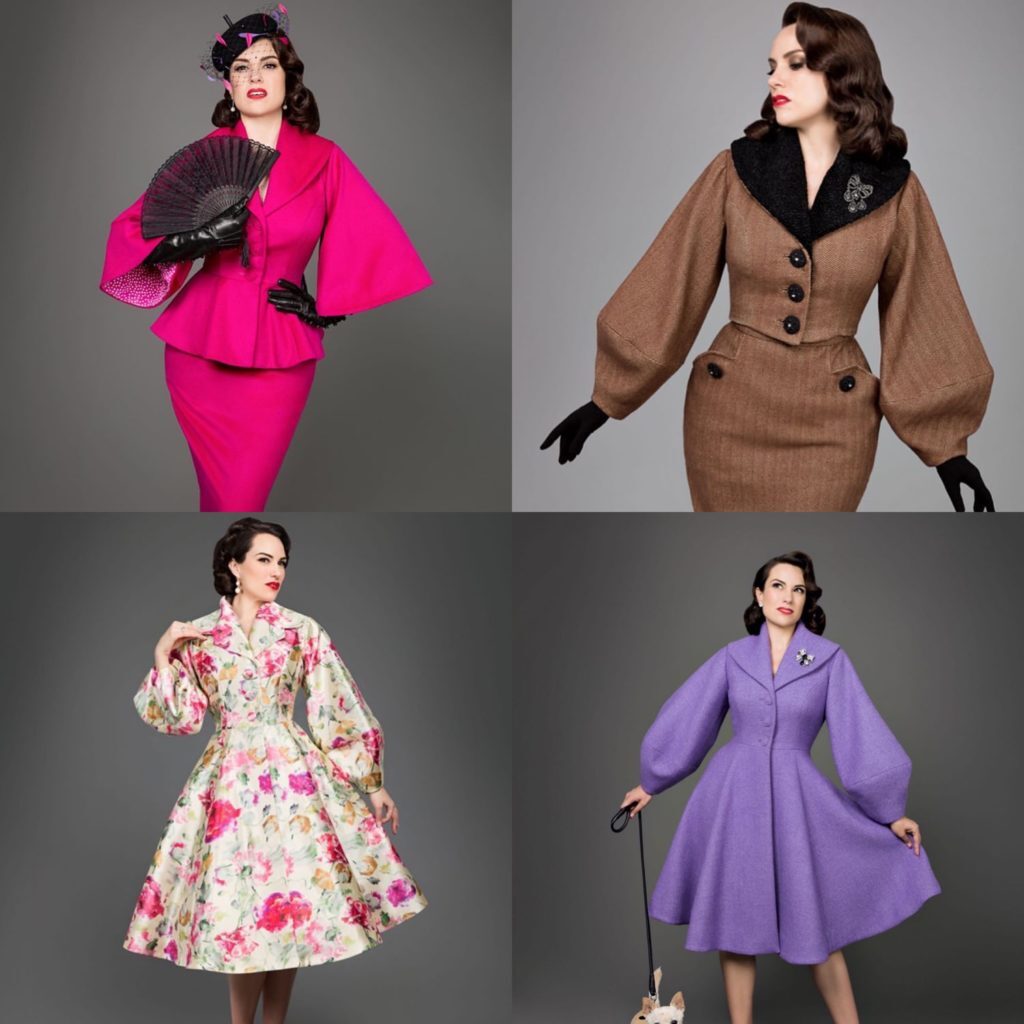
And then Serena made this gorgeous jacket for the semi-final of the 2021 Great Sewing Bee a few months ago:

The stars were aligned, I had to make this jacket!!
Preparation for sewing the Princess Coat
This is quite a technical piece to sew so if you want to enjoy the process, I would strongly advise you take plenty of time for preparation – it took me months to get going!
STEP 1: Getting hold of the pattern
The Princess Coat patterns is readily available to buy on the Charm Pattern website; so pondering about how to buy it may seem a bit silly.
However, I now absolutely refuse to print PDF patterns at home when they go over 12 pages – this one is close to 200 pages, plus a 76-page instruction booklet, beware!! On the other hand importing the pattern from the US seemed absurdly expensive.
In the end (and after literally months of pondering), I bought the PDF pattern, got the A0 pattern sheets (8 of them) printed by NetPrinter and printed the instruction booklet at home. That said, the paper version of the pattern is now available from minerva.com in the UK, so it is definitely the option I would have chosen if available then.
STEP 2: Reading the instruction booklet thoroughly
The instruction booklet for the Princess Coat is a gold mine and I would strongly recommend you read it in full as early in the process as possible.
STEP 3: Choose the version you want to make
The Princess Coat is offered:
- in three lengths: cropped, peplum, below the know
- with three sleeve options: lantern, bell or tailored
- with two collar options: with or without a notch
so it is essential that you make up your mind on which combination you fancy.
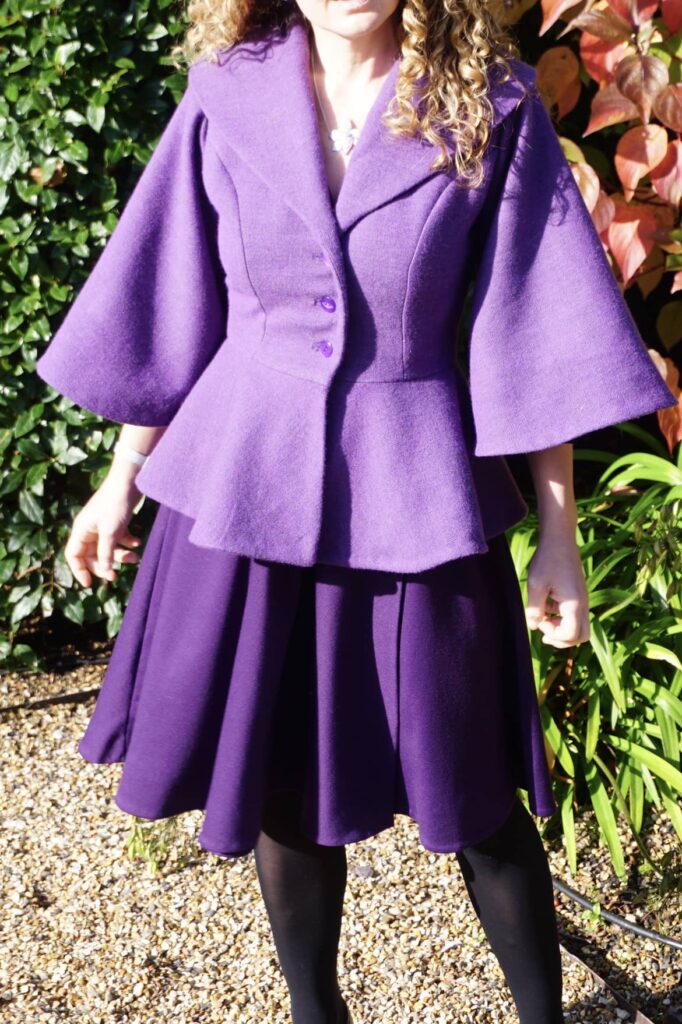
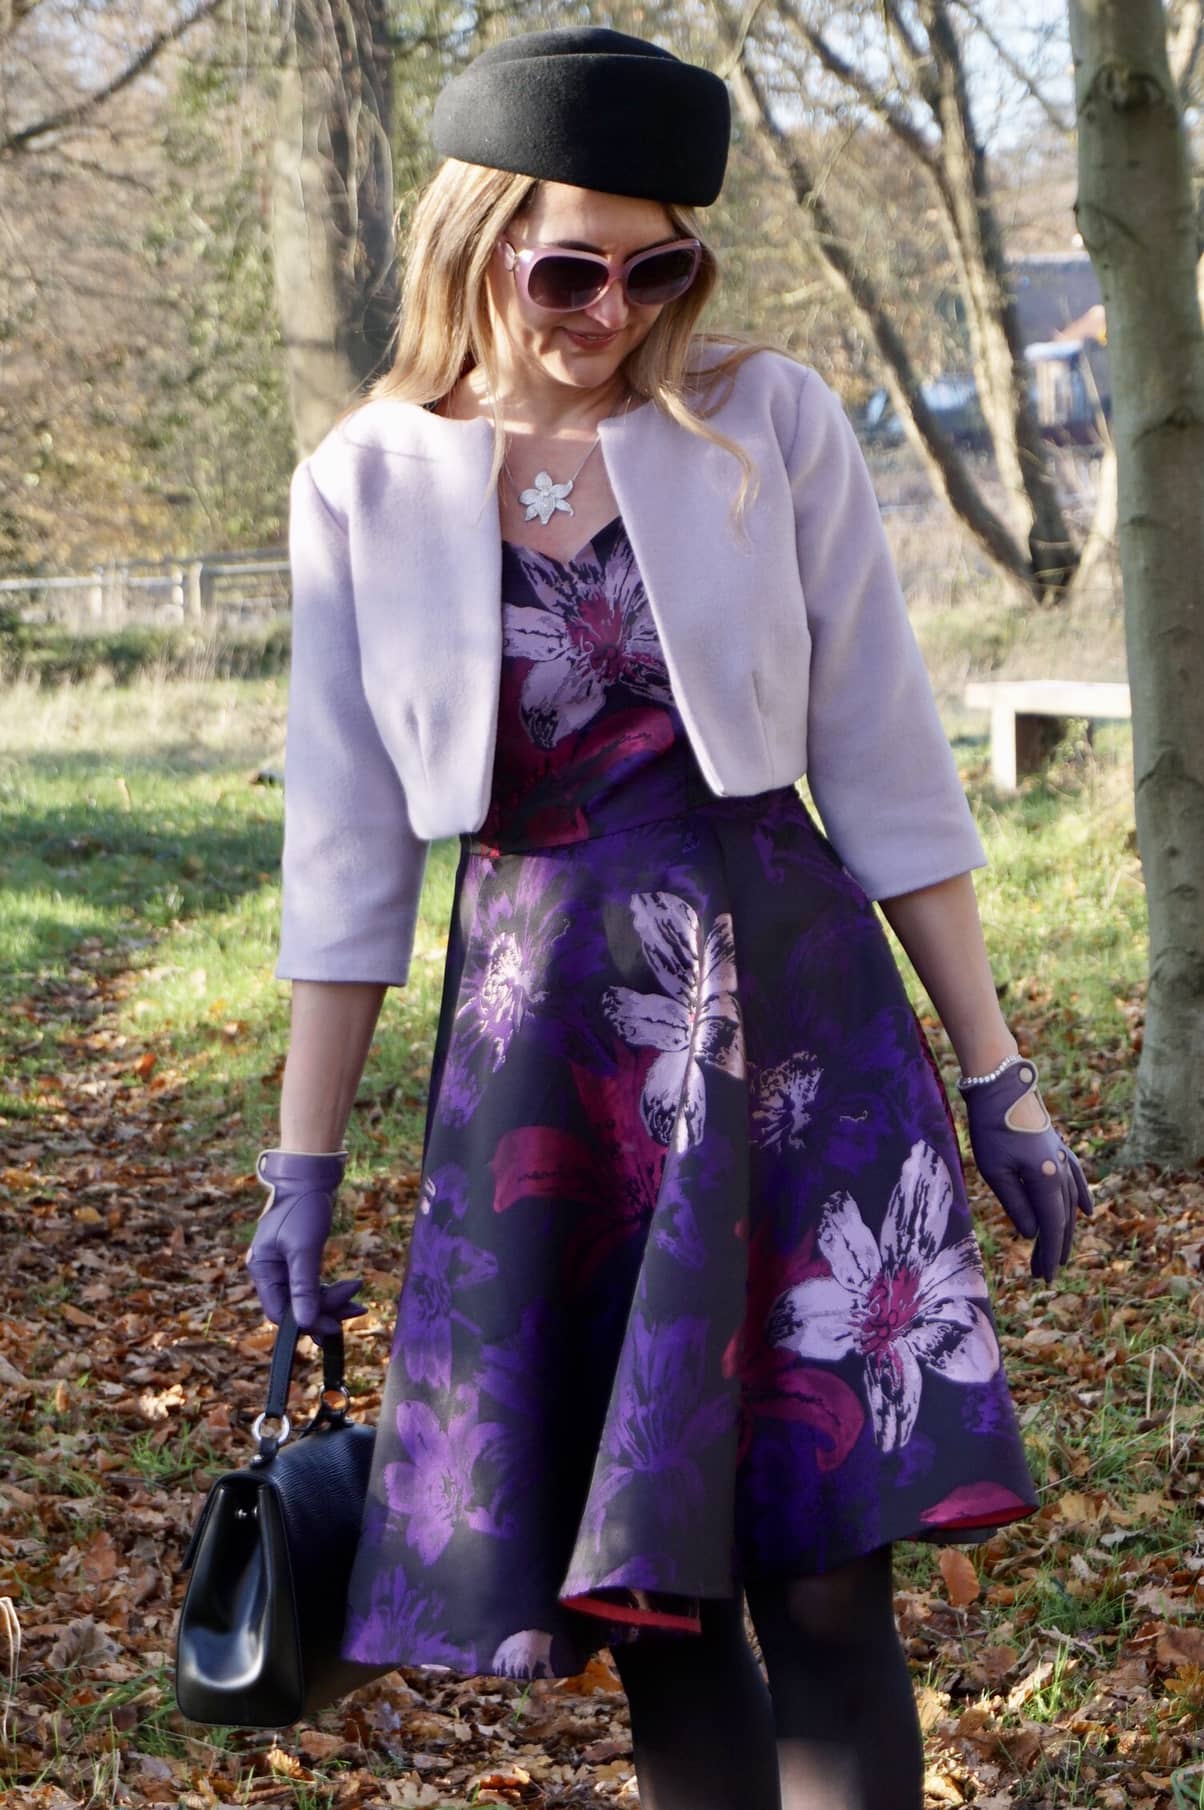
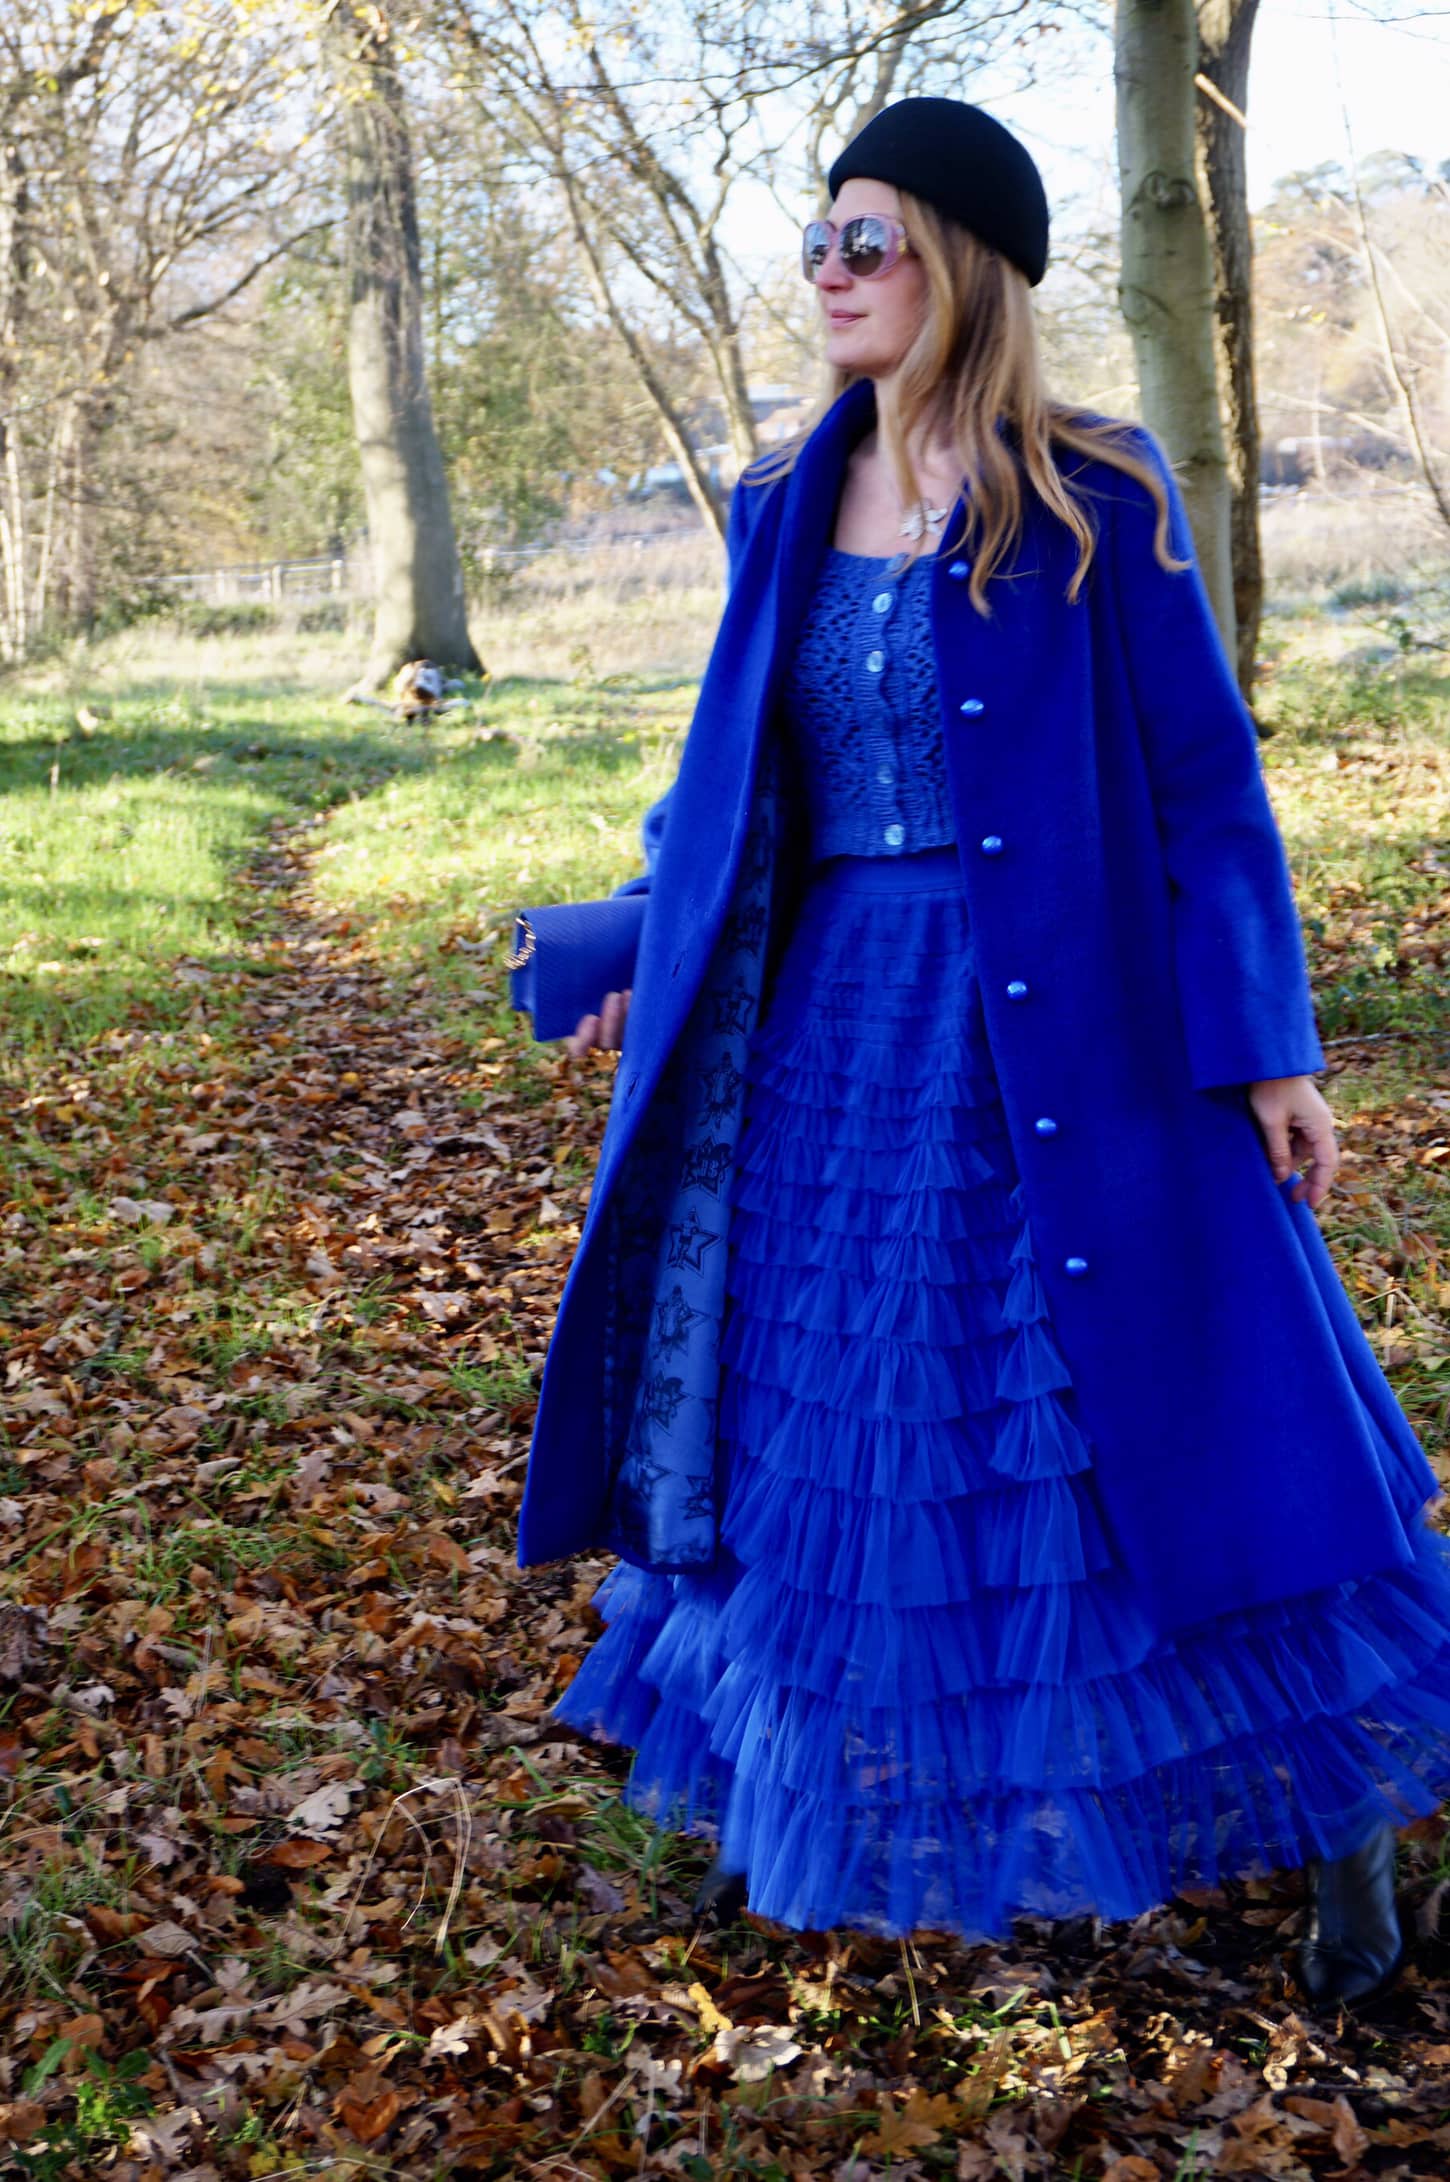
My Princess Coat is peplum length with bell sleeves, exactly like the pink version worn by Gertie. My goal was to get a medium-weight jacket that I can wear with my fit-and-flare dresses in Autumn – with sufficient ease to put a wool cardigan underneath.
STEP 4: Shopping for notions and fabric
You will need quite a few coat-specific notions, such as Weft interfacing, muslin, silk organza and horsehair braid. You can easily source them on E-Bay or Etsy but I would recommend you gather all of them before starting your coat. Nothing is more frustrating than having to stop the sewing process just because you’re missing a tiny bit of organza.
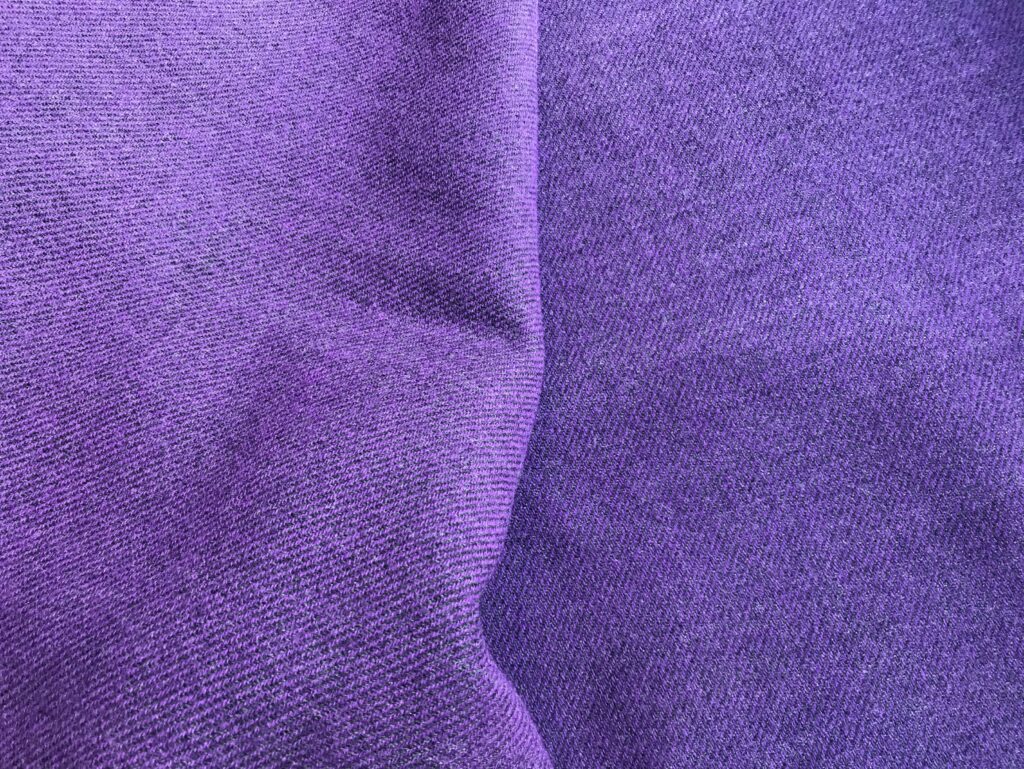
As for fabric, I am a usually a huge fan of online shopping; but it did not work at all here. I wanted a purple pure wool fabric, of medium weight and with good drape; and I ordered many samples to get this Holy Grail. The samples gave me a good idea of colour and weight but they were too small to assess drape. In the end, I spend a morning on Goldhawk Road (oh my God, oh my God, why did not I go there before!!!) and found this amazing wool tweed at Misan Fabrics, along with the perfect lining. The picture on the left is quite true to the colour.
While on the subject of fabric buying, beware that the recommended yardage is given for size ranges rather than for each size, so if you are at the bottom of the scale you will end-up with far too much. Given wool is not cheap and this coat consumes A LOT of fabric, I wish I had laid out my pattern pieces before buying – I will definitely do that next time.
STEP 5: Do make a muslin!
The instruction booklet is adamant that a muslin is a must – and so am I! This is a very fitted piece of garment made with quite expensive material. Making a very basic muslin will take you no more than 30 minutes, a completely worthwhile investment of your time to avoid an unwearable garment.
I actually made two muslins, as the first one was so tight under the arms that I could barely move (this is a problem I very often have, nothing wrong with the pattern here). I also managed to remove a bit of ease at the waist, making the line more fitted without compromising on comfort.
Princess Coat pattern review: positives, negatives and changes I made
I absolutely adored sewing this coat. I was terrified to start cutting into my precious wool and get lost in a very complex process but… it actually all went really smoothly!
They are many things I like about this pattern:
- The fit is terrific. Based on my measurements (I am a FR36/ UK8/ US2 and an E cup) , I chose a size 4 and a B/C cup. I reduced the waist at 1cm on each side and got the snug-but-not-uncomfortable look I like. The pattern has bust cup options, which I always see as a major positive.
- The silhouette is beautiful. I had been looking for this style of coat for a while and I am happy I waited. This is the first one with such a well defined fit-and-flare silhouette. Beautiful from the front and even more so from the back.
- The instructions are so clear that if you follow them step by step, the sewing process is truly enjoyable.
- This coat is the perfect opportunity to discover many tailoring techniques, which I was personally not familiar with.
As for negatives, they are really minor points:
- As I mentioned earlier, I wish the required fabric yardage was given for each size rather than for two size ranges (2-10 and 12-20), as it implies quite a lot of fabric wasted if you are the bottom of the size range (I bought 3.40m and ended-up using only 2.5).
- Attaching the lining to the peplum coat involves quite a lot of hand-sewing, completely unnecessary and far less neat than machine sewing in my view. Many moons ago, I saw the Ernest coat by Republique du Chiffon and followed this amazing tutorial for attaching the lining (scroll down to the lining section). The instructions are in French but the pictures are quite self-explanatory. I have never encountered any better technique since.
- The bound buttonholes are done at the beginning for the front fabric; but at a later stage for the facing, when facing and coat are attached together, which makes the process quite fiddly. Next time I will do both at the beginning.
I made very few changes to the initial pattern:
- I reduced the waist by 1 cm on each side, to make the coat more fitted.
- I increased the underarm opening by (a whopping) 2cm, because no pattern ever seems to come with enough room for me in this area.
- I cut my centre back fabric piece on the fold, as I really don’t see the point of having two pieces of fabric instead of one here.
- For the peplum, I used the facing pattern piece for both facing and outside, as the facing is just one pattern piece while the outside fabric is 6 I think – why??
- I did not fully follow the instructions for attaching the lining to the coat.
Conclusion: definitely ready for another one!
As you have probably guessed, I am absolutely delighted with this coat. I really enjoyed the challenge of tackling slightly more technical sewing techniques; and I am over the moon with the result. Now I’d love a long version with lantern sleeves, but wait a few months for me to choose the fabric…
Crazy Idea Fairy – how do you think this pattern would work with a mid weight water repellant coating? I’m thinking of a rain coat that I can use to show driving horses in when the weather turns to garbage. This coat would be perfect style wise. I have some olive green rain coat fabric on hand.
I think it has been done actually, with a hood – if you google hooded charm patterns princess coat you will find the beautiful red raincoat I am mentioning. The reason for the hood with raincoat fabric is probably because the fabric does not drap enough for the initial coat. Good luck!!