How to Sew with Metallic Brocade
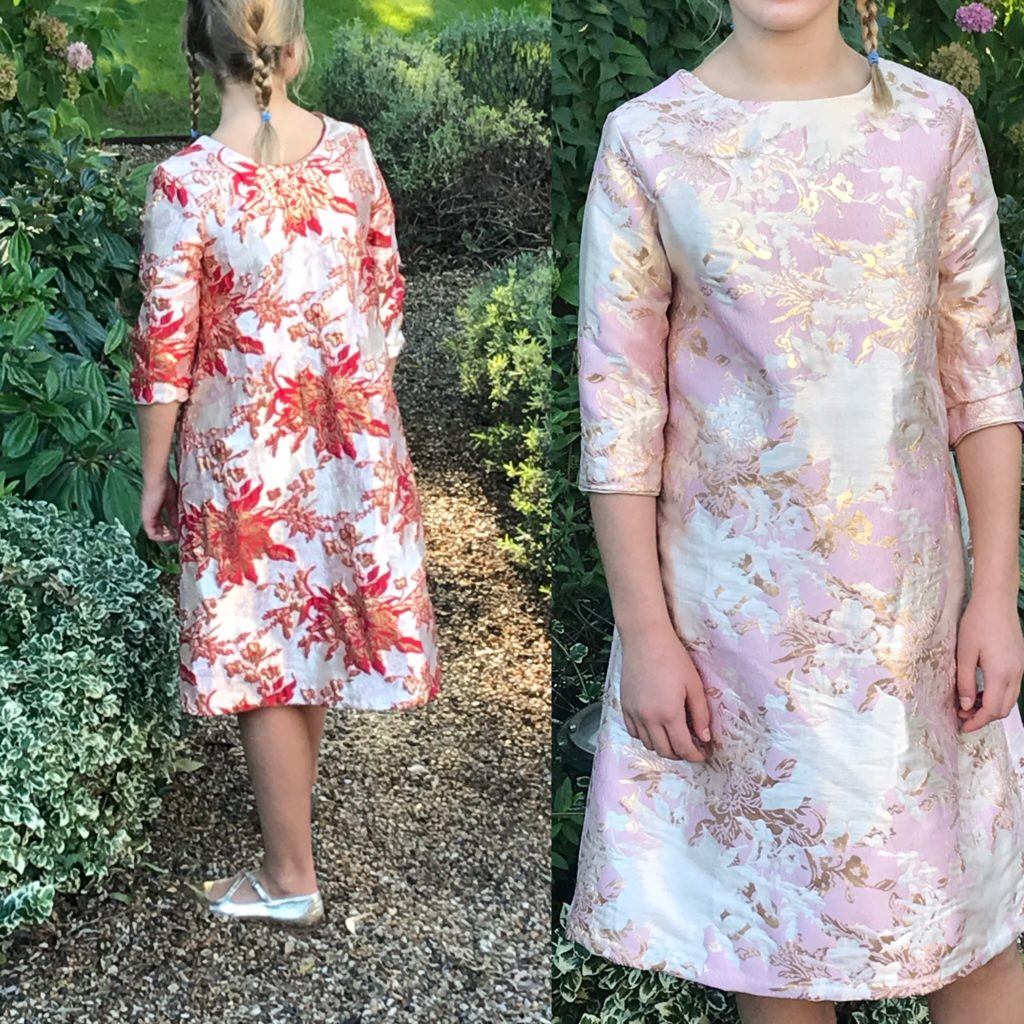
This winter has definitely been for me the season of glittery brocade! I’ve always loved this fabric but feared sewing it. After purchasing an excessive quantity at Bennytex, I had no choice but learn hands-on! The result: two party dresses for my daughter, two everyday dresses for me (not everyday for everyone though!), a top and skirt set, a mini and a midi skirt… And also many lessons on do and don’t of sewing metallic brocade, which I’m very keen to share!
I’ve read many times in sewing blogs and on Instagram that there are no rights or wrongs in sewing, just different ways to do things – which I’m not sure is totally true. Let’s say that when sewing with metallic brocade, there are many things I wish I had been told, and here they are.
I WISH I HAD BEEN TOLD NUMBER 1… BROCADE FRAYS LIKE THERE IS NO TOMORROW!! So as soon as you’ve cut all your piece do overlock them all, fully, even if they are to be fully lined – I suspect that if not overlocked they could fray by use, so personally I would not risk it. Also it will save you a lot of hoovering while sewing!
I WISH I HAD BEEN TOLD NUMBER 2…. METALLIC BROCADE IS EXTREMELY ITCHY and absolutely unbearable on bare skin. This has several implications.
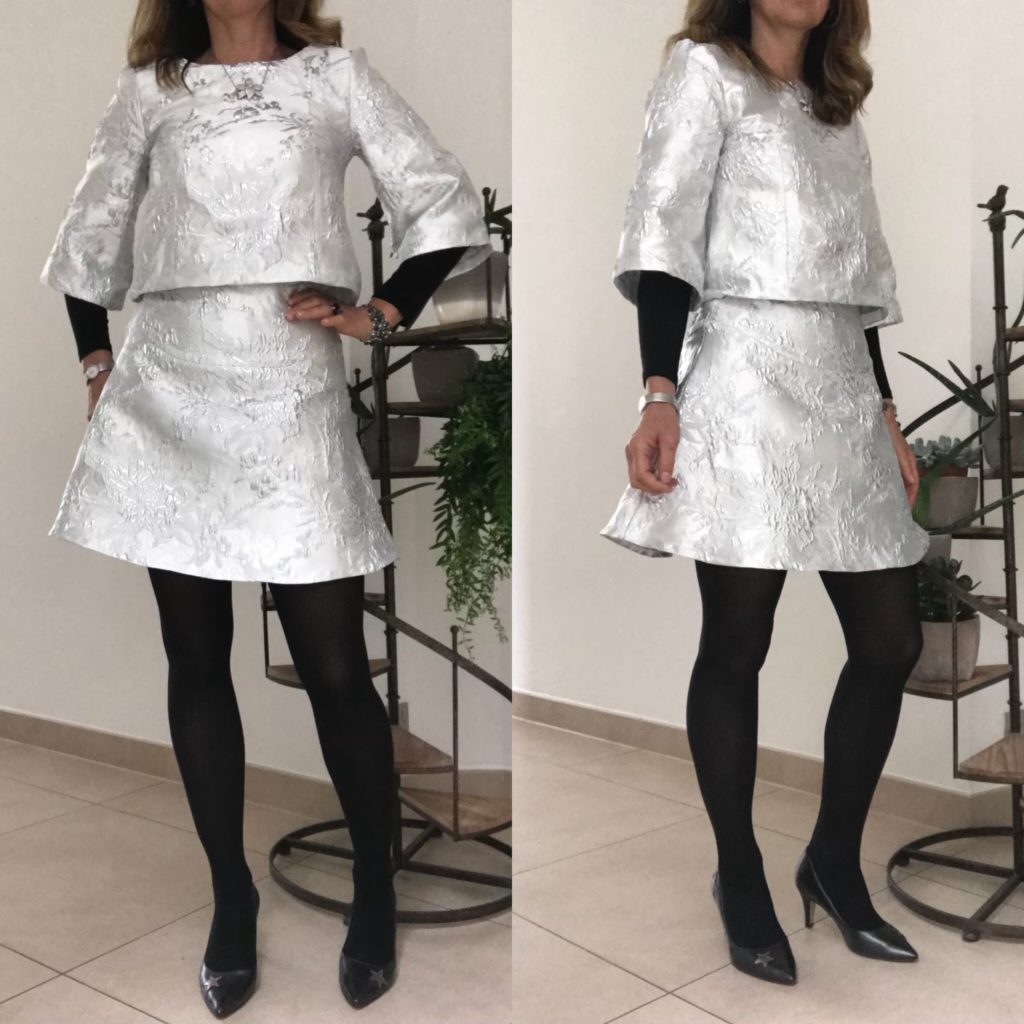
First, all metallic brocade projects need to be fully lined – partial or no lining just won’t do. I did not line the silver top/ skirt set and no matter how beautiful I find it, I just cannot wear it, even with ties and a long-sleeve turtleneck t-shirt underneath. In contrast, both my dresses are fully lined and I put them on bare skin with no problem.
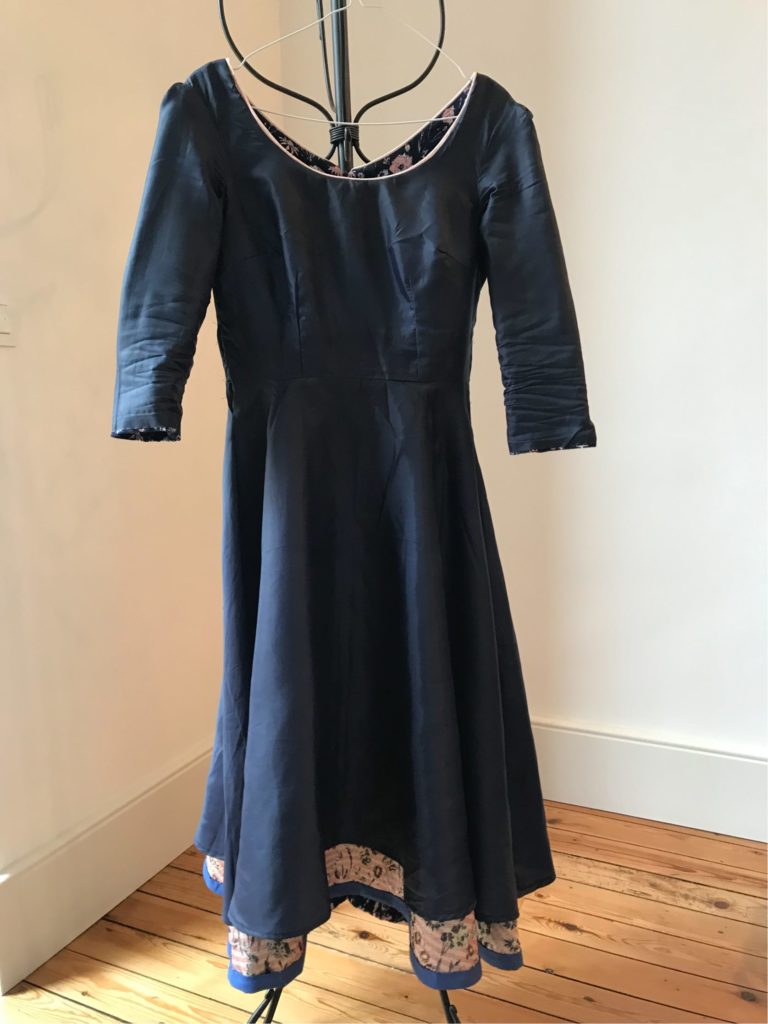
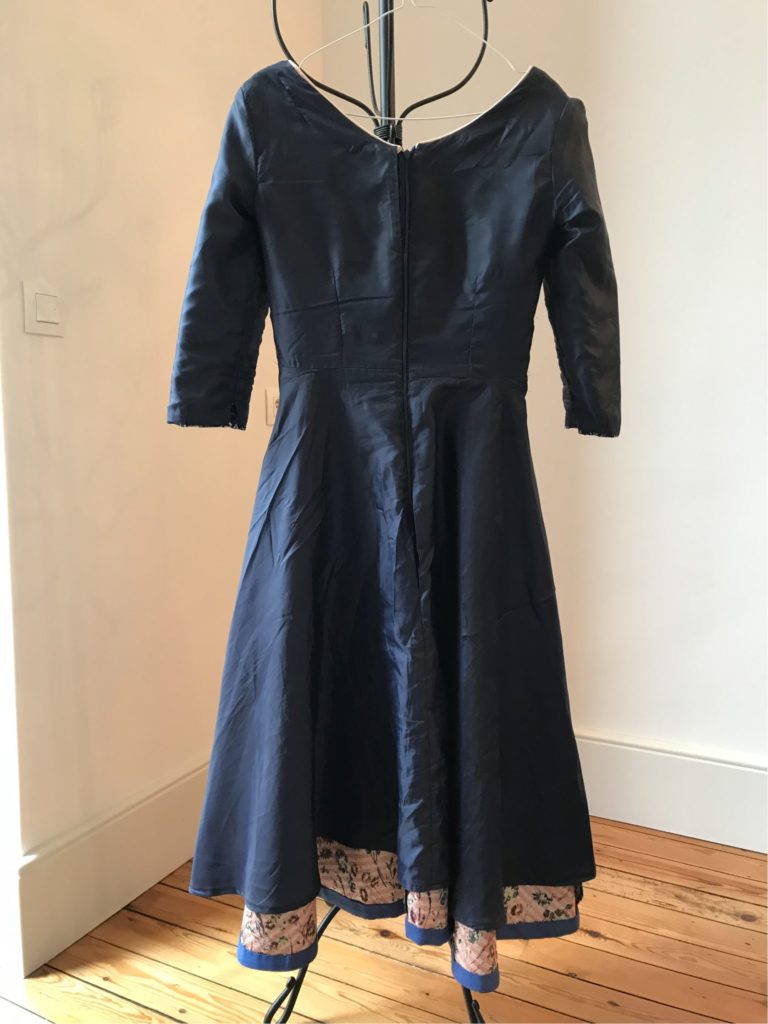
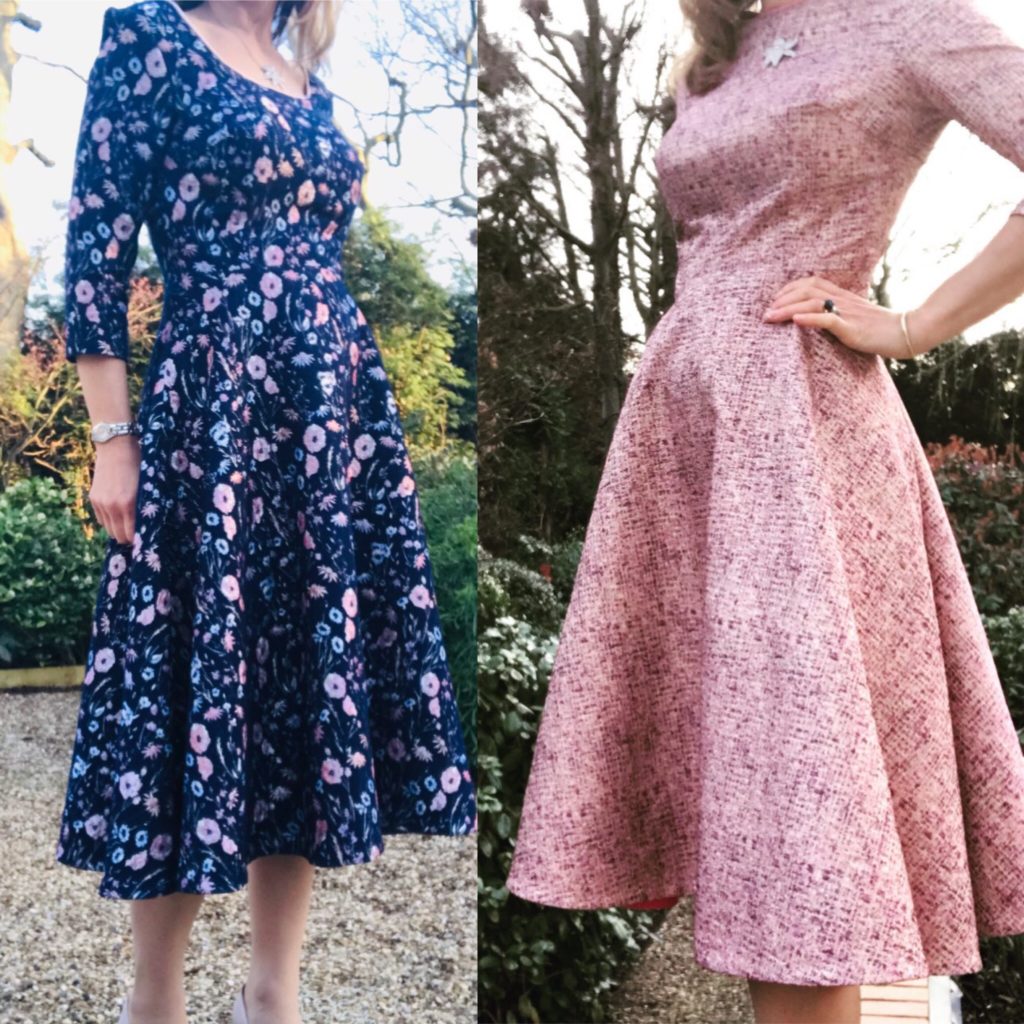
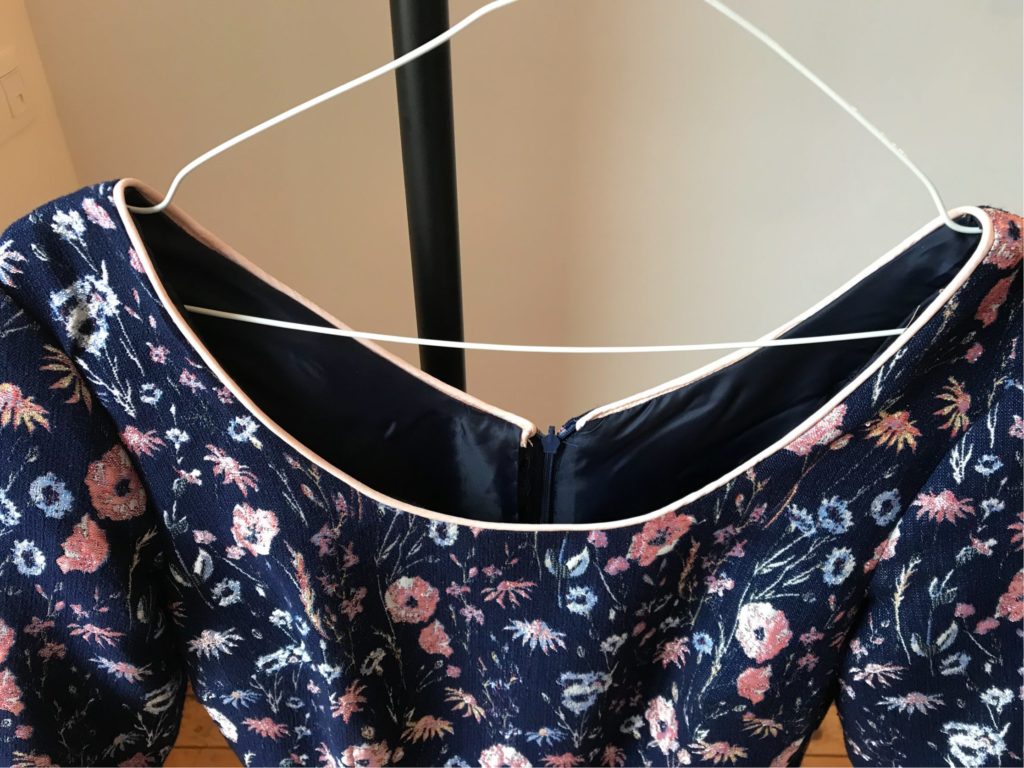
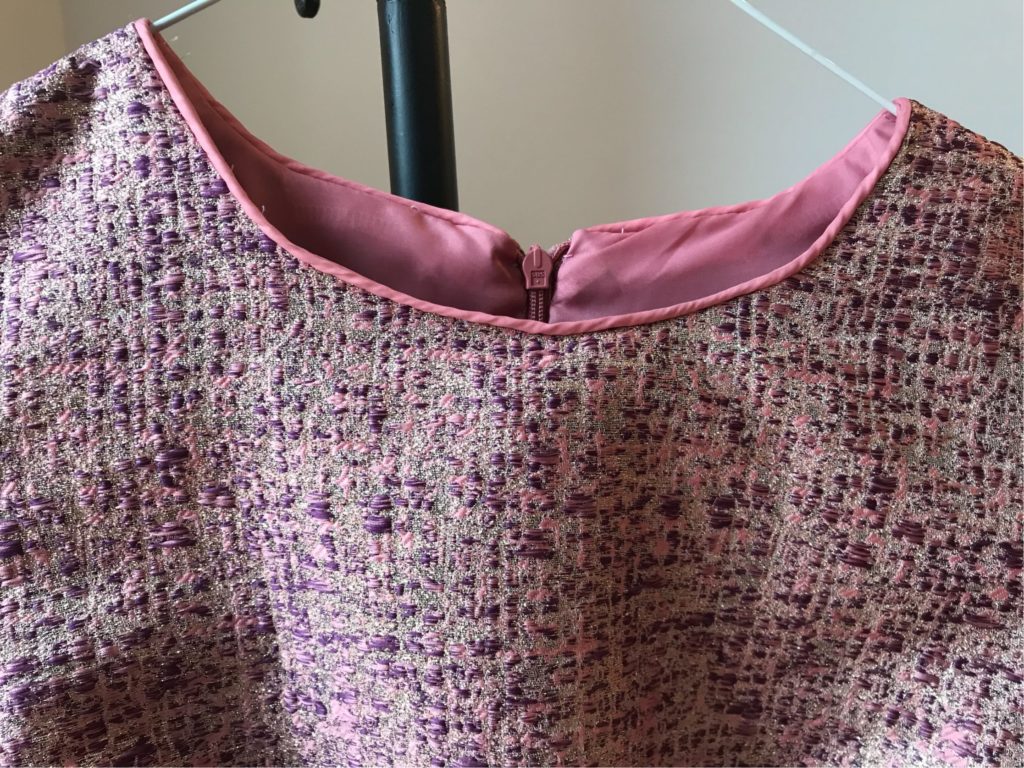
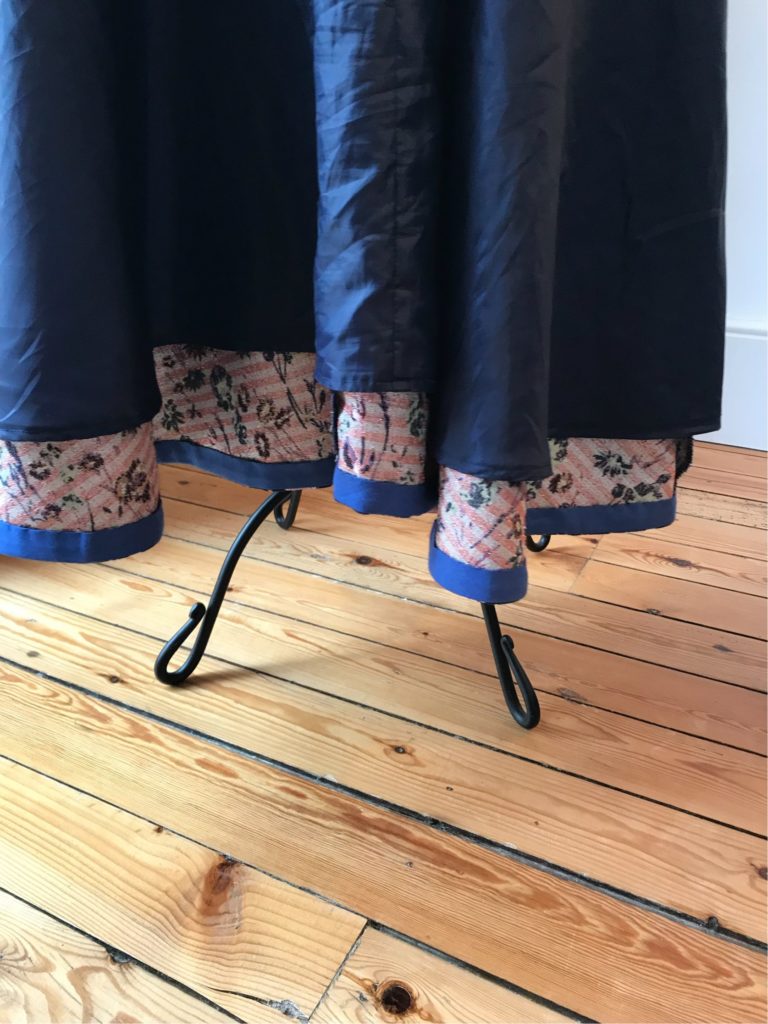
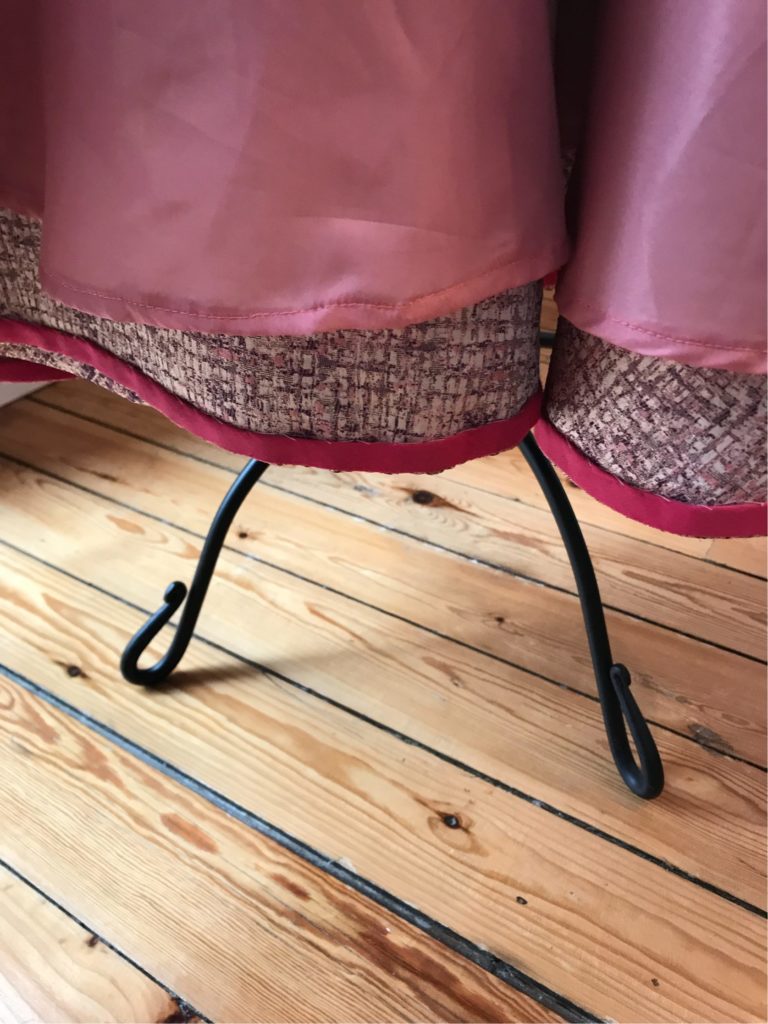
Second, you will need to cleverly think about how you finish your neckline, as this is definitely a very sensitive area. For both my dresses I inserted some piping, in a similar colour for the pink dress and in a contrasting one for the blue dress. To do this I sew the lining to the dress before attaching the lining by the neckline. You can also use a slighly overlapping bias, using the same method. Whatever your preference, you will need to use a different, skin-friendly fabric.
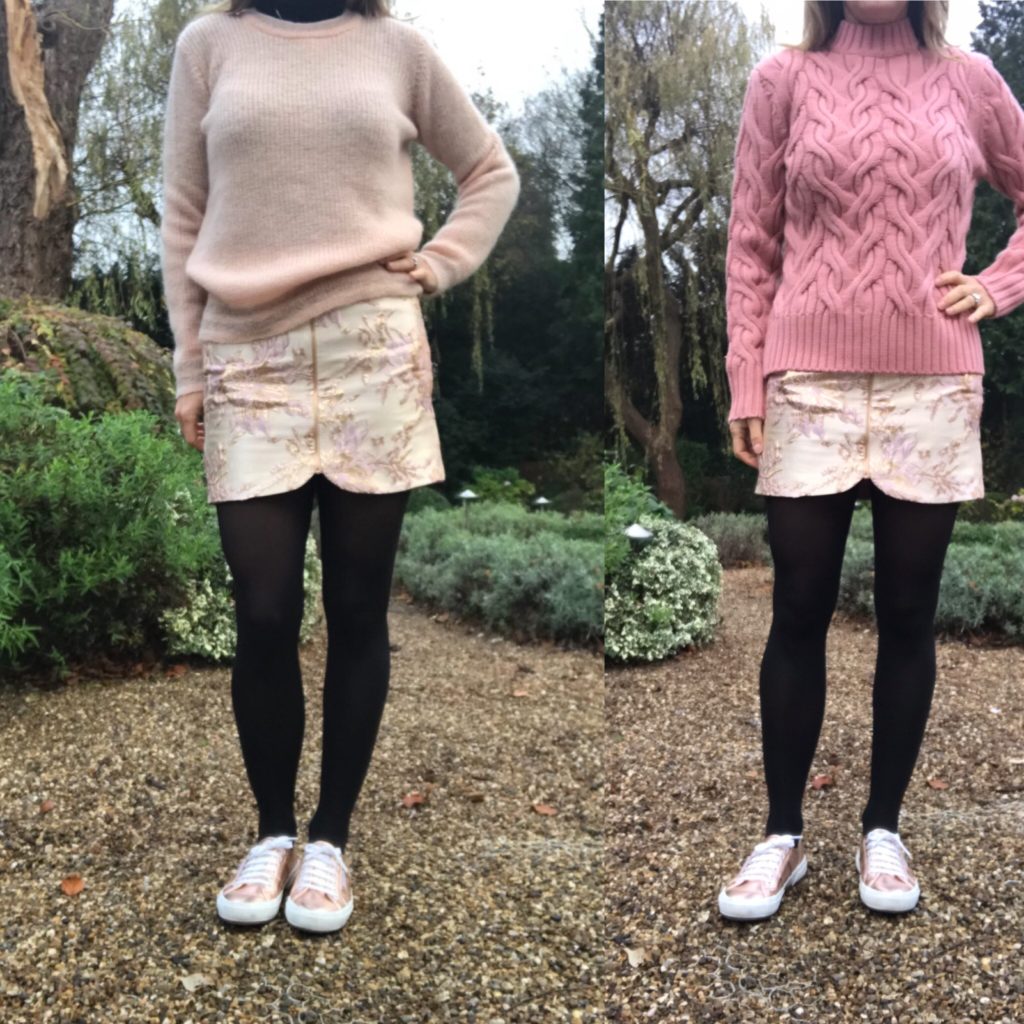
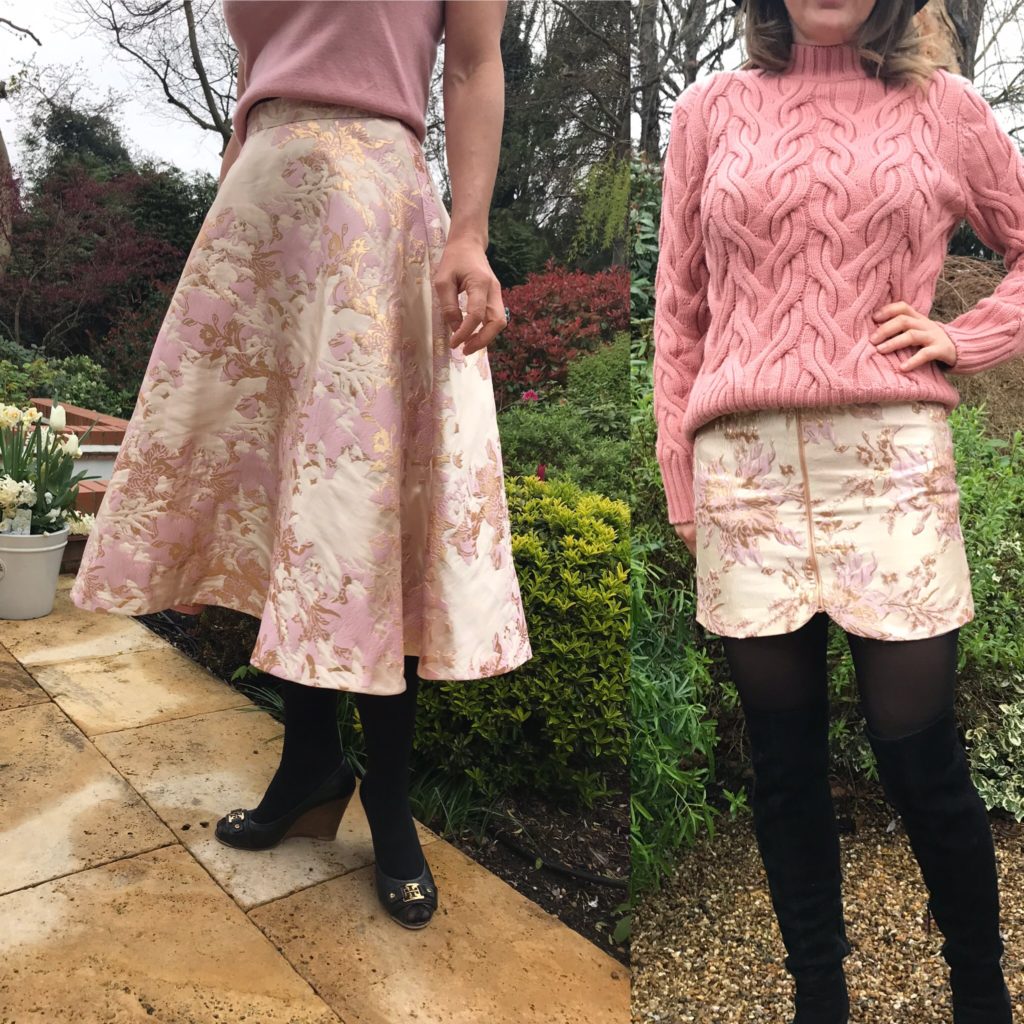
I WISH I HAD BEEN TOLD NUMBER 3… BROCADE IS VERY RIGID. It has no give whatsoever and does not really shape to the body. So I would not recommend using it for very tight fitted garments like my mini skirt, because it is just not comfortable to wear.
I would not recommend a very puffy gathered or pleated skirt either – I tried the later and it looked terrible. And I would strongly advise having plenty of seam allowance, to be able to enlarge at key areas – I did have to enlarge both my dresses (which are based on a fully tried, tested and perfectly fitted pattern) and my midi skirt at the waist.
I WISH I HAD BEEN TOLD NUMBER 4… BROCADE AND VISIBLE STITCHES JUST DO NOT WORK WELL TOGETHER. So get ready for a lot of hand-stitching, especially if you chose a circle skirt! Both brocade dresses and my brocade skirt are based on a (self-drafted) semi-circle skirt pattern; and I followed wonderful Emily Hallmann’s advice on how to line them: I sew with my machine a bias tape at the bottom, then fold it and and hand-stitched it inside. The hand-stitching takes absolute ages (90 minutes for a half-circle skirt, I counted!) but it is really worth the effort, the result is flawless. The bias also creates a nice rigid curve at the bottom, which is really pretty in my view.
I WISH I HAD BEEN TOLD NUMBER 5 … BROCADE OFTEN HAS A “WRINKLY SIDE”, WHICH IS QUITE DIFFICULT TO WORK WITH. So you have two options: either use the wrinkly side as your right side and be super careful that you don’t create unwanted folds when you sew – this will definitely require more time and attention than with “normal” fabric. Or work on the other side of the fabric, which is perfectly smooth – for illustration my mini skirt is wrinkly-side out, while my midi skirt is smooth side out.
I WISH I HAD BEEN TOLD NUMBER 6… BROCADE IS ABSOLUTELY BEAUTIFUL SO DO GO AHEAD AND USE IT!!! And I hope you will find this article useful to tackle this material.
The Glittery Coat
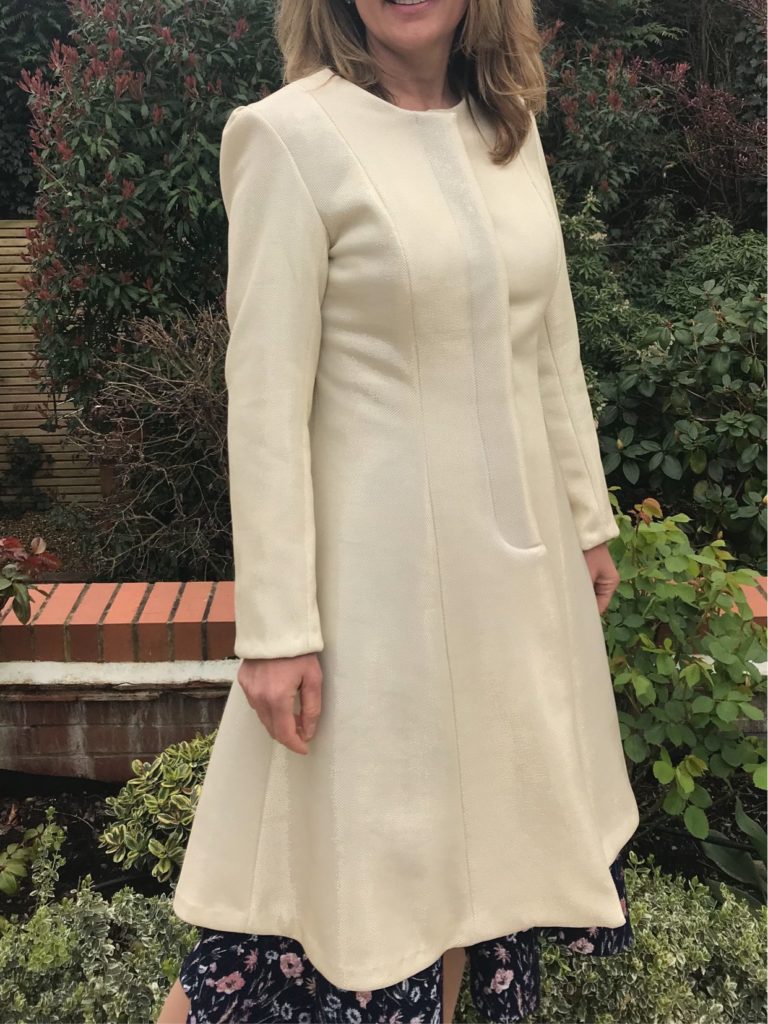
Having filled my Spring wardrobe with flared dresses (see here, here and here for my most recent projects), it was definitely time to sew a flared coat to match the lot! Here it is with B5966– although this one is more of a toile than the finished project!
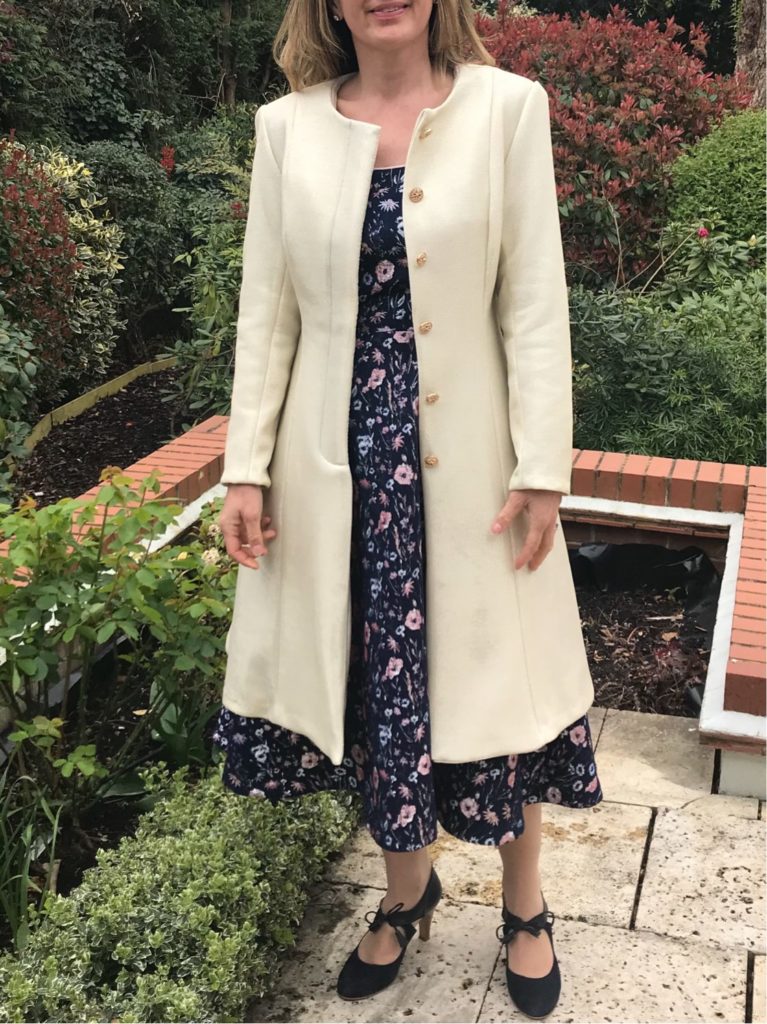
I am a complicated person, I know. Not only did the coat need to be flared, it also had to have the right cup option (D/E in my case) – I hate FBAs (Full Bust Alterations) with a passion and I did not want to end-up with a tight bust! So Butterick B5966 was pretty much my only option to be honest. As described on the enveloppe, it is fitted and flared with a fly button closing – that would do!
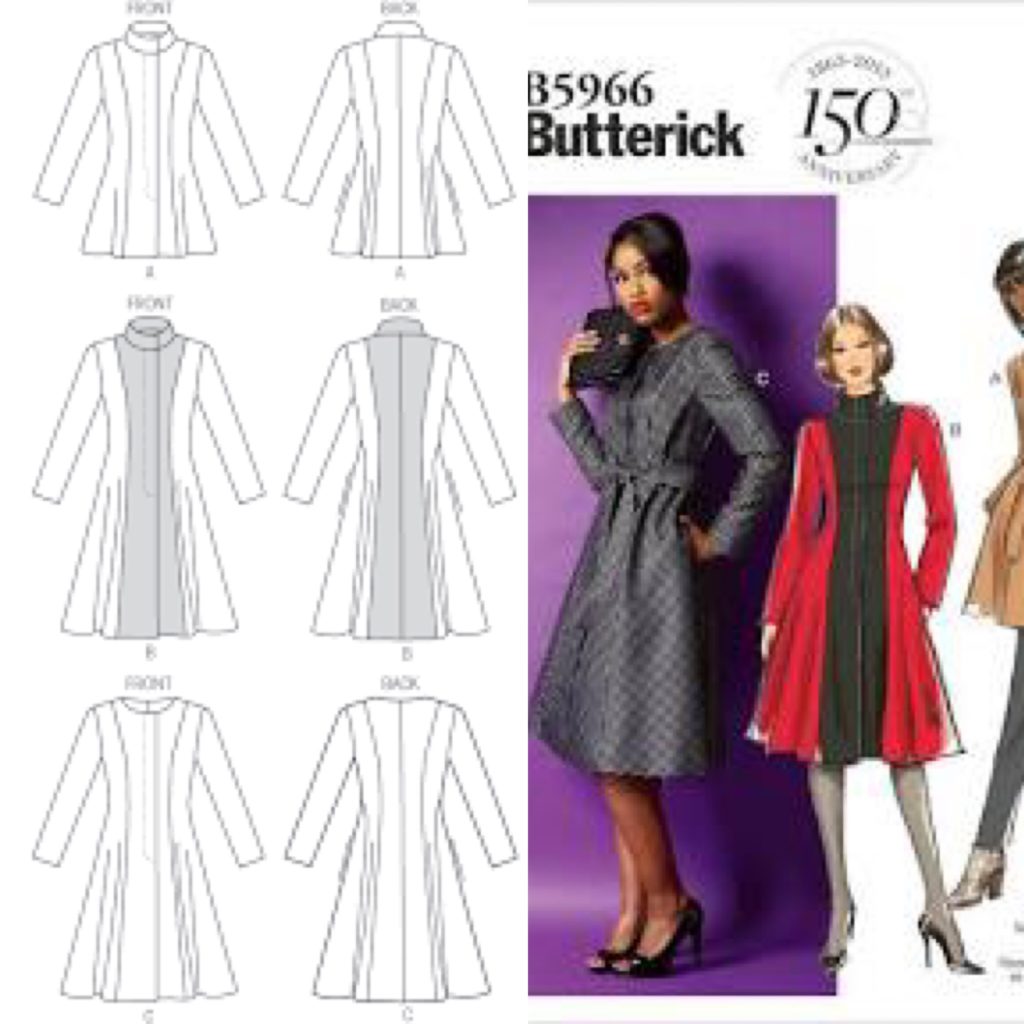
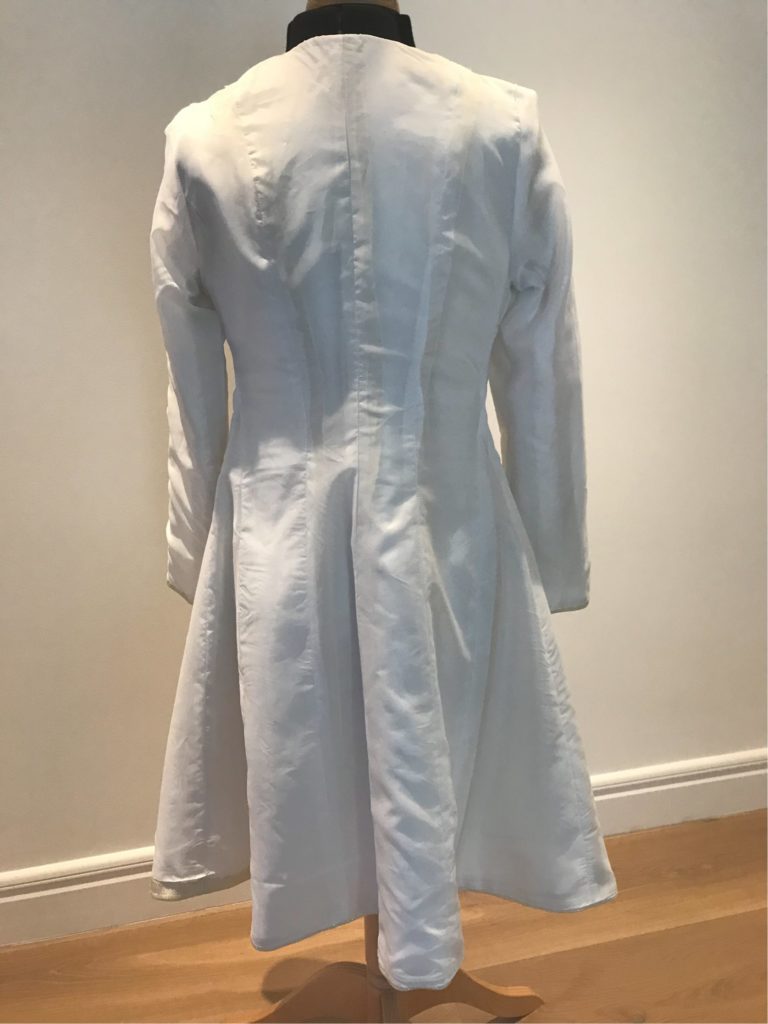
I chose view C, which is the collarless, 3/4 length option. I omitted the pockets, the shoulder pads and the belt (I actually made a belt, but given my fabric it was too chunky); but otherwise made no major alterations to the pattern.
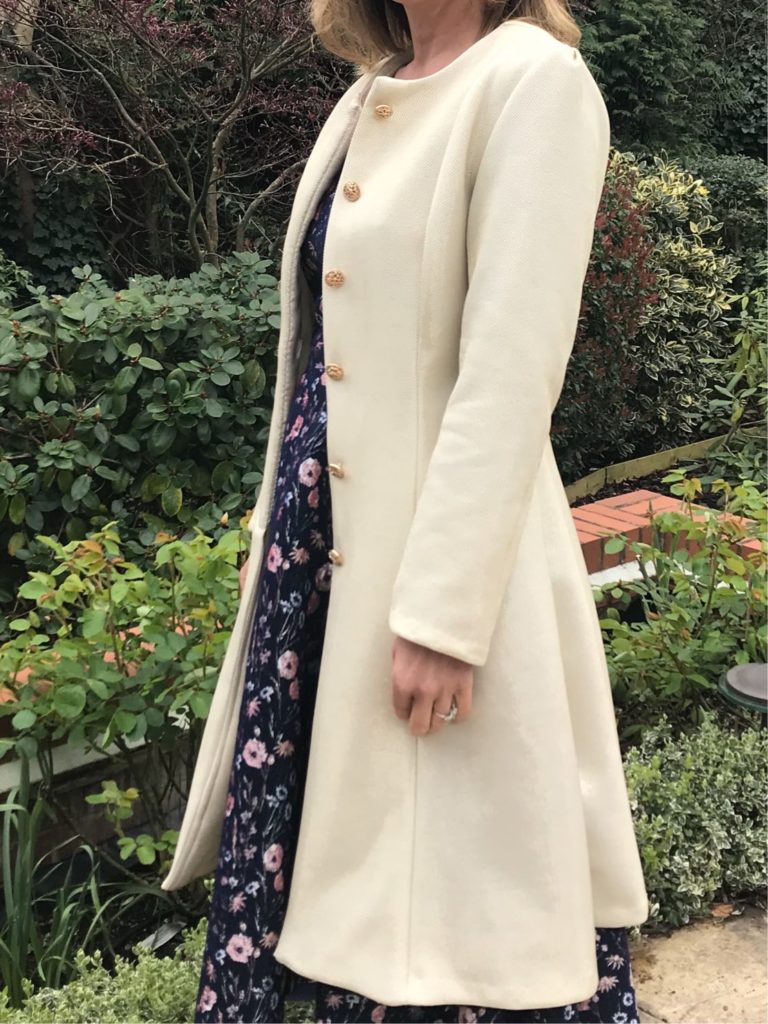
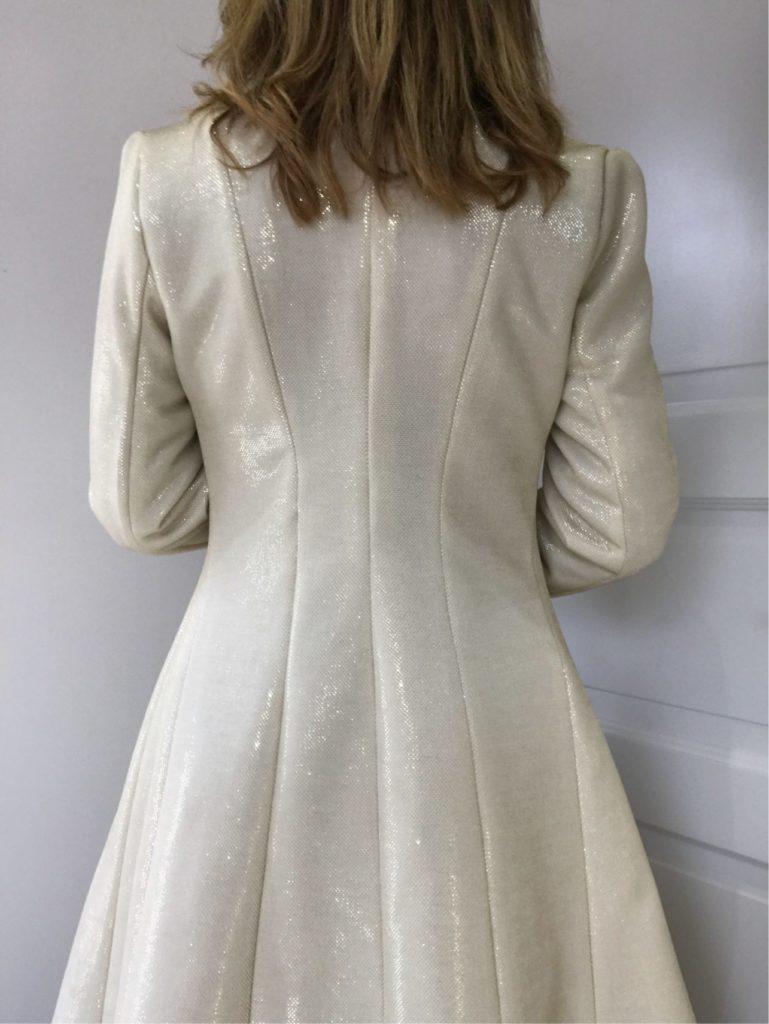
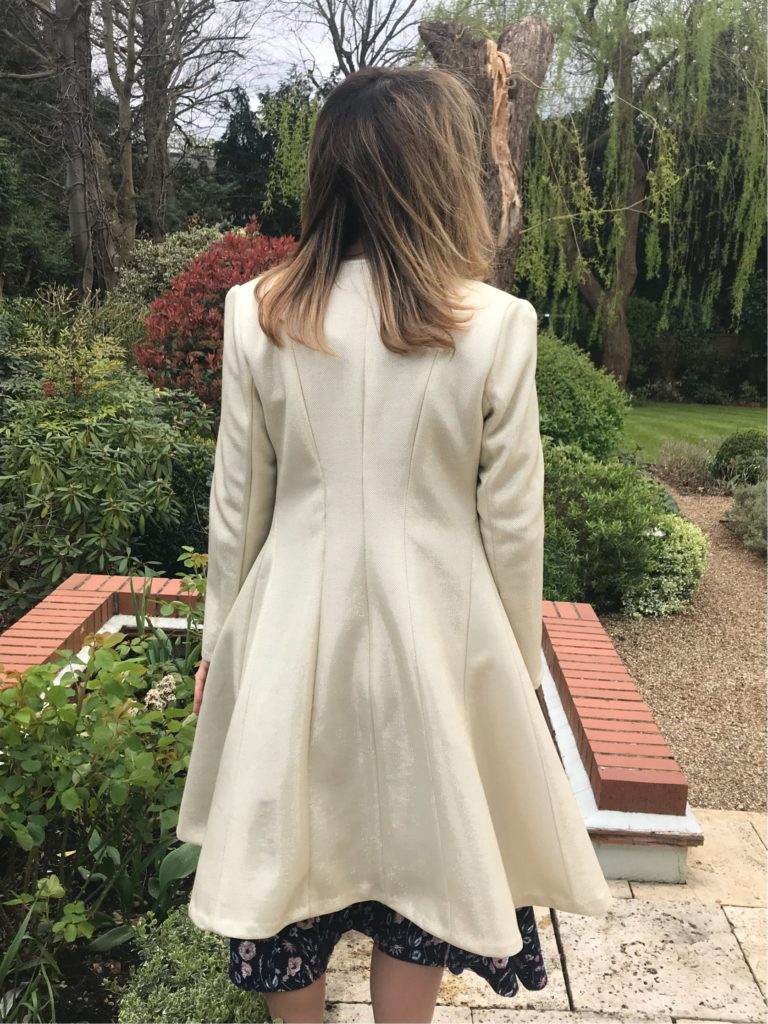
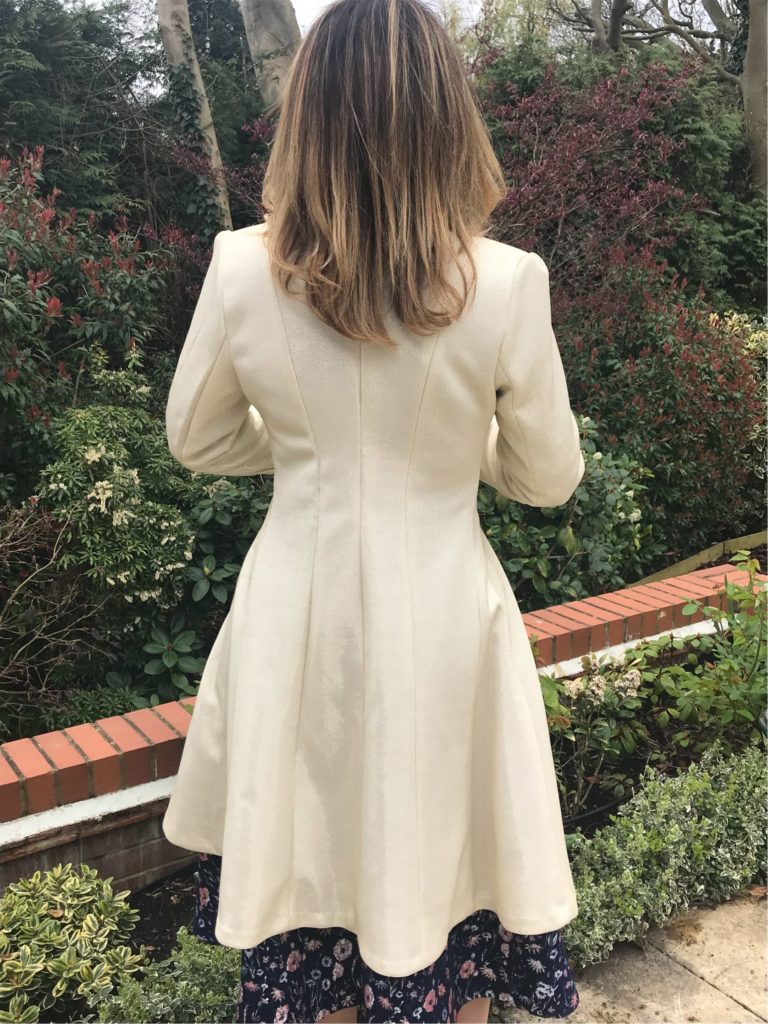
This coat is truly a love-hate case study. I really like the end-result, in particular the beautiful curves at the back.
But I really disliked making it, for the several reasons:
- The sizing is completely mad, way too large! My measurements indicated a size 12/ C cup, I chose a size 10 C cup and still had to take off 1.5cm out of the back and side seams – basically reverting to a size 8. This took ages and drove me completely crazy! The only positive point was the bust fit, which was perfect.
- The quality of the inside is quite disappointing. There is no proper bottom facing (you use the hemline fold); and no back facing whatsoever ; and there are no specific pattern pieces for the lining, so no fold for ease included. My first and only me-made coat was Ernest by Republique du Chiffon and all these details were impeccable, so I was quite disappointed to end-up with a lower quality finish here.
- The pattern instructions are not great. Here again B5966 fares poorly against Ernest, where he instructions were crystal-clear. The fly button closing took me a LOOONNNG time to understand!
- And lastly I don’t like the visible stitching of the fly button closing, it completely disrupts the otherwise perfectly clean line of the coat. I am actually thinking of taking it out.
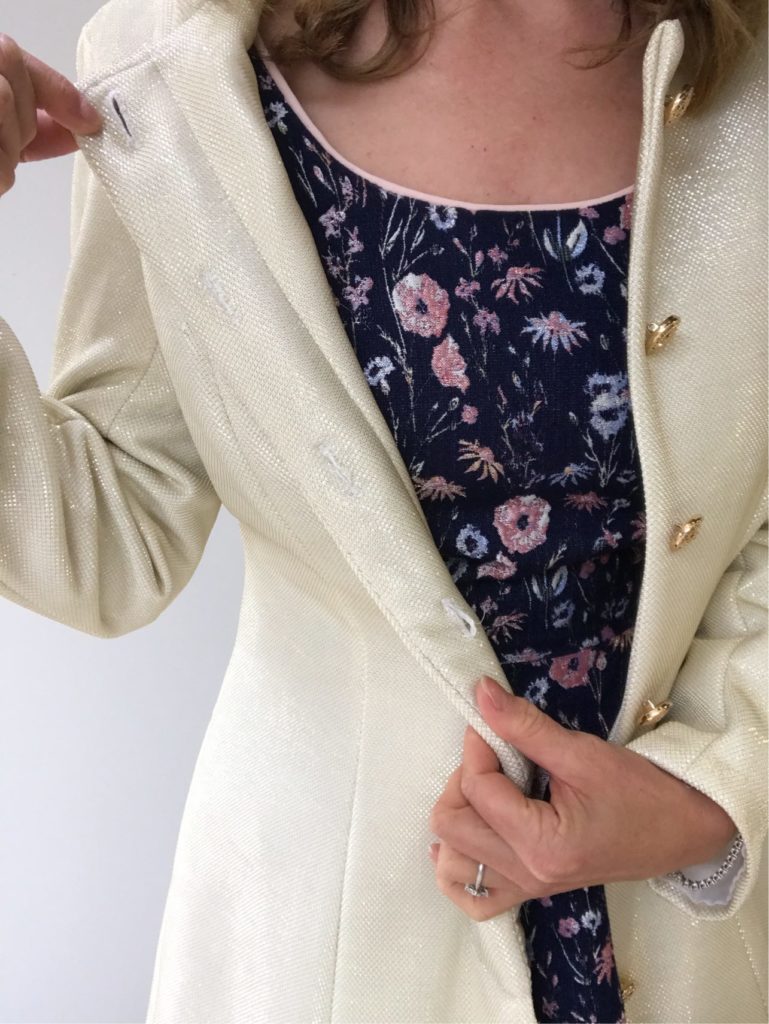
For those among you that love a look at the details, here are closer views of the hidden button holes:
the perfectly-fitted princess seams:
and the full lining:
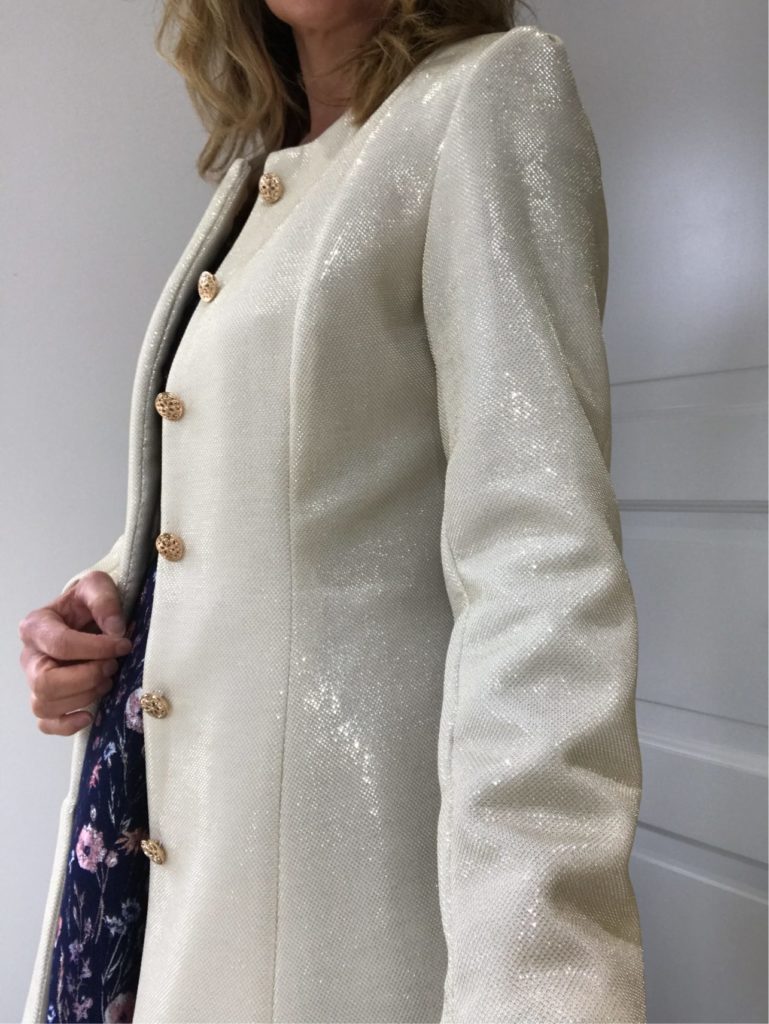
As for the fabric, it was gifted to me by Minerva Fabrics and is still available here. It is a medium-weight scuba, perfect for a structured garment such as a coat, a jacket or a pencil skirt. The fabric is made of two layers: a plain white scuba underneath; and a metallic gold net on top – do not fear, they stay firmly attached to each other when cut, sewn and washed (I was a bit worried initially). And I nearly forgot – being a scuba it does not fray! No overlocking needed, hurrah! This fabric is really easy to work with.
As for its look, the Minerva’s website gives a very good idea of the effect of this fabric: it really shimmers in the light. Some of my pictures caught this effect but not all.
Overall I think I will use this coat sparingly, for nights out most likely – and I view it more as a toile than as a completed garment to be honest! I am very keen to try an make it again though, in a plainer fabric and using the Ernest coat finishes inside!
In summary :
- Pattern: Butterick B5966, which is described as “fitted and flared lined coat with shoulder pads, princess seams, sides pockets, fly-button closing”. It has the huge advantage of bust cup options, so you don’t have to make the adjustments yourself to get a perfect bust fit!
- Fabric: I used a medium-weight glittery gold scuba from Minerva Craft, available here. Definitely not for a day outfit though – and that’s from the women who does all of her winter school runs in a fur coat with high heels!!!
- Sewing level: if you are a beginner looking to make your first coat, I would definitely not recommend this model, the explanations are a bit too light and the finish disappointing – coats should not be like that!
- Love level: I adore the shape but I am not a fan of this specific coat, I definitely need to find a plainer fabric to make another one!
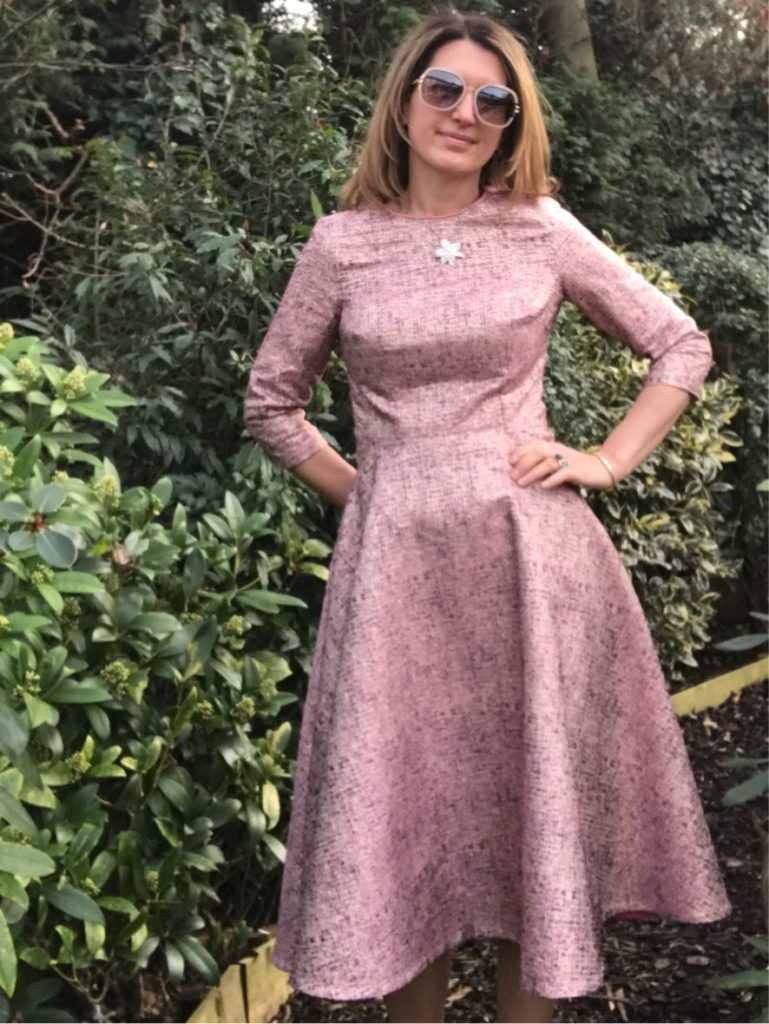
Pink and Sparkly
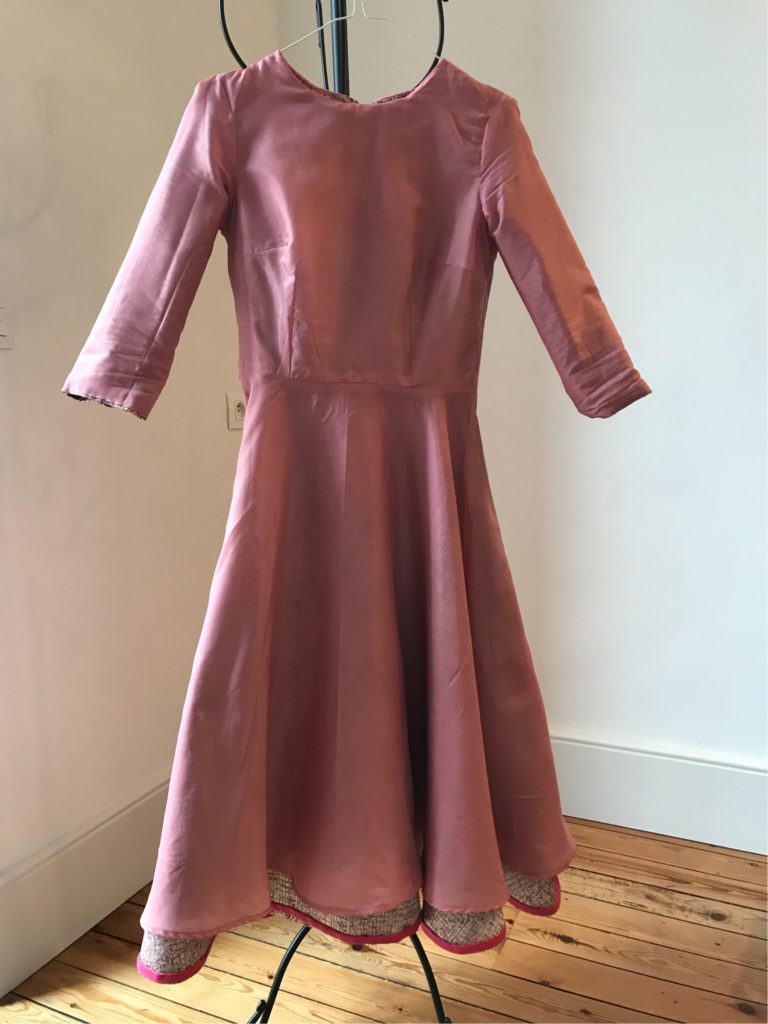
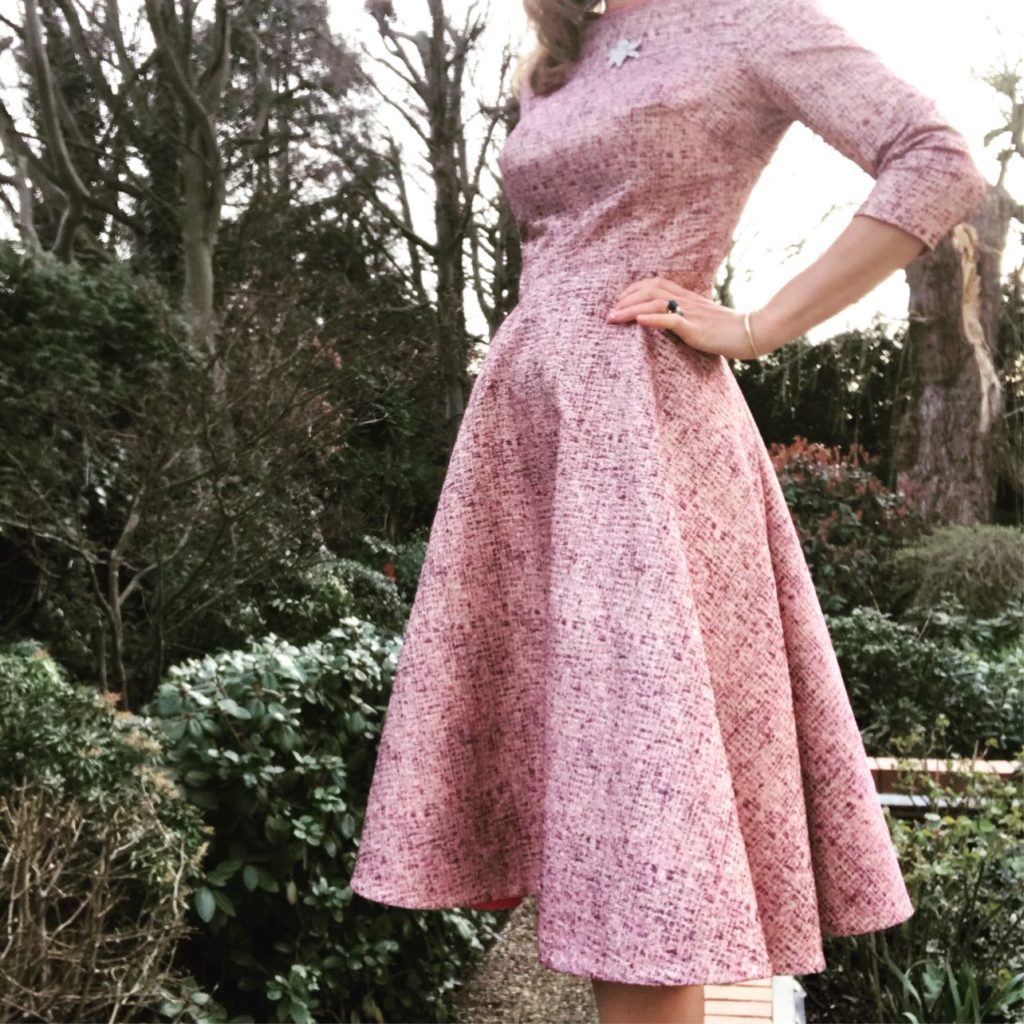
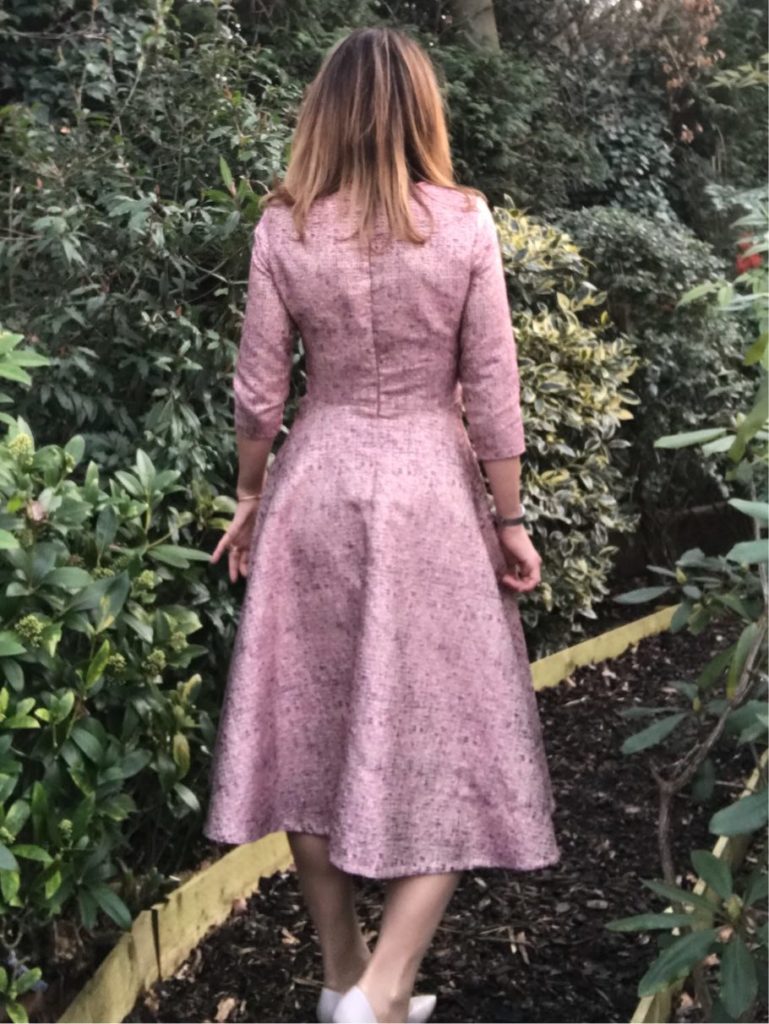
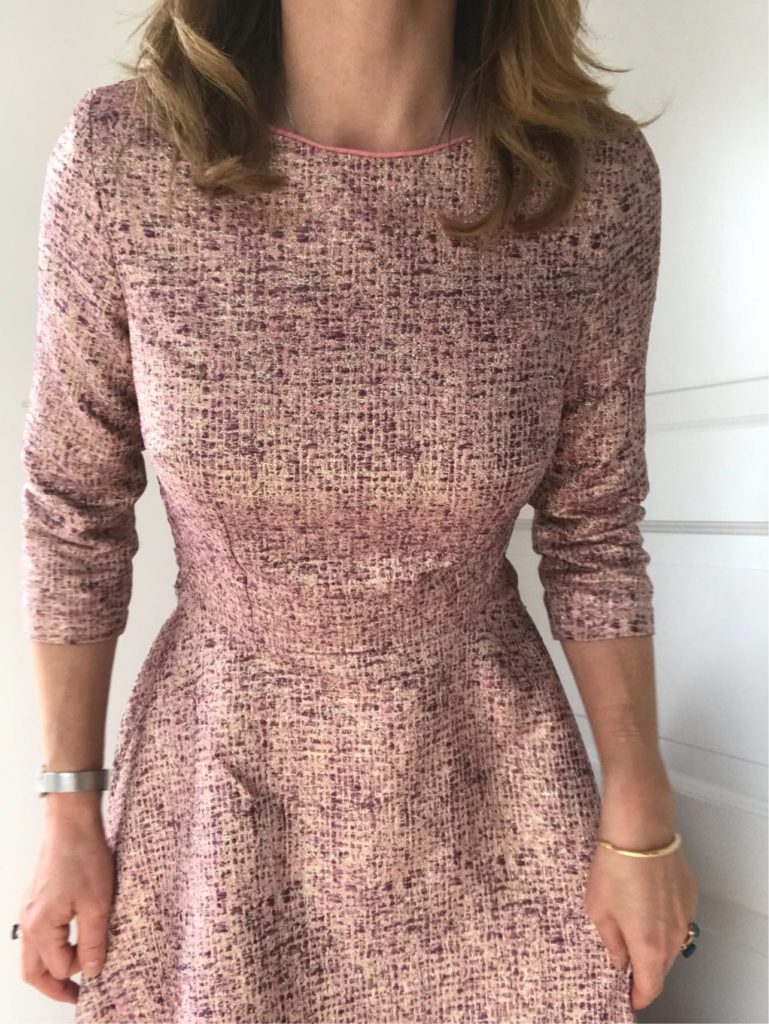
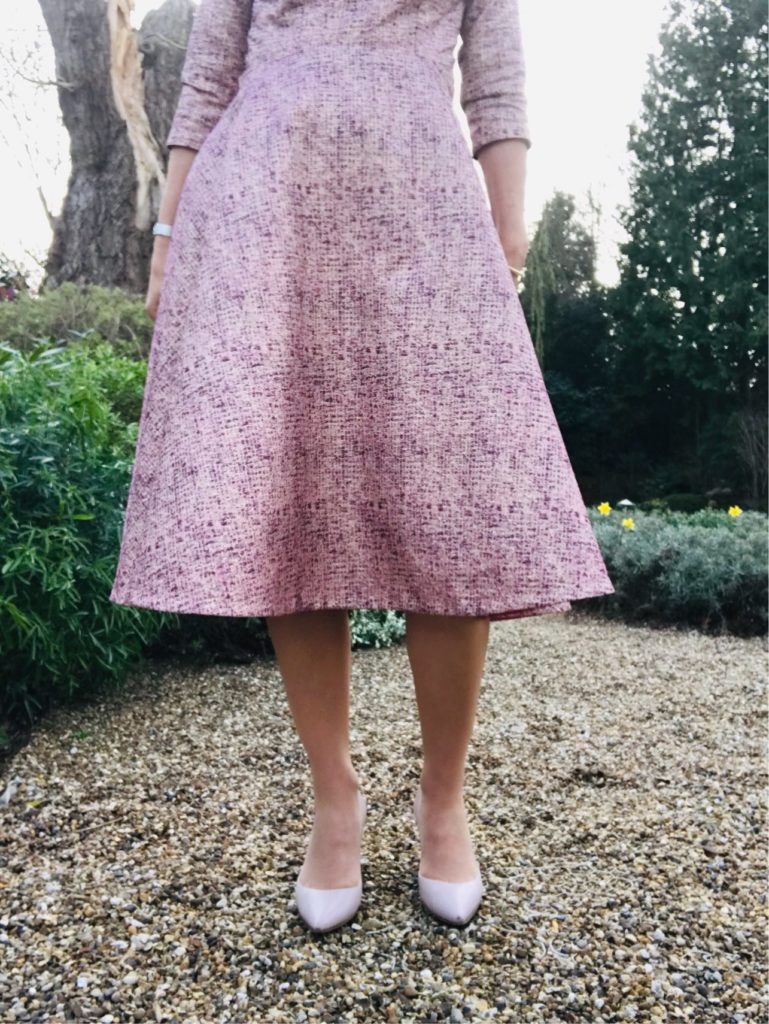
Let’s take a little break from fruits as I introduce you to my latest handsewn dress: pink and sparkly, with a fitted bodice, a circle skirt and piping at the neckline, I think it definitely gathers all my favourite attributes!
Although my fruit fabric addiction is still going strong (see here and here for more on this), I recently discovered this fabric on the Croftmill website and fell in love. But the price was quite hefty and my new resolution is to now order samples prior to any bulk internet orders. So I was patient indeed, ordered my sample, was convinced I had to have a dress in that fabric and ordered 2.5m.
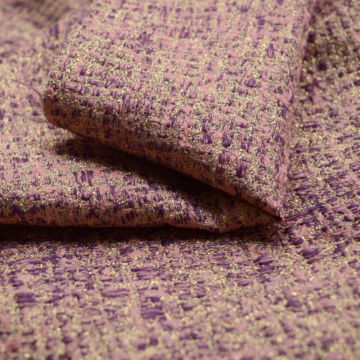
The fabric is quite similar to a brocade but with much denser threading, so it does not fray as much – it definitely feels very high quality. There is quite a lot of metallic thread so it is definitely very itchy against bare skin – hence full lining and piping at the neckline are absolutely necessary for a dress!!!
Having recently worked-out my perfect bodice pattern, which is basically a modified version the V8630 as I explained here, I did not look any further: I just reused the bodice of my lemon dress without any modification. I added a half-circle skirt (about 75cm long to make it midi lenght), pink piping at the neckline to avoid contact of the fabric with my skin… and obviously full lining, because it is so much to make the same dress again and again and again… especially a lining dress you cannot see… Oh well!
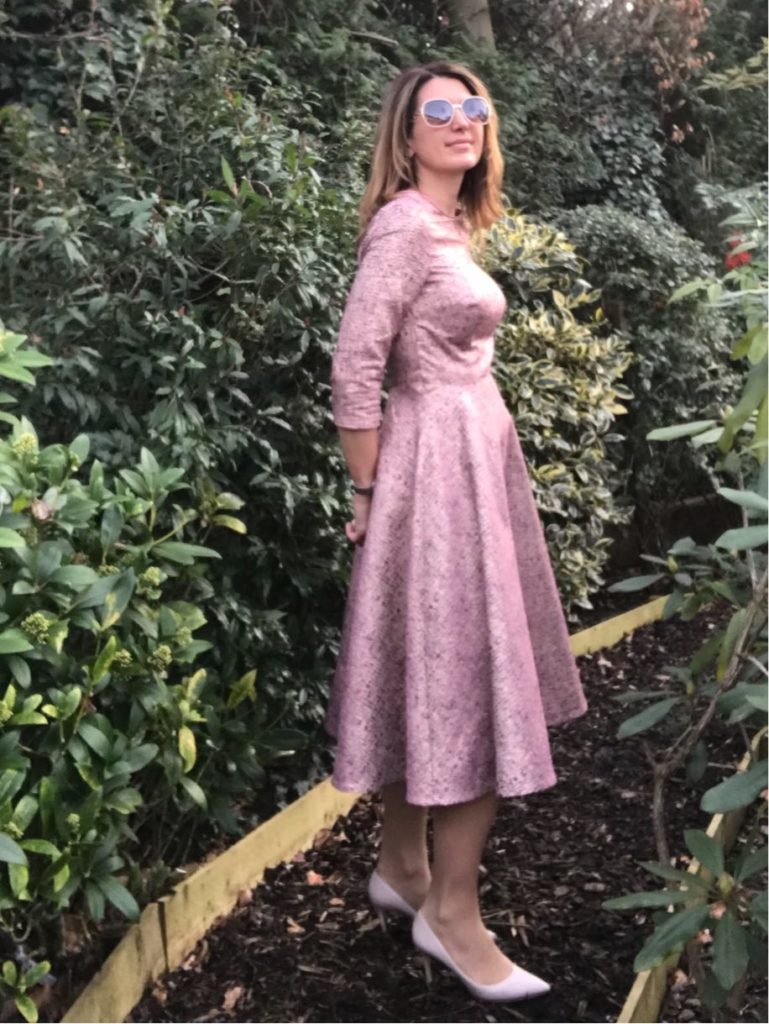
And I absolutely love this dress! One of my most expensive dresses fabric-wise but so totally worth it!
In summary :
- Pattern: Vogue 8630 for the bodice, modified by raising the neckline and adding two shoulder darts; and removing the very large collar obviously! The skirt is a half-circle one, from my trierd and tested self-drafted pattern (based on an internet tutorial, there are many as circle skirts are easy-peasy), 75cm long. I fully lined the dress.
- Fabric: absolutely amazing pink brocade fabric from Croftmill, with high fiber density and a lot of metallic thread – beautiful but very itchy. The dress is fully lined with plain pink lining fron Croftmill too – very affordable and very good quality.
- Sewing level: V8630 is completely manageable for a motivated beginner, so if you want to keep the same bodice without adjustment and add a circle or pleated skirt it is easy-peasy. Modifying the pattern like I did requires a bit more experience of course, but it iscompletely worth trying!
- Love level: I LOVE LOVE LOVE this dress; however the fabric is stiffer than my latest cotton sateen makes, so I will probably wear it a bit less often than these.
Now I’d like some lemons!
In keeping with my current fruit obsession (discussed in details in my last article) , here is my second fruit garment: the lemon dress.

Based on the largely modified Vogue v8630 pattern (used here and here without modifications), it was sewn literally the day after the cherry dress!!

A bit crazy I know… But how much do I love this fabric! Although the pictures make it look black, the background is actually a deep navy, which will be perfect for Spring. The quality is fantastic: it is a mid-weight cotton sateen, with a bit of elasticity, making fitting adjustments that bit easier. I saw it on Emily Hallman’s website and immediately ordered 5 meters from www.fabric.com in the US – no matter the distance or the shipping and import duties, I just had to have it!!!
After a rather disappointing fitting experience with the Vogue V9197 pattern, I decided to follow the advice of a friend who is a professional haute-couture sewer: go back to a perfectly-fitting bodice pattern and play around it. So I went back to V8630, which had shown such a good result in two very different fabrics, and made the following changes, in this exact order:
- I removed the collar, as I wanted a completely plain bodice.
- Once the collar removed, the neckline was too wide and too low, so I raised it, using the V9197 bodice pattern to help me get an accurate shoulder slope.
- V8630 has two lower-back darts, but I also wanted the top of the shoulders to be perfectly fitted, so I added two darts there as well, about 2cm wide and 10cm long.
- I had shortened V8630 by about 1cm for my previous dresses, but with a wide skirt it looked strange, so I went back to the original length.
- And for an obscure reason I must have lost a bit of weight over the past month (??) as I had to increase the curvature of the bodice by about 1.5cm.
All this pattern fussing-about was a bit lengthy but really worthwhile: I now have a perfect bodice pattern, which I am going to be able to use for multiple projects by decreasing the neckline, adding a button placket or a collar… The possibilities are endless!


In any case for the lemon dress I made not further adjustments, the fabric speaks for itself so it really does not need further complications. I added a self-drafted pleated skirt, lined the skirt only (to make the dress wearable with tights) and I was done! And very happy!


In summary :
- Pattern: Vogue 8630, modified by raising the neckline and adding two shoulder darts.
- fabric: bright yellow lemons on dark navy background, in the nicest quality of cotton sateen ordered from www.fabric.com.
- Sewing level: V8630 is completely manageable for a motivated beginner, so if you want to keep the same bodice without adjustment and add a circle or pleated skirt it is easy-peasy. Modifying the pattern like I did requires a bit more experience of course, but it iscompletely worth trying!
- Love level: HUGE CRUSH FOR THIS DRESS, I absolutely adore it.